Create your site with WordPress #3 - Settings and update procedure
You want to create a site with Wordpress but you don't know how to do it? Thanks to this series of tutorials you will learn step by step how to create a site, with as an example mine that I will build at the same time as you.
Attention: This article is the translation of one of my articles in French. Sorry if the translation is not perfect.
Today we will continue to see the WordPress settings in detail and update procedure.
Setup (2nd part)
Reading Settings
To start, go to Settings > Reading:
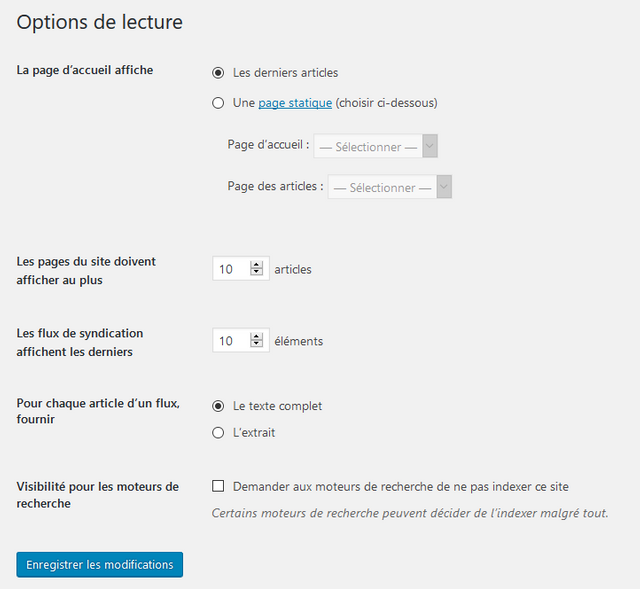
In The home page shows, put:
- The last articles if you want your last articles to appear on the page.
- A static page if you want to create yourself a homepage that won't change (static).
However, I advise you to leave the option on Latest articles.
In The pages of the site must display the latest and The syndication feeds display the latest, put the number of articles that should appear respectively on your site and on your RSS feed.
In For each article of a feed, provide, I advise you to leave the option on Full text.
Finally, we've already seen the last option in the first episode, so it's here to modify it.
Don't forget to click on  before leaving the page, otherwise everything will be lost.
Chat settings
Go to Settings > Discussion:
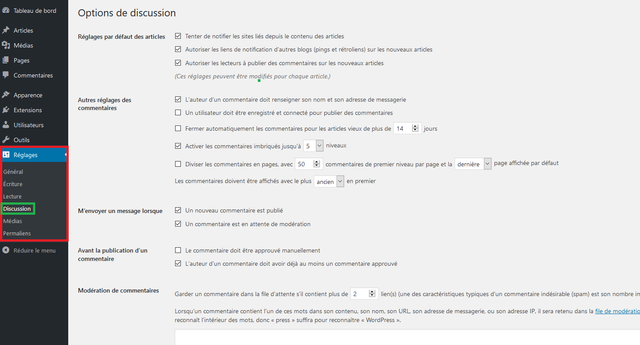
In Default article settings:
- Leave the first 2 options as is.
- Uncheck the 3rd option to prohibit comments, otherwise leave it enabled.
In Other comment settings:
- The first option defines whether a user must give his name and email to comment. It is up to you whether you prefer the ease of your readers or whether you want to know their information. Nevertheless, we may see in another tutorial an alternative to basic comments.
- Leave the second option unchecked, otherwise it is very impractical or even impossible if you followed my tuto (we may see that later).
- The 3rd option allows you to close the comments section for older articles. I advise you to leave it deactivated or people will not be able to ask you any more questions,... about the old articles.
- The 4th option allows you to activate nested comments. Basically, it's when someone answers a comment. Here it will leave 5 levels: A response to a response to a response to a response to a comment. I advise you not to bother and leave her like that.
- The 5th option, I let you manage it because I don't think I can explain it correctly. I'm just advising you to leave it unchecked.
In Send me a message when:
- This will send an email to your mailbox and a notification. I advise you to enable them unless you have a lot of comments on your articles (many mails otherwise ^^).
In Prior to the publication of a comment:
- The first option defines whether you (or a moderator you would have named) should check each comment. Activate it or not as you wish. But look at the second option first:
- The second option defines that each commenter must be approved at least once. If this is not the case you will have to manually approve his comment, and his other comments will no longer need to be approved.
In Comment Moderation:
- Here is the anti-spam and blacklist of comments. I'll let you fill it in at your leisure, but don't abuse it too much because if you banish the word "con" and someone says a word with con the comment will be rejected because it includes the string of letters con.
Updates
It's always important to update your software,... it's the same for WordPress. Updates bring new functionality and security, which is why it is important to do them.
To carry out an update, go to the corresponding menu:
Click on Updates
You will be faced with an interface similar to this one:
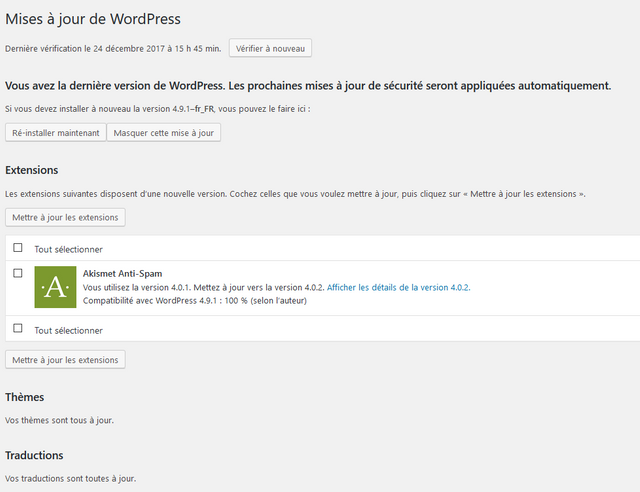
First, go to WordPress Updates. Check that WordPress is up to date. If this is not the case, follow the instructions on the screen to update. Note however that if you are already advanced in your blog, it is better to make a backup to avoid any risk.
Update procedure
Here we will see how to update WordPress extensions, themes and translations.
Here's the procedure to get there:
Check for updates in the Extensions section. If an update is available, continue, otherwise go to step number 5.
Click the box next to Select All.
Click on Update extensions.
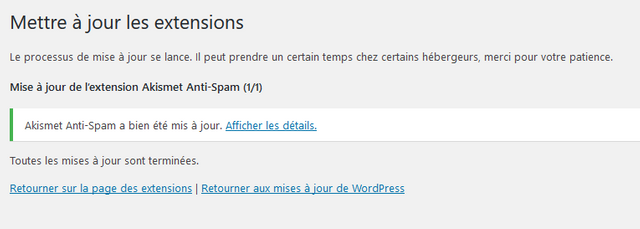
Make sure the surgery went well:
"All updates are complete " Indicates that everything went well.
Repeat the procedure with the themes and translations sections.
And that's it for this episode. I hope you liked it and that it will be useful! If this is the case, don't forget to vote, comment and resteem!
See you soon!
Thanks
Please don't spam comments.
Great tutorial! I don't speak French, but I appreciate that your instructions are in English to help. :)
Thanks ;-)
You have collected your daily Power Up! This post received an upvote worth of 0.56$.

Learn how to Power Up Smart here!
@originalworks
The @OriginalWorks bot has determined this post by @zonguin to be original material and upvoted it!
To call @OriginalWorks, simply reply to any post with @originalworks or !originalworks in your message!