Create your site with WordPress #2 - First startup
You want to create a site with Wordpress but you don't know how to do it? Thanks to this series of tutorials you will learn step by step how to create a site, with as an example mine that I will build at the same time as you.
Summary of the series:
Note: This is a translated article. The images are in english but the layout remains the same, so don't panic the tutorial is still valid.
Today we will start WordPress for the first time and make the basic settings. To do this, I will reset my website, just for you ^^.

First Start
Installation
Go to your site. You should run into that window:
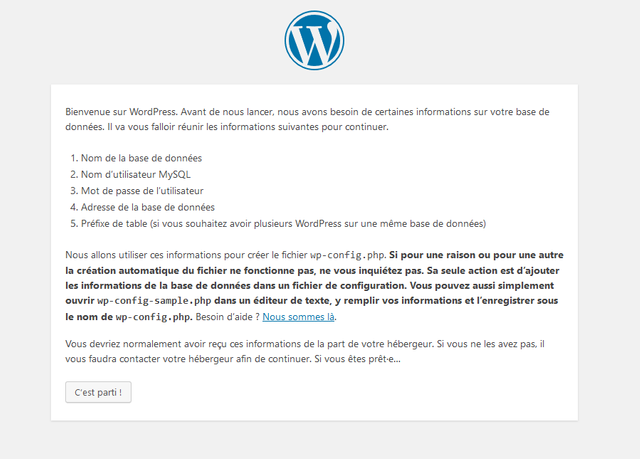
If not, check that the url looks like this one:

Then collect the necessary information on the database as indicated.
Click on It's gone!.
You will then find yourself on this page:

I won't dwell on the first 3 fields, because it's quite simple.
In database address, leave localhost.
The prefix, an important but forgotten security point
The prefix of the database is a text that will be placed before all the tables of the database. You can have a table with passwords, it will be named wp_motdepasses.
Often people leave wp_ as a basic prefix, but leave it as is may represent some security risk. So I recommend you choose another simple 2-letter prefix that you would remember.
**Ex: ** aa_ / bd_,....
Once this is done, you should get to this page if all went well:

So just click on Start the installation.
This is where we arrive at the real installation:
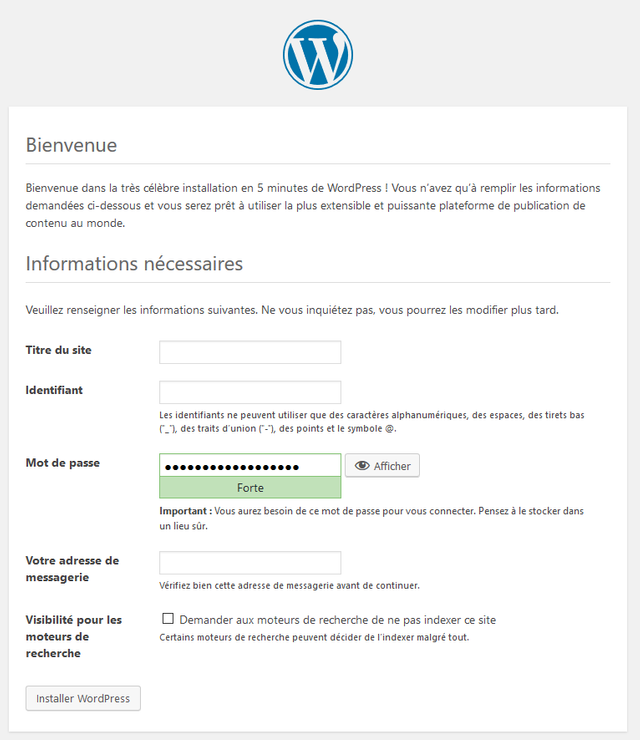
Explanation of the fields:
- In title of the site, put the desired title of your site.
- In Username, enter the username you will use to log in to Wordpress.
- In Password, choose the password to log in to Wordpress. It generates one automatically when you arrive on the page, but you are free to change it. Choose a secure password, because it is very important.
- In mail address, enter your email address. It will be useful for some functions. You can also create a mail at your host if it is included in the offer, for example I could have put [email protected].
In the last field, choose if you want us to be able to find your site by searching in google,... or not.
Then click on install wordpress.
There you go! If everything went well, you will arrive here, then click on Login:

You will then arrive on the Wordpress connection interface:
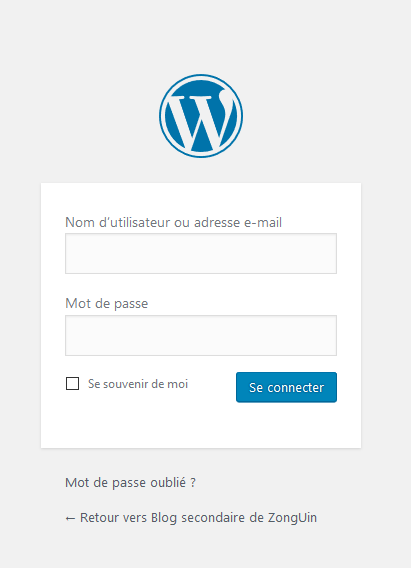
Remember the url, because it is the one that will allow you to connect to your site:

/wp-login. php
All you have to do is log in with the identifiers previously created. Don't hesitate to check the Remember me box.
Basic settings (part 1)
In the next tutorial I will show you each category, but in the meantime we will set up some important points of your site.
Go to Settings > General In the left menu:
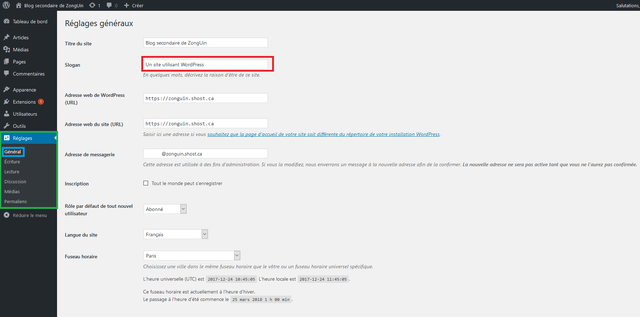
The different fields:
- Site title: The name of your site, previously created, can be modified here. However I do not advise you to change it too often for referencing.
- Slogan: I put it in red, because it has to be modified. This is the site's slogan, or subtitle if you prefer. You can put a short short sentence to explain your site.
- The addresses: nothing to change here, unless you have installed wordpress indirectly (ex: monsite. com/wordpress).
- E-mail address: This is where you can change the site's previously configured e-mail address.
Leave the box unchecked, we may see in another tutorial how to use it.
Here, the other fields are quite simple to understand.
Once all this is done, don't forget to click on Save changes! :

There you go! I hope you enjoyed this article! In the next tutorial, we will see part 2 of the basic settings and the basic functions.
See you soon!
Don't hesitate to upvote, comment, resteem !
Congratulations! This post has been upvoted from the communal account, @minnowsupport, by ZongUin from the Minnow Support Project. It's a witness project run by aggroed, ausbitbank, teamsteem, theprophet0, someguy123, neoxian, followbtcnews/crimsonclad, and netuoso. The goal is to help Steemit grow by supporting Minnows and creating a social network. Please find us in the Peace, Abundance, and Liberty Network (PALnet) Discord Channel. It's a completely public and open space to all members of the Steemit community who voluntarily choose to be there.
If you would like to delegate to the Minnow Support Project you can do so by clicking on the following links: 50SP, 100SP, 250SP, 500SP, 1000SP, 5000SP. Be sure to leave at least 50SP undelegated on your account.
Your Post Has Been Featured on @Resteemable!
Feature any Steemit post using resteemit.com!
How It Works:
1. Take Any Steemit URL
2. Erase
https://3. Type
reGet Featured Instantly – Featured Posts are voted every 2.4hrs
Join the Curation Team Here
You have collected your daily Power Up! This post received an upvote worth of 0.79$.

Learn how to Power Up Smart here!
@originalworks
The @OriginalWorks bot has determined this post by @zonguin to be original material and upvoted it!
To call @OriginalWorks, simply reply to any post with @originalworks or !originalworks in your message!