How I made a handle for my antique stone cutters hammer.
Intro planning and history.
Sometimes you just need a big freaking short handled hammer. This is how I made the handle for a 10lb head my pigs rooted up. With the short handle, the idea is that the weight and gravity do the work while working on forging steel.
Let the hammer do the work, the smith is just a guide for the hammer.
I obtained my hammerhead back when I had a handful of pigs. It seems that they will dig up all manner of junk.
Along with this hammerhead were a couple of old medicine bottles and some broken bricks. I wound up keeping the bottles the bricks went back into the earth.
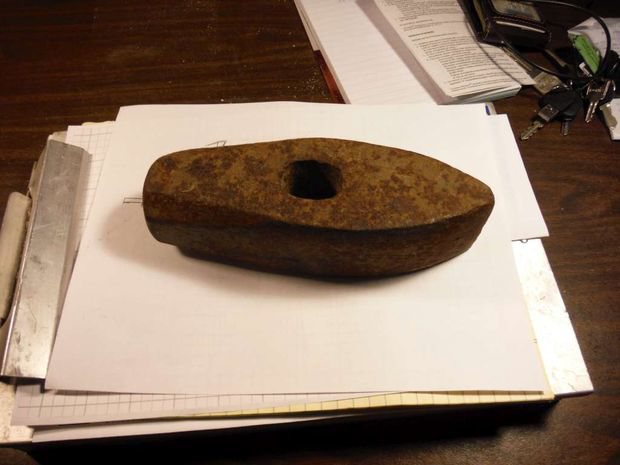
Back to the hammer. After removing a majority of the rust and dirt using a wire brush, I was able to just start to make out the makers marks. There is a 10 for the weight and the mark of Iron City inside a 6 point star. A quick search turned up that Iron City manufactured mining tools from 1854 - 1956. Going into a little speculation with what was built at the time there and a penny that was found in the same mud hole I am going to guess about 1900. The penny found was an 1890 indian head penny that a chicken had scratched up in the fresh mud.
Ok on to the good part.
These are the tools that I used.
Workbench
Shave horse
Drawknife
Hatchet
Dead Blow Mallet
Palm Sander
Reciprocating saw
2LB Drilling Hammer
Wire Brush
Lanskey Puck sharpening stone.
##Materials used.
Rusty hammer head
Block of Hickory
Sandpaper assortment
Replacement wedge kit for hammers over 4 lbs. ($3 menards)
Hoppes bore cleaner
Hoppes Elite Gun Oil
Step 1: Split the wood to be shaped.
Ok safety first ladies and gents. Keep your cutting tools sharp and your safety gear on.
I absolutely love the Fiskars lines of hatchets and axes. They are easy to sharpen and holds an edge like a really good pocket knife. The new drawknife I had bought is junk. I worked more on getting it sharp than I did carving my handle.
I did turn it into a froe but that is another post. Being $10 I can't complain too much.
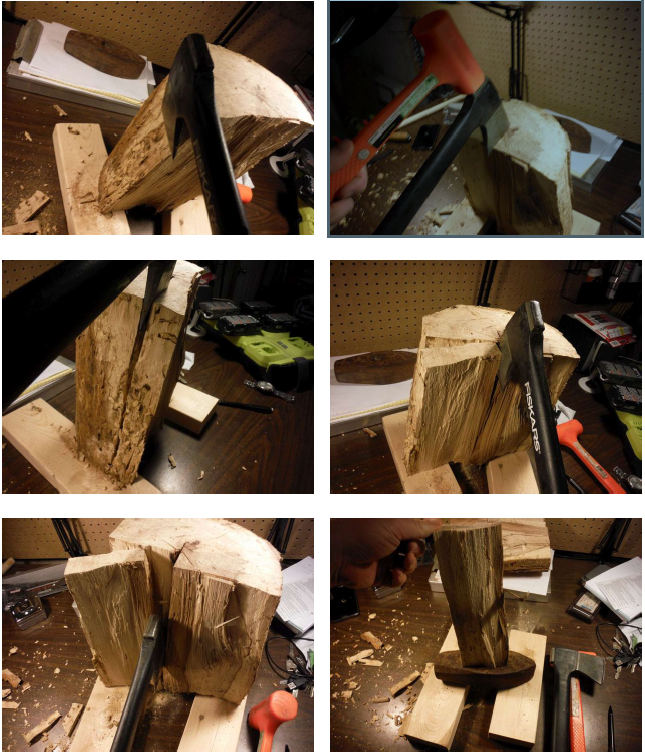
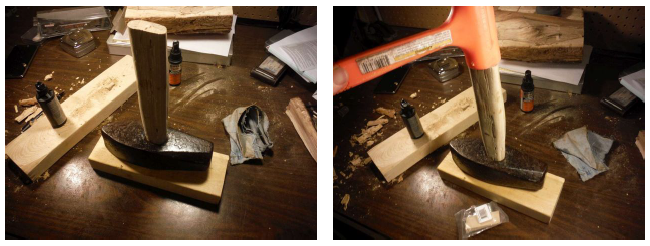
I started off by splitting out a chunk of Hickory from the block about 4 inches wide and a inch and a half thick. To split this out I held the hatchet along the growth rings of the larger block, and drove it in with the dead blow mallet. I was gently tapping the hatchet much like one would a wedge to keep from breaking the pice getting broken. Think of the force used like you would splitting kindling. The dead blow hammer ensured that it did not go bouncing all over the place or skipping off the hatchet.
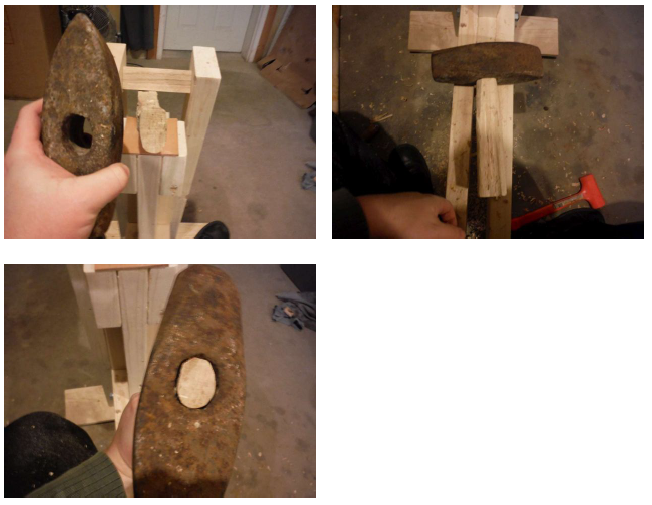
After the section was split out I set it on the head to get an idea how much wood i needed to remove from my handle.
Make sure to keep all your chips and shavings. I soaked the chips in water, put them in a foil pouch with a hole to add some more flavor to my burgers.
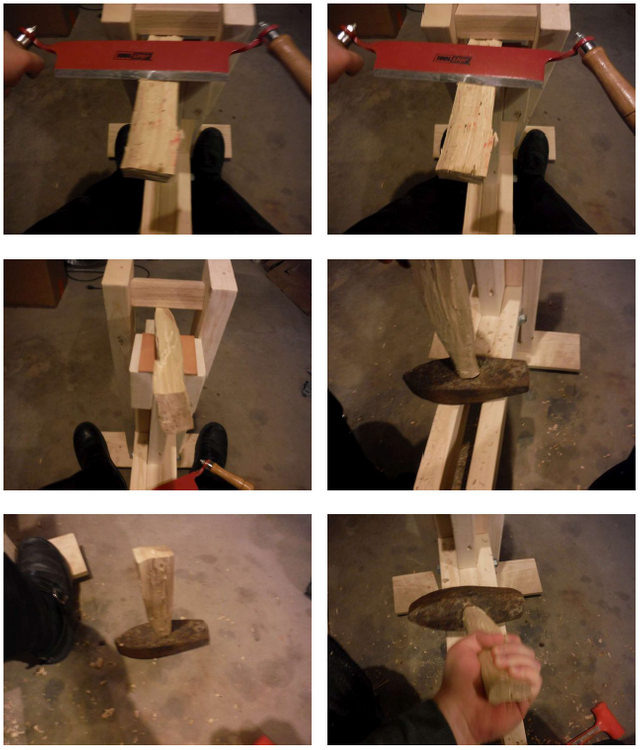
Step 2: Shave the stave
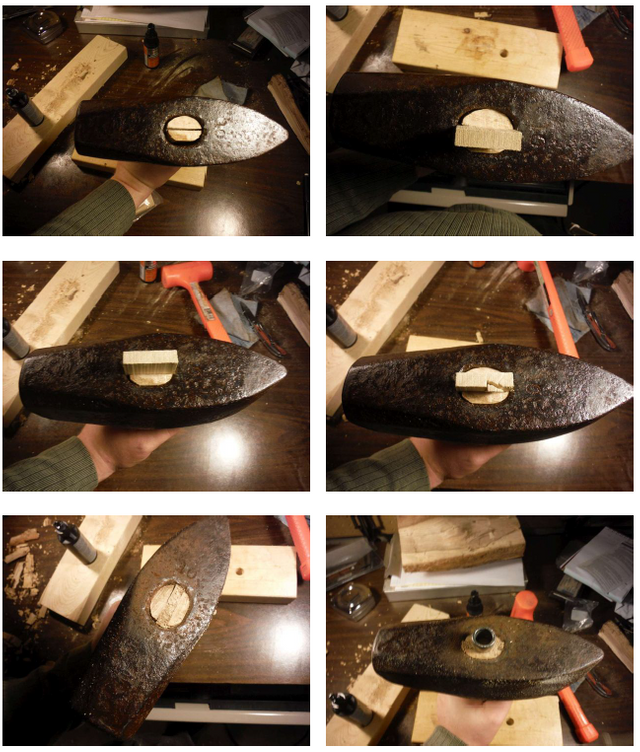
I am going to let the pictures tell most of this story. With my feet locking the piece of wood in the shave horse, I used a light touch to square up the piece of wood split. You may need to work on the edge if your draw
knife is not shaving well. My factory edge sucked so I shaved a bit, honed a bit, and shaved a bit. After I had my rough shape formed I lined it up against the eye of the hammer and smacked it in a bit to mark what to carve away.
Carve, sharpen test fit repeat. Keep this up until your handle extends all the way through the head.
After the handle fits flush it is time to start carving it to fit your hand. I went for something that filled my grip, but was not perfectly rounded. I like a bit of an oblong shape to my tool handles, this keeps the tool from twisting in my grip if my hands are sweaty.
Step 3: Just about done.
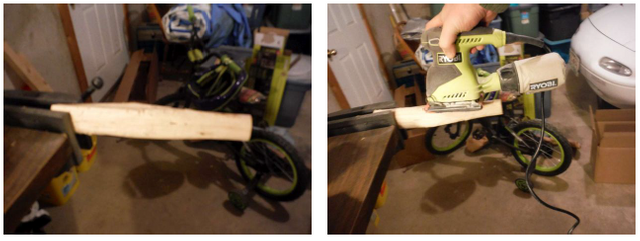
After shaving it as smooth as the lousy draw knife allowed, I sanded down the handle starting with progressively lighter sandpapers. Make sure to smooth all the knicks and finish rounding out any edges to ensure against splinters.
I left the imperfections and worm marks in the handle as natural grip texture and they leave character. After all this hammerhead is somewhere between 60-150 years old. Why not have the new handle reflect some of that.
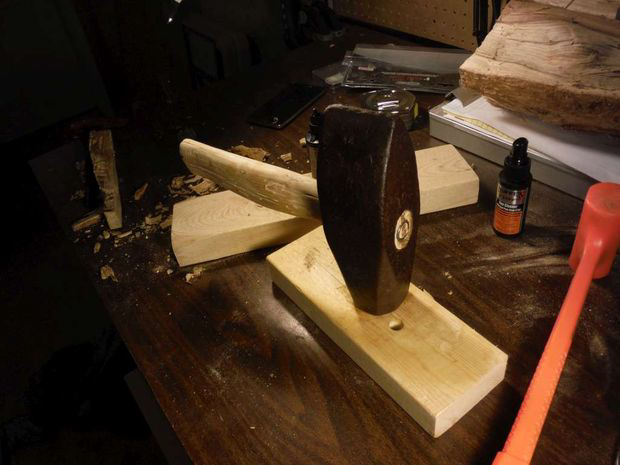
The hammerhead left a rust mark from the final test fit. Using that mark I knew how deep to cut a channel for the wedge kit.
Step 4: Cleaning the head up.
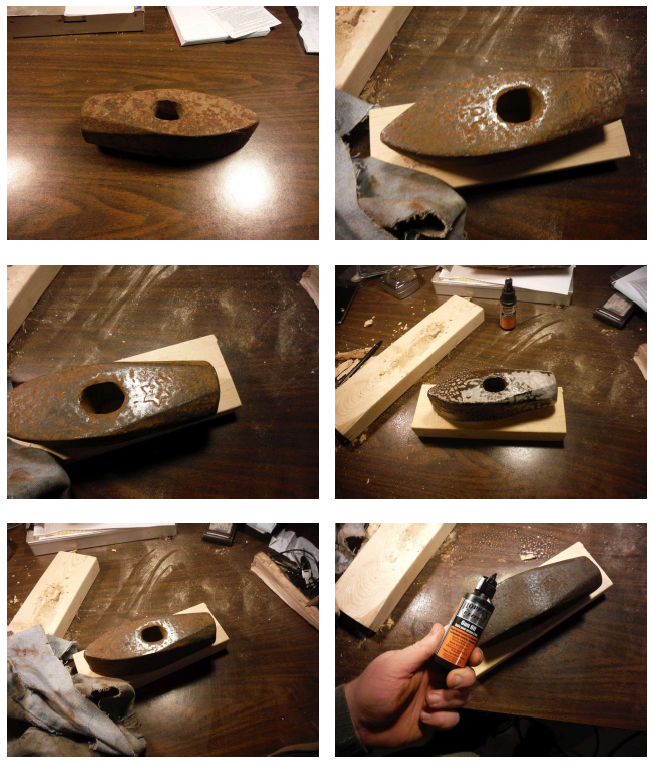
Once again this is a story told in pictures. Use a wire brush and remove some of the rust and grime from the hammerhead. After wire brushing the head you will notice that the maker's marks were starting to be visible.
Spray every surface with bore cleaner. Let it sit. Wipe it off with the denim rag. Apply oil and wipe it all over the hammer head.
Step 5: This is it. Put it all together.
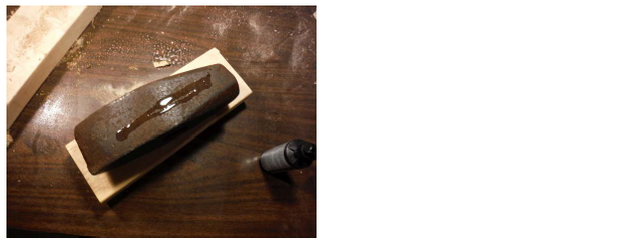
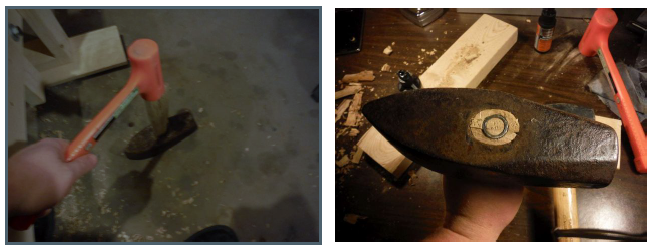
Take handle that you just fashioned from a solid block of wood in a most rugged manner. Insert it into the hammerhead until bottoming out. Give it a couple taps with a mallet for good measure. Inspect handy work. Insert the wooden wedge in the sawn channel. Use mallet to drove in wedge. Cut excess wedge off. After the wedge is flush cut, I inserted the metal ring wedge into the wooden end and tapping it with my drilling hammer to get it started. Then I set the hammer on the garage floor and gently smote the handle end untill the metal wedge was flush with the handle and wooden wedge. After the wedges were set I used several wiped coats of linseed oil to protect the wood and give it a nice finishing touch
And that folks is how I rehandled my Big Freaking Hammer. It is now set to use it as a doorstop, a bookend, play Thor, or just smash stuff.

Thank you for reading.
Making hand tools is so much fun:)
Just wait till I show the write up on the shave horse and the Froe. I was able to get ahold of an antique drawknife that actually cuts instead of bludgeons its way through wood.
Thinking of building a shave horse myself
Then that will be next weeks post I sort of went with a fusion of the 2 styles of shave horses. Stay Tuned till next week. :)
I finally got it written up.
https://steemit.com/woodworking/@motinkergnome/modern-shave-horse
Damn, that's impressive.
I like how new and shiny the head looks !
I'm sure you'll get some good use out of it. like smithing Loki for example ;)
Have fun Thor !
I hope you showed the pigs the fruit of their discovery.
I can imagine the irony of using the hammer to reinforce whatever fence is around them XD (unless you don't have the pigs anymore ?)
Nope when they hit market weight I sold them on the hoof and got out of the "pork belly" market.
Congratulations! This post has been upvoted by SteemMakers. We are a community based project that aims to support makers and DIYers on the blockchain in every way possible. Find out more about us on our website: www.steemmakers.com.
If you like our work, please consider upvoting this comment to support the growth of our community. Thank you.
You can read about us here
Very good. Nice and traditional technique. Thumbs up.
Thank you jist, That indeed is a compliment as I am an admirer of your work.
Nice work