Creating Responsive Web Apps Using ReactJS, NodeJS and ReactiveX Part 6
Repository
https://github.com/facebook/react
Welcome to the Tutorial of Creating Responsive Web Apps Using ReactJS, NodeJS and ReactiveX Part 6
What Will I Learn?
- You will learn how to make our Sketching Application Robust.
- You will learn how the connections to different ports occur in our app.
- You will learn about the handling of server connection interruption.
- You will learn how to reconnect to the server in our application.
- You will learn how to update the timestamp in our Sketching Application.
- You will learn how to test the results and check the real time behavior in browser.
Requirements
System Requirements:
- Node.js 8.11.1
- Yarn
- RethinkDB
- Visual Studio Code or any similar editor for code editing
- A computer with basic functionalities and Web browsers
OS Support:
- Windows 7/8/10
- macOS
- Linux
Difficulty
- Intermediate
Resources
- https://www.rethinkdb.com/
- http://reactivex.io/rxjs/
- https://reactjs.org/docs/optimizing-performance.html
Required Understanding
- You need a good knowledge of HTML, CSS and JavaScript
- A fair understanding of Node.js and React.js
- A thirst for learning and developing something new
- Prior tutorials that are Part 1,Part 2,Part 3,Part 4 and Part 5
Tutorial Contents
Description
You have studied how to subscribe to sketching changes in your RethinkDB. And then we have learned how we could improve the rendering time of our sketching application so that it can load our sketches fast in the Fifth Part of the tutorial, if you don't check the fifth tutorial then check the fifth part.
In this Tutorial, you'll learn how the connecting to different ports occur in our Sketching Application. Also, we will see what happens when the connection to different servers interrupted and how to reconnect with them.
Making our Sketching Application Robust:
This tutorial will take you through some key scenarios that you'll need to handle when building real-time systems like this one.
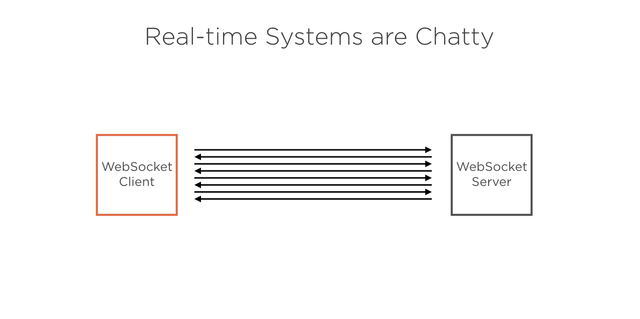
Because real-time systems are really chatty, meaning they send loads of messages back and forth, you need to cater for interruption of connections and service going down. You'll learn how to code up the client so that it reconnects to the server when it loses its connection or when the server it was connected to goes down.
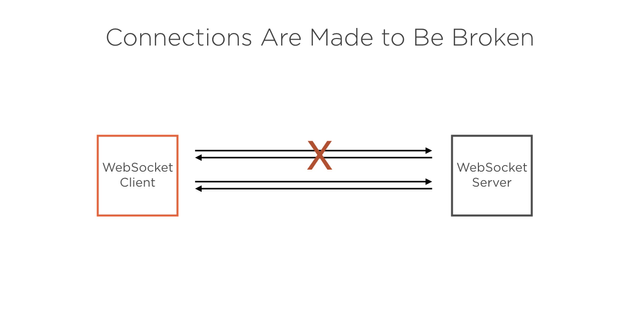
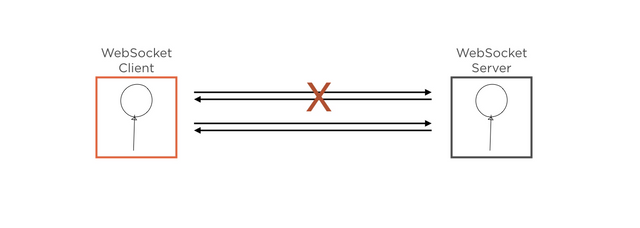
Not only will a client reconnect and download missed events, it will do so in such a way that it doesn't download events that it's already processed before. You'll even learn how to allow the user to keep on sketching while the connection is down and still have the data make its way to the server when it manages to reconnect to the server.
If you'd like to work from a stable starting point for this tutorial, you can start with our last part checkpoint that is fifth part of this series.
Connecting To Different Ports:
In order to do the work to test reliability, you'll make two changes to the app to make it easier to see what's going on. First, you'll make it possible to run the app on a different WebSocket port. You'll do this so that you can have two instances running at the same time on different ports.
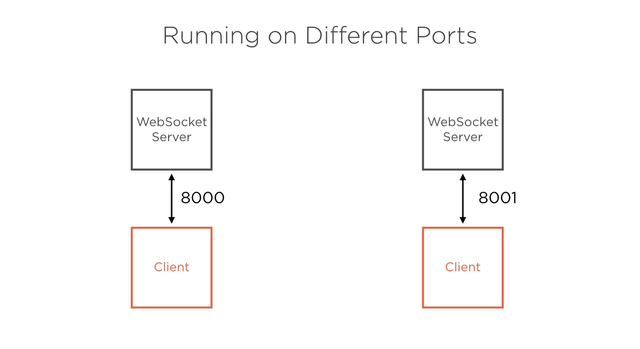
This way you can test the scenario where one user stays connected and keeps on sketching while the other user is disconnected. Secondly, you'll show a red box in the app to warn the user that the connection has been interrupted, which you'll use while testing the connection scenarios.
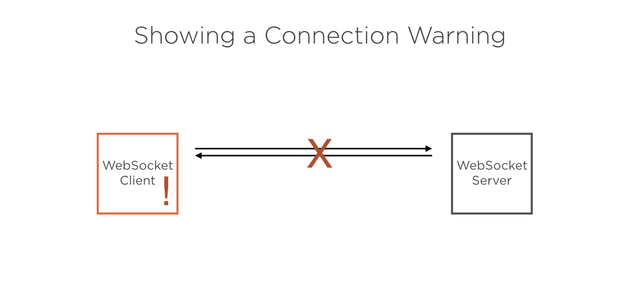
To make the app able to run on different ports, start on the server side in the index file. This is going to be a real quick change. At the bottom of the file, use the process argument on index 2 as the port to listen on, ensuring that you call parseInt on it. If it's not provided, fall back to port 8000.
const port = parseInt(process.argv[2], 10) || 8000;
const port = parseInt(process.argv[2], 10) || 8000;
That's all for the server side for now. On the client, in order to make it possible for the app to connect to a different port, we're just going to hack it. I would not recommend you do this in real life, but it's good enough for the purpose of this course. Create a new const called port, and call parseInt, and here pull the port from the current URL by doing this using the window.location.search attribute and replacing the question mark. If it can't do that, just fall back to 8000.
const port = parseInt(window.location.search.replace('?', ''), 10) || 8000;
const port = parseInt(window.location.search.replace('?', ''), 10) || 8000;
And now use the spot in the openSocket call. So we'll be able to pass an alternative port to the app on the query string, and it'll use that port to connect to the server.
const socket = openSocket(‘http://localhost:${port}’);
const socket = openSocket(‘http://localhost:${port}’);
In order to notify your component that a warning should be shown, create a function called subscribeToConnectionEvent, and make it take a parameter called cb, short for callback.
function subscribeToConnectionEvent(cb) {
}
In here, you're going to publish socket connection-related events to the rest of the app. Socket.IO already publishes events based on connection states, which you can subscribe to. Start by subscribing to the connect event by calling socket.on and passing connect to that. Now pass it a handler function, and in this handler, call the callback, but with an object with some info. Set your variable called state with a value of connected, and also send through the port so that the component can show the port to the user.
socket.on('connect', () => cb({
state: 'connected',
port
 }));
Now duplicate this line because you're going to do the same for disconnect. Change the connect to disconnect and the state to disconnected.
socket.on('disconnect', () => cb({
 state: 'disconnected',
    port
}));
Duplicate it again because you also need to handle the scenario where it can't connect to the server the first time that it tries to connect. Specify an event of connect_error, and leave the rest the same.
socket.on('connect_error', () => cb({
state: 'disconnected',
port
 }));
Our components will deal with both events in the same manner. Now just ensure that you export this function from this file.
subscribeToConnectionEvent,
subscribeToConnectionEvent,
For the connection warning view, go into your client code and create a file called Connection.js in the src folder. Set up the boilerplate for your component. Import React and Component from React.
import React, { Component } from 'react';
import React, { Component } from 'react';
Create a class called Connection, which you extend from Component,
class Connection extends Component {
  };
and export the connection in the end.
export default Connection;
export default Connection;
Set a default state variable, and on this specify connectionState. Give it a default value of connecting.
state = {
    connectionState: 'connecting',
  };
Now at the top import the subscribeToConnectionEvent function from the api file so that you can make your component respond to the events.
import { subscribeToConnectionEvent } from './api';
import { subscribeToConnectionEvent } from './api';
Create a constructor for this component. Remember to make the props parameter available. Call super in the constructor and pass along the props. You always need to remember to do this when you add a constructor to your React component class.
constructor(props) {
    super(props);
  }
Now call the subscribeToConnection event function, which will expect a callback function. This callback function will receive a parameter object. And you can expect a state on it copied onto a variable called connectionState using the structuring so that we don't confuse it with the React component state. And the port, you can keep on a variable called port.
subscribeToConnectionEvent(({
state: connectionState,
port
}) => {  }
);
Inside of this function, call the component's setState function, and set the connectionState and the port variable on state.
this.setState({
        connectionState,
        port,
      });
Now you can render this out. Go create a render function, and first you're going to set a variable called content to null.
render() {
    let content = null;
  }
Now check this state to see if the connectionState is disconnected. If it is, set content to a div with a className ofConnection-error. Add a message inside of this div, We've lost connection to the server.
if (this.state.connectionState === 'disconnected') {
      content = (
        <div className="Connection-error">We've lost connection to the server...</div>
      );
    }
Now duplicate this logic and adapt it for connecting the default state. In here, just set content to a div without a className and with a label showing the user that it's connecting.
  if (this.state.connectionState === 'connecting') {
      content = (
        <div>Connecting...</div>
      );
    }
Now for what we're going to return. Fromrender we return a div. This div has a className of Connection. Inside of this, add a new div with a className of Connection-port, and in here add a message that spits out the current port that we've got on state with a label, and below this output the content that was built up by the logic that checks the state.
  return (
      <div className="Connection">
        <div className="Connection-port">Socket port: {this.state.port}</div>
        {content}
      </div>
    );
So you have a component that will show the user the port that it's trying to connect to and a warning when it can't connect. Now to use this component, drop into the App.js file, and import the Connection component from its file.
import Connection from './Connection';
import Connection from './Connection';
Down in the render function just below the header, output the Connection component.
<Connection />
<Connection />
Great! To test this, you can go to your browser.Now you should see that it's connected to port 8000 by this message over here,
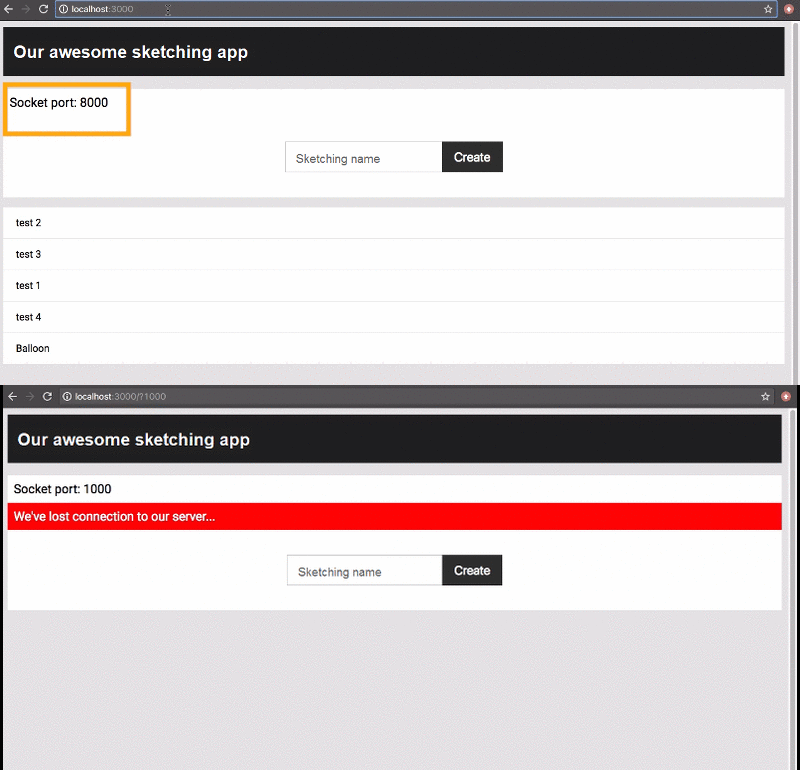
and if you pass a different port than
8000 into the URL, you'll see the connection warning because we are only listening on port 8000 at the moment.After this update Connection.js file will look like this;
//Connection.js//
import React, { Component } from 'react';
import { subscribeToConnectionEvent } from './api';

class Connection extends Component {
  state = {
    connectionState: 'connecting',
  };

  constructor(props) {
    super(props);
    subscribeToConnectionEvent(({ state: connectionState, port }) => {
      this.setState({
        connectionState,
        port,
      });
    });
  }


  render() {
    let content = null;

    if (this.state.connectionState === 'disconnected') {
      content = (
        <div className="Connection-error">We've lost connection to the server...</div>
      );
    }

    if (this.state.connectionState === 'connecting') {
      content = (
        <div>Connecting...</div>
      );
    }

    return (
      <div className="Connection">
        <div className="Connection-port">Socket port: {this.state.port}</div>
        {content}
      </div>
    );
  }
}

export default Connection;
Handling the Server Connection Interruption:
Now you're going to focus on the following scenario. You'll fire up the app in two different browsers windows and point each one to a different port.
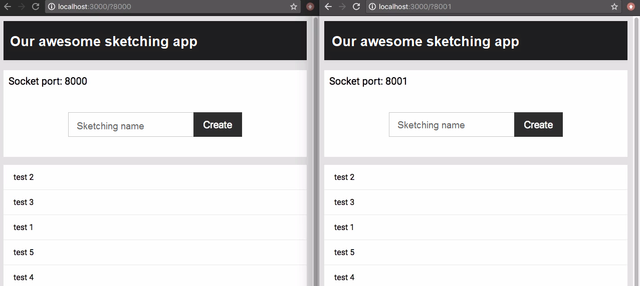
You'll also run the service at two different ports. You can draw on that sketching in both windows, and it'll update in the other.
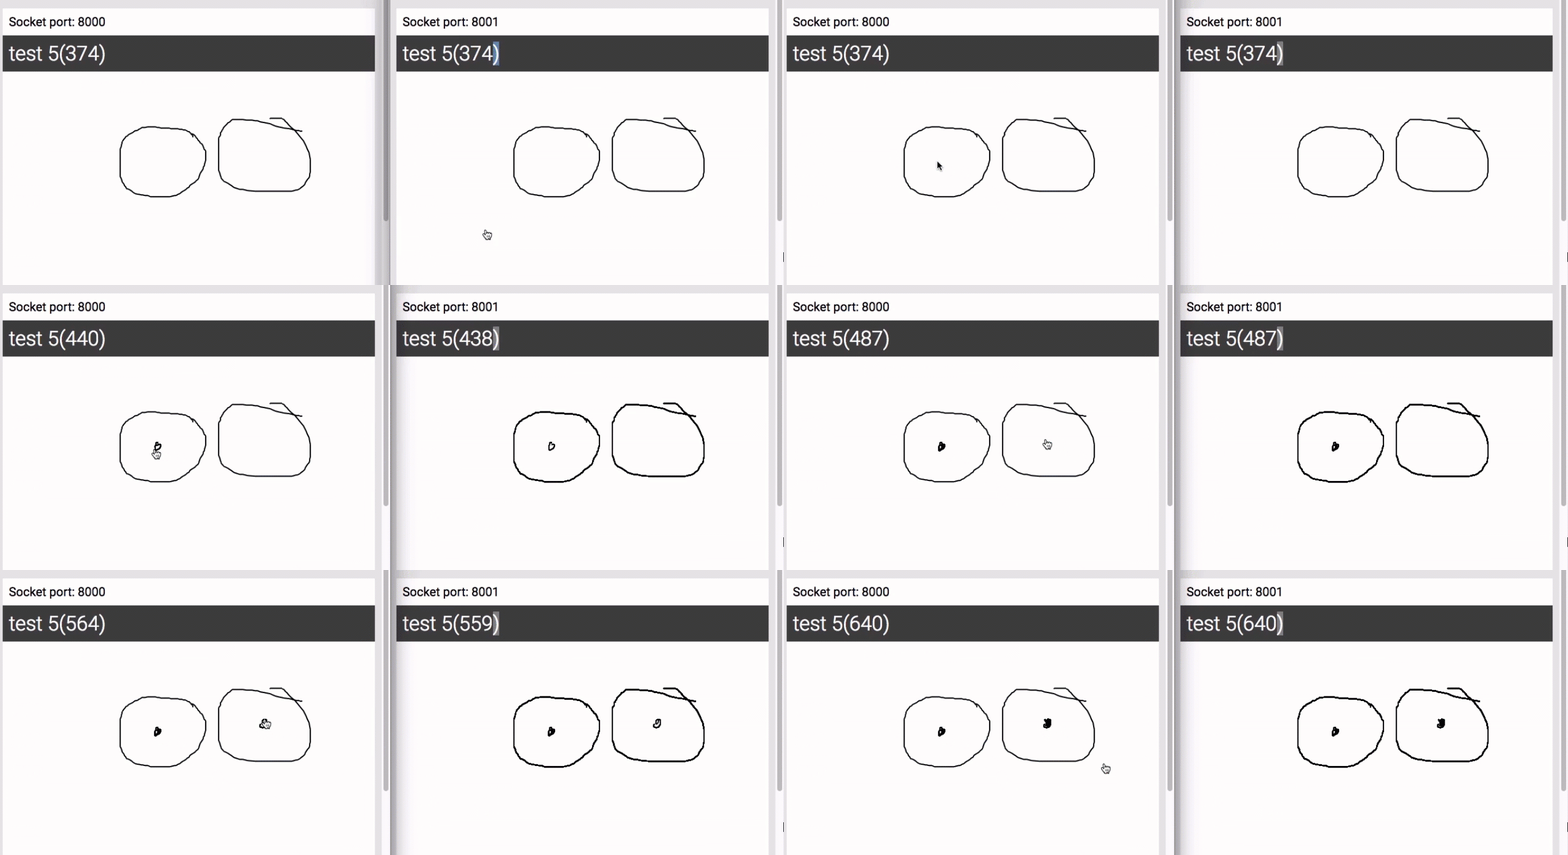
But when you stop the one service, you should see that the browser instance connected to it gets the connection warning. You'll keep on sketching in the connected one and then start up the service that you stopped
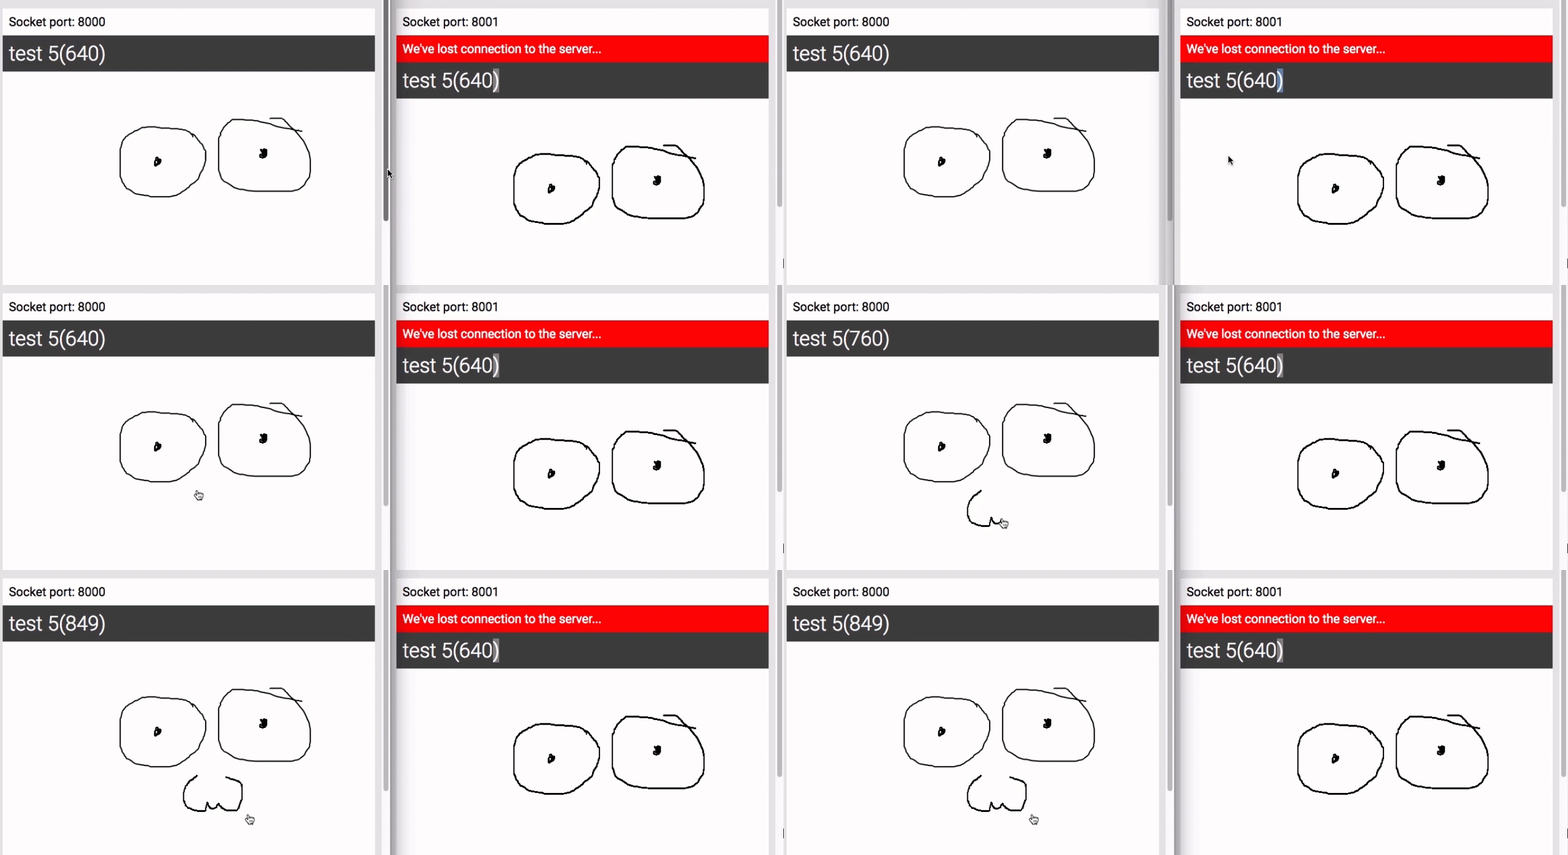
By typing this command;
yarn start 8001
yarn start 8001
allowing the client to reconnect. What you want to see is that the reconnected client catches up and gets the lines that were drawn while it was disconnected,
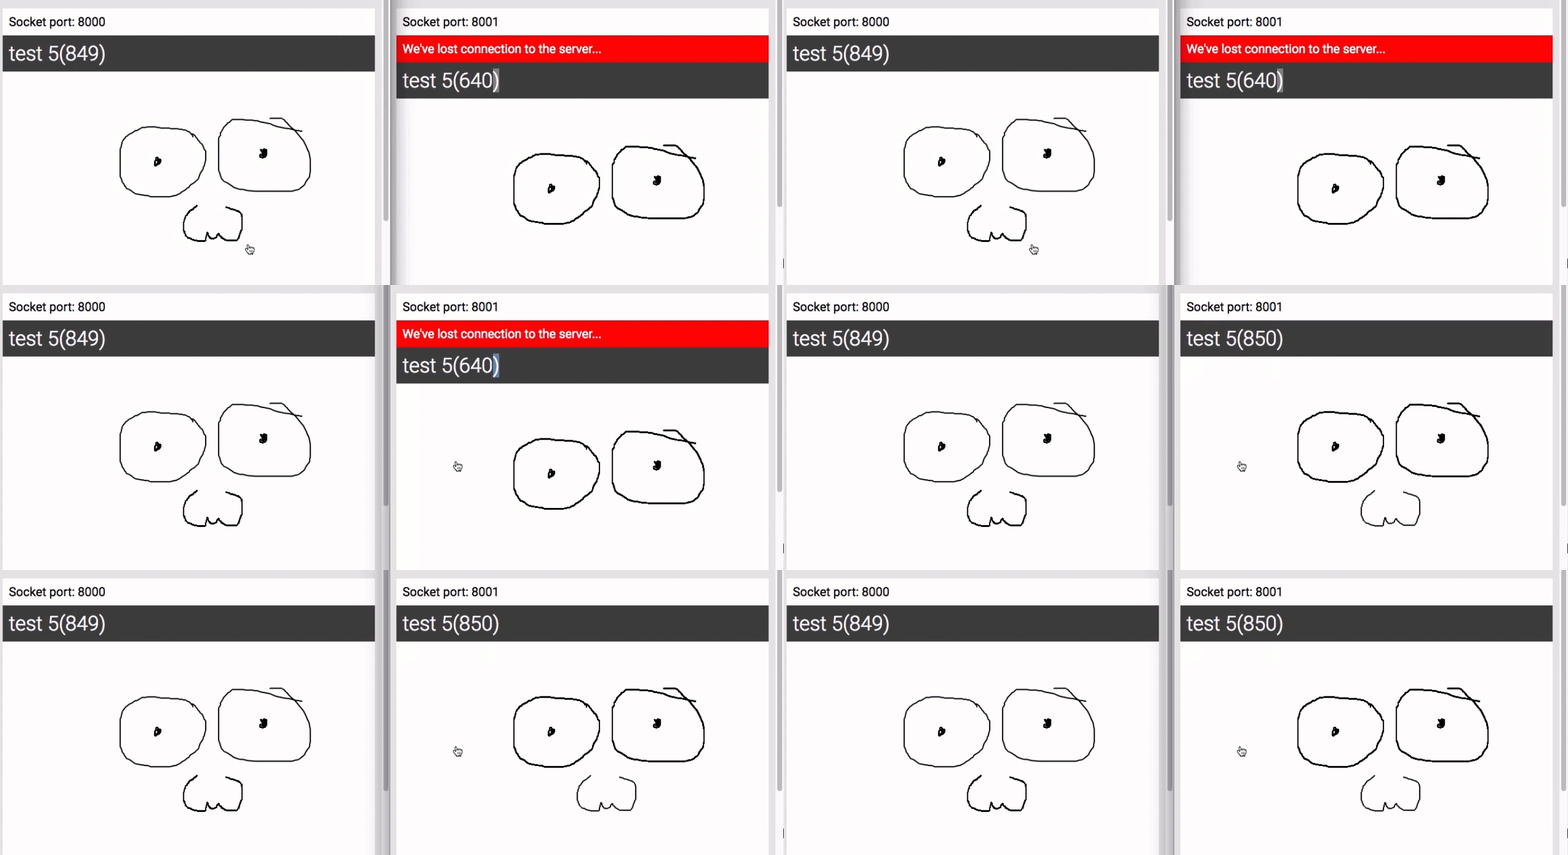
but only the lines that it doesn't already have. If we're doing the upcoming work, when a client reconnects, it doesn't even try and
resubscribe to date. It will just do nothing until the user refreshes the app and opens the sketching again.
In order to make it possible for the reconnecting client to get only the lines that it missed out on, go into the server index file. Make the subscribeToSketchingLines the structure a variable called from from its argument object.
function subscribeToSketchingLines({ client, connection, sketchingId, from })
function subscribeToSketchingLines({ client, connection, sketchingId, from })
Now go create a query variable and set that to the query that you're currently passing to the filter function.
let query = r.row('sketchingId').eq(sketchingId);
let query = r.row('sketchingId').eq(sketchingId);
Now you can check if you've got a from variable coming through, and if you do, make the query be what it's now, but with an extra predicate on by using the and method. And in here, you can specify that the row should also have a timestamp that is greater or equal to the from variable passed as date.
if (from) {
    query = query.and(r.row('timestamp').ge(new Date(from)))
  }
And remember to pass this query variable into the filter function.
.filter(query)
.filter(query)
To get this from variable, go down to where you handle a client subscribing to sketchingLines. Change the signature of this callback function to expect an object with a sketchingId on it, and add a from variable in here.
client.on('subscribeToSketchingLines', ({ sketchingId, from }) => {
     subscribeToSketchingLines({
        client,
        connection,
        sketchingId,
        from,
     });
 });
You'll go and change the client to send through an object instead of just the sketchingId. That's it for the server. To get the reconnect working from the client, go into the api.js file on the client. This is where you'll use the magic of RxJS to handle reconnect scenarios and sending the timestamp back. You need to know when the client is reconnected. Then, we open your subscription to the server with a timestamp of the last line that the client has received so that it can use it in the filter that you just coded up from the server.
const reconnectStream = Rx.Observable.fromEventPattern(
    h => socket.on('connect', h),
    h => socket.off('connect', h),
  );
Create a new observable called reconnectStream and set that to the result of calling Observerable.fromEventPattern, just like you did earlier for the lineStream. Wire up the observable to the Socket.IO event by first passing it to handleFunction that subscribes to the connect event, and then another function that unsubscribes from the connect event.
Now to ensure that we always use the last timestamp that came through our stream, create another observable called maxStream.
Where will this get the max timestamp from?
From the lineStream itself. First, map the lineStream to make the values coming out of that contain a date and not just the date string by calling new Date on the timestamp and calling getTime after that.
  const maxStream = lineStream
   .map(l => new Date(l.timestamp).getTime())
Now to get the latest timestamp, we'll use scan, which is very similar to calling reduce on an array. And you say that given the two values, you want the bigger of the two using Math.max. Okay, and scan also expects a default value, which we set to 0 so that the first timestamp that actually comes out of the observable will be bigger than that and become the biggest next number, the max date.
.scan((a, b) => ((a > b) ? a : b), 0);
.scan((a, b) => ((a > b) ? a : b), 0);
So this observable will always output the latest timestamp that it encountered in the lineStream observable. Now you say that when a value comes through from like a reconnectStream get the latest value from the maxStream too. And when you handle the results coming out of the combination, you'll have the timestamp that you need to subscribe to the WebSocket service within an array. So set that on a const called lastReceivedTimestamp, and get the value from the second index on the array.
reconnectStream
  .withLatestFrom(maxStream)
  .subscribe((joined) => {
    const lastReceivedTimestamp = joined[1];
    socket.emit('subscribeToSketchingLines', { sketchingId, from: lastReceivedTimestamp });
  });
Because it's joined the first index will contain the reconnect event, and the second index will contain the latest timestamp. Okay, now use that to subscribeToSketchingLines, specifying the sketchingId and the from variable using this lastReceivedTimestamp value.
socket.emit('subscribeToSketchingLines', { sketchingId });
socket.emit('subscribeToSketchingLines', { sketchingId });On the server we now expect to get an object and not the sketchingId on its own, down here also pass an object and set the sketchingId on that.
So you've got that handled. Before you can go test, head on over to the Sketching component, scroll to where you output the sketching name. Next to the sketching name, just output the length of the lines array that you have on state. We'll be using this to check the number of lines that we've bound on the Sketching component to ensure that we're bringing down only doubters when the component reconnects to the websocket.
({this.state.lines.length} lines)
({this.state.lines.length} lines)
After this update Sketching.js file will look like this;
//Sketching.js//
import React, { Component } from 'react';
import Canvas from 'simple-react-canvas';
import { publishLine, subscribeToSketchingLines } from './api';

class Sketching extends Component {
  state = {
    lines: [],
  }

  componentDidMount() {
    subscribeToSketchingLines(this.props.sketching.id, (linesEvent) => {
      this.setState((prevState) => {
        return {
          lines: [...prevState.lines, ...linesEvent.lines],
        };
      });
    });
  }

  handleDraw = (line) => {
    publishLine({
      sketchingId: this.props.sketching.id,
      line,
    });
  }

  render() {
    return (this.props.sketching) ? (
      <div
        className="Sketching"
      >
        <div className="Sketching-title">{this.props.sketching.name} ({this.state.lines.length} lines)</div>
        <Canvas
          onDraw={this.handleDraw}
          sketchingEnabled={true}
          lines={this.state.lines}
        />
      </div>
    ) : null;
  }
}

export default Sketching;
Testing the Results on Web Browsers:
Time to test. Create a new tab or new window for your command line, and start up the server again, this time passing it an argument of 8001, which is the alternative port it'll run on.
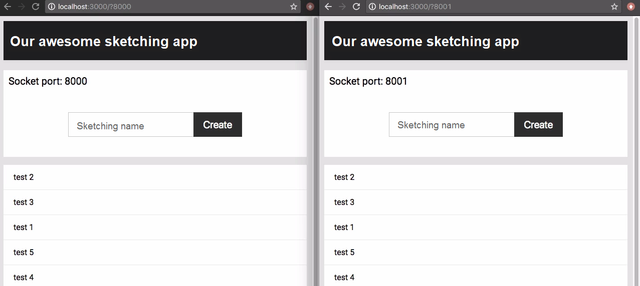
Now get 2 browser windows next to each other with the app running at localhost:3000. Point the one to port 8001 by adding a question mark on your URL followed by 8001. You should see that the app now reports as being connected to port 8001.

Okay, open up a sketching in both windows and draw on it. The windows keep in sync as they should, but now go stop the service running in port 8001.
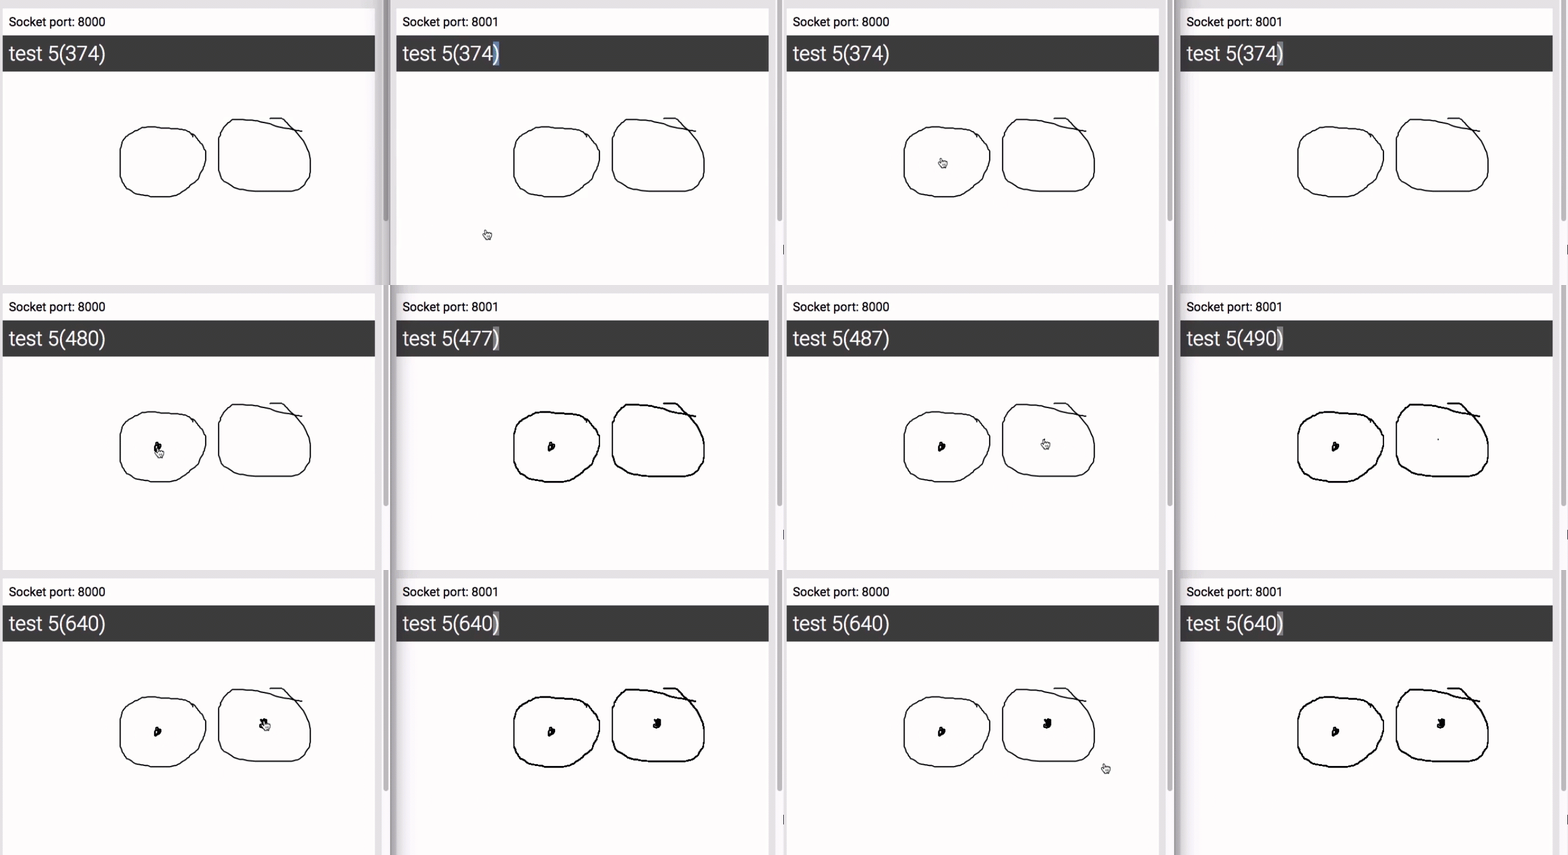
In the one window, the one connected to 8001, you should see the warning that it can't connect. Now go draw on the one that is still connected. Obviously the disconnected one is not updating.
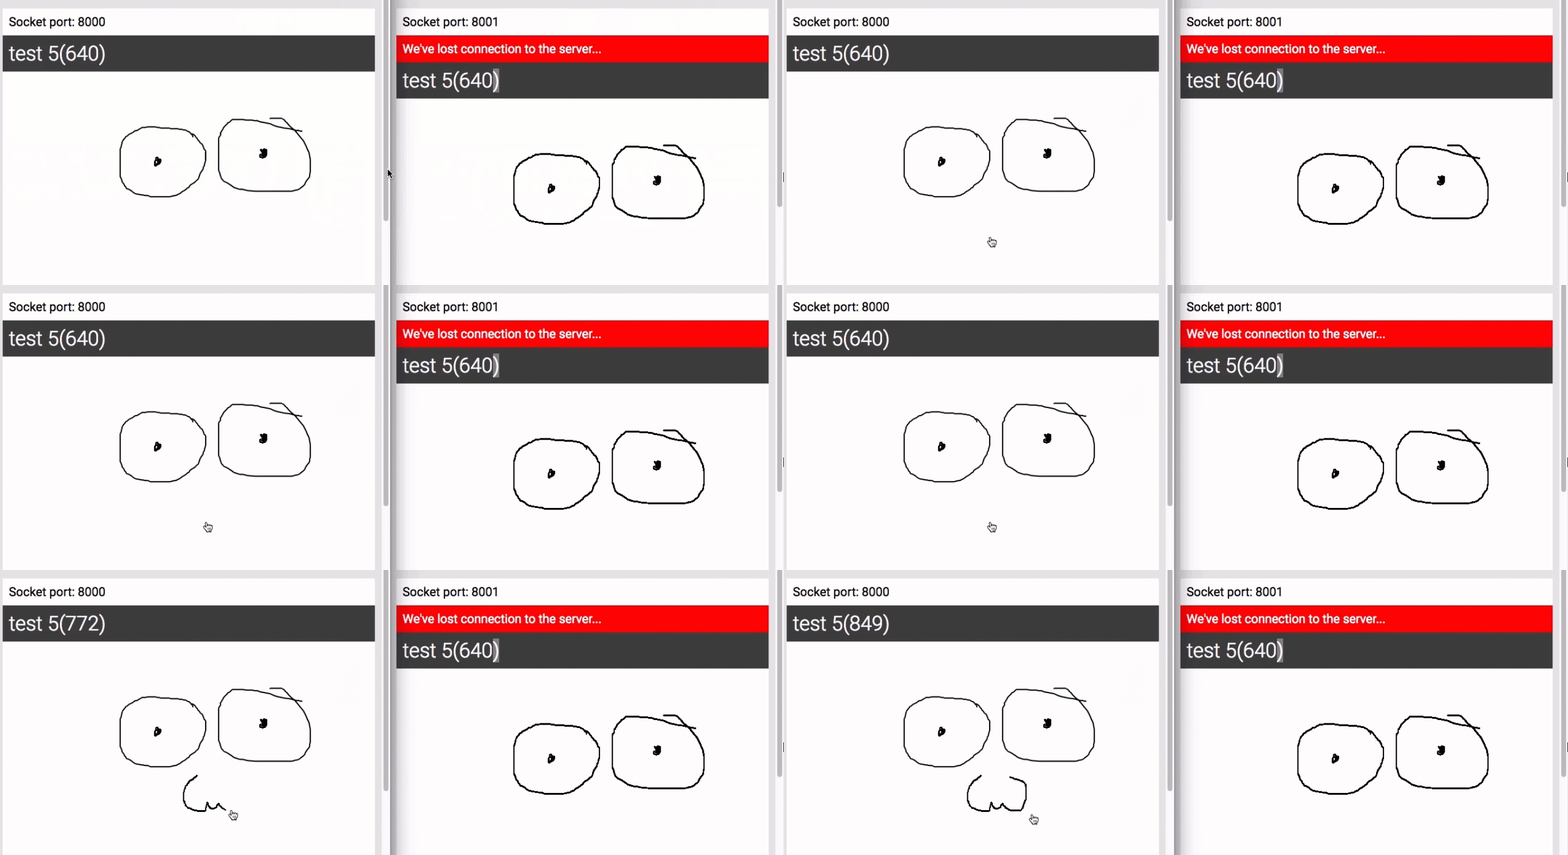
Now go start up your service on port 8001 again, and back in the browser window, great! It gets the lines that it missed out on. You can see that it got only deltas, it only the lines that it missed out on, well, plus one because it passes the last timestamp that it received onto the server, which does a greater or equal query on it. So you have one duplicate line, which is totally fine with this scenario.
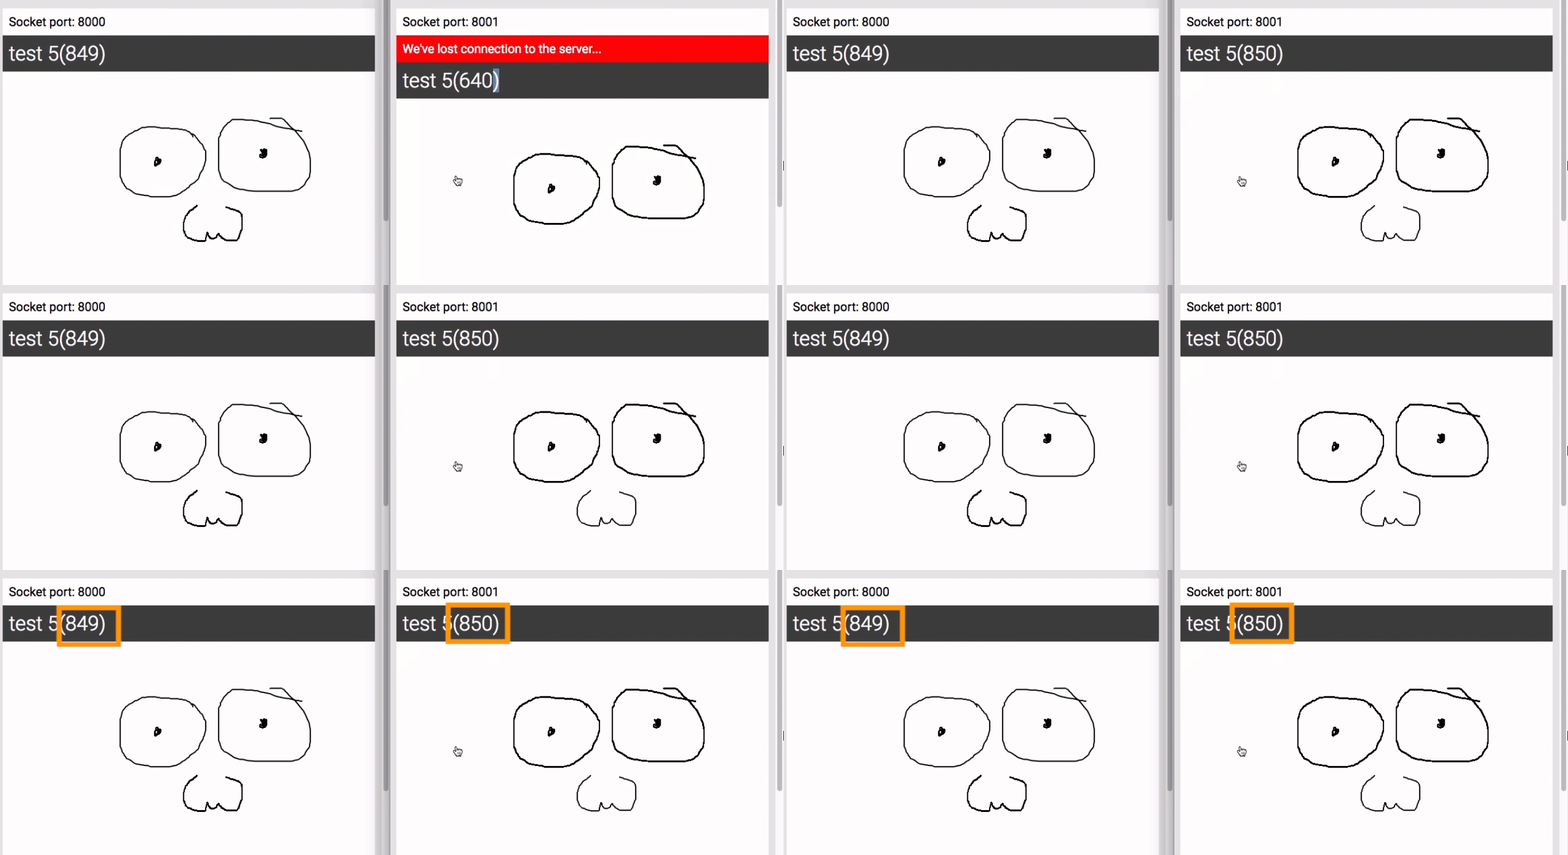
Okay, sweet! RxJS to the rescue. This would have been so much more difficult to build and to understand when you don't have the context without using RxJS.
Summary:
Great! So you've have learned how to connect to different ports. Also you have studied how to reconnect when connection to server is interrupted. RxJS helps your components to stay simple and for your complicated reconnect batching and so forth to be handled away from components in a place better suited to it. In the next tutorial we will wind up out app by publishing offline changes to the server after reconnecting.
Curriculum
- Creating Responsive Web Apps Using ReactJS, NodeJS and ReactiveX part 1
- Creating Responsive Web Apps Using ReactJS, NodeJS and ReactiveX Part 2
- Creating Responsive Web Apps Using ReactJS, NodeJS and ReactiveX Part 3
- Creating Responsive Web Apps Using ReactJS, NodeJS and ReactiveX Part 4
- Creating Responsive Web Apps Using ReactJS, NodeJS and ReactiveX Part 5
Project Repository
- Complete Source Code of Sketching-App Part 6
Thank you for your contribution.
Your contribution has been evaluated according to Utopian rules and guidelines, as well as a predefined set of questions pertaining to the category.
To view those questions and the relevant answers related to your post,Click here
Need help? Write a ticket on https://support.utopian.io/.
Chat with us on Discord.
[utopian-moderator]
Hey @engr-muneeb, your contribution was unvoted because we found out that it did not follow the Utopian rules.
Upvote this comment to help Utopian grow its power and help other Open Source contributions like this one.
Want to chat? Join us on Discord.