Creating Responsive Web Apps Using ReactJS, NodeJS and ReactiveX Part 5
Repository
https://github.com/facebook/react
Welcome to the Tutorial of Creating Responsive Web Apps Using ReactJS, NodeJS and ReactiveX Part 5
What Will I Learn?
- You will learn how to subscribing to changes in our Sketching Application.
- You will learn how to deploy those changes into the React Component.
- You will learn about the issue of slow loading of sketches in the browser.
- You will learn how to grouping up the events in time segments.
- You will learn how to fasten the rendering time of our application.
- You will learn how to test the results and check the changes in browser.
Requirements
System Requirements:
- Node.js 8.11.1
- Yarn
- RethinkDB
- Visual Studio Code or any similar editor for code editing
- A computer with basic functionalities and Web browsers
OS Support:
- Windows 7/8/10
- macOS
- Linux
Difficulty
- Intermediate
Resources
- https://www.rethinkdb.com/
- http://reactivex.io/rxjs/
- https://reactjs.org/docs/optimizing-performance.html
Required Understanding
- You need a good knowledge of HTML, CSS and JavaScript
- A fair understanding of Node.js and React.js
- A thirst for learning and developing something new
- Prior tutorials that are Part 1,Part 2,Part 3 and Part 4
Tutorial Contents
Description
You have studied about selecting a sketch from the list of sketches and also the handling of sketching events. You have also learned how to publish events over the web sockets and store the sketching events in the RethinkDB in the Fourth Part of the tutorial, if you don't check the fourth tutorial then check the fourth part.
In this Tutorial, you'll learn how to subscribe to sketching changes in your RethinkDB. And then we will see how we can improve the rendering time of our sketching application so that it can load our sketches fast.
Subscribe to Sketching Changes:
This time, let's get the server code done first before you wire up the client code. In the service index file, create a function subscribeToSketchingLines. Make this take an argument object with a socket client, the RethinkDB connection, and the sketchingId.
function subscribeToSketchingLines({ client, connection, sketchingId}) {

}
Now in here, return the result of calling r.table and specifying lines.
return r.table('lines')
return r.table('lines')
Now here is a new RethinkDB query command that you don't know yet called the filter function, which you'll use to query only for the lines associated to the sketching that you're interested in. And to build up a query, use the r variable in here, which is the RethinkDB import. Call a row on it, specify that you want to check the sketching field, and then state that you want it to equal the passed in sketchingId. This just generates a structure that RethinkDB can use to query the table.
.filter(r.row('sketchingId').eq(sketchingId))
.filter(r.row('sketchingId').eq(sketchingId))
So now you want this to be a live query, meaning you want it to bring back new values that match the filter as they get persisted to the db. Add changes onto the query chain. In here, specify that you want the initial values just like you did with the sketching list and timer earlier.
.changes({ include_initial: true})
.changes({ include_initial: true})
Now run the query, passing in the connection. Now this whole query chain is actually a promise, so you can chain a then on here, and this should give you access to the cursor.
.run(connection)
  .then((cursor) => {
});
Now use the cursor and call each on it. This expects a callback function with an error parameter and a row parameter. In this function, just use the client socket to emit an event for the line. For the event name, specify a concatenated string of sketchingLine followed by the sketchingId. Now you do this because the event now has a type of category. It only makes sense for this sketching. You don't want to mistakenly send events, meaning lines, from one sketching to another, so it makes sense for the actual event topic, the string, to have the sketchingId embedded on it.
.then((cursor) => {
    cursor.each((err, lineRow) => client.emit(`sketchingLine:${sketchingId}`, lineRow.new_val));
  });
As the payload of this event, just send through thenew_val of the row as you did earlier with sketchings too. Now hook it up on the socket layer next to where you handle all the other socket interaction. Below publishLine, add a client.on call and pass subscribeToSketchingLines as the event name. This is what's going to be sent from the client to show its interest in a particular sketching's lines. Provide it with a callback function, which should get the sketchingId from the client side.
client.on('subscribeToSketchingLines', (sketchingId) => {
      subscribeToSketchingLines({
        client,
        connection,
        sketchingId,
      });
    });
And in here, just call the function that you just created subscribeToSketchingLines, passing in an argument object with a client, the connection, and sketchingId. So that's it for the server side of providing lines to clients over the WebSockets.
Now after the updates Index.js file of the server looks like this;
//index.js//
const r = require('rethinkdb');
const io = require('socket.io')();

function createSketching({ connection, name }) {
  return r.table('sketchings')
  .insert({
    name,
    timestamp: new Date(),
  })
  .run(connection)
  .then(() => console.log('created a new sketching with name ', name));
}

function subscribeToSketchings({ client, connection }) {
  r.table('sketchings')
  .changes({ include_initial: true })
  .run(connection)
  .then((cursor) => {
    cursor.each((err, sketchingRow) => client.emit('sketching', sketchingRow.new_val));
  });
}

function handleLinePublish({ connection, line }) {
  console.log('saving line to the db')
  r.table('lines')
  .insert(Object.assign(line, { timestamp: new Date() }))
  .run(connection);
}

function subscribeToSketchingLines({ client, connection, sketchingId}) {
  return r.table('lines')
  .filter(r.row('sketchingId').eq(sketchingId))
  .changes({ include_initial: true, include_types: true })
  .run(connection)
  .then((cursor) => {
    cursor.each((err, lineRow) => client.emit(`sketchingLine:${sketchingId}`, lineRow.new_val));
  });
}

r.connect({
  host: 'localhost',
  port: 28015,
  db: 'awesome_whiteboard'
}).then((connection) => {
  io.on('connection', (client) => {
    client.on('createSketching', ({ name }) => {
      createSketching({ connection, name });
    });

    client.on('subscribeToSketchings', () => subscribeToSketchings({
      client,
      connection,
    }));

    client.on('publishLine', (line) => handleLinePublish({
      line,
      connection,
    }));

    client.on('subscribeToSketchingLines', (sketchingId) => {
      subscribeToSketchingLines({
        client,
        connection,
        sketchingId,
      });
    });
  });
});


const port = 8000;
io.listen(port);
console.log('listening on port ', port);
Deploying Changes to React Component:
Now let's go and wire up the clients to get these lines onto the React Sketching component through its props to get it to render. In the api file in the client source folder, create a new function called subscribeToSketchingLines, and make it take a sketchingId and a callback function.
function subscribeToSketchingLines(sketchingId, cb) {
  );
First, subscribe to the values coming through from the server by calling on on the socket, specifying the event name that's a concatenation between sketchingLine and the sketchingId. Remember, this is to make it more specific to ensure that you don't cross contaminate events when a user switches between sketchings and as the event handler, just pass it on to the callback.
socket.on(‘sketchingLine:${sketchingId}’, cb),
socket.on(‘sketchingLine:${sketchingId}’, cb),
Now that you know the event will be handled, you can emit the event that will tell the server that you're interested in getting sketching lines, so call emit on the socket and pass throughsubscribeToSketchingLines and pass through the sketchingId.
socket.emit('subscribeToSketchingLines', sketchingId);
socket.emit('subscribeToSketchingLines', sketchingId);
Say you were subscribing to events and also telling the server that it should open up a query for us and start piping through the events by emitting an event from the client.
subscribeToSketchingLines,
subscribeToSketchingLines,
At the bottom, export this function from this file. Now to use this functionality, go to the Sketching component in Sketching.js. Import this new subscribeToSketchingLines function.
import { publishLine, subscribeToSketchingLines } from './api';
import { publishLine, subscribeToSketchingLines } from './api';
You're going to store the lines coming back from the server on state, so add a default state variable on this component with an empty array called lines.
state = {
    lines: [],
  }
Add a componentDidMount method because you'll be subscribing to the data in here. This gets called by React when your component has been wired up, so it's a good place to start subscribing to data from the server. Call the subscribeToSketchingLines function that you imported and pass on the ID of the sketching that you get through on this component's props. Also, pass a callback function with a line parameter
componentDidMount() {
    subscribeToSketchingLines(this.props.sketching.id, (line) => {
  });
  }
In this callback, call setState using the function syntax this time because you want to ensure that you don't work with stale state. You don't want to go and append a new line onto the array as it was a few updates ago. This expects a function that it can call with the previous state being passed in.
this.setState((prevState) => {
        return {
          lines: [...prevState.lines, line],
        };
      });
In here you can just say that you want the new state to have the lines array with the new line added onto it. Good! So you're subscribing to values coming over the WebSocket and adding them to the array on state as you receive them using the functional setState syntax.
Now you can go and use the lines that you have on state. Down in the window where you have the Canvas component, go add a lines prop on it and set that to the lines value that you have on state, and that's it.
lines={this.state.lines}
lines={this.state.lines}
Now go and open two browsers side by side. When you draw something on the one, you should see it coming through on the other one in real time.
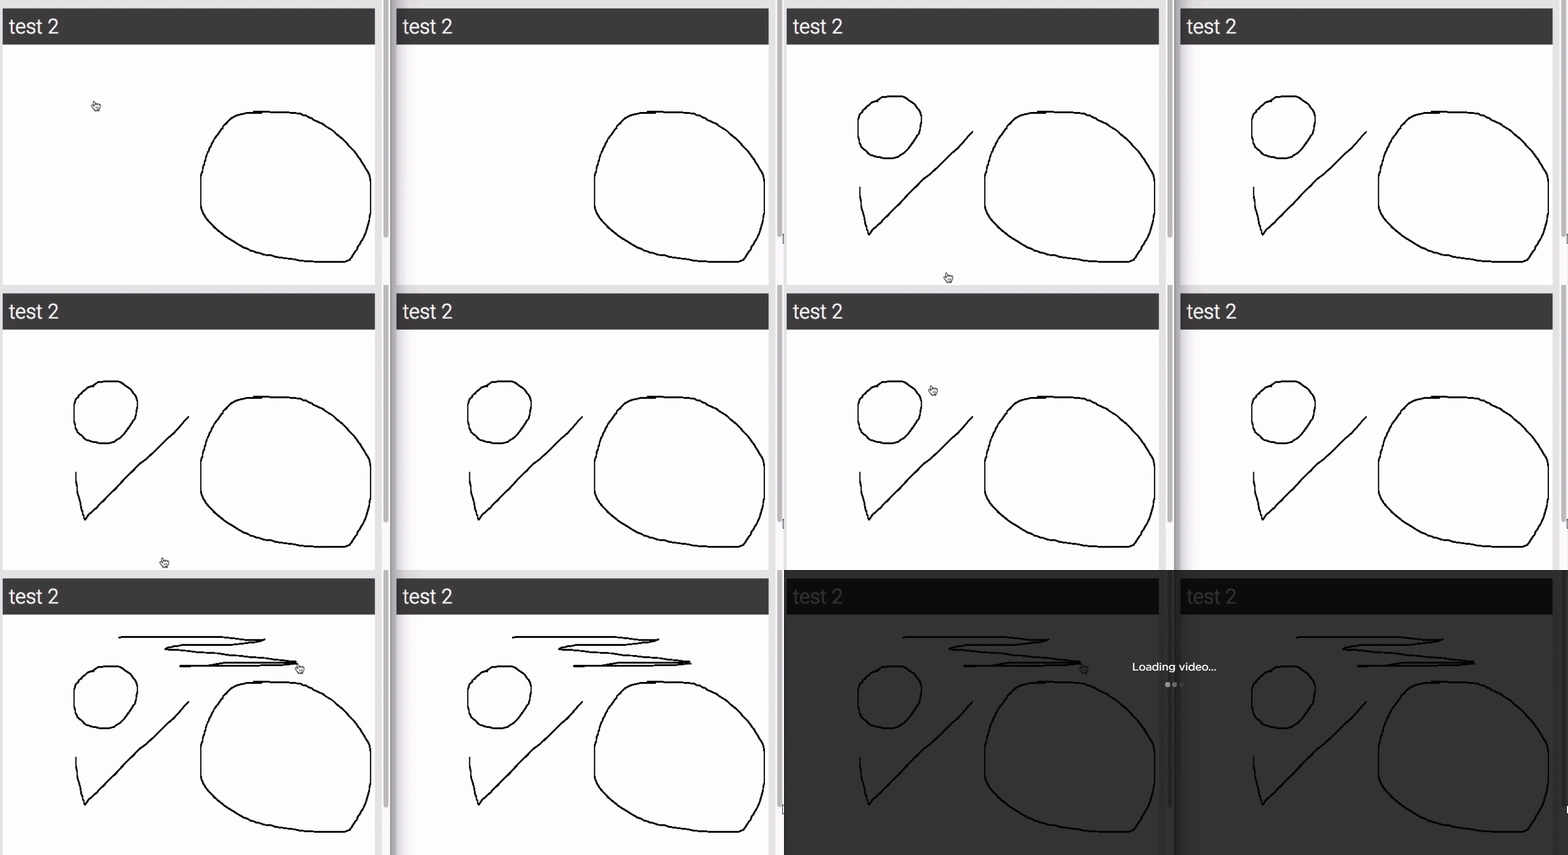
Pretty cool! So we have done it.
Delay in Loading Sketch:
So the call logic is done, and you can get a sketching to update in close to real time between two different browsers. That's cool, but you might've noticed a problem as you played around with it in your browser. When you have a sketching with a bit more detail, meaning it'll have more lines in the database, it takes a very long time for it to show the sketching when you open it.
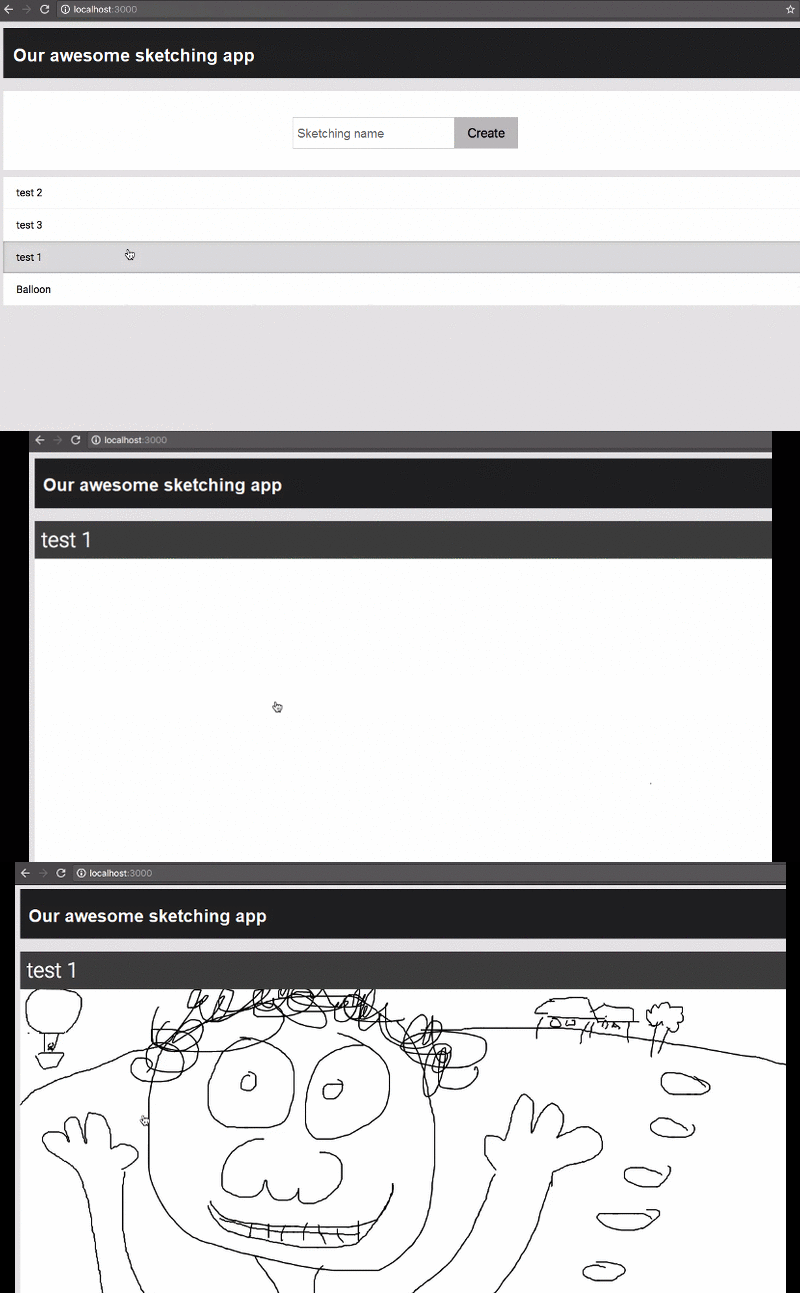
Take this for example. I've already clicked on it, and it takes way too long to actually show the sketching that we've selected. Not what I would call real time. This takes long because React will try to render the Sketching component each time that it receives a new line to be drawn. This particular sketching contains
6,400 lines,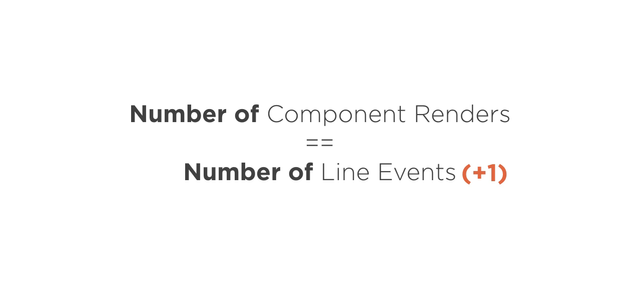
So it tries to render the Sketching component
6,400 times. Well, actually 6,401 because it renders the first time on default state when there are no lines present. You could override the Sketching component's shouldComponentUpdate in order to avoid reconciliation. You could use this approach to ensure that you wait for a while of inactivity without receiving any new line events before rendering. But why should your component be aware of the architecture that it lives in and cater for this? It would be nice if we could keep the Sketching component simple and handle the issue inside of the API where we're aware that we're working with WebSockets.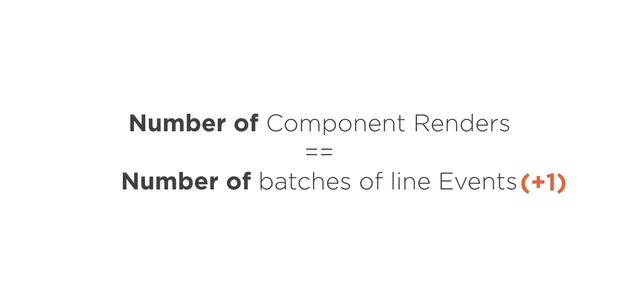
And the way you can do this is by batching up the updates a bit and sending through chunked updates to your component so that it can render those. So basically instead of sending through each line to the canvas props, you're going to send it through in buffers, giving it time to go apply a buffer of lines together. You're going to do the bulk of this work in the api.js file and try to keep your component as simple as possible. This is also where you'll first start using RxJS in this project. RxJS provides you with functions and abstractions that help you deal with streaming. Because your event coming through from the server is definitely a stream, it makes sense to use it. You could definitely code up something yourself without relying on RxJS, but it would be complicated and difficult to follow.
Why reinvent the wheel?
RxJS is part of the package.json file, so you've already got it installed, and you can just go ahead and use it. In the api.js file, import Rx from rxjs/Rx.
import Rx from 'rxjs/Rx';
import Rx from 'rxjs/Rx';
Now what you want to do is change the subscribeToSketchingLines function so that it has the same signature, but instead of calling back on the callback function for each event, you want to batch it up and call back on it with an array of lines. But first you need to get an Rx observable representing your data, also known as a stream. This will represent the events coming through from the WebSocket server. Luckily, Rx has an easy way of doing this. Create a new const called lineStream.
  const lineStream = Rx.Observable.fromEventPattern(
  );
Now set this to the result of calling Rx.Observable.fromEventPattern, which is a factory function that'll return the observable that'll send through an item every time the event fires. This function takes two functions as parameters. The first is for you to subscribe to the event and make the RxJS observable the handler. Rx will pass this function to the handler that you need to hook up to your event. Let's call that h, short for handler.
h => socket.on('sketchingLine:${sketchingId}', h),
h => socket.on('sketchingLine:${sketchingId}', h),
Now as you did earlier, just use socket.on to subscribe to the event, but instead of choosing the callback from the function from up here, you wire up the handler that RxJS passes you, which you called h. So now every time an event gets published over the socket channel, it'll send it through on this observable, allowing you to use all kinds of cool stream operators on it. You'll see soon enough how powerful this is. The next function that Rx will pass you allows you to do the reverse, to basically unsubscribe from the event.
h => socket.off('sketchingLine:${sketchingId}', h),
h => socket.off('sketchingLine:${sketchingId}', h),
This is so that you get a chance to unsubscribe from events when the stream wants to be disposed. So again, make it take the handler, and this time call socket.off, using the same event name, and pass in the handler. Now the observable can easily get disposed and garbage collected.
Grouping the Events In Time Sagments:
Great! So now you have an observable that you can use to buffer it up. What you want to do is buffer up the events being published up from the server based on time. If, in the first 100 mm since starting, 2 events came through, then the observable should return those 2 events on the callback. If, in the next 100 mm, 50 events came through, then 50 events should be returned on the callback. If, in the next 100 mm, no events came through, it should not call the callback. So you're basically just grouping it up in time segments.
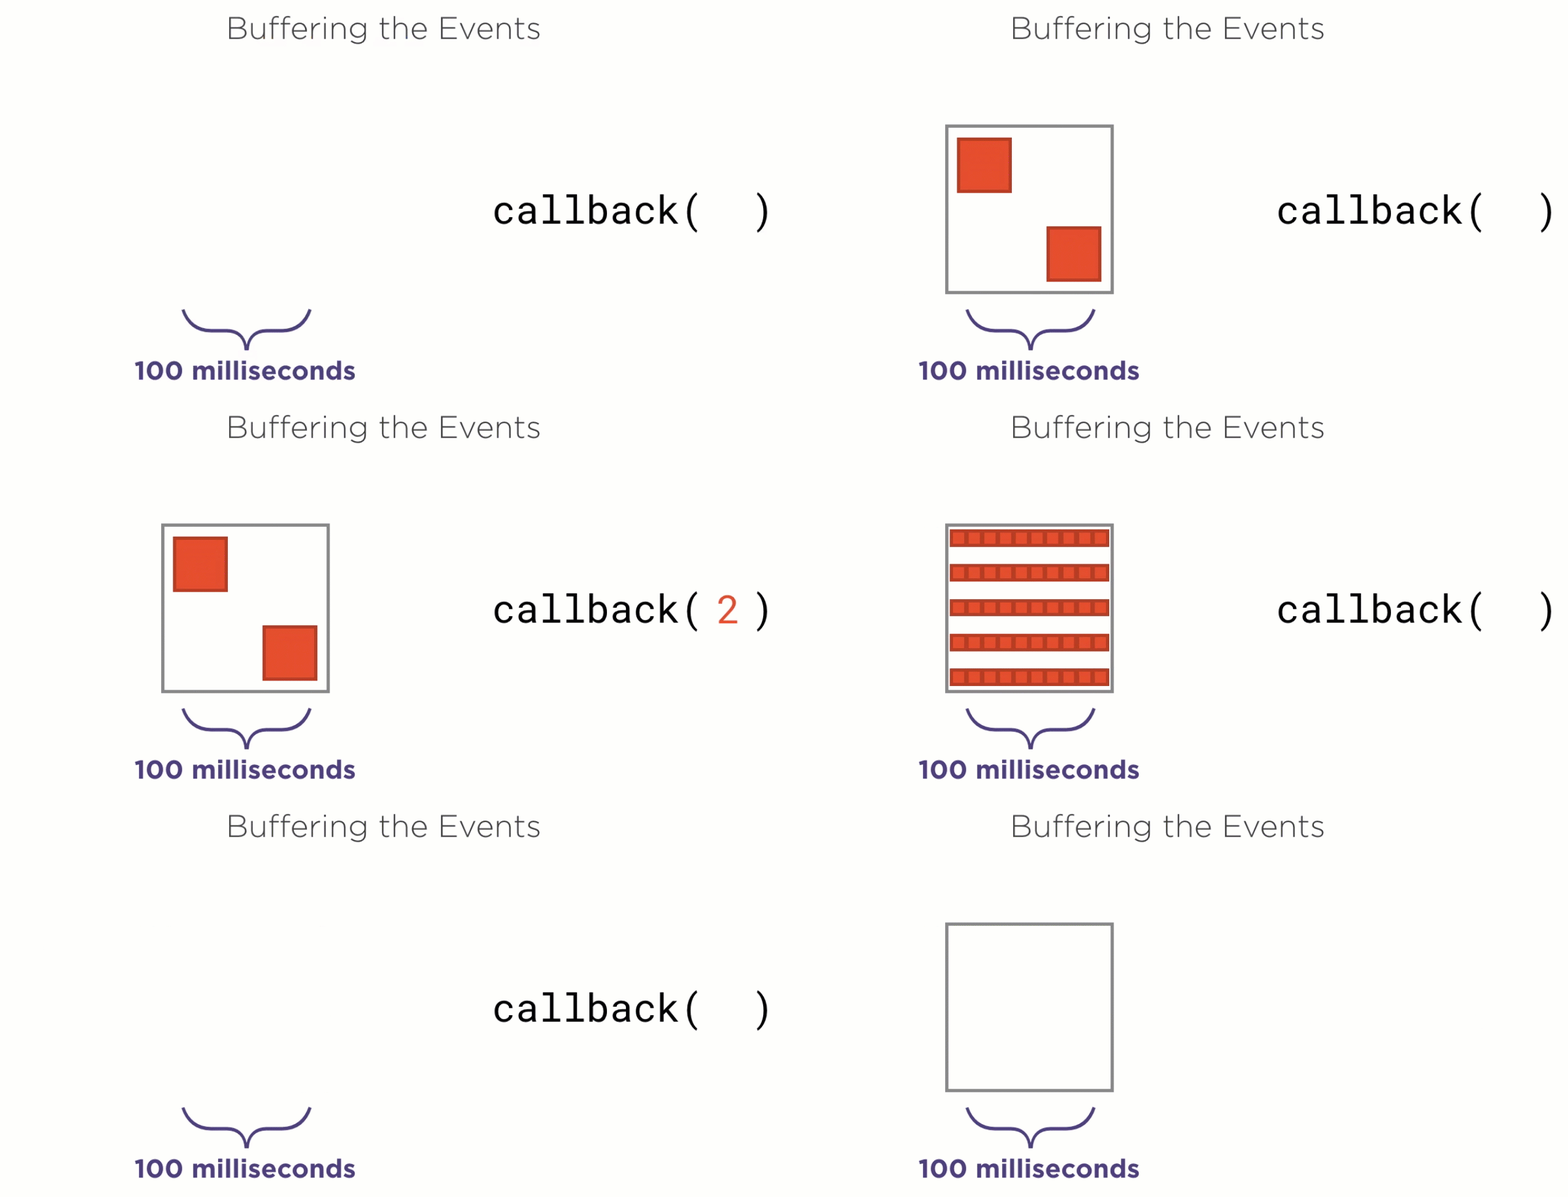
To do that in code, create a const called
bufferedTimeStream and set that to the result of calling a method on lineStream called bufferTime. This is what RxJS calls an operator. It's a method that you execute on the observable that allows you to consume the stream of data coming through in it in a certain way.
const bufferedTimeStream = lineStream
  .bufferTime(100)
Interestingly enough, it'll also return an observable, but the values in the observable will now come through according to the way that bufferTime decided. BufferTime takes a numeric value, which is the number of milliseconds that it should use to buffer items up, which, in our case, is 100. What you want to do now is map over this and ensure that you have an object containing the actual lines on it.
.map(lines => ({ lines }));
.map(lines => ({ lines }));
This isn't really necessary, but I wanted to show you that it's possible to do something like this to get access to the array with the values in it from the buffer and do something else with it. Now, how do you feed the values from this observable over the callback to the subscribeToSketchings function? Easy. Just call a method on the bufferedTimeStream called subscribe, and then pass the callback function in there. It'll call the callback function as soon as an item comes through.
bufferedTimeStream.subscribe(linesEvent => cb(linesEvent));
bufferedTimeStream.subscribe(linesEvent => cb(linesEvent));
Now the api.js file after the updates looks like this;
//api.js//
import openSocket from 'socket.io-client';
import Rx from 'rxjs/Rx';
const socket = openSocket('http://localhost:8000');

function subscribeToSketchings(cb) {
  socket.on('sketching', sketching => cb(sketching));
  socket.emit('subscribeToSketchings');
}

function createSketching(name) {
  socket.emit('createSketching', { name });
}

function publishLine({ sketchingId, line }) {
  socket.emit('publishLine', { sketchingId, ...line });
}

function subscribeToSketchingLines(sketchingId, cb) {

  const lineStream = Rx.Observable.fromEventPattern(
    h => socket.on(`sketchingLine:${sketchingId}`, h),
    h => socket.off(`sketchingLine:${sketchingId}`, h),
  );

  const bufferedTimeStream = lineStream
  .bufferTime(100)
  .map(lines => ({ lines }));

  bufferedTimeStream.subscribe(linesEvent => cb(linesEvent));
  socket.emit('subscribeToSketchingLines', sketchingId);
}

export {
  publishLine,
  createSketching,
  subscribeToSketchings,
  subscribeToSketchingLines,
};
Now that this function returns the line items in an array on an object, you need to change the Sketching component to expect that. Head on over to the Sketching.js file. In the callback function that you're passing to the subscribe function, change the parameter name to linesEvent in order to communicate better what it does.
subscribeToSketchingLines(this.props.sketching.id, (linesEvent) => {
});
And where you're currently just appending the line that you got, change this to add the lines in the array on the event to the array on state by using the spread syntax.
lines: [...prevState.lines, ...linesEvent.lines],
lines: [...prevState.lines, ...linesEvent.lines],
Now the Sketching.js file after the updates looks like this;
//Sketching.js//
import React, { Component } from 'react';
import Canvas from 'simple-react-canvas';
import { publishLine, subscribeToSketchingLines } from './api';

class Sketching extends Component {
  state = {
    lines: [],
  }

  componentDidMount() {
    subscribeToSketchingLines(this.props.sketching.id, (linesEvent) => {
      this.setState((prevState) => {
        return {
          lines: [...prevState.lines, ...linesEvent.lines],
        };
      });
    });
  }

  handleDraw = (line) => {
    publishLine({
      sketchingId: this.props.sketching.id,
      line,
    });
  }

  render() {
    return (this.props.sketching) ? (
      <div
        className="Sketching"
      >
        <div className="Sketching-title">{this.props.sketching.name}</div>
        <Canvas
          onDraw={this.handleDraw}
          sketchingEnabled={true}
          lines={this.state.lines}
        />
      </div>
    ) : null;
  }
}
export default Sketching;
Checking the Results:
So go and check out the results in the browser. I'm opening the same sketching that took a very long time to open earlier, and it renders the sketching immediately.
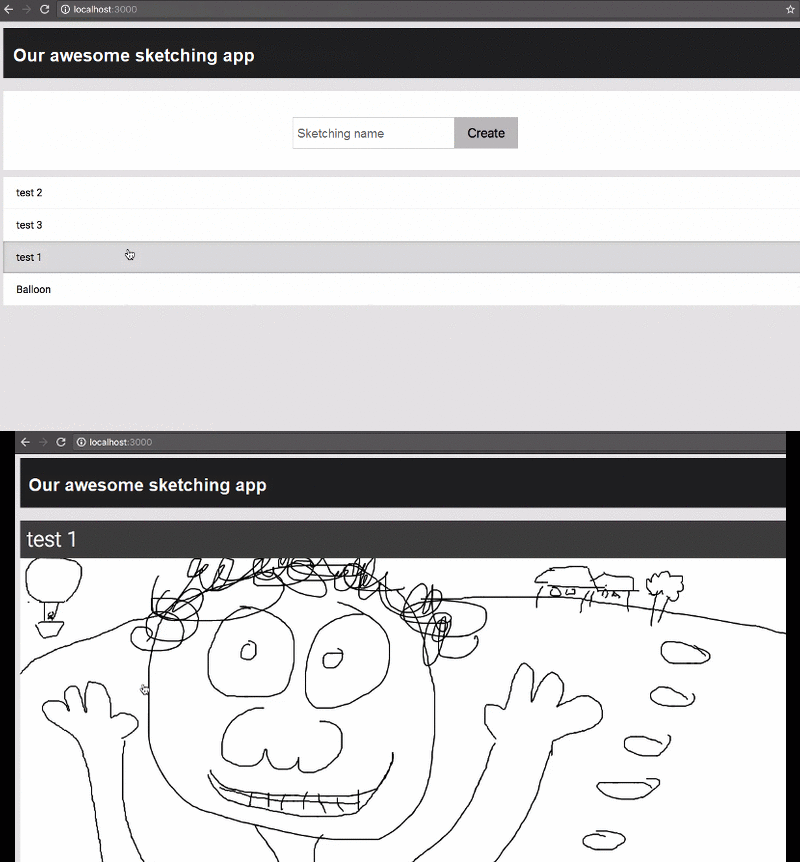
The buffering really made a difference, and the best is our Sketching component remained really simple.
Summary:
Great! So you've now got a working collaborative real-time whiteboard. The best thing is you can even run the WebSockets on a separate service because using RethinkDB allows you to scale out through the use of its live query functionality. You can imagine how useful this stack could be when you need to build out something real time. That said, to get this sketching app that you build to scale well, it'll also need to be robust. It should handle it seamlessly when the server that the user is connected to goes down. It should also handle the scenario where the user loses her connection to the server because a lot of apps are used on phones with spotty network connections. In the next tutorial, that's exactly what you'll learn, how to handle failure scenarios in a real-time, socket-based stack, like the one that you've been working on.
Curriculum
- Creating Responsive Web Apps Using ReactJS, NodeJS and ReactiveX part 1
- Creating Responsive Web Apps Using ReactJS, NodeJS and ReactiveX Part 2
- Creating Responsive Web Apps Using ReactJS, NodeJS and ReactiveX Part 3
- Creating Responsive Web Apps Using ReactJS, NodeJS and ReactiveX Part 4
Project Repository
- Complete Source Code of Sketching-App Part 5
Thank you for your contribution.
Looking forward to your upcoming tutorials.
Your contribution has been evaluated according to Utopian rules and guidelines, as well as a predefined set of questions pertaining to the category.
To view those questions and the relevant answers related to your post,Click here
Need help? Write a ticket on https://support.utopian.io/.
Chat with us on Discord.
[utopian-moderator]
Thank You Sir...Your suggestions and sayings really help me.Sir this is the fifth part of the series please check this in the questionaire.
Hey @engr-muneeb, your contribution was unvoted because we found out that it did not follow the Utopian rules.
Upvote this comment to help Utopian grow its power and help other Open Source contributions like this one.
Want to chat? Join us on Discord.