Xamarin Learning Serie #1 – Communication with WEB APIS
![]()
Github Repository
My github Adress
https://github.com/elsedongusu
Github project file
https://github.com/elsedongusu/xmarina
What we will learn:
- Why we are using web api with mobelie applications?
- How does web apis communicate with mobile systems?
- Basic operations. Add, Edit, Delete, Display.
Requirements
- MsSql Server (optional, you can use mysql or oracle)
- A web api
- Visual Studio I will be using Visual Studio Mac for Mac but you can use any version which compatible with Xamarin
What you need to pay attention:
Difficulty
- Intermediate
Tutorial Contents
Why we are using WEB API?
When it is necessary to work with a global data in a web application, it is usually connecting to a database, and the data from that database is served to all clients. If there is no need for it here, it is the fastest way to connect directly to the database and to extract the data from there. In mobile technologies, it is not directly connected to a common database system like Mssql. Because you can not guarantee that mobile systems will always be connected to the internet.Instead of, you can use a portable database systems such as Sqlite when it is not necessary to work with shared data. For collaborations, we have to use a layer (Web API, Web Service) works as a bridge between the database system and the mobile application. Most preferred one from these, is a Web API.
If you are making a request to a Web API with WebClients in a desktop or web software and doing basic CRUD (Cread, Read, Update and Delete) operations here, the same techniques are used at mobile applications to connect to the Web APIs and perform basic operations.
For a simple Web API that we will enter from our mobile application, create the database as follows.
After that, lets code ouırWeb Apı's and be sure of its working. (I will be sharing my code)
[Route("api/[controller]")]
    public class StudentController : Controller
    {
        private readonly SchoolDBContext _context;
        public StudentController(SchoolDBContext context)
        {
            _context = context;
        }
        // GET api/values
        [HttpGet]
        public IEnumerable<Student> Get()
        {
            return _context.Student.ToList();
        }

        // GET api/values/5
        [HttpGet("{id}")]


public Student Get(int id)
        {
            return _context.Student.FirstOrDefault(s => s.Id == id);
        }

        // POST api/values
        [HttpPost]
        public Student Post([FromBody]Student student)
        {
            _context.Student.Add(student);
            _context.SaveChanges();
            return student;
        }

        // PUT api/values/5
        [HttpPut("{id}")]
        public Student Put([FromBody]Student student)
        {
            _context.Student.Update(student);
            _context.SaveChanges();
            return student;
        }

        // DELETE api/values/5
        [HttpDelete("{id}")]
        public void Delete(int id)
        {
            var deleted = _context.Student.FirstOrDefault(s => s.Id == id);
            _context.Student.Remove(deleted);

        }

    }
We can code at Xamarin forms side now.
Firstly we are creating an class at Models folder which one delegate our student class. So we can transfer datas to our student class, which one we got from web api
namespace XamarinTutorial1WebApi.Models
{
    public class Student
    {
        public int Id
        {
            get;
            set;
        }
        public string Name
        {
            get;
            set;
        }
        public string Surname
        {
            get;
            set;
        }
        public int Number
        {
            get;
            set;
        }
        public string Phone
        {
            get;

set;
        }
    }
}
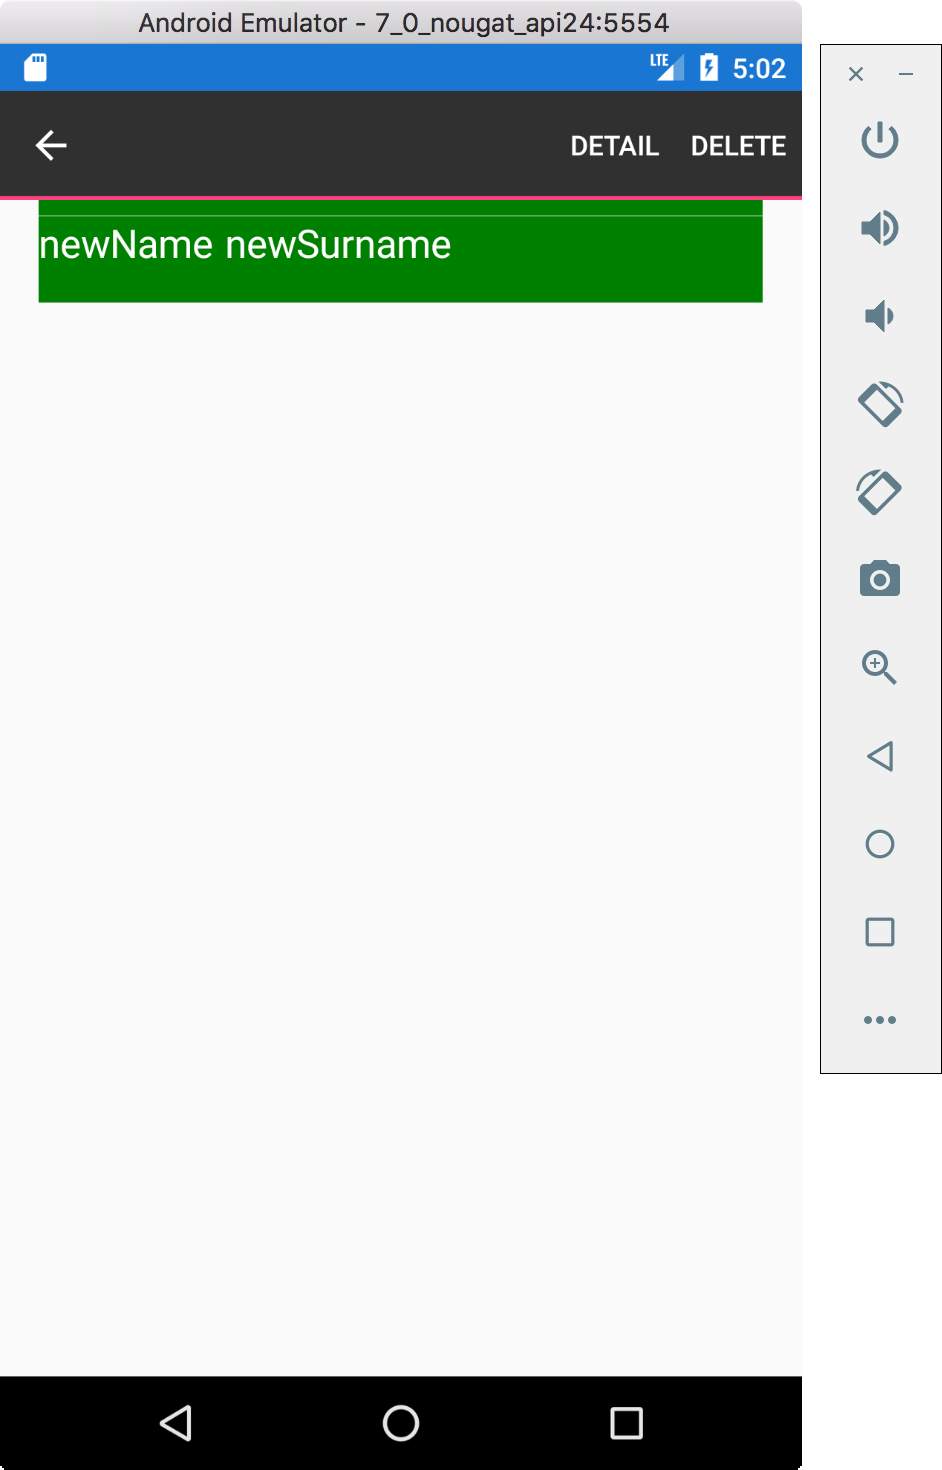
We are creating an screen for display student datas. We will be listing student datas are there and this screen will be a main page. We will can add a new student, edit student or delete student on this screen.
<?xml version="1.0" encoding="UTF-8"?>
<ContentPage xmlns="http://xamarin.com/schemas/2014/forms" xmlns:x="http://schemas.microsoft.com/winfx/2009/xaml" x:Class="XamarinTutorial1WebApi.StudentList">
    <ContentPage.Content>
        <StackLayout Padding="20">
            <ListView x:Name="lstVStudent">
                <ListView.ItemTemplate>
                    <DataTemplate>
                        <ViewCell>
                        <ViewCell.ContextActions>
                                <MenuItem Clicked="MenuItemDetail_Clicked" Text="Detail" CommandParameter="{Binding .}"></MenuItem>
                                <MenuItem Clicked="MenuItemDelete_Clicked" Text="Delete" CommandParameter="{Binding .}"></MenuItem>
                            </ViewCell.ContextActions>
                            <StackLayout BackgroundColor="Green" Orientation="Vertical">
                                <StackLayout Orientation="Horizontal">
                                    <Label TextColor="White" FontSize="20" Text="{Binding Name}"></Label>
                                    <Label TextColor="White" FontSize="20" Text="{Binding Surname}"></Label>

                                </StackLayout>
                            </StackLayout>
                        </ViewCell>
                    </DataTemplate>
                </ListView.ItemTemplate>
            </ListView>
        </StackLayout>
    </ContentPage.Content>
</ContentPage>
Our C # code will look like this:
namespace XamarinTutorial1WebApi
{
    public partial class StudentList : ContentPage
    {
        void MenuItemDetail_Clicked(object sender, EventArgs eventArgs)
        {
            var student = ((MenuItem)sender).CommandParameter as Student

            if (student != null)
            {
                Navigation.PushModalAsync(new AddStudent(student));
            }
        }
        async void MenuItemDelete_Clicked(object sender, EventArgs eventArgs)
        {
            var student = ((MenuItem)sender).CommandParameter as Student;
            if (student != null)
            {
                var result = await DisplayAlert("Warning", "Are you sure?", "OK", "Cancel");
                if (result)
                {
                    await (new WebAPIService()).DeleteStudentAsync(student.Id);
                }
            }
        }
        public StudentList()
        {
            InitializeComponent();
        }
        protected override async void OnAppearing()
        {
            base.OnAppearing();

            var result = await (new WebAPIService()).GetData();

            lstVStudent.ItemsSource = result;
        }


    }
}
Our intent is listing students data, edit and delete any student at this screen. We will use MenuItems for this.
And Menu Items look like this:
Before connecting a Web Api, we have to inject libraries which one is neccesarry. We will be using NewtonSoft JSON.NET because we generally use json structure at Rest services. Because of this don’t forget to add this library to your Project. Also we are inject Microsoft.Net.Http Library for using HttpClient class.
After that we are creating our servicemanager, it will be a middleware for connect Web Api
using System;
using System.Collections.Generic;
using System.Net.Http;
using System.Threading.Tasks;
using Newtonsoft.Json;

namespace XamarinTutorial1WebApi.Models
{
    public class WebAPIService
    {
        private HttpClient _client;
        public WebAPIService()
        {
            _client = new HttpClient();
        }
        public async Task<List<Student>> GetData()
        {
            var uri = new Uri(@"http://192.168.1.24/SchoolDBWebAPI/api/student");
            var items = new List<Student>();

            var response = await _client.GetAsync(uri);
            if (response.IsSuccessStatusCode)
            {
                var content = await response.Content.ReadAsStringAsync();
                items = JsonConvert.DeserializeObject<List<Student>>(content);
            }
            return items;

        }
    }

}
In the section I pointed out above, it is important to note that the url is specified with an IP address when specifying it. Because if we specify localhost, we get Connection Refused error because the mobile emulator is referring to its own IP address and our Restful service is not working in the emulator. For this we need to use IIS instead of IIS Express on the computer where we run the Web API (it may be a virtual server).
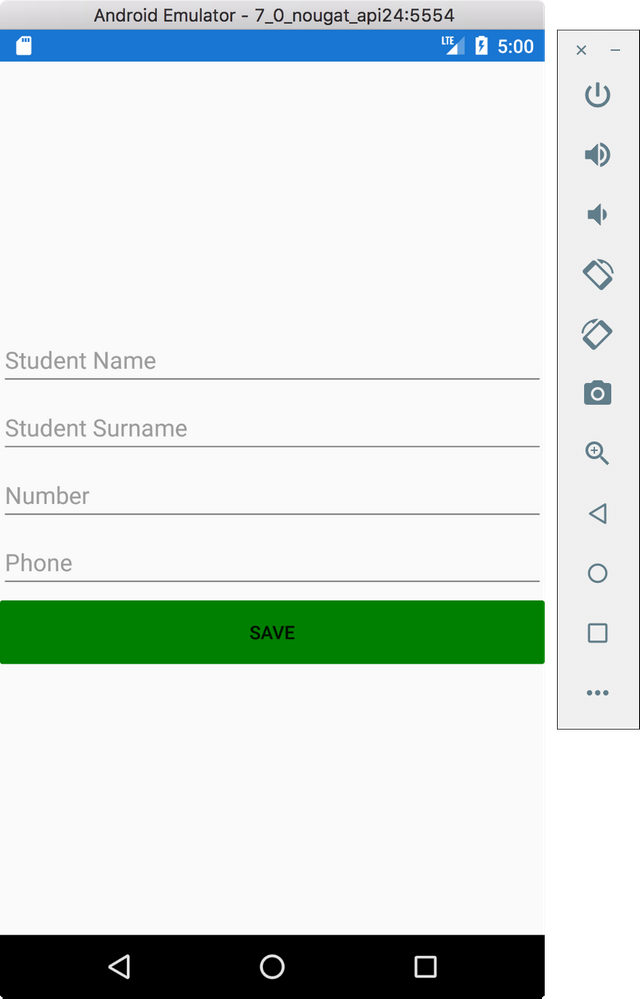
We are desingning a screen for enter a student name, surname, school id and phone numberIf we want we can design another screen for this work but we did not design another screen because it wil have same components.
This is how our screen’s look like;
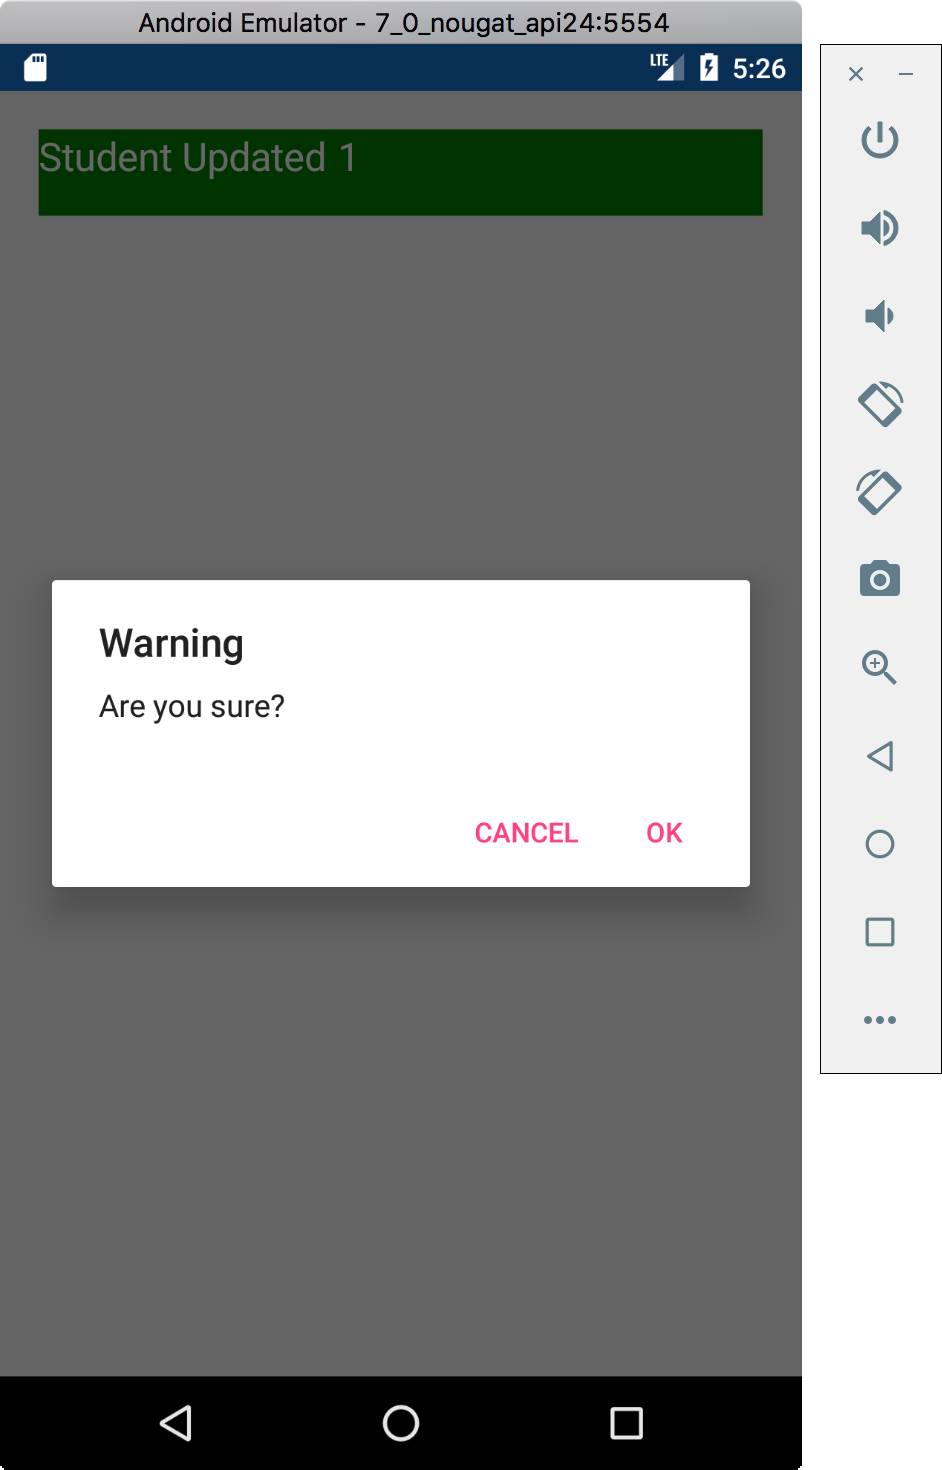
For delete operation, it is enought to send only student’s id. Our Rest service will delete entry which one is related with this id. If we get a pre-approval for this, accidental clicks can not lead to data loss.
Thank you for your contribution.
Please do a tutorial where the subject in internet is not well documented and is useful to the open source community.
Need help? Write a ticket on https://support.utopian.io/.
Chat with us on Discord.
[utopian-moderator]
@therealwolf 's created platform smartsteem scammed my post this morning (mothersday) that was supposed to be for an Abused Childrens Charity. Dude literally stole from abused children that don't have mothers ... on mothersday.
https://steemit.com/steemit/@prometheusrisen/beware-of-smartsteem-scam