Build The Biografy of Sultan Iskandar Muda Mobile Application with Ionic Framework [Part 1]

Repository
[Ionic Repository](https://github.com/ionic-team/ionic)
What Will I Learn?
- You will learn How to start a mobile application with Ionic Framework
- You will learn How To Create A Project with Framework
- You will learn How To Add & Theming components of Ionic
- You will learn how generate a page & use NavPush
- You will learn How to test it.
Requirements
- NodeJS [Download](https://nodejs.org/en ) & [How To Install](https://www.npmjs.com/get-npm)
- Ionic Framework
- Code Editor (Sublime or other)
- Browser (Firefox Mozilla or Chrome or Other)
Difficulty
- Intermediate
Tutorial Contents
Today, I will show how to make a biographical application of an important figure using the Ionic Framework. The Ionic Framework is an Open Source SDK for hybrid mobile app development. With Ionic, we can develop a hybrid mobile app using HTML5, CSS & Sass technology. To work with Ionic we must first install NodeJS in our machine. NodeJS for executing server-based applications & we need the "npm" command from NodeJS to install ionic framework through command line. The features of ionic framework is AngulasJS, Css Components, JavaScript components, Cordova plugins, Ionic CLI, Ionic View & Licence.
#Step by Step :
1. Install Ionic with the npm command in the command prompt (For Windows OS). Open command prompt and type this code :
npm install -g ionic
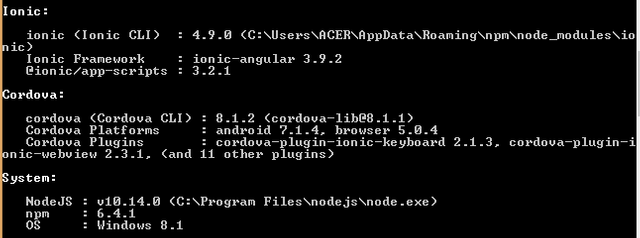
2. After that check the version of your ionic , type this code : ionic -v
check more information: ionic info
3. Now we can create a new project with ionic. Ionic provides several templates such as Blank, Tabs, Sidemenu & Supertabs. I will use the sidemenu template for this biography application. Select where the directory to place your new project then type this code in the command prompt: ionic start app_biografy sidemenu.
Ionic will create a project with the app_biografy name using the sidemenu template.
4. Next, we can change this project by changing code in files with HTML, CSS & TS extensions (Script Type), this files in Name_Pages/Pages/src directory. Structure an ionic project You can see in the picture below:

5. The first step now, I will change The Home Page and Add Components like as ion-card, image, ion-list & ion-button.
- i add ion-card component to good-looking
- to add image , you must save your image in img/assets/src directory
- ion-list to display various information
- ion-button for move to other page (using NavPush component)
- All this component will be place in ion-content (ion-content is the container)
6. This code below to add component ion card, image & List.
code : Home.HTML
<ion-header>
<ion-navbar>
<button ion-button menuToggle>
<ion-icon name="menu"></ion-icon>
</button>
//title of this app
<ion-title>
Biografy Sultan Iskandar Muda
</ion-title>
</ion-navbar>
</ion-header>
//add component card, list & image in ion content
<ion-content no-padding>
<ion-card >
//ion-list in ion-card component
<ion-list>
//to add your image
<img src="assets/img/sultan.jpg" />
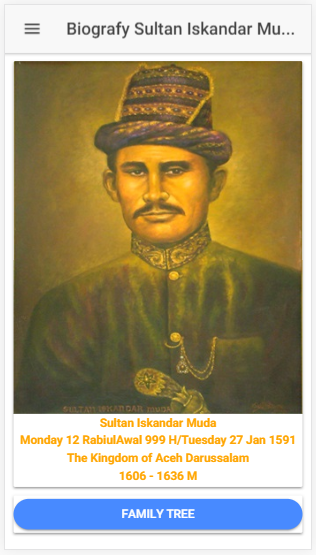
<p class="p1"><b>Sultan Iskandar Muda</b><br>
<b>Monday 12 RabiulAwal 999 H/Tuesday 27 Jan 1591</b><br>
<b>The Kingdom of Aceh Darussalam</b><br><b>1606 - 1636 M</b>
</p>
</ion-list>
</ion-card>
</ion-content
Style your component in home.css by class name.
code to : home.html
//theming your paragraph
.p{
text-align:center;
color:#ffa500; }
- - Test app it with type command ionic serve on CMD.
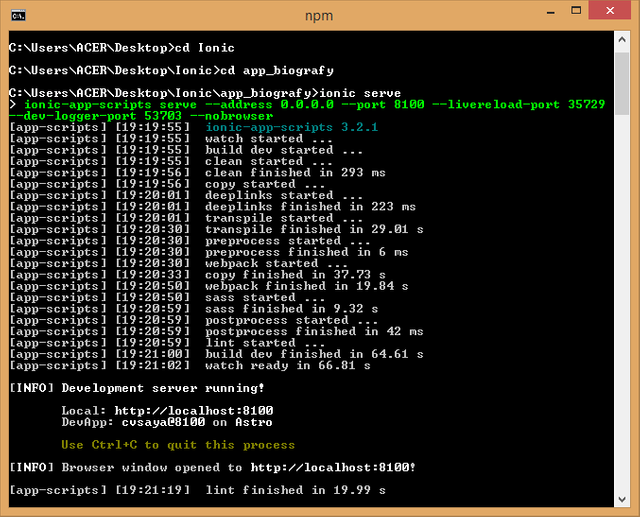
This command for to run app on browser
Tips : press F12 for change to Console developing mode (Browser : Mozilla)
result :

- Now I will add button component. Like this code below :
<ion-header>
<ion-navbar>
<button ion-button menuToggle>
<ion-icon name="menu"></ion-icon>
</button>
<ion-title>
Biografy Sultan Iskandar Muda
</ion-title>
</ion-navbar>
</ion-header>
<ion-content no-padding>
<ion-card class="card1">
<ion-list>
<img src="assets/img/sultan.jpg" />
<p class="p1"><b>Sultan Iskandar Muda</b><br>
<b>Monday 12 RabiulAwal 999 H/Tuesday 27 January 1591</b><br>
<b>The Kingdom of Aceh Darussalam</b><br><b>1606 - 1636 M</b>
</p>
</ion-list>
</ion-card>
// add a button in ion-card
<ion-card no-padding class="cardmenu">
//this button is "full"=100% width, and "round" have radius.
<button class="buttonmenu" ion-button round>
Family Tree
</button>
</ion-card>
</ion-content
- Result :
- Now I will add a page, on your cmd type this code : ionic generate page familytree
- Next step i will make button "family tree" to go page familytree-page when I was clicked it. To do that I will use NavPush, this component to navigate to the specified component.
- just add [navpush] component in ion-button start.
code : home.html
//put this code between <ion-content>here</ion-content
<ion-card no-padding class="cardmenu">
<button class="buttonmenu" ion-button round full [navPush]="familytreepage">
Family Tree
</button>
</ion-card>
- Add some components to familytreepage
code : familytree.html
<ion-header>
<ion-navbar>
<button ion-button menuToggle>
<ion-icon name="menu"></ion-icon>
</button>
<ion-title>Family Tree of Sultan Iskandar Muda
</ion-title>
</ion-navbar>
</ion-header>
<ion-content padding >
<h6>Family Tree of Sultan Iskandar Muda</h6>
</ion-content>
- Now Import NavController, declaration it in constructor and export this class
code : familytree.ts
import { Component } from '@angular/core';
import { NavController } from 'ionic-angular';
@Component({
selector: 'familytree-page',
templateUrl: 'familytree.html'
})
export class FamilytreePage {
constructor(public navCtrl: NavController) {
} }
- Video Result :
Finish, for next series I will show you how to style side menu, header of side menu and add list/or item components.
Curriculum
You can read and follow this tutorial about Ionic Framework
- [Build A Simple CV Mobile Application with Ionic Framework (Part 1 of 3)](https://steemit.com/utopian-io/@anitatmj/build-a-simple-curriculum-vitae-mobile-application-with-ionic-framework-in-3-days-part-1-of-3)
- [Build A Moile Application with Ionic Creator](https://steemit.com/utopian-io/@anitatmj/make-a-mobile-application-with-ionic-creator-fast-and-easy)
Proof of Work Done
You can get this Project on my github : [app_biografy_sultan_iskandar_muda](https://github.com/anitatmj/biografy_app)
Thank you to Following my tutorial about ionic framework if you have a problem about following this tutorial please contact me or comment here.
Thank you for your contribution.
Your contribution has been evaluated according to Utopian policies and guidelines, as well as a predefined set of questions pertaining to the category.
To view those questions and the relevant answers related to your post, click here.
Need help? Chat with us on Discord.
[utopian-moderator]
Thank you for your review, @mcfarhat! Keep up the good work!
Congratulations @anitatmj! You have completed the following achievement on the Steem blockchain and have been rewarded with new badge(s) :
Click here to view your Board
If you no longer want to receive notifications, reply to this comment with the word
STOP