Consuming JWT API with MongoDB and Node.js part-3# Verify Token, Decode Token , Route Protection
What Will I Learn?
- Verify Token
- Decode token
- A protected route with token
- Checking the user who is logged in
Requirements
Write here a bullet list of the requirements for the user in order to follow this tutorial.
Difficulty
- Intermediate
Protection on route
In the previous tutorial Consuming JWT API with MongoDB and Node.js part-2# User Validation, Create token.. We have created the validation and successfully created the token. now we will use the token to protect the route. So later all routing that we protect will check token from a user.
Noted: We must make the route protection function on the route to be protected.
- Create a protection function
We can use the use () method to create a protection function. as usual, the method use () has 2 parameters. as usual, the method use () has 2 functions. They are (req, res). but I added 1 additional parameter that is next. next is useful for making the decision to continue or cancel access to the route. but I added 1additional parameter that is next. next is useful for making the decision to continue or cancel access to the route.
Example:
router.use(function(req, res, next){
    //get token
        var token = req.body.token || req.query.token || req.headers['authorization'];
    //decode token
    if(token){
        jwt.verify(token, app.get('secretKey'), function(err, decode){
            if(err){
                return res.json({
                    success: false,
                    message: 'There was a problem during verification'
                })
            }else{
                req.decode =  decode
                next();
            }
        })
    }else{
        return res.status(403).send({
            status:false,
            message: 'Token not available '
        });
    }
})
- Get Token
We can retrieve the user token. there are several ways to retrieve user tokens.
req.body.token: Withreq, We can get token in body and with token: valueOfToken.
req.query.token: Withreq, We can get token from query parameter and with token='token'.


req.headers['authorization']: Withreq, We can get token by headers['authorization'] in headers with key 'authorization'.

and we can create an if {} else {} to check whether token exists or does not exist.
if(token){
// do something if token available
    }else{
        return res.status(403).send({
            status:false,
            message: 'Token not available '
        });
    }
If the token is not available we can make a response with thestatus (403)., and give the message message: 'Token not available '
- Decode Token
The generated token contain encrypted data, and to know the encrypted data in the token. We have to decode the token by using the verify () method of JWT.
Example:
jwt.verify(token, app.get('secretKey'), function(err, decode){
            if(err){
                return res.json({
                    success: false,
                    message: 'There was a problem during verification'
                })
            }else{
                req.decode =  decode
                next();
            }
        })
method verify () has 3 mandatory parameters to decode token. They are :
1. token: The first parameter is the token to be decoded.
2. secret key: The second parameter is the secret key that we use when we will generate the token. in this tutorial, we can get it in the app.get ('secretKey').
3. function(err, decode): The third parameter is an anonymous function that has two callback parameters. They are error(err) and decode(decode). in this tutorial the parameters are (err, decode).
We can check if there is an error if (err) and give response in JSON return res.json({success: false, message: 'There was a problem during verification'})
- req.decode = decode: We can save the decode results in
req.decoded, and to proceed into the destination route after verification, we add the next method ().
- Check expired token
We can check the expiration period of the token in this way:
Example:
if(decode.exp <= Date.now()/1000){
    return res.status(400).send({
            status:false,
            message: 'Token has expired'
            })
    }
We can check by using if (), then add the mathematical operator <=.
decode.exp : decode is the decode of the verify() function which we have described above, and exp is the expression value in units of a second.
Date.now()/1000 : This is the method in javascript to get the time. but because of decode.exp in a second unit. then we have to change Date.now() into second unit with / 1000.
Then we can respond in JSON with status (400).return res.status(400).send({status:false,message: 'Token has expired'})Checking the user who is logged in
to see the currently logged in user, we need to create a new routing. I will create a new routing that is '/ profile'.
Example:
router.get('/profile', function(req, res){
    res.json(req.decode._doc);
});
We have stored the decoded token into req.decode (req.decode = decode). There will be a lot of data stored in req.decode. to specify just take the data only, we can use ._doc.
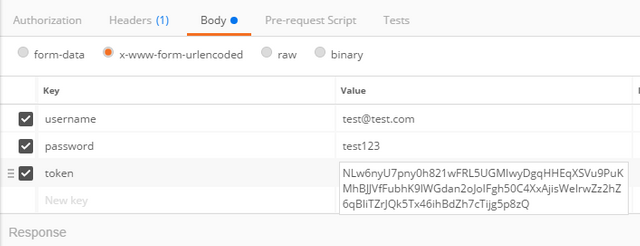
Result
We can see the result by running postman, we will see the user data being logged using routing '/ profile'.

- FULL CODE
router.use(function(req, res, next){
    //get token
    var token = req.body.token || req.query.token || req.headers['authorization'];
    //decode token
    if(token){
        jwt.verify(token, app.get('secretKey'), function(err, decode){
            if(err){
                return res.json({
                    success: false,
                    message: 'There was a problem during verification'
                })
            }else{
                req.decode =  decode
                if(decode.exp <= Date.now()/1000){
                    return res.status(400).send({status:false,message: 'Token has expired'})
                }
                next();
            }
        })
    }else{
        return res.status(403).send({
            status:false,
            message: 'Token not available '
        });
    }
})
router.get('/profile', function(req, res){
    res.json(req.decode._doc);
});
We have verified token, decode token, and route protection with token. We can also retrieve user data. hopefully this tutorial helps you in the field of security and user verification.
Awesome post!! Keep it up and check out THIS POST as well as I have something similar.
Thank you for the contribution It has been approved.
Need help? Write a ticket on https://support.utopian.io.
Chat with us on Discord.
[utopian-moderator]
Hey @alfarisi94
We're already looking forward to your next contribution!
Utopian Witness!
Vote for Utopian Witness! We are made of developers, system administrators, entrepreneurs, artists, content creators, thinkers. We embrace every nationality, mindset and belief.
Want to chat? Join us on Discord https://discord.gg/h52nFrV
Reall a helpfull tutorial
Thanks @amn