Upcycling project: old T-shirt into room flipflops and steps
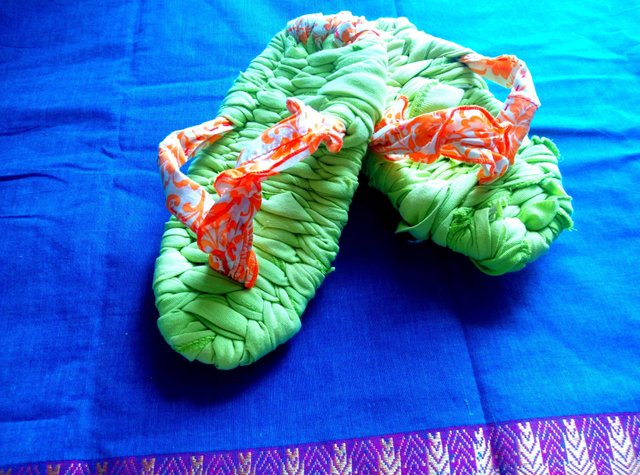
Hi! If you have your place with wood flooring or tiles, this fabric flipflops will be so good for you because it could clean while you wear and roam around your house! After that, you could machine wash!!
If you stand long hours daily, this slippler will give your feet a nice gentle massage too!!
[Brief background history]
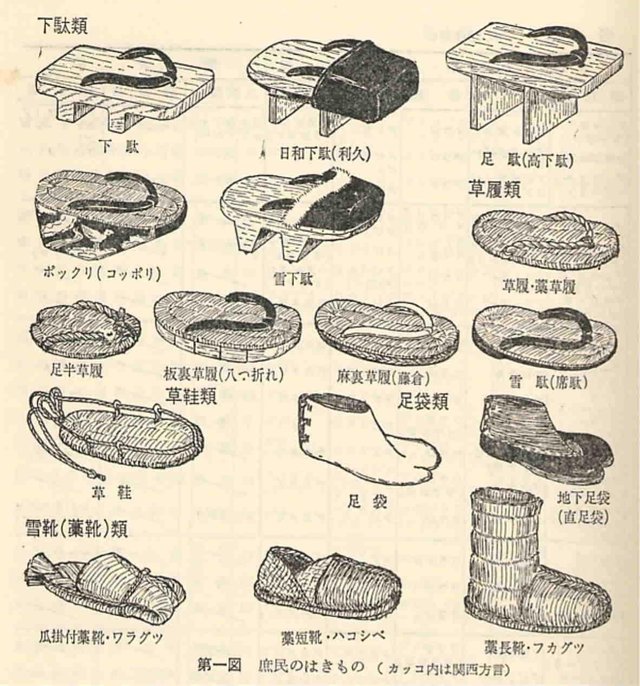
The flip flop that I am introducing is a traditional Japanese stlye with weaving. Trace back to centuries ago!
source
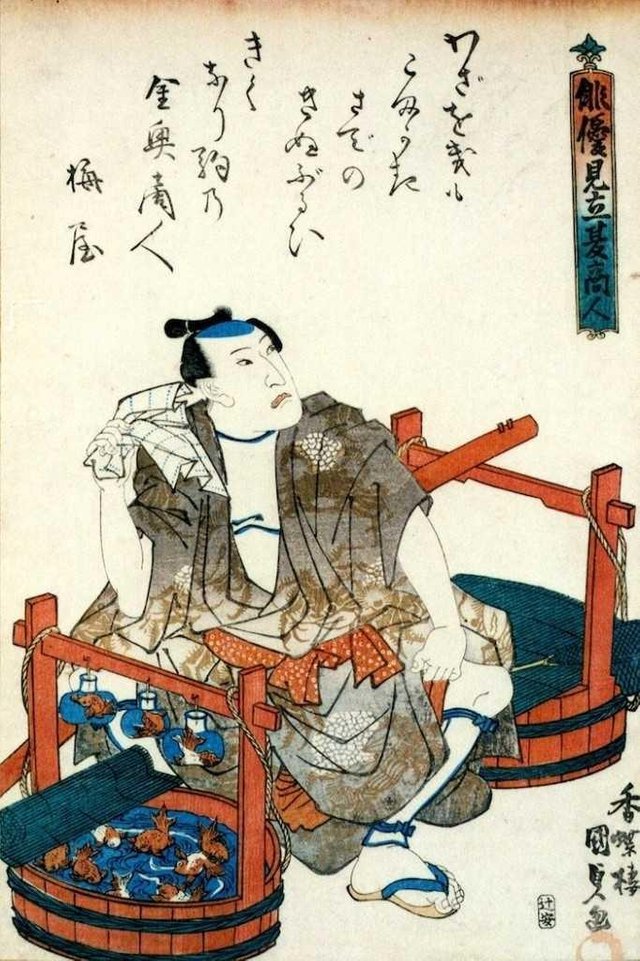
In the old days, footwear made of leather were available, but majority of peasants and samurais wore footwear made of wood, straw or leaves.
source
And still today, there's a traditional bamboo leaves sandals made by craftsmen. Click on the source to visit their store!!
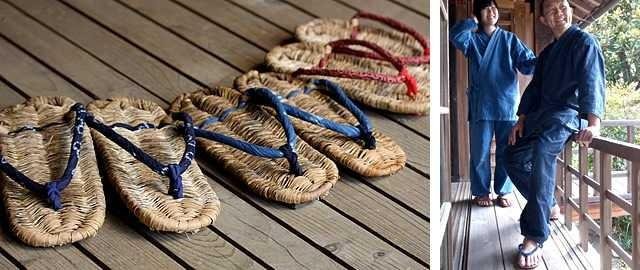
source
And creative Japanese people today, make them DIY with towels, fabrics and other materials for at home use!!
[Materials]
So!
Here are the things you need!
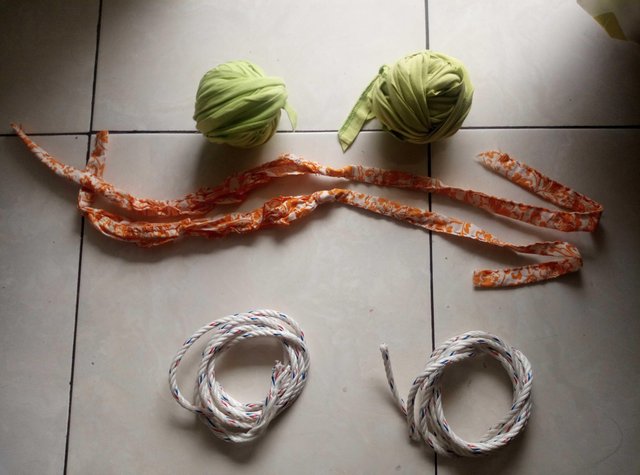
For the base, 2 ropes (around 5~8mm thick) for 2m. If you don't have rope, you could replace with non-stretching fabric. And if your height is more than 160cm, make it 2.5m.
For the straps, 2 tubed tapes for 60cm. I cut out from my shirt.
For the body, I used my kids old T-shirts cut into 8cm width strips. Good thing about t-shirt is that the cut edge will always be intact!
clip, sewing kit and scissors will be needed.
[Weaving]
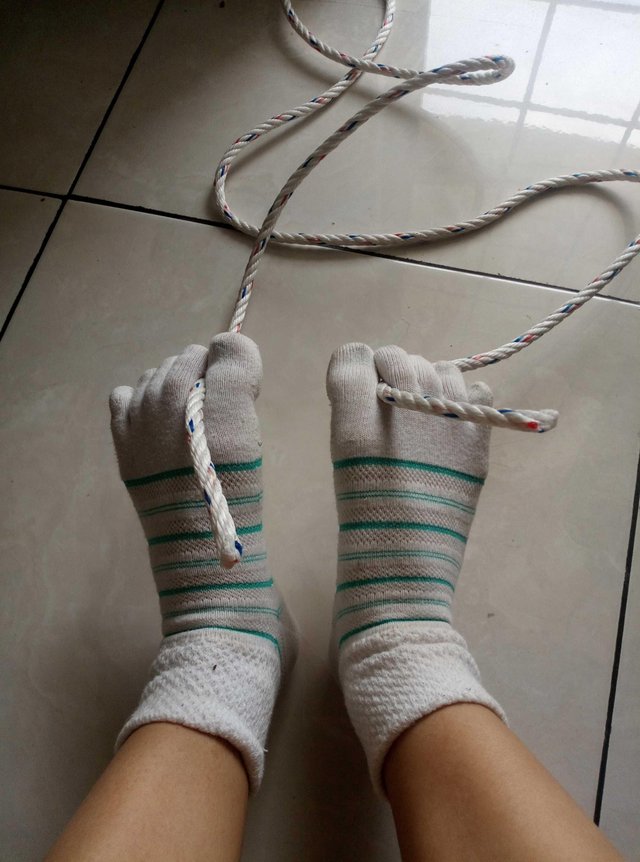
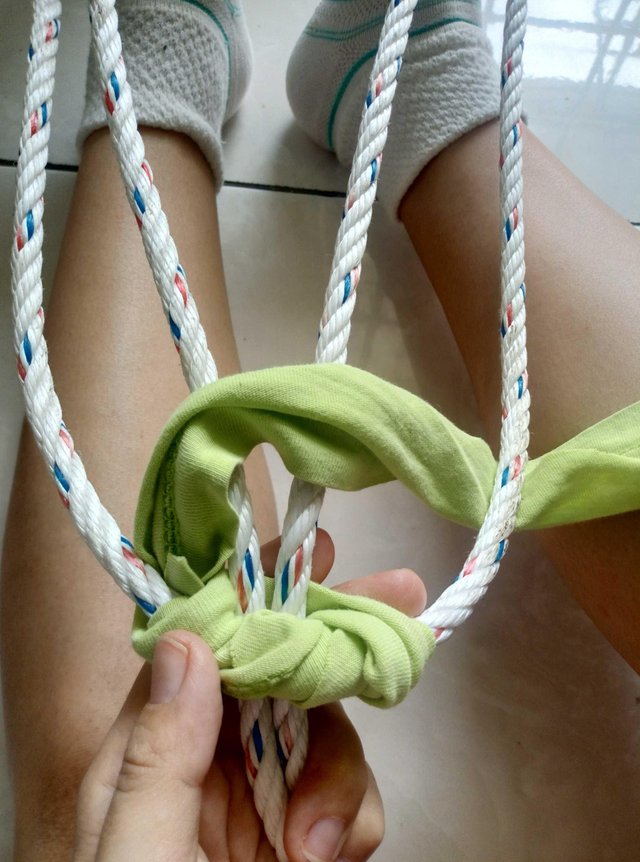
- Find a comfortable sitting position with legs stretched out! Yes, using your toes as a frame! This is the traditional way!! 😄
If you have difficulty, can borrow someone elses feet or hook!
Hold the edges of ropes with your toes like me.
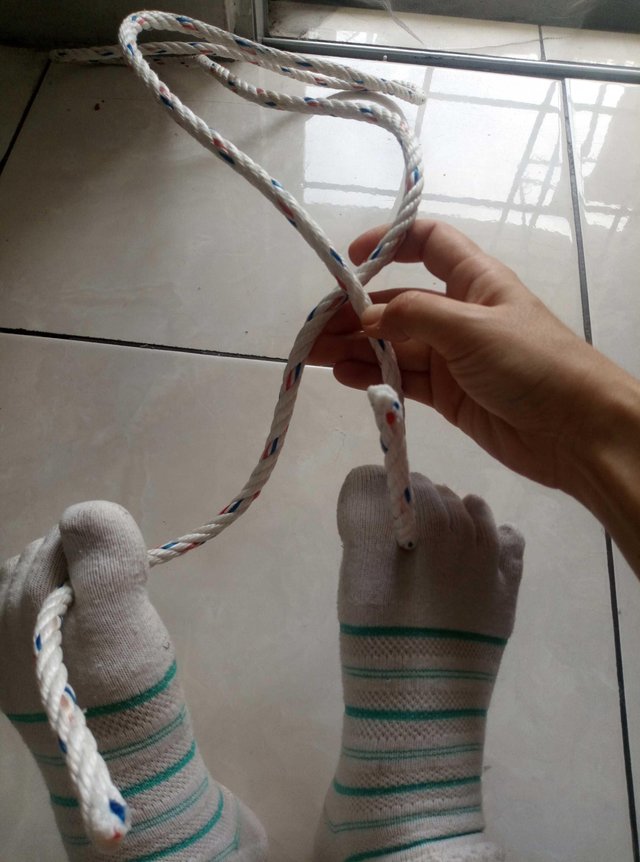
Then, cross the rope.
Bring the loop to you, with grabbing it with your little toes.
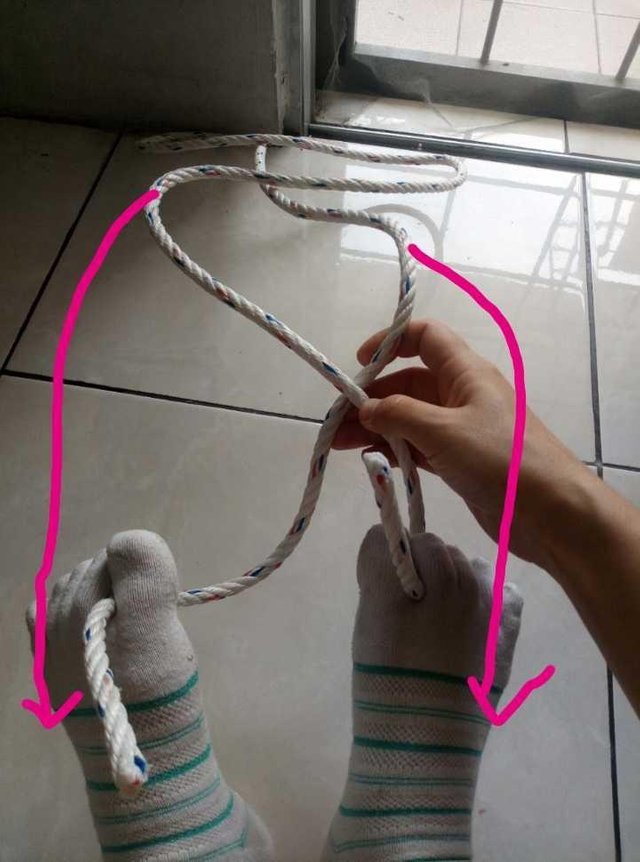
And gently pull the edges so it will be like this.
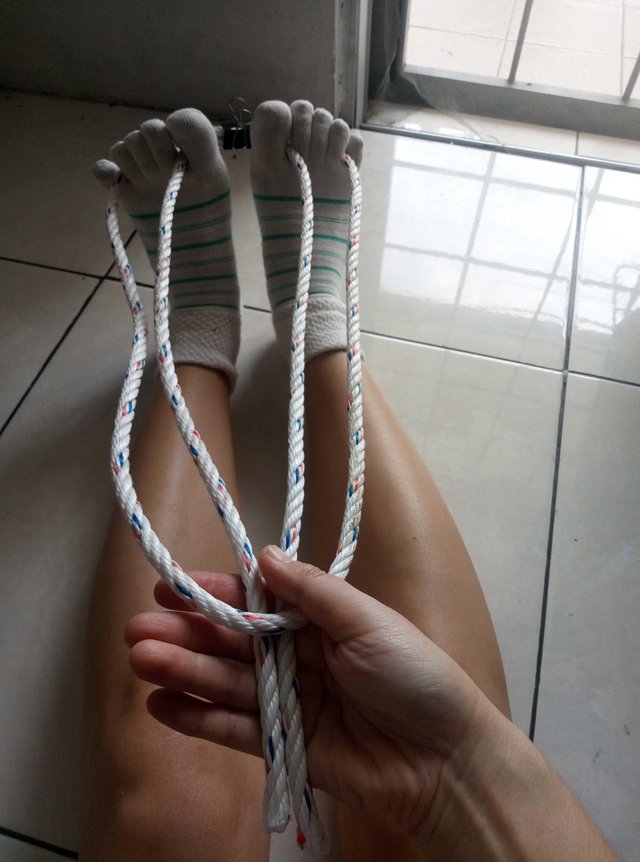
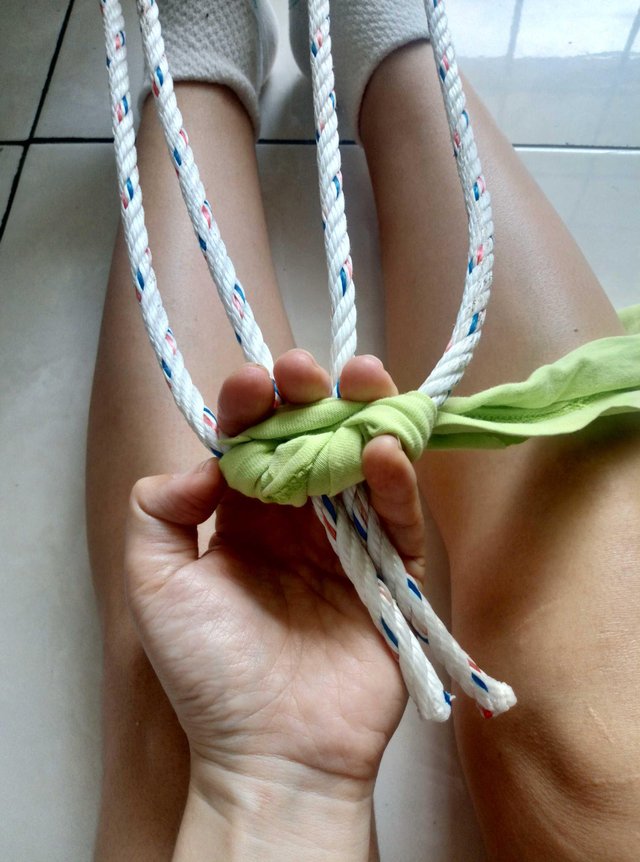
Clip ropes where it's in between your big toes so it will be set.
- The loop nearest to you will be the tip of your flipflops.
This is the starting point.
Wrap the stip twice.
Then go under 2 middle ropes and come over.
Go around and over 2 middle ropes and come under.
Use your fingers to press hard. Always press after one weave done!
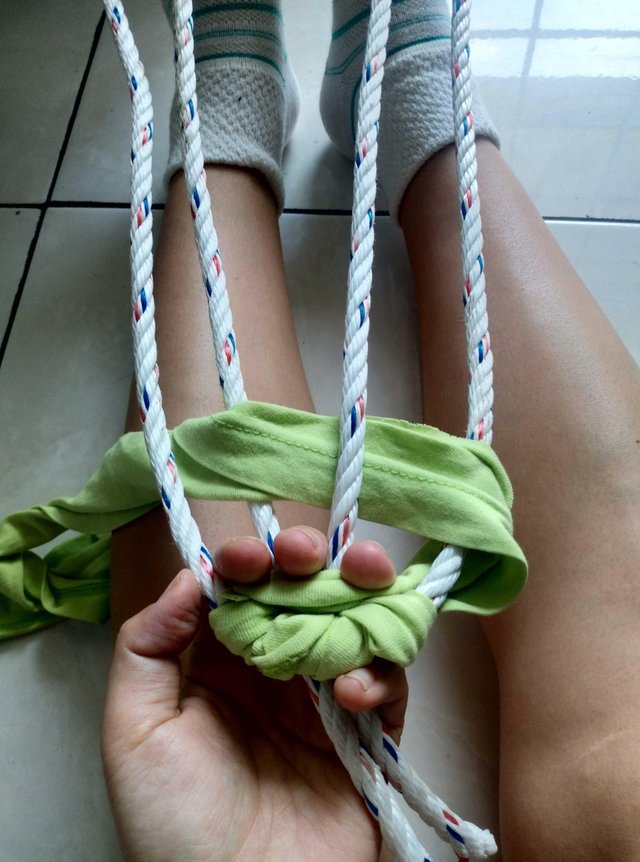
- Now, from here onwards, over, under, over and under each ropes! Don't forget to press hard!
[Adding the strap]
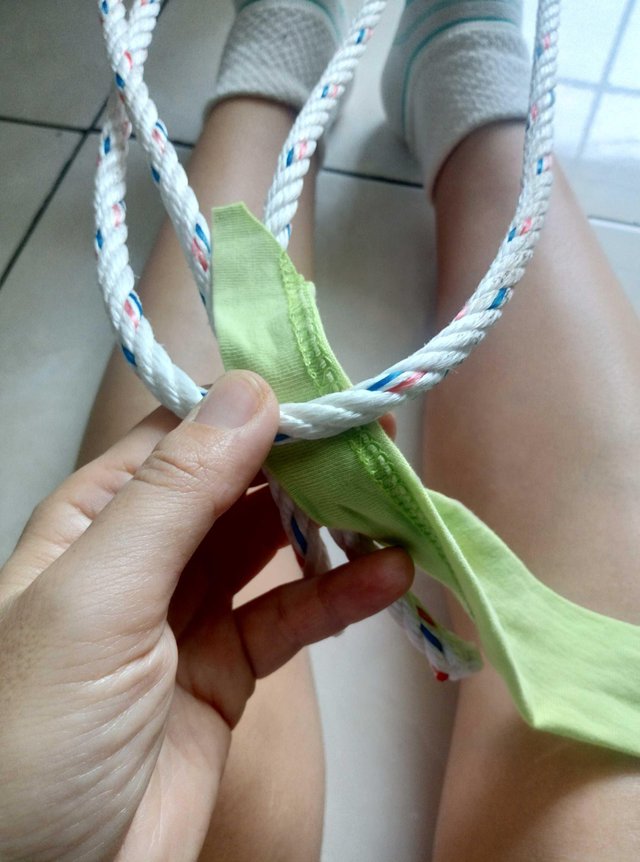
When the weaving gets near to your ankle, we could add the strap.
Place and match the center of your strap with your half completed flip-flop.
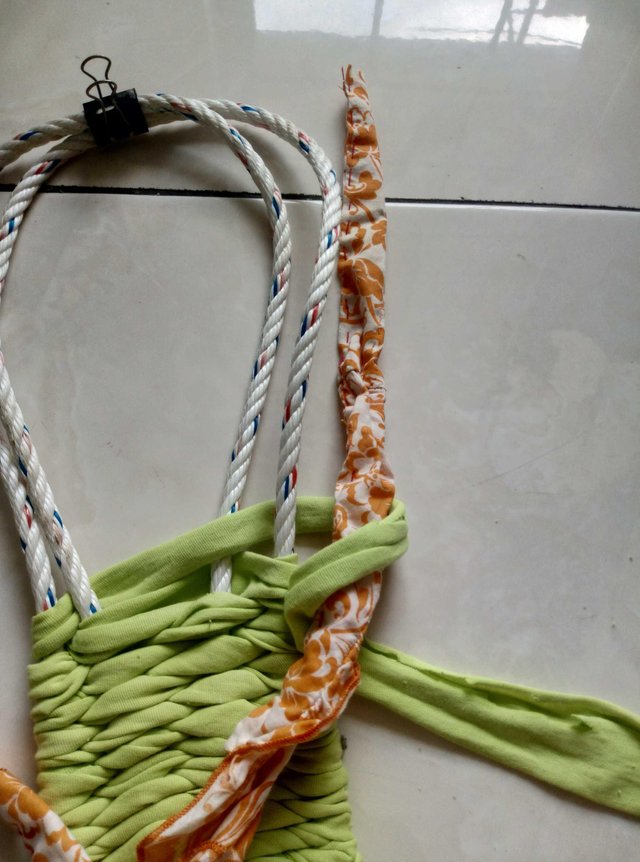
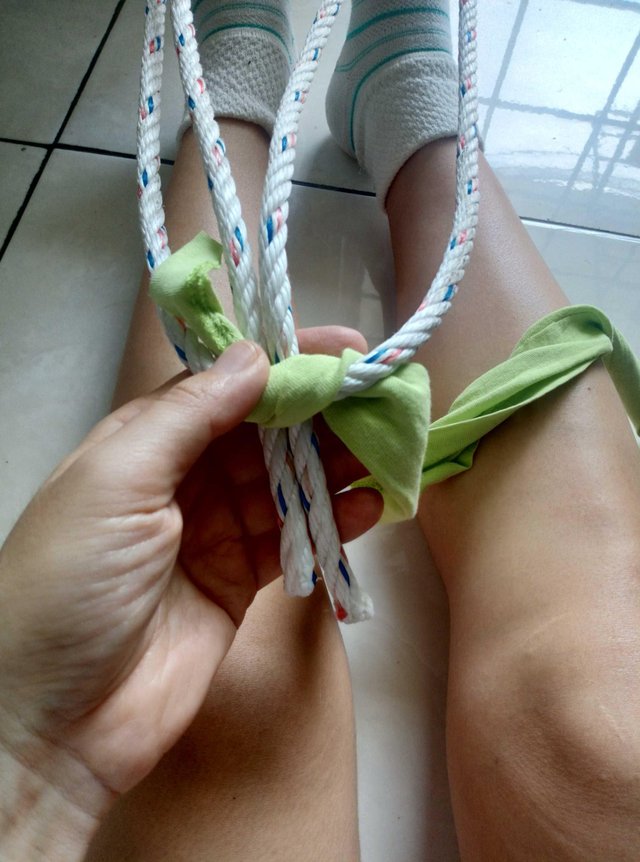
Wrap it like this. Tighten it.
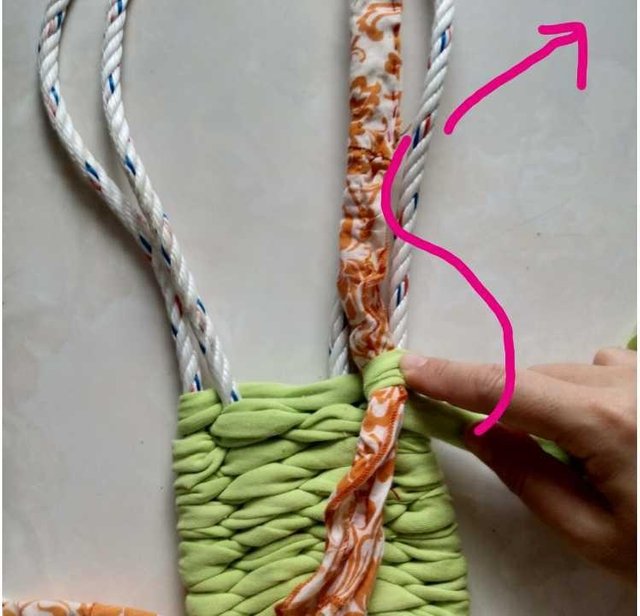
Then wrap only the rope once more.
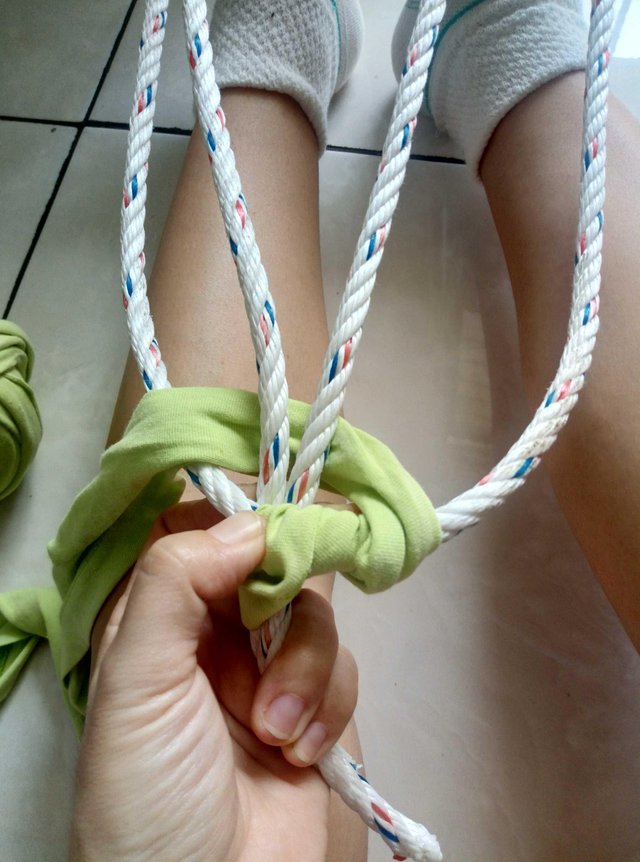
Over, under, over, under. Then wrap once the strap, then rope once, too.
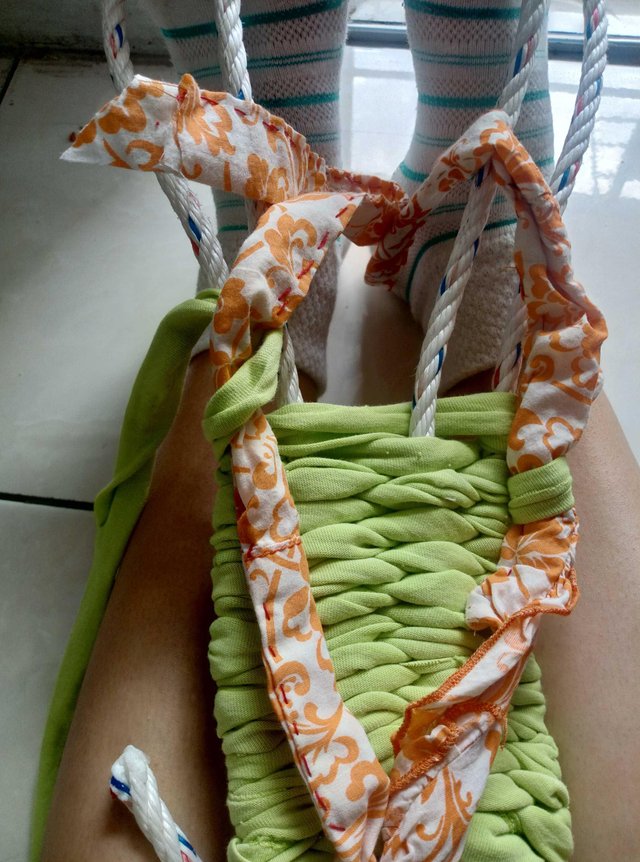
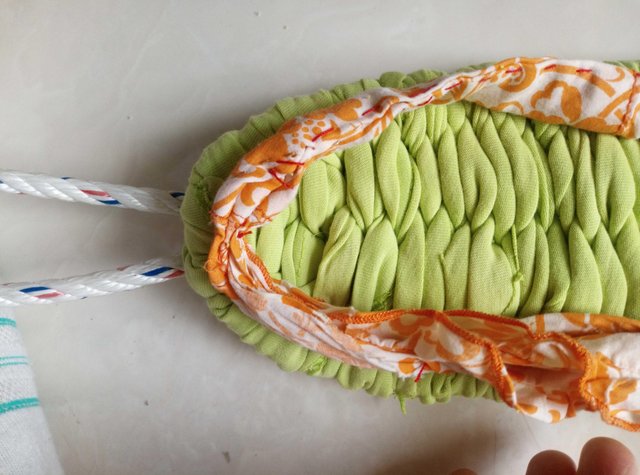
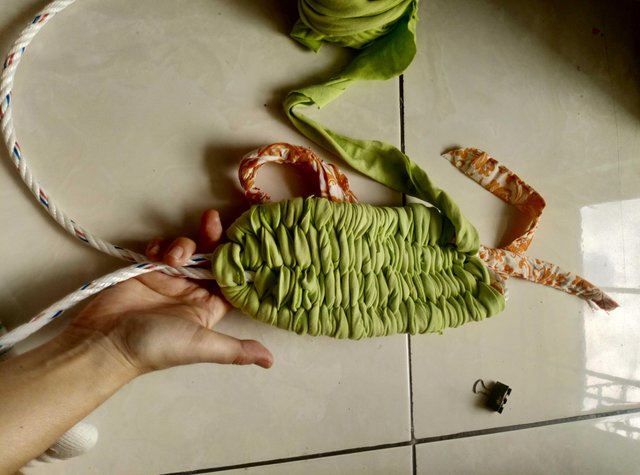
Continue the weaving until it comes a little longer than your foot.
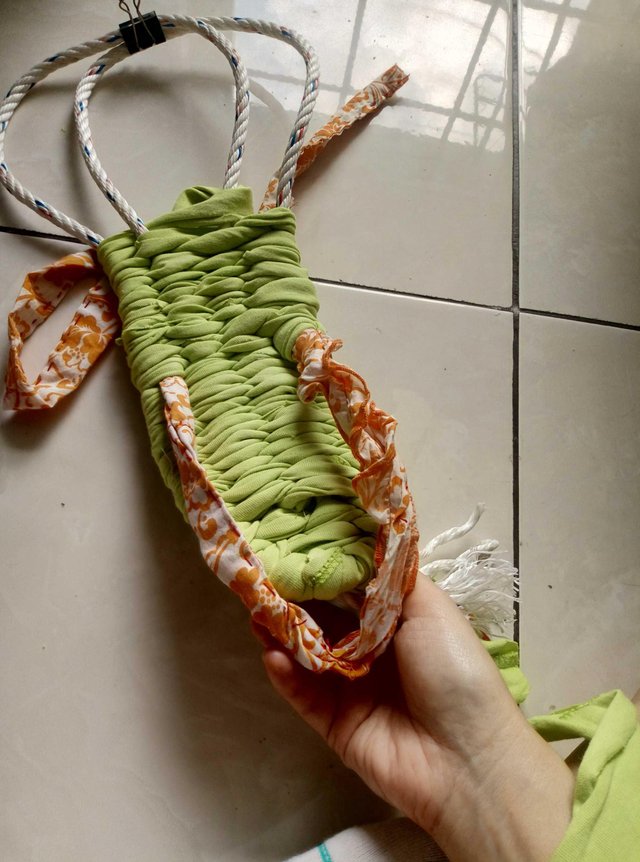
[Finishing]
Take it off from your toes now!
We are almost done!
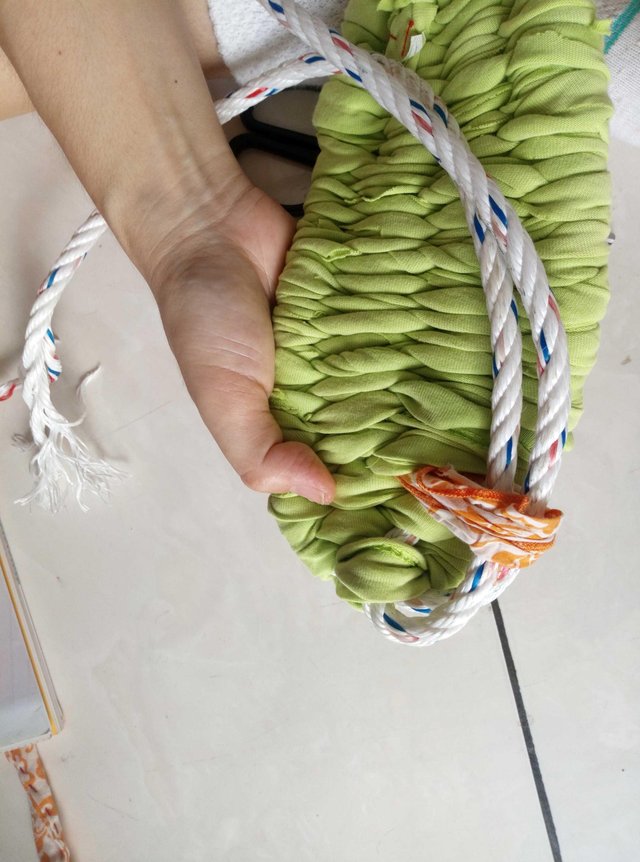
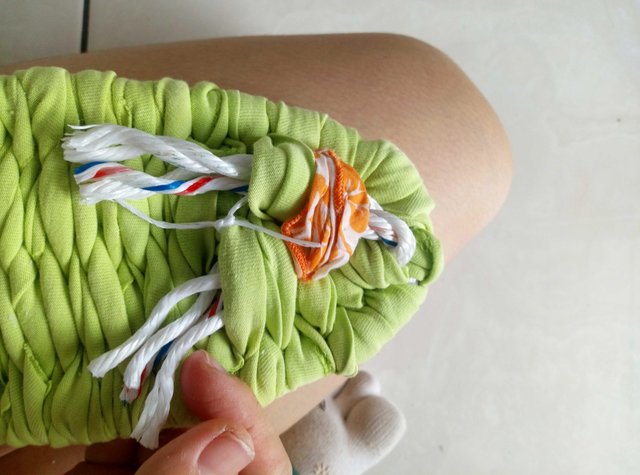
- Pull the edge of the ropes gently, until the sole becomes round and no gap.

Cut the material with extra length so you could wrap and hide the rope if it is still showing. Then push in the edge in between to hide. I sew it to be sure it won't get undone.

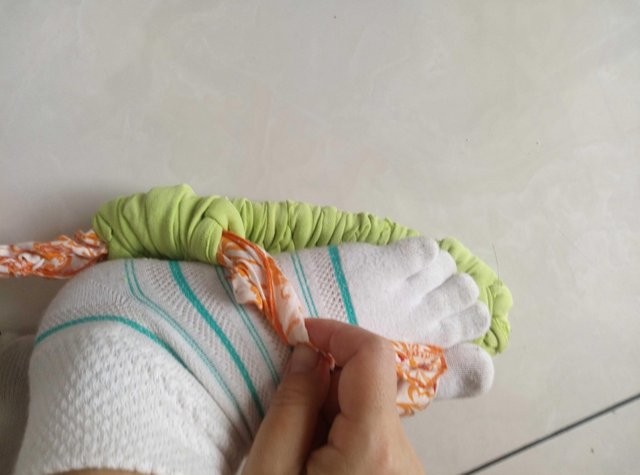
2.The strap needs to squeeze it through.
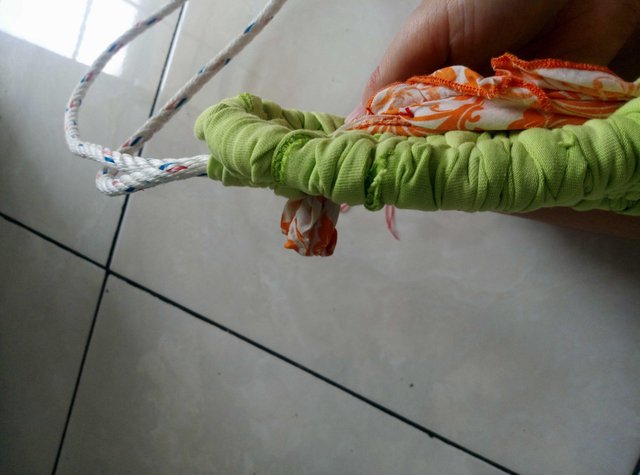
Get the loop come out to the other side.
Grab the edge of ropes and make it through the loop. This makes the strap secured!
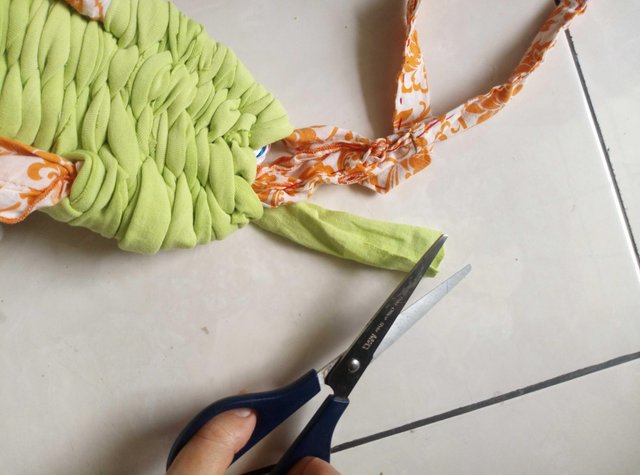
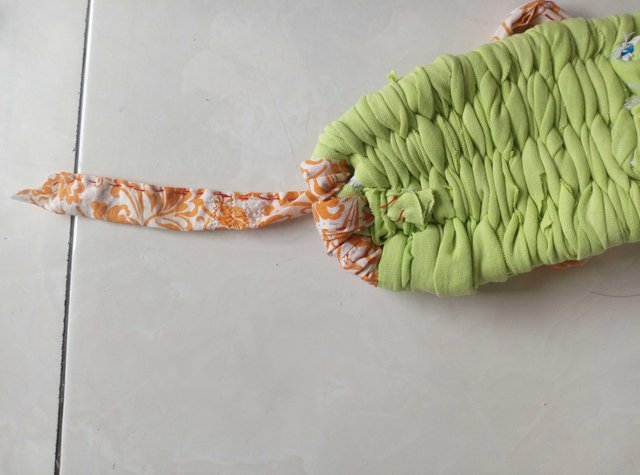
- We no longer need these long, so cut them with extra length so we could tie and hide them.
Go under and undone the rope. Tie them and stitch them if you can.
- Lastly, put your foot in to see whether the strap is comfortable or not. You can still pull it to make it tight or loose.
Wrap around it to make it secured and hide the edge.
And you are done...!!.... with one of the flipflop.
Make one more for the pair and you are done!!!
Thank you for reading!
I refered and added few alterations from this book.
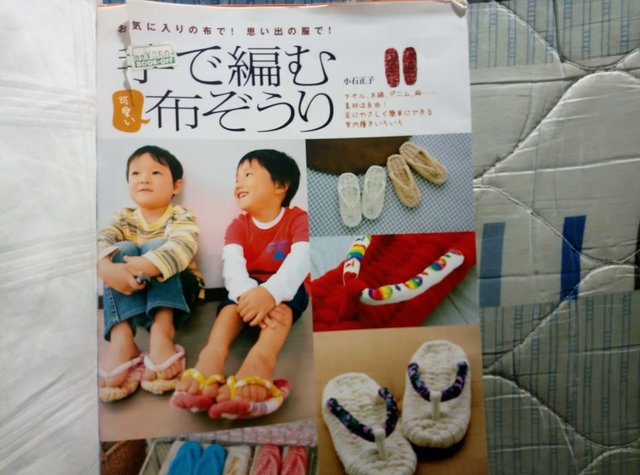
The author is introducing so many variations!!!
ISBN978-4-309-28076-9
All the images are taken by me if not stated its source.
This is excellent!
Thank you @timothyallen!! 😄
Thanks for using eSteem!
Your post has been voted as a part of eSteem encouragement program. Keep up the good work! Install Android, iOS Mobile app or Windows, Mac, Linux Surfer app, if you haven't already!
Learn more: https://esteem.app
Join our discord: https://discord.gg/8eHupPq
Thank you so much @esteemapp ❤️❤️❤️
jajaja I loved!! very original
Thank you @dariuska2008!
I'm so glad you like it!
Hey this is a very clear to follow tutorial and the results look great! Very useful! Much love - Carl
Thank you @carlgnash!! Towels and other textiles can use too! 😄
This post was shared in the Curation Collective Discord community for curators, and upvoted and resteemed by the @c-squared community account after manual review.
@c-squared runs a community witness. Please consider using one of your witness votes on us here
Thank you @c-squared!!! Your help is so much help!!! 😄 Really appreciate it ❤️
I've seen photos of these, @naomipangolin. I like the fact that they're recycled and fully washable :D
Thank you @cryptocariad!! I made 3 sets of these, so I could skip sweeping the floor few days a week!! eheheh
Very interesting work! Thank you for sharing! :)
Thank you @sweettais! My holiday work😁
Congratulations @naomipangolin! You have completed the following achievement on the Steem blockchain and have been rewarded with new badge(s) :
Click here to view your Board
If you no longer want to receive notifications, reply to this comment with the word
STOPDo not miss the last post from @steemitboard: