Secure Your Linux Server with Tripwire IDS
Security is continually developing, and you can't be sure to have locked down every possible vulnerability for some pesky hacker to get in through.
An intrusion detection system will run a check of your system and compare it to a snapshot stored database of what your system previously looked like. Changes that you are not aware of indicate a possibly compromised system.

Tripwire
The previous tutorial was with AIDE, but I didn't like it much. So I tried out Tripwire and like it more.
This is a continuation from 5 previous parts:
- Secure Your Linux Server with an Intrusion Detection System
- Secure Your Linux Server with Fail2Ban
- Secure Your Linux Server with a Firewall
- Setting Up A Linux VPS Securely (Pt.2)
- Setting Up A Linux VPS Securely (Pt.1)
Optional - Disable/Remove AIDE if you have it installed
If you were followed my previous AIDE install, remove the crontab:
crontab -e
comment out the line that was added from the las tutorial for AIDE.
#00 01 * * * /root/aide.sh
save and exit.
If you don't want AIDE at all, do
sudo apt-get purge aide
sudo apt-get purge aide-common
Install Tripwire
sudo apt-get update
sudo apt-get install -y tripwire
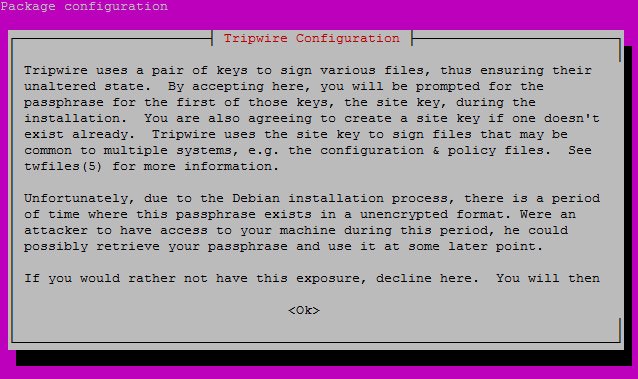
You will get a prompt to install:

Hit the right arrow, then enter.
Do you wish to create/use your site key passphrase during installation?
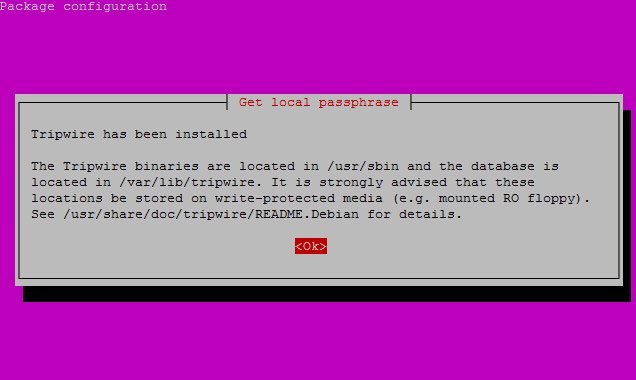
Repeat as necessary and for all the other "windows" hit enter or yes apart from when you need to pick a password.
You need to choose two passphrases, make them strong, and store them somewhere to not forget.
Enter site-key passphrase:
Enter local key passphrase:
After some time:

Database
Optional - Recreate policy file
If you chose no above at "Rebuild Tripwire policy file?", otherwise skip this.
sudo twadmin --create-polfile /etc/tripwire/twpol.txt
Please enter your site passphrase:
This creates an encrypted policy file from the plain text one that we specified in the /etc/tripwire/ directory. This encrypted file is what tripwire actually reads when running its checks.
Initialize the Database
You will get a lot of warnings, false positives and errors because the file not adjusted for your system:
sudo tripwire --init
When you see:
Please enter your local passphrase:
enter enter the local passphrase, which is the second password from above. Then you will see *** Processing Unix File System *** with warning and such... ending with:
The database was successfully generated.
Check
Save your check results in a file:
sudo sh -c 'tripwire --check | grep Filename > test_results'
Then wait some time and it will finish.
I did:
cat test_results
to show them on my screen for the next step. If you have two terminals open, that probably works better.
Configure the Policy File
Time to edit the policy file and get rid of errors:
sudo nano /etc/tripwire/twpol.txt
Find all the file errors from the previous step, and comment them out of the policy file.
In nano, it's ctrl+w to enter search mode, then put in the filename, hit enter, and comment it out if it's found.
I had about 20 files to do.
#/etc/rc.boot
        #/root/mail                     -> $(SEC_CONFIG) ;
        #/root/Mail                     -> $(SEC_CONFIG) ;
        #/root/.xsession-errors         -> $(SEC_CONFIG) ;
        #/root/.xauth                   -> $(SEC_CONFIG) ;
        #/root/.tcshrc                  -> $(SEC_CONFIG) ;
        #/root/.sawfish                 -> $(SEC_CONFIG) ;
        #/root/.pinerc                  -> $(SEC_CONFIG) ;
        #/root/.mc                      -> $(SEC_CONFIG) ;
        #/root/.gnome_private           -> $(SEC_CONFIG) ;
        #/root/.gnome-desktop           -> $(SEC_CONFIG) ;
        #/root/.gnome                   -> $(SEC_CONFIG) ;
        #/root/.esd_auth                        -> $(SEC_CONFIG) ;
        #/root/.elm                     -> $(SEC_CONFIG) ;
        #/root/.cshrc                   -> $(SEC_CONFIG) ;
        /root/.bashrc                   -> $(SEC_CONFIG) ;
        #/root/.bash_profile            -> $(SEC_CONFIG) ;
        #/root/.bash_logout             -> $(SEC_CONFIG) ;
        /root/.bash_history             -> $(SEC_CONFIG) ;
        #/root/.amandahosts             -> $(SEC_CONFIG) ;
        #/root/.addressbook.lu          -> $(SEC_CONFIG) ;
        #/root/.addressbook             -> $(SEC_CONFIG) ;
        #/root/.Xresources              -> $(SEC_CONFIG) ;
        #/root/.Xauthority              -> $(SEC_CONFIG) -i ; # Changes Inode n$
        #/root/.ICEauthority                -> $(SEC_CONFIG) ;
In my file of errors I had these and more:
     Filename: /proc/16024/fd/3
     Filename: /proc/16024/fdinfo/3
     Filename: /proc/16024/task/16024/fd/3
     Filename: /proc/16024/task/16024/fdinfo/3
Find "/proc" and comment it out:
But we still want other directories in /proc to be scanned. Add the folders:
        /dev                    -> $(Device) ;
        #/proc                  -> $(Device) ;
        /proc/devices           -> $(Device) ;
        /proc/net               -> $(Device) ;
        /proc/tty               -> $(Device) ;
        /proc/sys               -> $(Device) ;
        /proc/cpuinfo           -> $(Device) ;
        /proc/modules           -> $(Device) ;
        /proc/mounts            -> $(Device) ;
        /proc/dma               -> $(Device) ;
        /proc/filesystems       -> $(Device) ;
        /proc/interrupts        -> $(Device) ;
        /proc/ioports           -> $(Device) ;
        /proc/scsi              -> $(Device) ;
        /proc/kcore             -> $(Device) ;
        /proc/self              -> $(Device) ;
        /proc/kmsg              -> $(Device) ;
        /proc/stat              -> $(Device) ;
        /proc/loadavg           -> $(Device) ;
        /proc/uptime            -> $(Device) ;
        /proc/locks             -> $(Device) ;
        /proc/meminfo           -> $(Device) ;
        /proc/misc              -> $(Device) ;
Note, I used vim to get all that in. In nano it wasn't formatting well, not that it matters for the file, but for me it does. Save the file, exit, then you can do sudo vim /etc/tripwire/twpol.txt, then slash / to enter search mode, proc, enter, it finds the line, then either hit dd on each of the two lines there to delete them, or enter insert mode with i and backspace them. Then in insert mode, copy the above /proc folders to allow, and then in the nano editor right click your mouse to paste the content of the file in between the two brackets (make sure they are in between). To save and exit, ESC out of insert mode, and type :wq, then hit enter.
Lastly, comment out /var/run and /var/lock, since we don't want to be bothered each time a filesystem does a change from a regular service:
in the section rulename = "System boot changes"
        #/var/lock              -> $(SEC_CONFIG) ;
        #/var/run               -> $(SEC_CONFIG) ; # daemon PIDs
Save and exit.
ctrl+x, y, enter
Recreate updated policy
sudo twadmin -m P /etc/tripwire/twpol.txt
After you enter you local key, it will say Wrote policy file: /etc/tripwire/tw.pol
Now we need to redo the DB:
sudo tripwire --init
Enter the pass, and wait again. This time... no errors!

krnel@steembuntu:~$ sudo tripwire --init
Please enter your local passphrase:
Parsing policy file: /etc/tripwire/tw.pol
Generating the database...
*** Processing Unix File System ***
The object: "/dev/hugepages" is on a different file system...ignoring.
The object: "/dev/mqueue" is on a different file system...ignoring.
The object: "/dev/pts" is on a different file system...ignoring.
The object: "/dev/shm" is on a different file system...ignoring.
The object: "/proc/sys/fs/binfmt_misc" is on a different file system...ignoring.
Wrote database file: /var/lib/tripwire/steembuntu.twd
The database was successfully generated.
If you still got errors, go comment them out as before. If not, run a check again (since we're not expecting errors, we can forget about the file):
sudo tripwire --check
All is well when this finishes.
No violations.
...
No Errors
...
Integrity check complete.
Cleanup Security
Finally, you can get rid of plain text config files that aren't used. But before you do that, you need to test if you can successfully recreate the config files. Move the current file, then test creating a new one:
sudo mv /etc/tripwire/twpol.txt /etc/tripwire/twpol.txt.bak
sudo sh -c 'twadmin --print-polfile > /etc/tripwire/twpol.txt'
If that worked, great. You can remove the plain text files:
sudo rm /etc/tripwire/twpol.txt
sudo rm /etc/tripwire/twpol.txt.bak
Done!
Email Notifications
It would be nice to have this intrusion system run automatically and send you emails about issues. Let's do it!
Install mail with:
sudo apt-get install -y mailutils
Test if the mail system works. This will have warnings, since we just installed the program and didn't tell tripwire about it first:
sudo tripwire --check | mail -s "Tripwire report for `uname -n`" [email protected]
Now you'll get an email once that finishes running with the changes made.
Update and accept changes
To update and ok the changes in the DB, run a check with an extra parameter:
sudo tripwire --check --interactive
At the end a file will open. Page down a bit and you will see files listed with an x in front:
[x] "/usr/lib/libgsasl.so.7"
[x] "/usr/lib/x86_64-linux-gnu/libmu_pop.so.4"
...
If you want to make sure any changes made are ok/accepted, then go through this file, and uncheck an option by removing the x for those files you want to investigate the change of. Then save and close when done. It will ask for the tripwire local password again and write the new DB.
If you want to run the command again, it won't show the changes anymore since we accepted them by default with the x option. If you unchecked the x, then you will still see the change.
Automation with crontab
Get the system to do this all on it's own. Backup the existing crontab, then edit it:
sudo sh -c 'crontab -l > crontab.bad'
sudo crontab -e
If it asked you what application to use, choose nano as the default, unless you want another program.
Now add the following, and add your email:
0 1 * * * /usr/sbin/tripwire --check | mail -s "Tripwire report for `uname -n`" [email protected]
This will run every day at 1am, and send you an email report afterwards.
Save and exit, and you are done!
When changes get done, you will get notified by email.
Optional - Exclude folders
User ! stop points like so:
!/etc/rc.d ;
!/etc/sysconfig ;
!/steem/blockchain ;
Those directories will not be scanned, for example. Consult the man page for more info.
Congratulations! Enjoy a nice instruction detector and file integrity manager!
I really recommend tripwire over aide. I thought aide would be simpler, but I found this installation easier, and I like how fast the check is. Aide has a really slow checking. There is OSSEC which is also popular, if you want to try a 3rd option.
Thank you for your time and attention! I appreciate the knowledge reaching more people. Take care. Peace.
References:
If you appreciate and value the content, please consider:
@krnel
2016-12-16, 8am

I followed through on using your tutorials. Since no longer using Aide can you give me the instructions to remove it?
It's the first step in this tutorial.... lol
Lol indeed!
Would like a post on setting up email. I cant get my stuff to work. will donate.
When you install mail, it works automatically, unless your ports are blocked.
Remember
sudo netstat -tulpnfrom the previous tut?https://steemit.com/cybersecurity/@krnel/secure-your-linux-server-with-intrusion-detection
Try that. Does it show mail/sendmail?