Tiny House Episode 6: Exterior Finishing Work
Siding Selection and Installation
There are many different considerations when deciding on what type of siding to use for a tiny house on a trailer. We wanted to keep both the weight of the siding and underlying sheathing as light as possible. The trailer had to be no more that 8' 6" wide for road travel but we also wanted to maximize the interior width. Minimizing the siding thickness helped us keep the house narrow without sacrificing our living space.
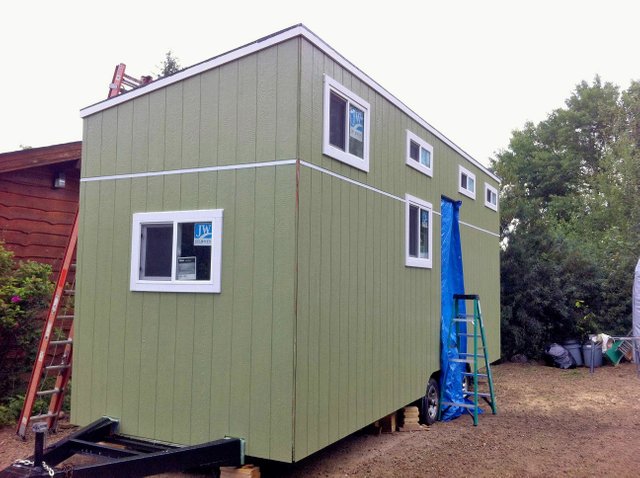
The siding we choose for our tiny house is LP SmartSiding. It is relatively light and doubles as a structure rated exterior sheathing as well. Not having to use OSB allowed us to save about 50 lbs and $10 per sheet. This was a big deal as we would have used about 23 sheets. Not a huge cost savings, but reducing over 1000 pounds in weight was a big deal.
The LP SmartSiding width is relatively narrow in comparison to other wood, metal or vinyl siding products. We nailed the SmartSiding directly over the foam using 2 ½" spiral nails. The installation instructions noted that using this siding over the foam was acceptable as long as the nails were spiral nails and went at least 1 ½ inches into the studs.
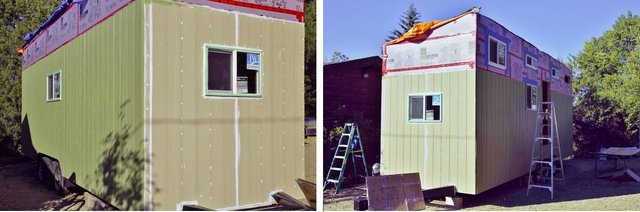
The siding was installed vertically and has built in overlapping seams on the sides of the sheets. Our walls were more then 8' high so we used Z flashing between rows of siding to make sure that water would not find a way in behind the siding at the seam. The trickiest part of installing the SmartSiding was cutting around the windows. I definitely went by the motto "measure twice and cut once."
Corner and Window Trim
I looked at several differnt types of exterior window trim before deciding to use a molded PVC product. What sold me was that it didn't need to be painted which was going to save on labor and it would never rot or need to be repainted like wood products.
Installing the corner trim was a bit tricky. The corners are covered by two pieces of trim. The inconsistencies of the exterior walls can make lining the trim up difficult if each piece is installed separately. Tacking them together first and installing them together as a unit was much easier.
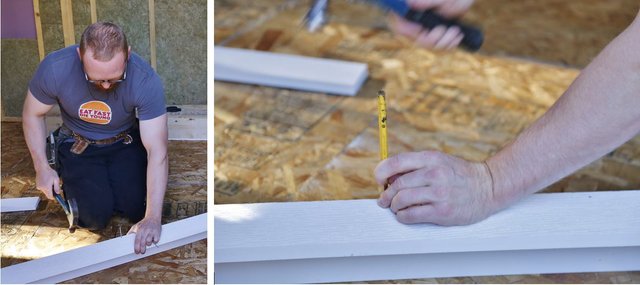 I used fairly large finishing nails and sunk them just below the surface of the trim with a punch. I used one nail approximately every foot.
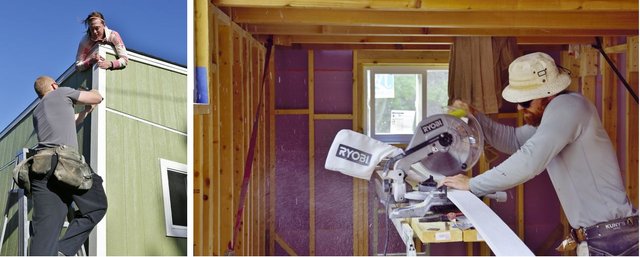 Left: Aimee helps me to hold the assembled corner trim in place while I secured it to the house. Right: Cutting the trim board with a cut off saw.
Installing the Door
The door install was fairly similar to the window install. I started out by flashing the base of the door frame the same way I did the windows so if you want to see how to do that step by step refer to that blog post.
 By the time I remembered to take pictures of the door installation I already had the door set in place. In this picture you can see the sill flashing at the bottom corners of the door and that I also had the first piece of exterior door trim installed.
Once the flashing was completed, I placed the door in the wall. I shimmed the sides as necessary to center the door and to make sure that it was level, square and plumb. I had a fair bit of extra space so some of the shims were small chunks of plywood. Once I was satisfied with the position of the door, and that it would open and latch properly, I secured the door frame to the wall with 3" screws.
 Left: You can see the small chunk of plywood being used as a shim. Center: Door fully installed. Right: Measuring the length of the side trim.
Window and Door Trim
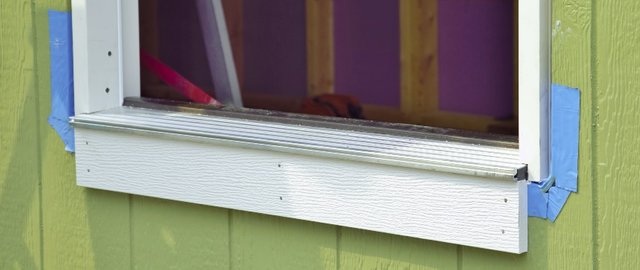
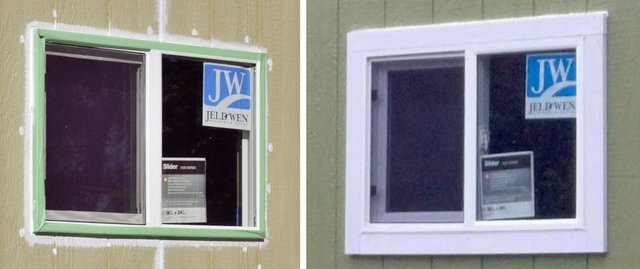
I had to be extra careful how I sealed around the windows because our tiny house doesn't have any roof overhang and the sides of the house get wet regardless of wind intensity or direction. After cutting the siding around the windows the first thing I did was used a generous amount of exterior rated silicone to seal the space between the siding and window frame.
Once the silicone was dry I started installing the window trim. Unlike interior window trim, you shouldn't cut the trim diagonally. Leaving the top piece of trim to overlap the window and the side pieces of trim will prevent water from leaking through.
I started out by measuring and cutting the bottom piece of trim first. This piece is only as wide as the window so the side pieces of trim can go all the way to the bottom. Once the sides are installed and inline with the top of the window then the top piece can cover everything and deflect most of the water.
 Left: Window sealed with a liberal amount of silicone. Right: If you look carefully you will notice a bead of silicone along the top piece of trim. This keeps the majority of water from even being able to get behind the trim. Its also important not to use any caulking on the bottom piece of trim so any water that may find it's way behind the trim is able to drain out.
Siding, Window and Framing Video
In this video I go into a little more depth of how I installed the siding and exterior trim. I also take another look at the framing of the tiny house from the inside.
Pretty cool walkthrough of this. Thanks for sharing. Resteemed
Thanks for the support!
These are so in depth. What a wonderful series!
Thank you for your continued support. Been spending a lot of time on these.
Cute tiny house :) I love it!
That looks very neat! Thank you for sharing :)
You're welcome! Thanks for reading.
If you would prefer to watch the video on Dtube I have uploaded it here.
I was having some issues with Dtube, I think my file size was too big. In the future I will be posting any relevant videos to Dtube sooner and linking to them in the main blog post.
Tiny houses!!! I love it! Will we get to see the final product and inside when it's finished!?! I can't wait to see! Great work!
Of course you will get to see the final product!
Yay! I will be patient! :)
Very impressive work. I assume the bed is up in the loft? Your physique has me wondering about the details of your lifting routine too. I never know what to do at the gym and can't afford to hire a trainer, haha.
I was a competitive power lifter for awhile. I still train similarly but not quite as hard. I may in the future do some posts about my routine. Right now though it is in a bit of dissaray due to the twins. 🙃
Yes the bed is up in the loft. We actually have two lofts.
Amazing and very impressive, thanks bro......Resteemed.
Thanks for for the resteem! ☺️
Looks like it's coming along really well, I would love to take on a project like this one day, a while back I was even thinking of one of those barge storage containers as a starter.
I have also thought about the converted storage containers. I think they have their pros and cons. Building from scratch just seemed to have a bit more flexibility.
Looking good!
Thanks!