Tiny House Episode 5: How to Install Windows on a Tiny House, or any House!
When Aimee and I first started our discussion about windows we planned to find used windows or off-size new windows to keep our costs low. However, after shopping around we discovered the places that carried used and off-sized windows really weren’t as affordable as we hoped they would be. In the end, we choose to use standard sized off-the-shelf windows. If you have a lot of spare time, you may be able to salvage windows or find them using online classifieds but we didn’t really have much free time for this type of sourcing. If you are planning to build a tiny house in the future, and have a place to store materials, cutting your costs is definitely possible by stocking up on salvaged and re-purposed materials. If you are really trying to reduce expenditures, I would even recommend spending a year bargain hunting and stocking up on supplies. When you are in a hurry, finding what you need used is very difficult.
One of the other big advantages to standard sized windows is that if you ever have to replace one it is possible to do so on short notice at a reasonable price. If a custom sized window breaks from an accident or freak weather (remember most tiny houses on trailers don’t have overhangs to protect windows from hail) getting a replacement may take a couple weeks and will be more expensive than standard sizes. While picking up some off-sized windows may seem like a great idea remember to at least give some consideration to “what if” scenarios.
Here is how we installed our windows step by step.
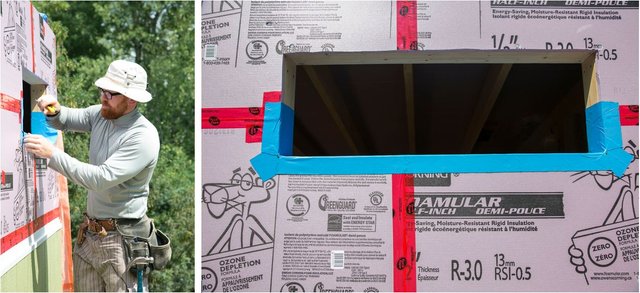
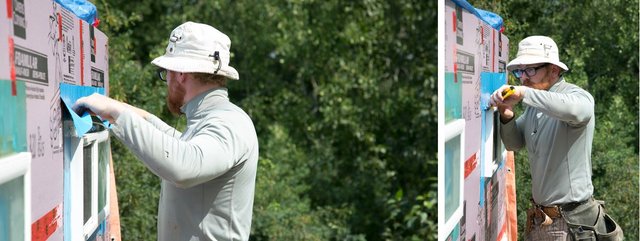
The first step is to prepare the frame. We flashed the bottom of our window frames with a waterproof membrane called Blueskin. If water leaks around your window or somehow through your window this will lessen the chance of water getting into the house and causing damage. There are many different brands of these sorts of products. The one I would recommend, at this time, is one I came across after we did our window install called Protecto Wrap. It is a bit thinner, which I like, and is super sticky. No harmful off gasses are produced during the manufacturing or installation of this product.

Start out by measuring the piece of membrane to fit your window opening. It should be long enough to cover the bottom of the window frame and go up both sides about 6 inches. You will notice that I also put some small pieces of the membrane to flash the corners before installing the main piece. For best practice, start at one end of the membrane and work your way slowly to the other end, removing the backing as you go, and making sure to get the membrane tight into the corners. The adhesive is so sticky that if you remove the backing all at once, positioning the membrane properly is almost impossible.

Once I had it in place I made a 45° cut in the membrane starting about ¼” from where it meets the wall at the corners and carefully folded the flaps down against the outer wall.
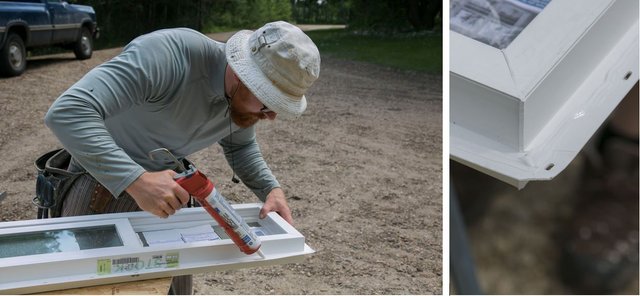
Once the flashing was done I prepared the window. I cleaned the inside of the flange with a rag to remove dust and other debris and then applied a pencil thick bead of silicone to the top and side flanges. I did not apply silicone to the bottom flange to allow any moisture accumulation around the window to be able to escape and flow to the outside of the foam.
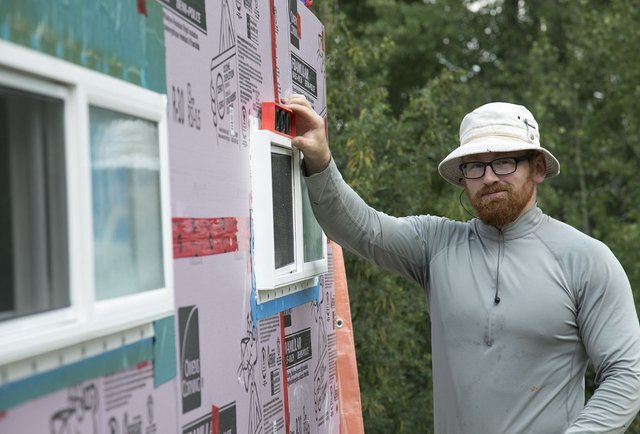
After the window was prepared I put a shim on each side of the window frame and lifted the window into place. Having a helper for this part, if possible, would be best. Adjust the shims so the window is centered in the frame. The frame should be slightly larger than the window to allow room for spray foam and to prevent the window from having too much pressure pressed against it should your wall shift, expand or contract. Make sure that you use the special window spray foam because it expands well but does not exert excessive pressure on the window frame. Once I was satisfied with the windows location and checked that it was level I nailed the window into place with roofing nails. Stainless steel screws, with flat heads, are also available for window installation but they are expensive and I feel like they are overkill.
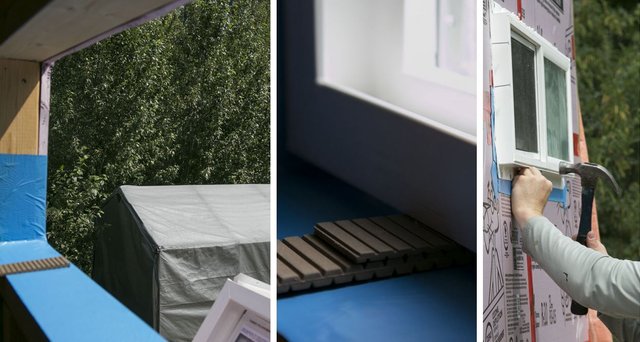
The last step was to flash the outside of the window frame, covering the flange and nails with the same membrane used to protect the sill. I pre-measured the pieces again and applied the membrane first to the sides and then to the top. Any time you apply flashing you should start at the bottom and work your way up so the overlap and seams are always facing downward. If the glue on the membrane ever gives out, layering the flashing in this manner will prevent water from leaking behind it. I did not apply the membrane to the bottom flange for the same reason I left the silicone off the bottom; so that water could escape out the bottom onto the foam board. If you seal the bottom of the window and water manages to get behind the membrane it can build up and leak back into the house.

The good thing about windows is that once you have done one the others are all basically the same!

I like that you have presented the steps to follow, there is a lot of work, but we can succeed if we want to achieve this. I appreciate your work. All the best for you!
Thank you!
Very nice #howto! Looks like a lot of work, but windows are important!
Thanks. It wasn't too bad. Our house has 8 windows and I could have done them all in one day if I needed to. Once you have done one it just gets easier and easier.
Very good instructions! Window installs can be tricky for people and it will sometimes give you a headache. Just be sure to pay attention to the rough opening size when forming the windows in the walls.
Those are great tips! We built a tiny cabin several years ago and used standard and some random off sized windows. It worked well. I have been obsessed with tiny houses lately so I will be following.
Thanks! Do you have any posts on your cabin?
We built it about 22 years ago as a cabin on our property out in the country. Our friends all pitched in and helped build it. We didn’t have electricity or running water, but it was very comfortable. 16’ x 24’ It served us well for a few years and then we decided to move to the property so we traded the cabin to the guys that did all of our excavation work. They sawed it off of the slab floor and hauled it about five miles away to their property. It was a pretty good barter.
I would have to dig through boxes to find the photos of it, but we have very fond memories of that cabin.
Thanks for sharing that.
Clear instructions and great tips! Working with that membrane is tricky, so your advice is right on regarding measuring first and the order in which to apply the pieces.
Thanks for the support and input! Yeah that membrane can be a pain. I use similar products at work all the time and still have to throw out the odd piece if it sticks to itself.