My off grid cabin project - Part 1
For many years I have wanted a small cabin in the woods. Reasons include: getting away from the hustle and bustle of modern life to slow down for awhile, enjoy nature, spend vacations there and to have a bug out location if TSHTF. It wasn't until 3 years ago that I had the financial means to buy some land and begin this project. Also since I am getting older, I may as well start working on this while I am still strong and fit.
Cabin design
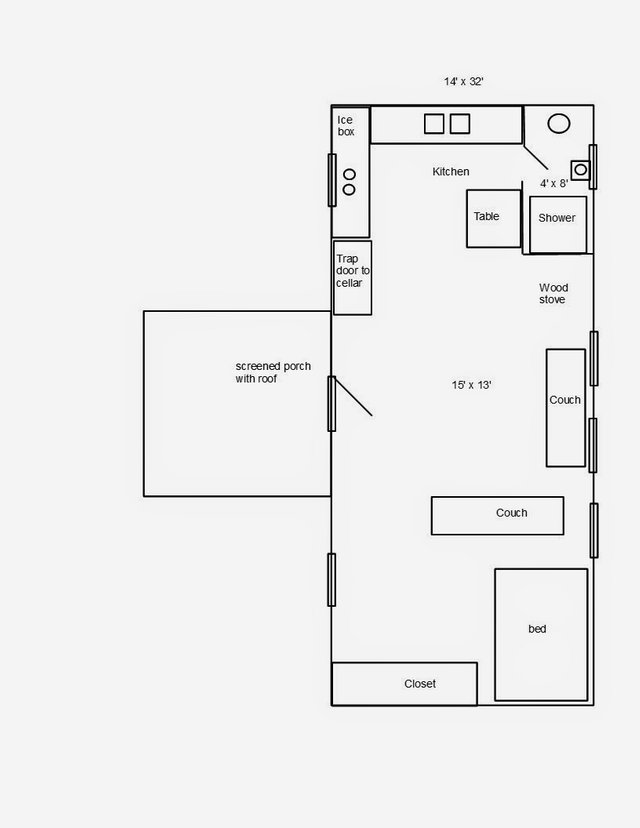
I have been following the tiny house movement for the past 5 years. A lot of the ideas make sense: figure out how much space you really need and live within that space, reduced construction, electrical, heating and cooling costs, creating a smaller footprint on the environment. After making numerous drawings and floor plans, I settled on a 32' by 14' rectangular layout of approximately 400 sf. I didn't want to go wider, because I would have to handle the long boards by myself. This gives me plenty of space for a kitchen, bathroom and room for a bed all on one level which will be helpful as I get older. The cabin will have a loft on each end for additional sleeping and storage. I used 10 foot walls to get 2 foot high knee walls in the lofts for headroom. The 16 foot middle section of the cabin between the lofts will be open to the roof line, to give a more open feeling to the small area. I wanted to keep the design simple so it would be easier for a first time builder to build. I am wiring the cabin for both 12 volt DC and 120 volt AC for potential upgrading to the grid.
This is a sketch of the cabin floor plan.
Search for land
I wanted to look for land in a small town, at least one hour away from the closest city. It should be accessible year round in both winter and rainy seasons. I was looking to be close to a large body of water for boating and fishing. I wanted a town where there were no building codes, so I could do most of the building myself. Many of these requirements are based on a possible SHTF scenario.
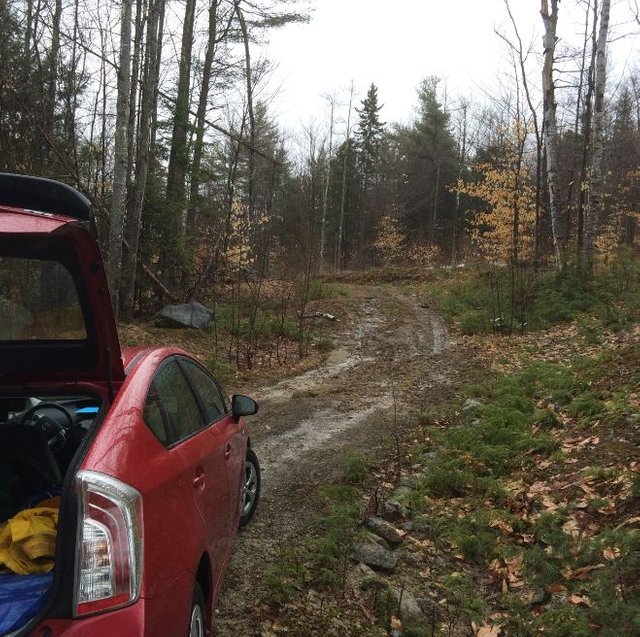
I spent a year looking at land in small towns in NH. I feel very fortunate to have found the property that I did. It is a little over 2 acres and is directly off a paved secondary road that is accessible year round. It is a 10 minute drive to a large fresh water lake. The town will let me do all the construction by myself. The previous owner had cleared an area of trees where a house would go and had cleared an access road. I bought the land in the fall of 2013.
Infrastructure
The state of NH requires an engineered septic system before towns can issue building permits. So the septic system was a major expense. The previous owner had paid an engineer to design a septic system on the land. So I went to the same engineer and asked him to update septic design. Once I had state approval of the septic design, I was able to pay $100 for a building permit.
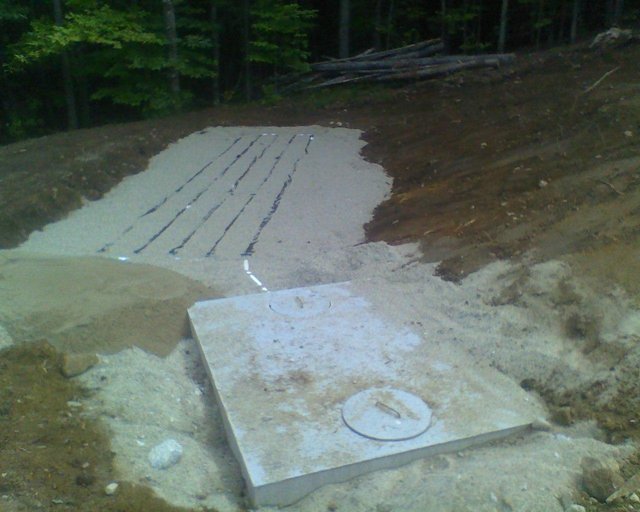
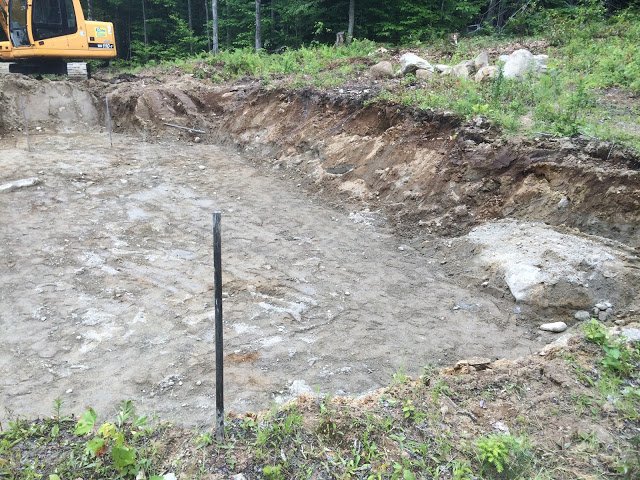
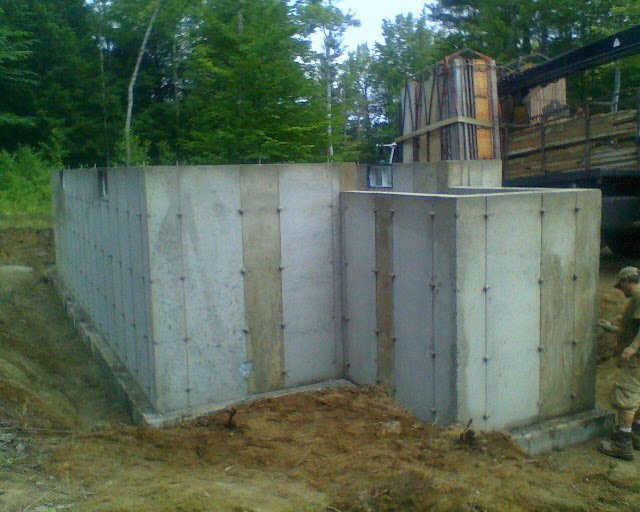
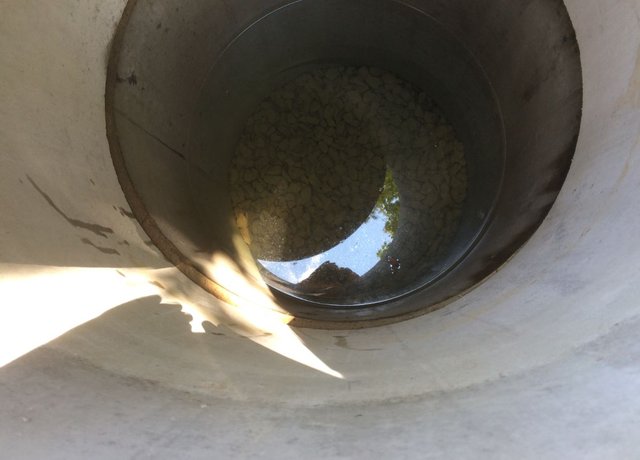
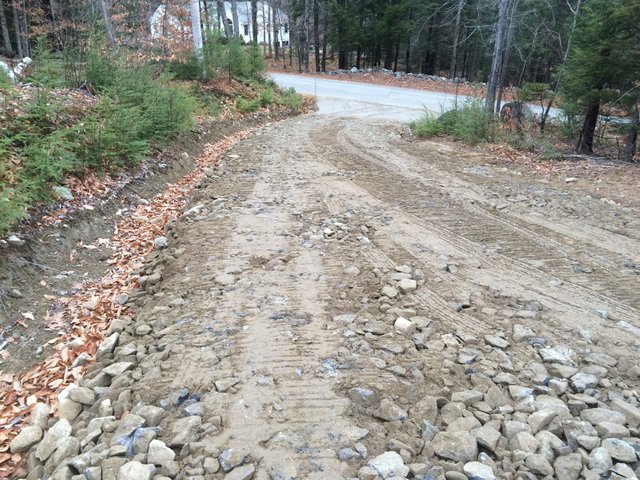
I found a local excavation contractor who installed the septic tank and leeching field, as well as digging the hole for the foundation. We had planned to dig an additional 2 feet down, but we hit ledge and stopped there. So my foundation will never move because it is sitting on ledge! As a result of this, we had to build the ground up around the foundation to keep the footings below the frost line. My excavator dug a shallow well and hit water at 10 foot down. This was a bonus because I didn't want the expense of drilling a deep well and the need for a 240 volt deep well pump. I have a 300 gallon IBC tote water tank in the cellar to store water from the well, especially in the summer dry season. The existing access road turned to mud in spring. My excavator cut a ditch into the uphill side of the driveway to drain the water away from it in the spring thaw. Then he put down a layer of landscape fabric and covered it with 6 inch rock. The rock fractures when he runs his heavy equipment over it and the pieces interlock to form a firm surface, even in the spring. The landscape fabric keeps the rock from migrating into the soil.
Framing the shell
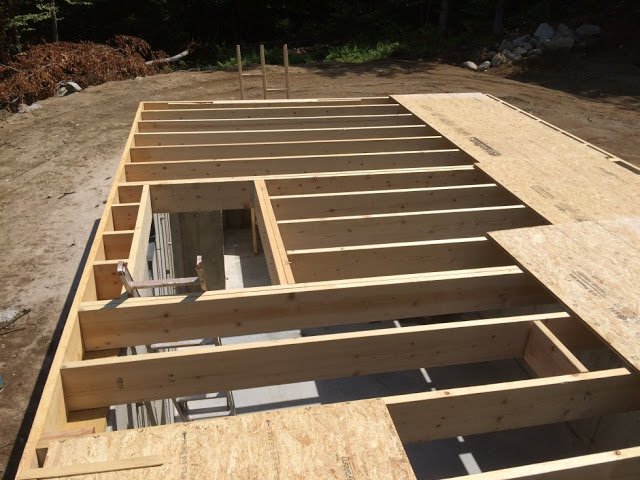
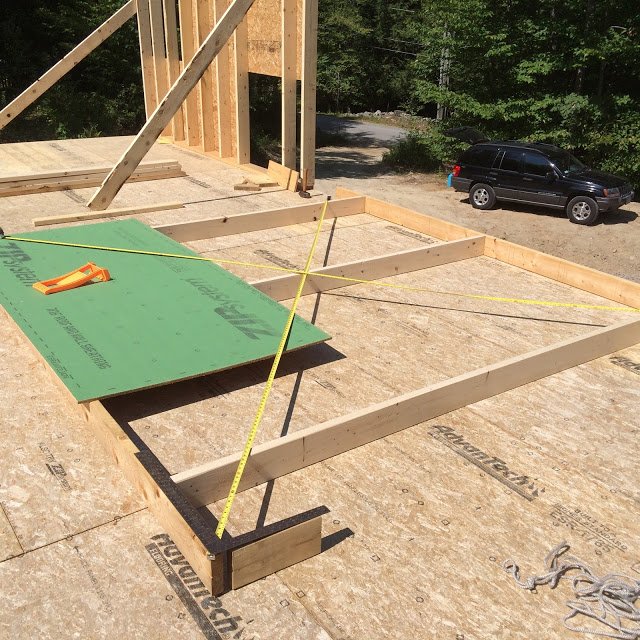
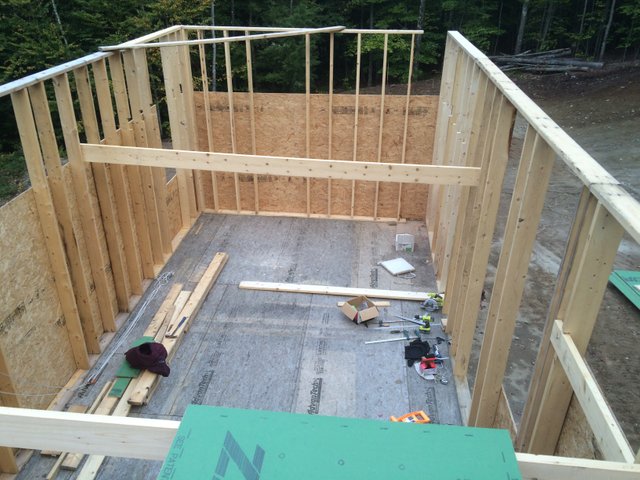
I started framing the cabin in the summer of 2015, working on weekends and during my vacation. I used 2x8 pressure treated wood for the sills and 14 foot long 2 x 10s for the floor joists. Working alone doubles the time of construction. For each floor joist I would slide it into position, walk to one side to align the joist over the measured mark and then walk around to the other side and align that side to the measured mark. The 3/4 inch thick sheets of plywood for the main floor are very heavy! I constructed the walls in 12 foot sections on the floor. It was all I could do to lift one wall section consisting of 4 wall studs and one sheet of plywood by myself. Once the wall was standing up, I added the remaining wall studs and plywood sheathing. The loft joists are 2x8 14 feet long and were interesting to get in position by myself. I did all the framing using Ryobi cordless power tools. I would recharge the batteries with a charger that plugged into my car.
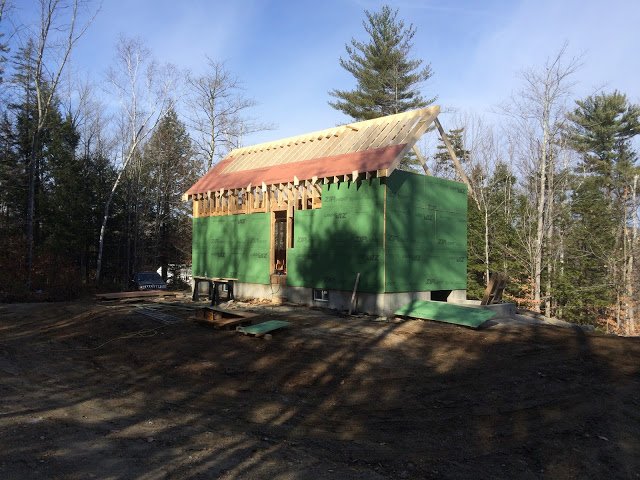
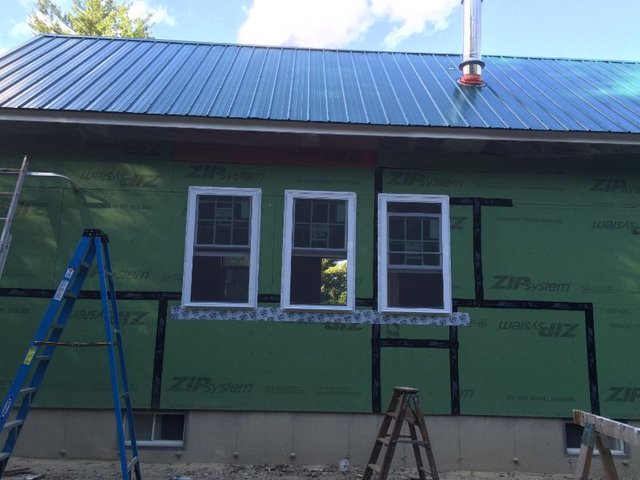
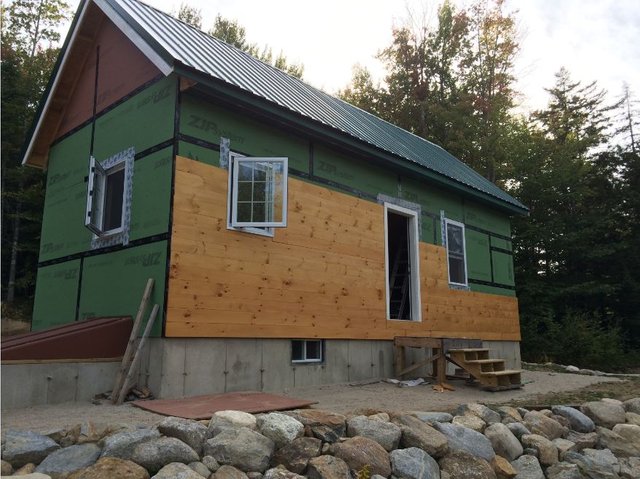
I had a local carpenter frame and sheath my roof. This was a job I could not have done myself. I was the carpenter's helper; he taught me a lot of old timer tricks of the trade! We had the roof framed and sheathed in 3 days. I paid another local roofer to install the green metal roof on the cabin, a few months later. This was another job I could not have done myself.
Woodstove
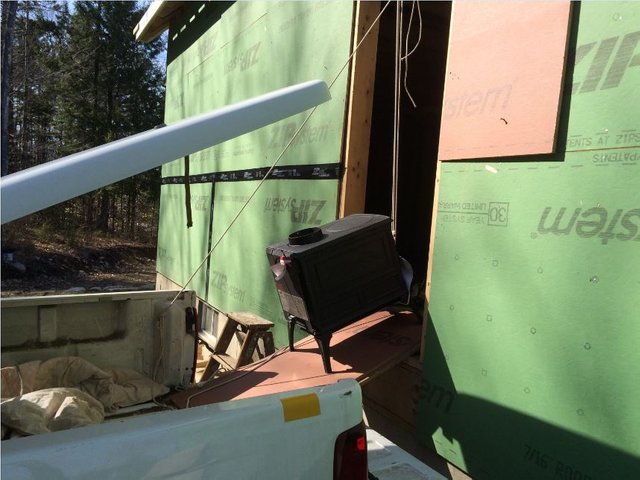
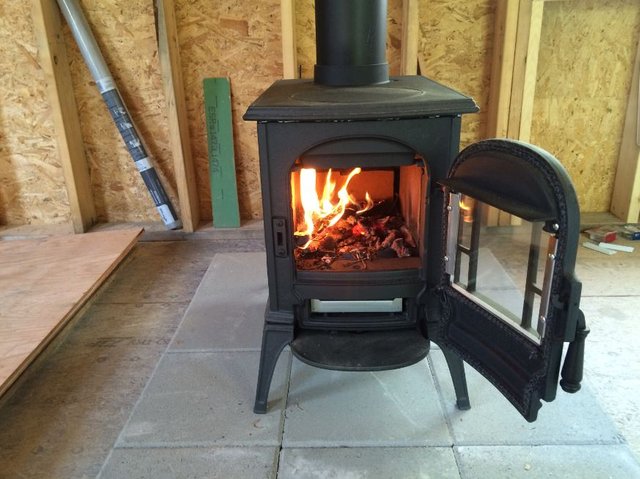
I purchased a small Vermont Castings wood stove to heat the cabin. It was interesting getting the 250 pound stove into the cabin by myself. I used a block and tackle to lift the stove into the cabin and move it into position. The one thing I learned when installing stove pipe, is to orient the male end of the pipe toward the stove. I initially installed the pipe the wrong direction and after making a fire in the stove, I had creosote leaking on the outside of the pipe.
Windows and siding
I purchased new, insulated, vinyl windows for use in the cabin. They were reasonably priced and don't require any maintenance. Low maintenance is another goal in the cabin design and is why I went with the metal roof. I used shiplap pine for siding. I stained both sides of the siding before I nailed it up, probably not necessary, but I feel better doing it.
This is where I am right now. I'll post part 2 in a few months as I make more progress. I am starting year 3 of a 5 year construction plan. I have made some videos of the cabin construction which you can watch here.
Very Cool, trying to do the same thing here in westrn Canada.
Thanks, good luck with your project!
Dave! This is awesome! You did this mostly by yourself, you are a beast! I am in construction and at 32 years know how heavy all those walls are :) I really like your floor plan after seeing so many tiny homes over the years as well. It is functional yet open, nice. I can't believe they just let you build whatever you want, great find on the land. 2 acres is plenty outside of a city. You have done some hard work here and it shows the construction looks solid! I will check out the videos. Couple of things I wanted to ask and add: You are on a ledge that is nuts. Solid, also a shallow well is something to be wary of, you got the water tested? If that is good, huge plus to use so much less power to get water. I am a master roofer and I believe your roofer did a great job. I was wondering about the flashing around the stove pipe coming out of the roof. Is that adequate for the heat? And that stove OMG! IT is gonna roast you :D It all looks awesome though, great foundation, solid framing. Love the wood siding. Here in the mountains of BC we use rigid foam on the exterior of the new homes now as well. I am currently siding a new home with siga wrap (gortex like tech), 2 inches of high density foam, and a rainscreen screwed into studs, with siding material on that. Long process. Rewarding :D Look forward to seeing more, just wanted to get this all out while it was fresh. I will post some more Airstream stuff! I posted this as a noob on Steemit https://steemit.com/art/@egregorian/ever-wanted-to-buy-a-vintage-airstream-and-renovate-it but check it out. 32 videos on youtube.
Thanks for your comments. I will probably get the well water tested this year. My next cabin project is to install the drain, vent and water supply piping. Plumbing is new territory for me, so things may move slowly! I'm planning on only using the well water for washing and the bathroom. There is a spring in the next town where locals get their drinking water! I'm planning to do the same thing. The flashing around the stove pipe is some kind of high temperature silicone material that was recommended by the metal roofing supplier. I have to replace the inside black pipe before the fall. I discovered it is easier to use piping from the same manufacturer because the pipe is the correct diameter. I'll check out your videos.
Thats really awsome.
Thanks