Have you ever been try to CHANGE your COVER PHOTO on Steemit? Here's How - [Step by Step - Tutorial]
Good Day steemit friends and most specially to @teamphilippines.
This post will going to show you how you really change our "Cover Photo" in steemit. Yes! you now change your "Cover Photo" on you own Steemit site, and this was really awesome.
Changing a very simple Blue color on you cover photo will make your steemit site gorgeous, it will also make people be interested visit your site and the will attract them to follow you a best and simple to gain more followers.
So, Here it goes. First thing you need to do is:
- Open you Photoshop or other better graphic design application on you desktop.
Well mine i prefer to use Adobe Photoshop coz' this is the i used to make some logo and design.
Note: If you don't have any Grapic Design Application there you can also use "Microsoft Paint", I will show later just keep reading :)
Oh well back to Cover photo tutorials
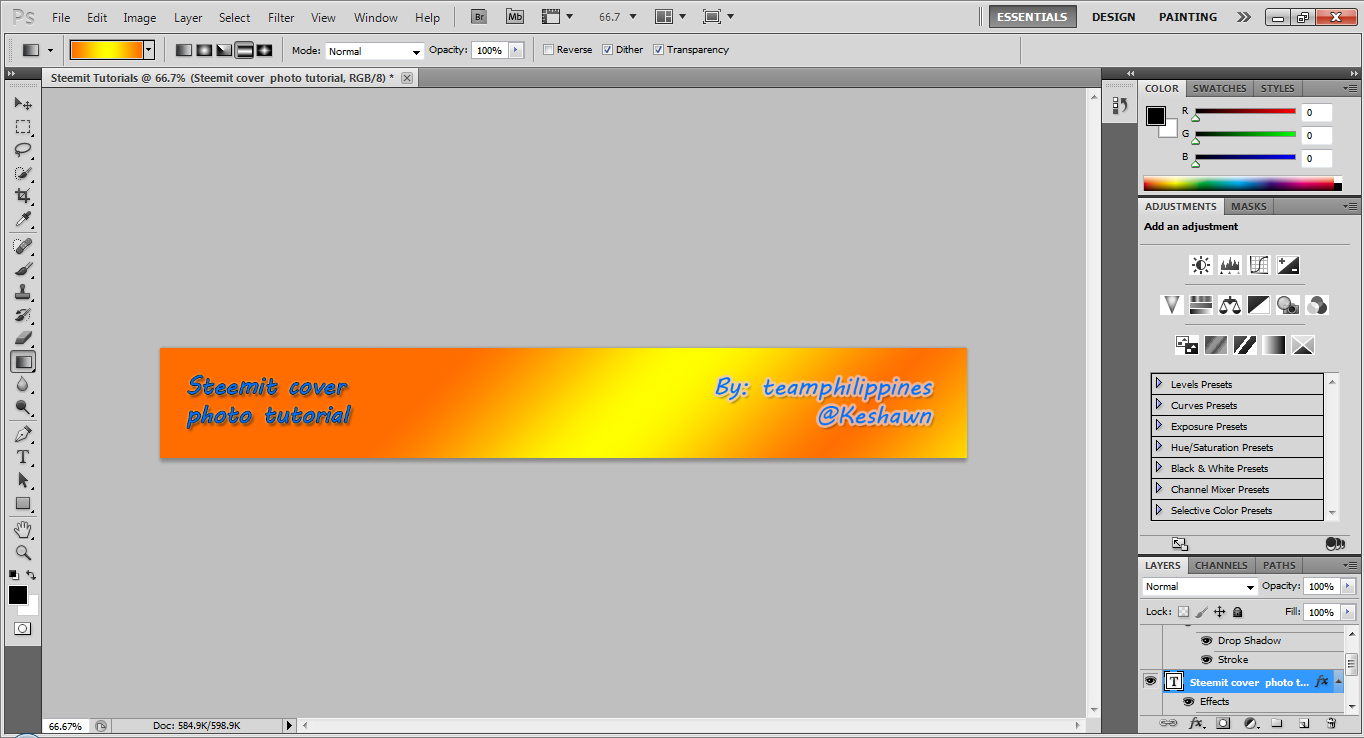
First: Open your Graphic Design App, Then Click new and set it to
Width: 1210 px[pixels]
Height: 165 px[pixels]
Resolution: 72 px/inch
it should be like this:

Then add anything you want to that tab or Layer, Such as Text, desirable designs, logo, Banner and anything you want to make your "Cover Photo" Attracting. You can edit and add all you from that layer.
Now when you're done, Save your photo. and upload it to any site that will upload or covert a photo files (PNG,JPEG) to URL.
well in my case, i don't want you to go anywhere if you are a Steemian use Steem to convert your file to URL.
How?
This is my version converting Photo files into URL. and it's the easiest way though
Go to your steemit site, Click Submit story as you were able to post something great
Then Click Here
and upload your photo there, after it's done. Copy only the "URL"
it should be like this
![file . Png] >>(https://Steemitimages.com)<<


and then after that go to your steemit account settings

And paste it into, "Cover Image URL"

And there you go, You have made an interesting Cover photo that make most people do.
Now, You remember about creating a cover photo using Microsoft Paint as i said above, then here it goes.
Go to Steemit Site, And print screen your Blog profile, after that go to Microsoft Paint and CTRL+V or Paste it there.
It should be like this:
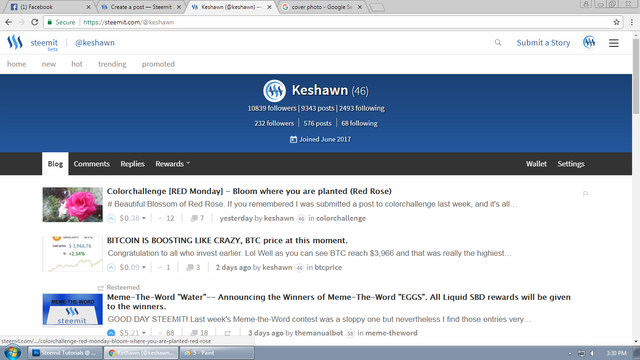
Now Crop the portion of your cover photo to take the actual size of it,

And repeat the instructions above. It's Very Simple, Right?
and it's all done. Thank you for reading, I'm Hoping that you've learned something is this simple tutorials.
Make your own Cover Photo now, And let everyone impress with your great and amazing design Cover Photo.
Fell Free to:

Great job showing the dimensions and letting everyone know they can change the banner now. I haven't worked on my banner art yet but I will soon!
so do i, lol... i just show this for good and let anyone know that they can already change their cover photo. i'm working on mine now. Lol
This post was resteemed by @resteembot!
Good Luck!
Learn more about the @resteembot project in the introduction post.
Thank you, for this tutorial, I will do it right now
nice tutorial L. thanks for sharing.. :)
Congratulations! This post has been upvoted from the communal account, @minnowsupport, by KESHAWN from the Minnow Support Project. It's a witness project run by aggroed, ausbitbank, teamsteem, theprophet0, someguy123, neoxian, followbtcnews/crimsonclad, and netuoso. The goal is to help Steemit grow by supporting Minnows and creating a social network. Please find us in the Peace, Abundance, and Liberty Network (PALnet) Discord Channel. It's a completely public and open space to all members of the Steemit community who voluntarily choose to be there.
Nice one, very detailed. :)