Comets – How to Discover them (Part I)
It was hard to imagine that a faint smudge of light I found in the constellation of Centaurus on November 27, 2011, would soon evolve into what International Space Station astronaut Don Burbank would describe as “the most amazing thing I have ever seen in space”. But that’s what happened, and as it turned out this would be just one of six comets I discovered from a suburban backyard in Brisbane, Australia.
The question a lot of people ask is how is this possible? Especially from the suburbs of Brisbane in a climate probably better suited for a tropical garden than astronomy! So, in this article I’ll discuss how this is possible as well why I got interested in finding comets and the techniques I use.
Why did I start searching for New Comets?
Photography and astronomy are two of my favorite hobbies, and what better way to combine the two to takes lots of photographs of the night sky to find something new! In my previous article Comets and Asteroids – Hunting down Potentially Hazardous Objects I spoke of how professional sky surveys are finding most of the new comets and asteroids. However, because these surveys are optimized for finding small earth approaching asteroids there are large areas of the sky that they don’t look at very often (if at all). These same areas of sky also happen to favor rapidly brightening comet’s and thus provide an opportunity for amateur astronomers.
Although Comets are not considered a primary goal for professional sky surveys, the discovery of them is still a very for science. For instance, the early discovery of the “Lovejoy” comet pictured above allow several satellites to plan and prepare for unique observations of the comet as it ploughed through the solar corona.
Comet Naming
Before getting onto describing the discovery process, one question I am frequently asked is the naming of a comet. The best way is to look at an example because they can get a bit confusing.
Example: Comet C/2006 P1 (McNaught). The comet pictured above.
Comet and C/ are the standards used for Long Period comets (that is comet’s travelling in near parabolic or highly elliptical orbits that won’t return soon). The discoverer’s surname appears in brackets, in this case the discoverer was Rob McNaught. The final part of the Name “2006 P1” requires a bit more explanation.
In “2006 P1” the “2006” simply means that the discovery year of the comet. But the “P1” means it was the 1st comet found in the “P’th” half month of the year. If you count the letters of the alphabet from A, you will find that P is the 16th letter. The 16th half month of a year is the first half of August. Comet C/2006 P1 (McNaught) was found on August 7, 2006, so in the 16th half month of the year, hence the “P” letter.
In Part 2 of this article I’ll write about the discovery process itself. In the meantime, lets return to the subject of finding comets.
My first Comet Hunting Setup
Above is a picture of the original comet hunting setup I used in 2007, which although very agricultural, still managed to discover 2 new comets! There are 2 Canon DSLR cameras both equipped with 200mm focal length telephoto lenses. These were mounted on top of guiding platform made from welded water-pipe, driven by an old 5.25” floppy disk stepper motor attached to a worm drive. There was no observatory, just a small concrete slab where the mount would sit, and I would throw a tarp over when it wasn’t being used!
To drive all this, I built an automated mount/camera control using a Microchip PIC embedded controller and a Stepper motor driver kit (pictured above). If I was doing this again today, I’d probably do it with Arduino board or similar. The idea of this controller was to control the shutters on both cameras, taking a dozen or so 90 second exposures of the same part of the sky, then re pointing the telescope to the next bit of sky.
After the imaging session was finished for the night I would then collate the images according to the sky position and then loop through the images in quick succession using an animation program. An comet (or asteroid) in the image will move slightly between each exposure, so if the images are looped as an animation you can see the comet moving quite clearly. To see how this work click on this link where 20 successive 90 second exposures of a known comet have been compiled as an animated gif.
Here is a brief account of the 2 comets that were found with this setup.
Comet C/2007 E2 (Lovejoy)
This was my first discovery. Click on image to see an animation showing how it moved during 16 images
Comet C/2007 E2 (Lovejoy) was found on March 14, 2007, from Thornlands, Brisbane, QLD. A lot of people were surprised to hear the discovery was made with a Canon 350D consumer DSLR and Canon 70-200 Zoom lens from suburban Brisbane, rather than a big telescope on top of a mountain. But as mentioned previously mention there are areas of sky not searched by professional surveys, and this comet had been out of range of those survey areas for several months while rapidly brightening. One fun fact was that the memory card containing the comet discovery images also contained images of my daughters 7th birthday party!
Comet C/2007 E2 (Lovejoy) and galaxy NGC6015 on 17 May 2007. Comet is trailed because this was a 1 hour exposure. Telescope ASA 8" f/2,75 and Canon 350D. Image Credit: Albert Van Duin
Astronomers would refer to this comet as medium bright (which equals really faint to the general public!). It remained too faint to see with the unaided eye but could be followed in a small telescope if you knew where to look. Even though not bright, it was still an exciting moment for me! Calculations show that the comet is travelling in a long ellipse and will not return for another 20,000 years.
Comet C/2007 K5 (Lovejoy)
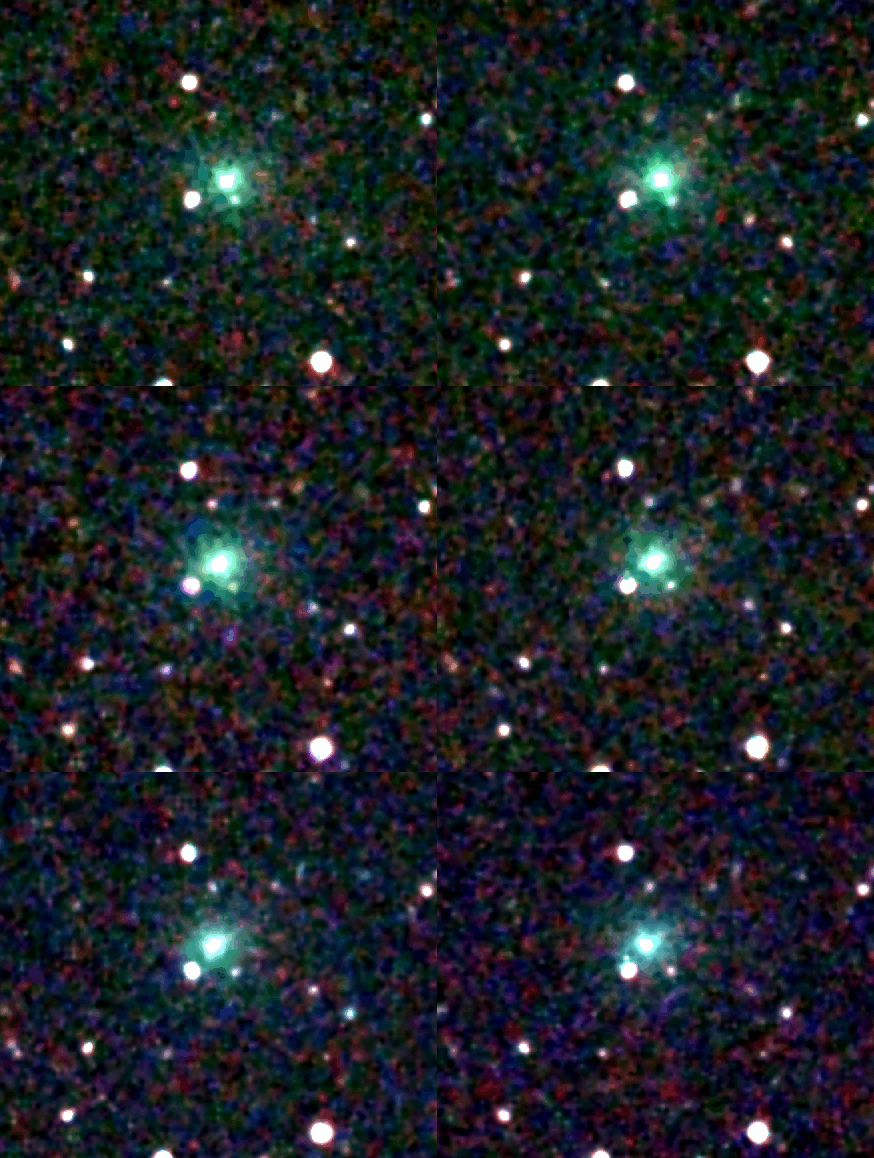
It took only 2 months to find the next discovery, on May 26, 2007. This one was very faint though and I was lucky to find it at all and it was also fading from discovery. The best image I saw of it was this one by John Drummond from New Zealand.
Comet C/2007 K5 (Lovejoy). The colored dots are stars, and because the photographer was tracking the moving comet while taking multiple exposures in alternate red, green and blue filters. Image Credit: John Drummond
A new Setup
In 2009 I did a complete revamp of everything. First, I was tired of having a system left out in the weather, so the first point of call was to build a roll off roof observatory. This is simply a modified commercial garden shed. This ended up being a bit more work than anticipated as I had to build an internal frame to strengthen both the walls and the roof. But the result was a lot more convenience and was much kinder on equipment.
The next big change came with replacing the 2 Canon Cameras and lens with a single telescope Celestron C8 Schmidt-Cassegrain telescope equipped with a Hyperstar corrector (see insert below). I had found at times I was working too close to the detection limit of the Canon’s and wanted to improve on this. This telescope had an effective aperture of around 160mm compared to the Canon lenses which were closer to 65mm, an improvement of 6 times light gathering power.
Furthermore QHYCCD, an astronomical camera builder based in China who had just started getting a good reputation at the time, had just released a camera based on a Kodak (now On Semi) KAF-8300 sensor which at the time was the first affordable larger format monochrome CCD sensor. Monochrome CCD camera’s do away with the alternating grid of red, green and blue filters (Bayer array) in most color cameras, and as a result are in the order of 5 times more sensitive. You can see this in the following comparison.
Comparision between a color image sensor and a monochrome sensor, same exposure and same telescope. The monochrome sensor image on the right shows much greater sensitivity. Image Credit: Christian Buil
Overall the new system was much as 30 times more sensitive, but there was a trade-off as my field of view was much smaller than with the Canons plus 200mm lenses. But the overall result was better, even if I had to take many more images to cover the same amount of sky.
The final part of the equation was a more sophisticated mount that could be pointed from a computer. Using a combination of Perl and ASCOM (Astronomy Common Object Model) I was able to control the telescope as well as the camera and was able to full automate the acquisition of images.
Discovery no. 3 - Comet C/2011 W3 (Lovejoy)
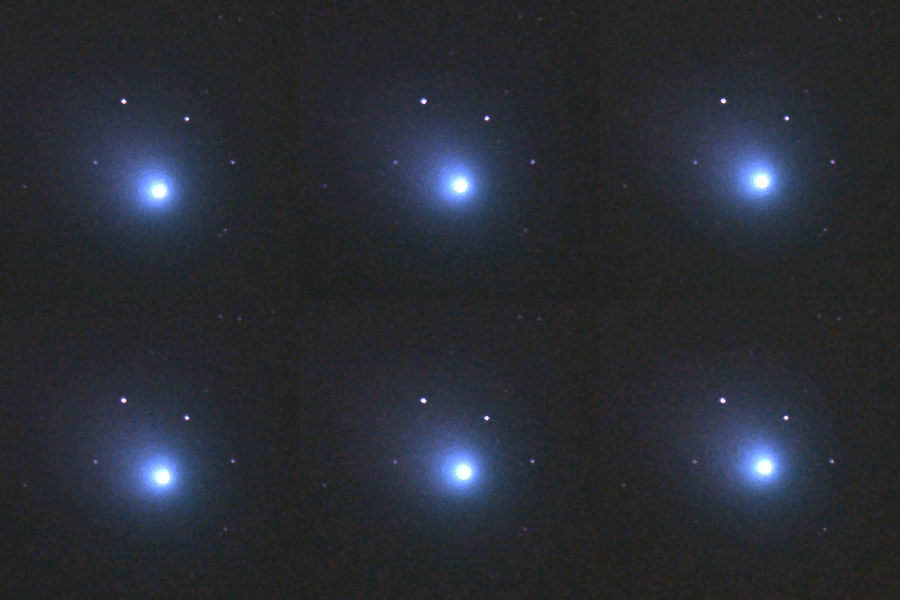
The 3 discovery images of Comet C/2011 W3 on November 27, 2011
Discovery number 3 was a very memorable because even though it started very faint when I found it on Nov 27, 2011, it would soon prove to be extremely interesting. Within a few days of discovery enough observations had been received to calculate an orbit which indicated the comet was rapidly approaching the sun in a rare “sungrazing” orbit. At the comet’s perihelion (closest approach to sun) on Dec 16, 2011, it would pass just 140,000km from the sun, or in other words 10% of the suns diameter! Assuming the comet survived this would give astronomers an unprecedented opportunity to probe the sun’s inner corona, an envelope of high temperature plasma that surrounds the sun.
The comet passed just 140,000km from the sun on Dec 16, 2011. From earth this is what the trajectory looked like
To make the most of the event numerous satellites were mobilized to prepare for special observations of the comet during its perihelion passage. I also suspect the astronauts aboard the International Space Station were also informed (and subsequently made observations). From earth, it was difficult to follow the comet as it got closer to sun, and only those people who had very clear skies were able to follow it near the sun.
The comet rapidly brightened, and as it became observable from some of Spacecraft like SOHO (Solar and Heliospheric Observatory) it had developed a long tail as can be seen here.
Dec 16. The sun is hidden by an occulting disk in this view from the LASCO camera aboard the SOHO orbiting solar observatory. Comet C/2011 W3 is clearly visible - the tail can be seen stretching downwards from the occulting disk. Credit: LASCO/SOHO/NASA
different spacecraft followed the comet as it raced through the solar corona leaving a wake of ionised gases. In the following images, taken in UV light it is possible to see the interaction of the ionised gases from the comet with the magnetic field in the solar corona. All told, the comet was subjected to immense heat, losing so much mass its diameter is estimated to have decreased from 500 to 200 meters during the encounter. The following amazing image sequence is from the SDO (Solar Dynamics Observatory) Atmospheric Imaging Assembly 171 Ångström channel.
Dec 15, 23:50 UT. Comet’s is racing up from the bottom left leaving a wake that interacts with the suns magnetic field. There is no conventional tail because it so near the sun the tail is destroyed as soon as it forms. Credit: SDO/AIA/NASA
Dec 15, 23:54 UT. 4 Minutes later the comet has move further to the upper right, and the wake has changed quite a bit. Credit: SDO/AIA/NASA
Dec 15, 23:58 UT. Another 4 minutes later and the wake has changed further. Credit: SDO/AIA/NASA
Dec 16, 00:02 UT. Comet’s wake has become disrupted, notice some of the wake still remains in the bottom left through all the images (I am sure why). At this point the comet was travelling at 1 million km per hour. Credit: SDO/AIA/NASA
Be sure to check out the full animation of these images here
And a few hours later it emerged as follows:
Dec 16 UT. Comet appears again. Credit: SDO/AIA/NASA
Be sure to check out the animation here to see the outbound leg of the comet near the sun.
After the somewhat miraculous survival at perihelion, the comet appeared to rejuvenate over the next 24 hours, becoming brighter than ever before until there was a sudden loss of out-gassing at the 36-hour mark which probably signaled the demise of the nucleus. Up until that point he comet was detected during the daytime from several ground-based observers.
Just before the sun rose on Dec 17, 2011, this image was obtained from Argentina. Credit: Jakub Cerny, Jan Ebr, Martin Jelinek, Petr Kubanek, Michael Prouza, Michal Ringes
This demise of the nucleus is documented in the following 2 images. These show the rapid loss of the comet’s central condensation which is a bright knot of material inside the comet’s coma that marks where the nucleus is. In the right-hand frame taken on Dec 21, there is no central condensation at all. Hubble images later showed no trace of any residual nucleus.
Comet imaged on Dec 19 and 21, 2011. Credit: Jakub Cerny, Jan Ebr, Martin Jelinek, Petr Kubanek, Michael Prouza, Michal Ringes
Despite the apparent demise of the nucleus, a huge tail had developed, and this persisted for several months as it moved away from the sun and became visible in the dark before dawn. For a couple of days leading up to about boxing day, 2011, it was obvious to the naked eye from a dark location looking like a big searchlight beam rising out of the east. Unlike a normal comet however, it had no coma or nucleus, it was purely a long trail of debris strewn across the morning sky. Please enjoy the following photos I from near Miles on Dec 24, 2011, just using a Canon 350D mounted on a tripod with 17mm and 70-200 Zoom lens. It gives you some idea how the comet looked with the naked eye in binoculars from a proper dark sky.
Comet is in the process of rising, with Milkyway, Alpha and Beta Centauri and the Southern Cross and similar to view with naked eye. Can you see the emu? - hint its upright and its neck spans almost the whole length of the image. Canon 350D + 17mm f2.8 lens from Miles. Credit:Author.
Comet. Canon 350D + 70mm f2.8 lens from Miles. Credit:Author.
To be Continued
In the next part I will discuss how I began automating the detection process, the comet discovery process (versus the Hollywood process!) and will give an account of the most recent 3 “Lovejoy” Comets.
Being A SteemStem Member
As usual I really appreciate your support @steemstem !
Wow... Was reading this article but not the authors name, just noticed you are Terry Lovejoy.
Really interesting to see you equipment and method of photograhy and comet hunting! I appreciate this posts.
I would call myself a beginner amateur astrophotographer and this is impressive to me, keep it up!
One Question: With this Hyperstar, the camera is mounted directly in front of the SCT?
Thank you @daveiano ! Yes the camera is mounted directly in front of the SCT.
amazing , thanks bro for sharing :)
Thank you @benchel !
your welcome bro :)
Wow,,, amazing.
Hi, I found some acronyms/abbreviations in this post. This is how they expand: