Faydalı Wordpress Eklentileri: Nextgen Gallery / Useful Wordpress Add-ons: Nextgen Gallery

enHey everyone.
It's very important to all of us how your blog looks. The design is causing readers to stay on blog for a long time. This increases the readability of your content. Interestingness is the most important thing for content producers. So we share plug-ins that can make your blogs designs interesting.
For example, with the Elementor plug-in we shared before, we could play on our entire web site as if it were painting paint. Thanks to Nextgen Gallery, we can create a great gallery.
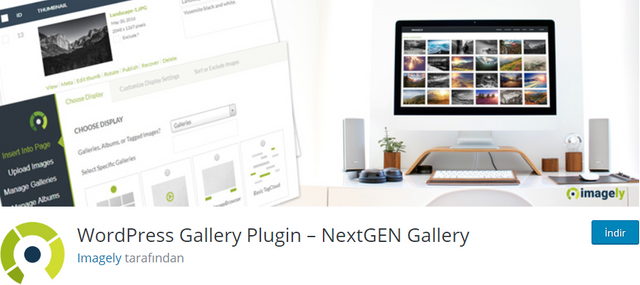
image source and Wordpress page
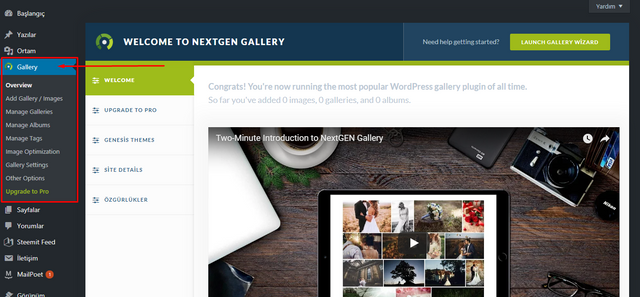
Download the add-on from the link above and then from the Attachments section. Then click Activate. After clicking, you'll see Gallery section at the left bar.
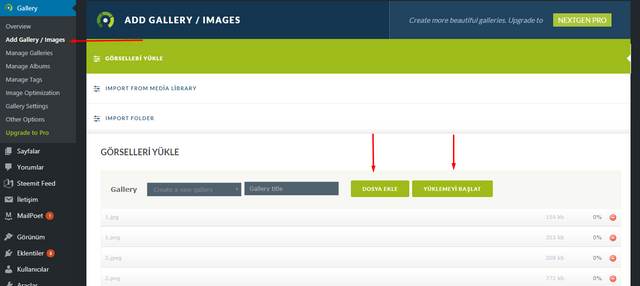
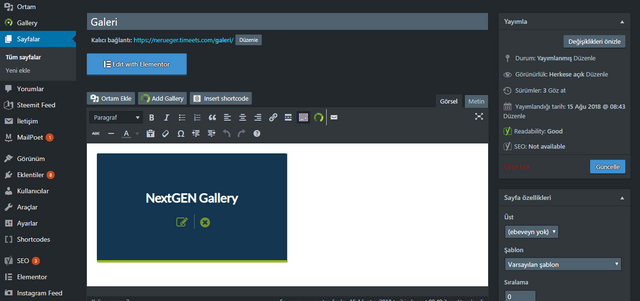
Click Add Gallery / Images under the menu and then click Add File. Once you have selected the pictures you want, you will be given the name you want to give to the gallery title in the "Gallery title" section and click on Start Upload.
Once uploading is complete, our gallery becomes active. It's up to you to adjust the settings.
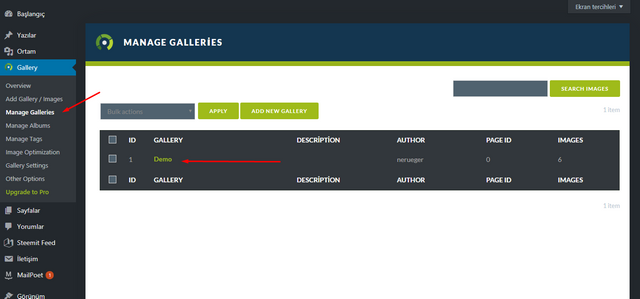
Once you click on the Manage Galleries section, the galleries that we have prepared come out. As an example, the gallery I just created appears with the name Demo. If we click on the name of the gallery, we can access the image settings.
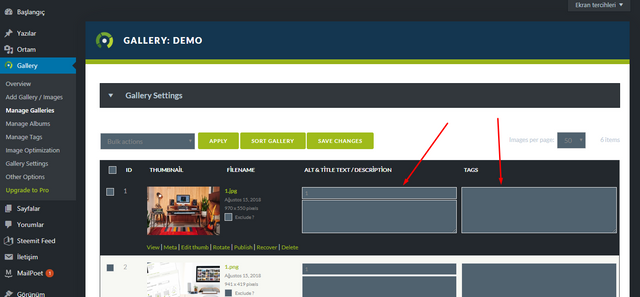
You can name your photos from Alt & Title Text / Description, and you can add tags one by one from tags. Then just click on Save Changes. Your pictures now have the tags and names you want.
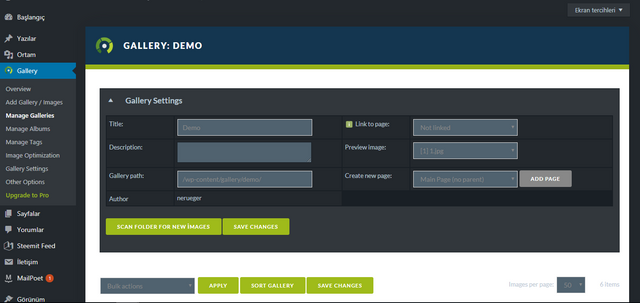
If we click on the Gallery Settings above, we can open our gallery settings. This is where we will determine where to place our gallery.
We need a page here to direct our gallery. We need to create a new page from the pages, select this page from the Link to Page, and click Save Changes. We then click on the edit page we created.
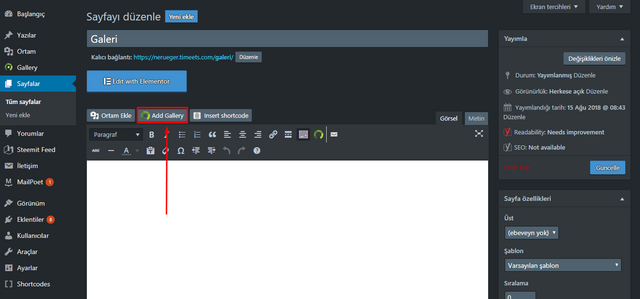
Click on Add Galery. The remaining gallery settings are made in the opened page.
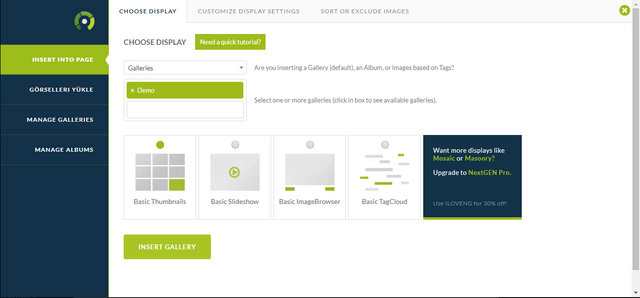
After selecting the gallery we created in the second option, we select the view from below and click on Insert Gallery. We are updating our page. Now our gallery is working.
Now we can place this page in the place that our website wants. Likewise, it is possible to add a gallery to a different page. All you need to do is to go to the page where you want to add the gallery and click on Add Gallery.

trHerkese merhabalar.
Blogumuzun nasıl göründüğü hepimiz için çok önemli. Tasarım okuyucuların blogda uzun süre kalmasına neden oluyor. Böylece içeriklerinizin okunma oranı artar. İlgi çekicilik içerik üreticileri için en önemli şey. Bundan dolayı sürekli bloglarınızın tasarımlarını ilgi çekici kılabilecek eklentiler paylaşıyoruz.
Mesela önceden paylaştığımız Elementor eklentisi ile tüm web sitemiz üzerinde sanki paintte resim çiziyormuş gibi oynayabiliyorduk. Bugün bahsedeceğimiz eklenti Nextgen Gallery sayesinde ise kendimize harika bir galeri oluşturabiliyoruz.
image source and Wordpress page
Eklentiyi yukarıdaki linkten indirdikten sonra Eklentiler kısmından yükleyin. Daha sonra Etkinleştir'e tıklayın. Tıkladıktan hemen sonra "Gallery" başlığı sol taraftaki kullanıcı panelimize otomatik olarak eklenecektir.
Menü altındaki Add Gallery / Images sekmesine tıkladıktan sonra Dosya Ekle seçeneğine tıklanır. İstediğimiz resimleri seçtikten sonra "Gallery title" kısmına galeriye vermek istediğimiz isim yazılır ve Yüklemeyi Başlat tıklanır.
Yükleme tamamlandıktan sonra ise galerimiz aktif hale gelir. Geriye ayarları yapmak kalıyor.
Manage Galleries kısmına tıkladıktan sonra hazırladığımız galeriler karşımıza çıkar. Örnek olarak, az önce oluşturduğum galeri Demo adıyla görünmekte. Galerinin adına tıkladığımızda ise resim ayarlarına ulaşabiliriz.
Alt & Title Text / Description kısmından fotoğraflarınıza isim verebilir, tags kısmından ise teker teker etiket ekleyebilirsiniz. Daha sonra Save Changes'a tıklamanız yeterli. Artık resimleriniz istediğiniz etiketleri ve isimleri taşıyor.
Yukarıdaki Gallery Settings kısmına tıkladığımızda ise galeri ayarlarımızı açabiliyoruz. Galerimizi nereye yerleştireceğimizi belirleyeceğimiz yer burası.
Burada galerimizi yönlendirecek bir sayfaya ihtiyacımız var. Sayfalar kısmından yeni bir sayfa oluşturup, Link to Page kısmından bu sayfayı seçmemiz ve Save Changes'e tıklamamız yeterli. Daha sonra oluşturduğumuz sayfayı düzenle seçeneğine tıklıyoruz.
Add Galery'e tıklanır. Açılan sayfada kalan galeri ayarları yapılır.
İkinci seçenekte oluşturduğumuz galeriyi seçtikten sonra aşağıdan görüntüleme şeklini belirliyoruz ve Insert Gallery'e tıklıyoruz. Sayfamızı güncelliyoruz. Artık galerimiz çalışır durumda.
Artık bu sayfayı web sitemizin istediği yerine yerleştirebiliriz. Aynı şekilde, farklı bir sayfaya da galeri eklememiz mümkün. Yapmanız gereken tek şey galeriyi eklemek istediğiniz sayfaya girip Add Gallery seçeneğine tıklamak.
- Steemit Account: https://steemit.com/@timeets.com
- Discord Channel: https://discord.me/timeets
- Support System: https://timeets.com/support
- E-mail Address: [email protected]

Posted from my blog with SteemPress : https://www.timeets.com/faydali-wordpress-eklentileri-nextgen-gallery-useful-wordpress-add-ons-nextgen-gallery/
Congratulations @timeets.com! You have completed the following achievement on Steemit and have been rewarded with new badge(s) :
Click on the badge to view your Board of Honor.
If you no longer want to receive notifications, reply to this comment with the word
STOPDo not miss the last post from @steemitboard:
SteemitBoard and the Veterans on Steemit - The First Community Badge.