Chandelier DIY Makeover - Mommy DIY
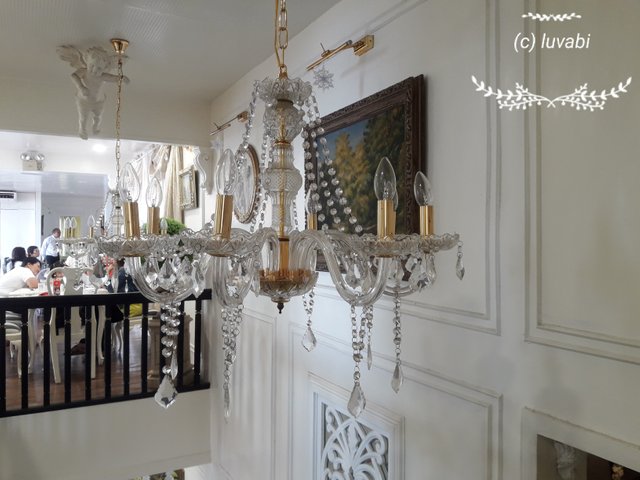
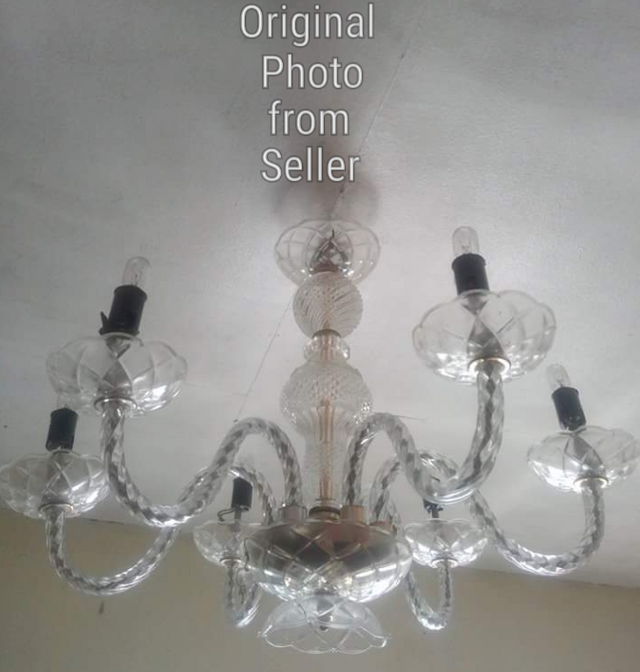
I saw this chandelier online that looked similar to the one I photographed at posh Charito's restaurant in Tagaytay.
The previous owner sold it for cheap maybe because it looked pretty old. I thought I could bring new life to this beauty and in turn, it would bring elegance to my humble living room.
Here is how the inspiration for this DIY looked like, from the interior of Charito Restaurant in Tagaytay:

A Touch of Elegance
How did I do it?
You will need:
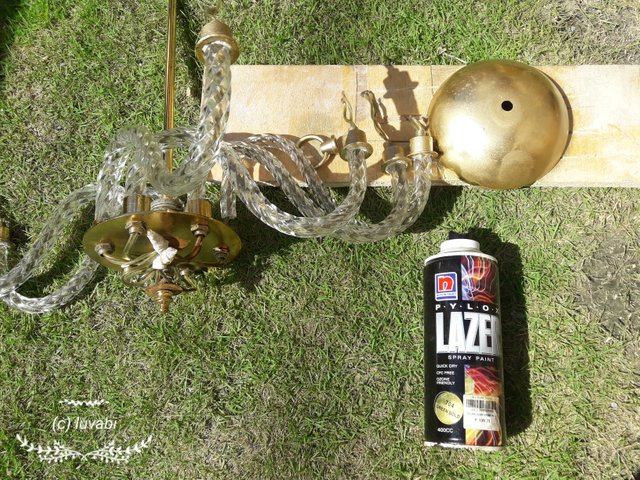
- A can of Matte Gold Spray paint
- 250 pcs Stainless steel wire (the type used for earrings)
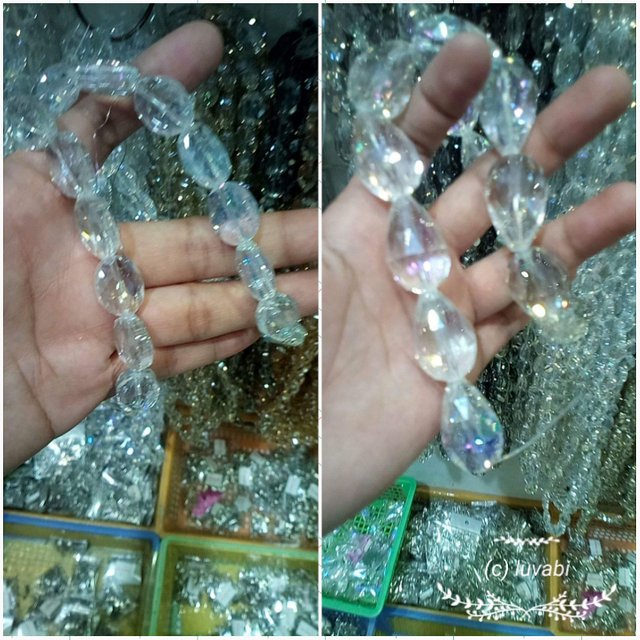
- 12 large Teardrop glass beads from Quiapo
- 200 flat circle glass beads from Quiapo
- Long nose pliers

Quiapo is an assortment of shops that have different semi precious stones and lovely trinkets that rendered us the additional spark to our little project. I had leftover matte gold paint from this DIY Egyptian costume I did for my daughter before so I used only about half a can or less.

Spray paint livened up the old gold and made it come alive, adding color and life to the almost forgotten beauty of this chandelier.
I spray painted the gold parts first, more of the steps are clearer in the video where I share the complete process.
Next, adding the shimmer and sparkle was done with the help of a pair if long nose pliers and metal wire. I couldn't find my long nose pliers that were for making accessories, they are much smaller and lighter.
I figured out how the drop of the chain of beads would look like from the top to each arm. I also thought about how the Teardrop shaped beads would hang from the chandelier and started from there.
I share in the video above, how I completed the hanging of the beads on the chandelier and reattaching the different parts after putting on the decorations.
And here is the final look of our precious project and its unrealized beauty!

What do you think about this DIY project, let us know in the comments!
Also posted on luvabi.com.
Follow me on facebook for regular updates.


Cool project @luvabi. And you make it look easy. I love DIY's, keep 'em comin'!
I don't know if it looks easy, coz the hard part was hanging it from the wall and I didn't do that myself :D
It was a fun project, sure, there are more to come, thanks for checking it out, appreciate it much!
Wow awesome i love it keep it up
Thanks so much, I'll post more soon :)
welcome
It's aaaaaaaaliive!!! You are like Frankenstein, but the lady-type and what you ressurected is a thing. Hehe. ..from a dull and boring antique to a classy and lively decoration. Kudos to that. One question though,how were you able to attach that in your ceiling? It would be heavy I thought.
@greymonolith drilled to the ceiling this large hook that I bought at the hardware store. I was going to hang it from a small chain like the one in Charito but I had to buy at least 3m of gold chain(store minimum).I couldn't think of use for the remaining 2.8m of gold chain. Maybe ill just find an old bicycle chain or something and spray paint it.
Amazing! In a way, it's resource conservation - recycle, reuse. Shinin'...
Shine bright like a diamond... 😉
Yep it was sad if the old owner would just throw it away.
That's a masterpiece! A work of a true artist. Keep it up.
Thanks! I enjoyed making this DIY project,glad you liked it.
Ang astig. 😀
Haha 😊
Salamat!
It looks great, nice job!
Thanks for the nice words!
:) wow! nice job!
Thanks for reading!
cool DIY @luvabi :) looking forward to more posts about DIY projects.