Creating a simple Pixel Art Goblin Sorcerer
Hi everyone!
Steemmonsters is pretty fun, and Pixel Art is pretty fun so it makes sense to combine the two.
I think the characters from the game Tiny Tower from Nimblebit are some of the most simple pixel art dudes, and so we're basically merging all the funnesses into one super fun green guy.
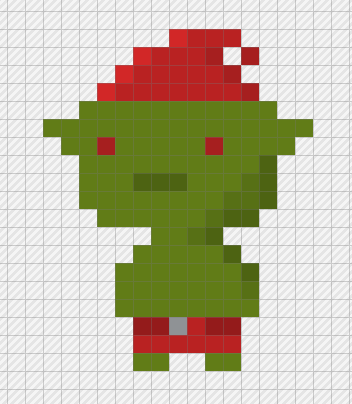
Here is what we're creating :
I'll be using Pyxel Edit but you can totally use any program... most of the kids on /r/PixelArt love Asperite but you can use the free art programs that come with your computer, tablet or phone... or online programs like PixilArt.
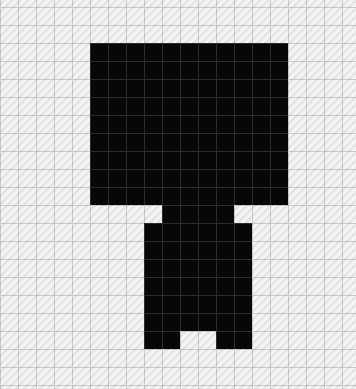
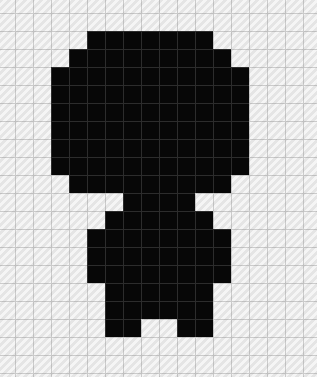
Alright, let's start with the basic shape:

Above, we have a single line 4 block neck separating the absolutely massive 9x11 head and 6x6 body.
You'll notice that the neck and body are not centered to the head. This is on purpose. The neck is inset 4 blocks in from the front of the head, this means that our little character is looking towards the left.
If he was looking towards the right, we'd inset the neck 3 blocks in.
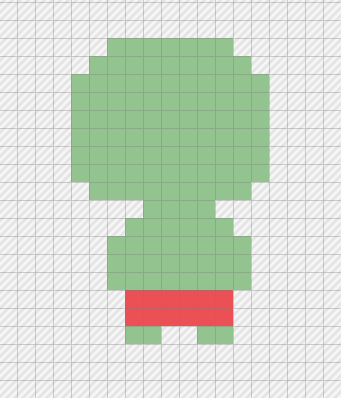
Let's put feet on him. Of the 6 squares at the bottom of the character, use 2 for each foot and 2 to separate them.
Pretty easy so far?
Let's give him some arms that will just be by his side:
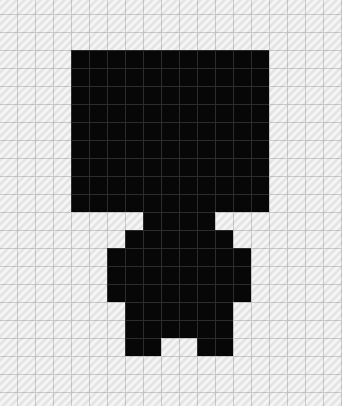
Okay, so he's a little blocky at the moment... let's round out his head a bit.
Pixel art is all about using the least amount of pixels to convey your message, and so a lot of the time it's more about removing pixels than adding them. I probably spend the majority of my time adding, then removing and then adding again, then changing the colour of a single pixel than I do on overall creation. Pixel art is more about attention to detail than raw artistic talent... which I love, it means it's truly open to every one.
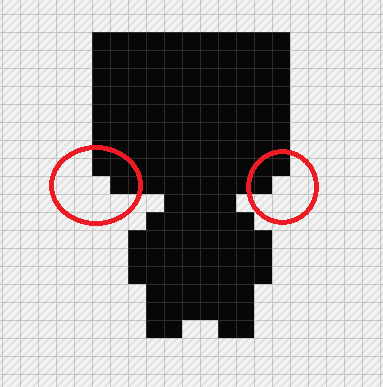
Remove the two pixels at the bottom of the head block... don't worry about the red circles, they're just to show you where to remove the pixels.
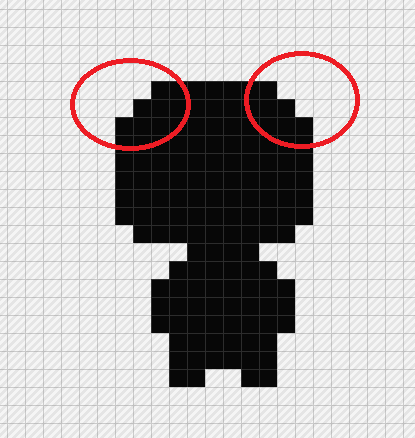
We're actually removing 3 pixels from each side of the top of the head. Take the two corner pixels out, and then each pixel either side... this gives the head a more rounded shape.
Okay, so now we've got our basic template to our Tiny Tower inspired characters:
Obviously, you can create whoever you like... but today I'm interested in translating this little fella to pixel art:
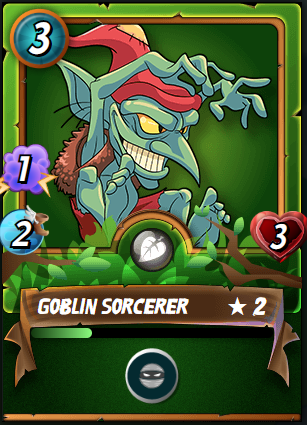
Source
I honestly don't use him myself every often, but I totally love how mischievous he looks on his card. I can totally see him scampering around throwing fireballs.
So he's green, with red shorts and a red hat. Let's go.
I'll use the same green that they've used on the card... which is #93c38e.

It might be a little light. The image on the card is tricky... there are 3 colours for his skin... the yellow highlight #d6da9b, the middle green we've used and the shadow colour #5c9194.
They totally work for the card above, but I'm not sure if I'll like them for our guy... we'll see...
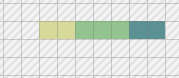
#d6da9b, #93c38e & #5c9194
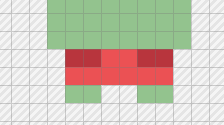
Let's give him shorts using the same red on the card (#eb5154):
Sure, he looks like a zombie wearing a towel, but let's use the darker red on the card (#b8353d) to give him so pockets to make it more pantsy:
Still not super digging these colours, but let's press on.
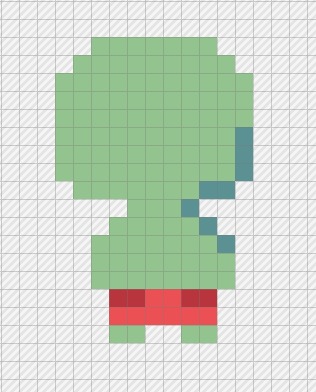
Add in some shadow pixels on the back side (remember he's looking towards the left, so shadow the right side)... I've used the darker shadow colour from our Steemmonsters card... and I just don't think it's working. The change is too dramatic for this pixel art... and I want our Goblin Sorcerer to look more gobliny:
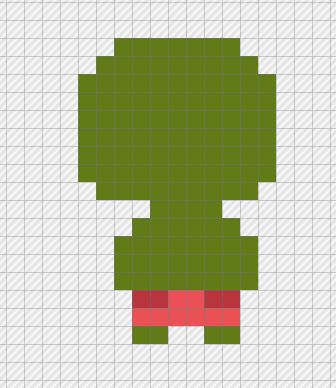
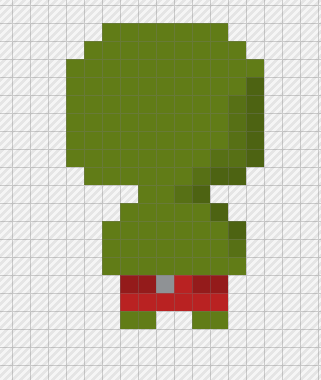
I've used #617c17 for the green now. The shorts look too light in comparison so let's change those up:
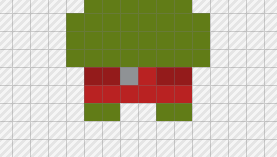
Alright, the shorts are now #b92222, the darker accent pockets are now #941b1b and I've given him a little silver (#8f9295) belt buckle to again, make it more pantsy.
There's a lot to like about Pyxel Edit but the thing I like most is the suggested shading and highlight colours. If you click on the colour palette (by clicking on the colour) you'll see the suggestions:

I like to shadow in two parts.. darkest colour at the furthest point, and a middle colour between the base colour and the darkest colour:
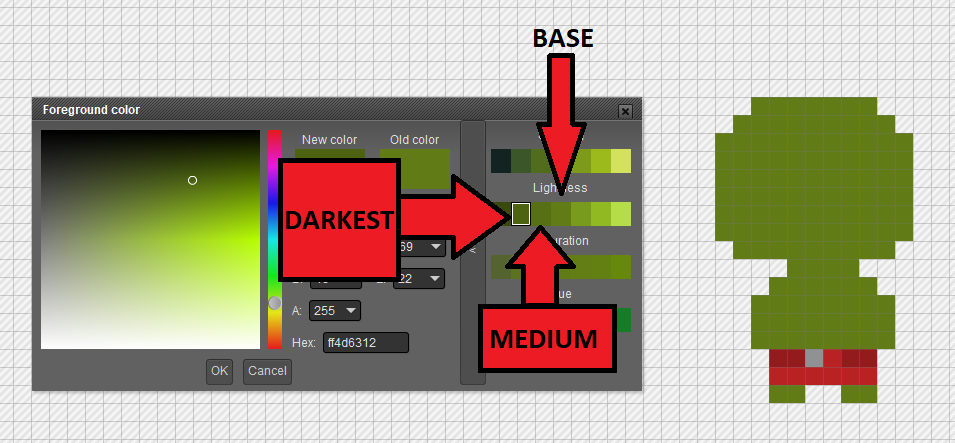
These are totally just my preference to use these suggested colours, you can totally choose whatever you like.

Shading is usually about finding a light source and creating shadows to suggest depth... but in pixel art, it's often used to define the back of a character... since you're so limited. By rights, if you say that your light source is coming from the left-hand side then if the character turns and starts walking to the right, then their face would be in shadow... but pixel art doesn't really do this. If the character turns around, the shadows flip with them so the front and back are clearly defined.
So, shadow the pixels on the right hand side to show our guy is looking left.
I've used the Pyxel Edit suggested colour #f4d6312.
It would be totally fine to leave the shading there, but I'm going to go a step further and use the medium colour #577015 (that Pyxel Edit suggests between our dark #f4d6312 and our base #617c17).

Basically try and choose the pixels between the dark shadow colour and the base colour to help the transition:
Again, how much or little you do is all personal preference.
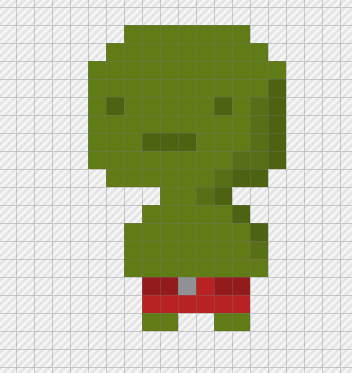
Okay, using our darkest green, let's give this guy a face.
I like to put the mouth 3 squares up from the bottom of the head and 4 squares in from the direction he's looking.
I like a 3 pixel line mouth, I feel that gives the most flexibility for animated talking.
The eyes then go two pixels up, two pixels away from each corner of the mouth, and each eye is one pixel in size.
Looking at our source Steemmonsters card, our guy has green ears too, so let's chuck them on:
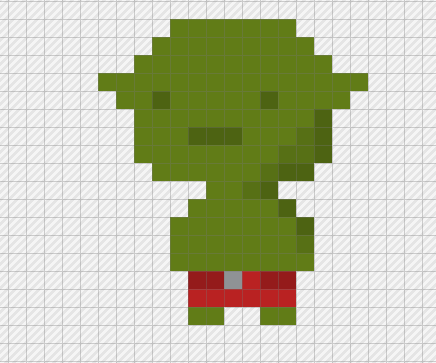
The ears are one pixel for the earlobes and two pixels for the ears. I actually reduced the shading on the right hand side so that it didn't go up past the ear.
He's looking very Yoda-like at the moment, so let's give him his red hat.
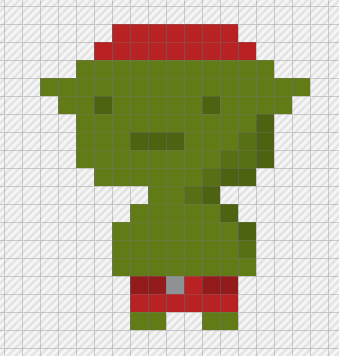
Use the same red as his shorts and then fill in the two top-most lines on his head. Now he looks less Yoda and more first-mate Goblin pirate.
Extend the hat up one more line, keeping the rounded shape:
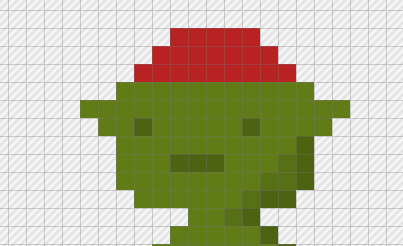
Since the Goblin Sorcerer's hat is huge, we're going to have to add more onto it to give it a floopy look:
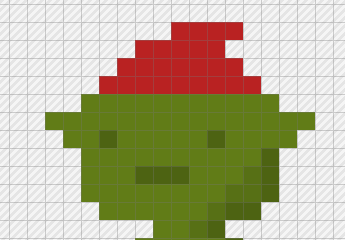
Still not quite there, let's make it look like it's drooped down... even though the source material doesn't do that at all:
Some shading will give it a little more definition.
Since it's at the very top of our character, I'm going to give it some shading and some shadow... so I'm only going to use one shadow colour this time... and will use #a61f1f as suggested by Pyxel Edit:

It's very subtle, but basically I shaded each of the right-most pixels:
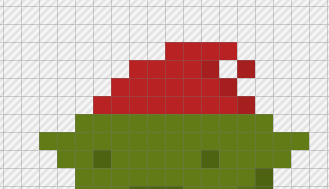
For the highlight, I've chosen the next lightest colour (#d22727 to the right of the base colour, and just clicked on all the left-most pixels on the hat:

So, his eyes look a little lifeless at the moment... our source material Goblin Sorcerer has yellow eyes, but most characters in the Tiny Tower game have black eyes:
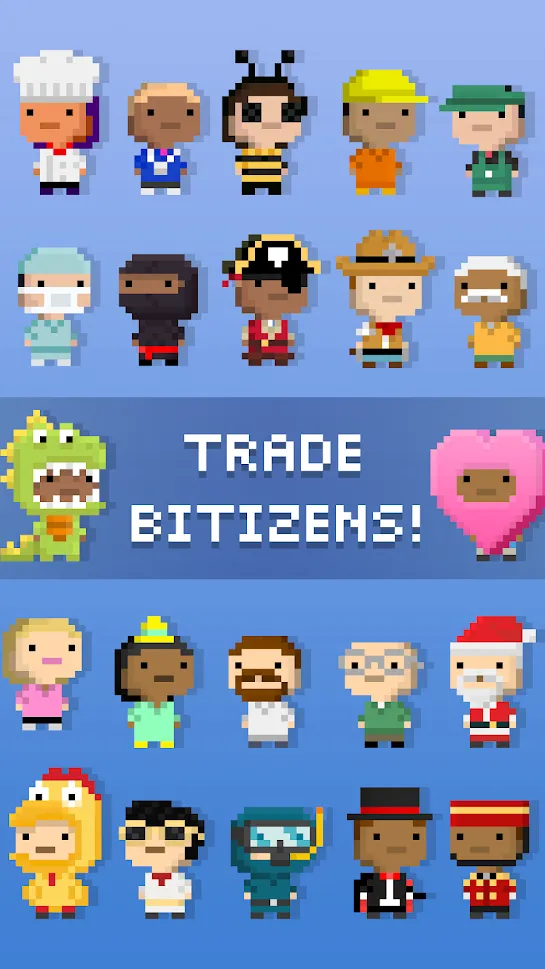
Source
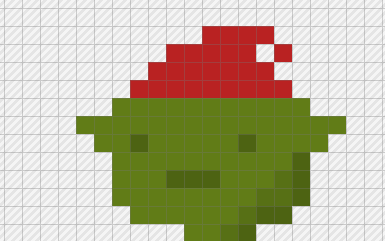
I'm going to try red eyes to make him that little bit more evil:
I tried yellow eyes but that made him look undead.
I've now added in a couple more shaded pixels... one above the ear on the right hand side, and next to his arm. You'll notice in the Tiny Tower image above, the characters mostly have shirts and hands that are different colours. Since our guy is a never-nude, I wanted to shade that right-side to define his arm.
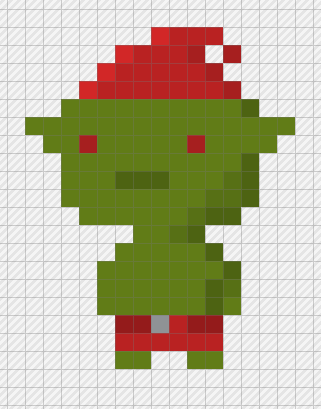
Okay, so this is the actual size of our pixel art:
In Pyxel Edit though, it's easy enough to scale up when you export it to an image:
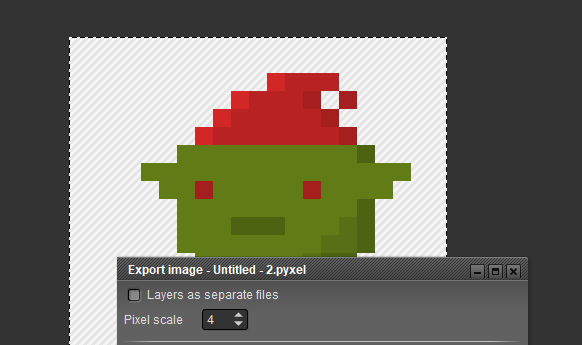
The scale up makes things really easy, it basically replaces each one pixel with whatever number you set it to.
| 4 pixel scale | 8 pixel scale | 12 pixel scale |
|---|---|---|
This is one of those things that is way easier in Pyxel Edit than the way more expensive Photoshop.
So this tutorial turned out way longer than I expected... I was intending to animate him and have him run around shooting fireballs, but I think that might require a whole other post.
I know he's probably not super exciting... but we've got to start somewhere.
Let me know if you have any questions or anything specific you'd like me to tackle...
Thanks!
fantastic work dude.
Thank you, that's very kind of you to say.
This tutorial is pretty amazing and detailed :-D I'm going to keep it around in my bookmarks in case I need to do pixel art!
You got a 32.78% upvote from @ocdb courtesy of @ninjavideo! :)
@ocdb is a non-profit bidbot for whitelisted Steemians, current max bid is 20 SBD and the equivalent amount in STEEM.
Check our website https://thegoodwhales.io/ for the whitelist, queue and delegation info. Join our Discord channel for more information.
If you like what @ocd does, consider voting for ocd-witness through SteemConnect or on the Steemit Witnesses page. :)
Hi @ninjavideo!
Your post was upvoted by @steem-ua, new Steem dApp, using UserAuthority for algorithmic post curation!
Your UA account score is currently 3.420 which ranks you at #6623 across all Steem accounts.
Your rank has improved 197 places in the last three days (old rank 6820).
In our last Algorithmic Curation Round, consisting of 208 contributions, your post is ranked at #41.
Evaluation of your UA score:
Feel free to join our @steem-ua Discord server
Your post was included in @wiseagent's entry to the @c-squared / @c-cubed Scavenger Hunt Contest, and has been upvoted and resteemed by the @c-squared community account after manual review.
@c-squared runs a community witness. Please consider using one of your witness votes on us here