How to create table in Microsoft Office Word
At this time I will explain or share about How to create table in Microsoft Office Word, following steps below
1. Create Table
- Click the insert menu on ribbon menu
- Click the table icon and select rows and columns that you want
- Our Table is Ready
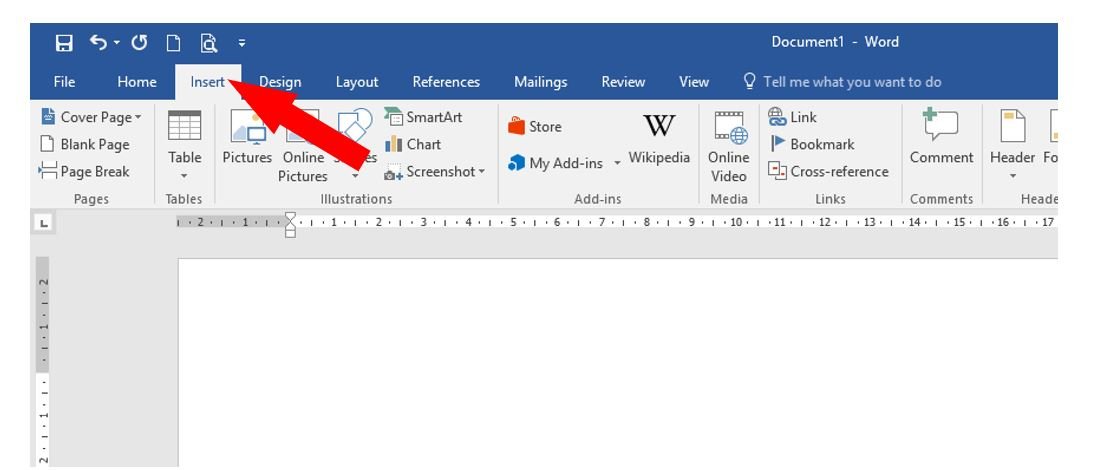
Image By: Liya

Image By: Liya
2. Delete Row and columns
Delete Row
- Select or put cursor on the Row that you want to delete
- Right click and select Delete Cell
- Select Delete Entire Row
- Click OK and Rows Deleted

Image By: Liya
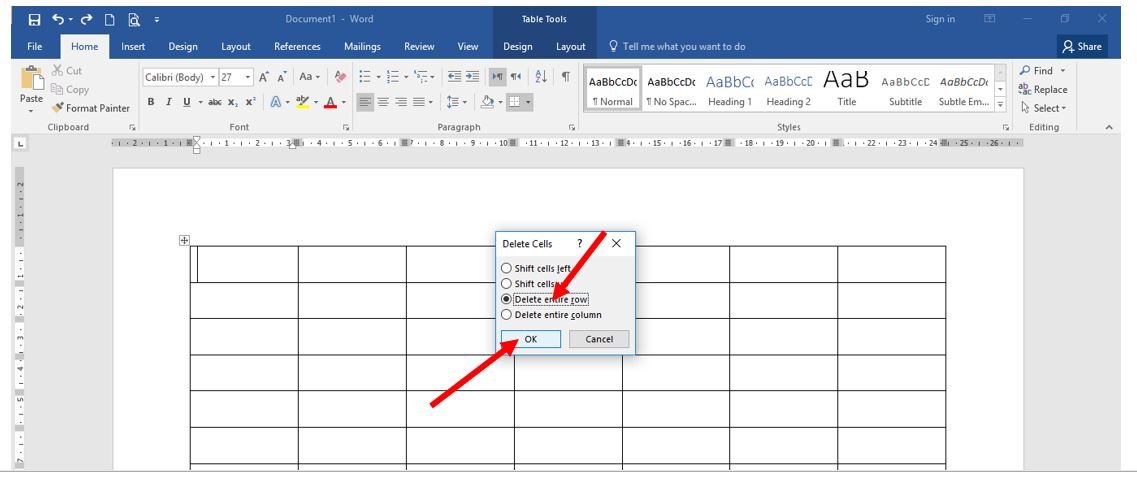
Image By: Liya
Delete Columns
- Select or put cursor on the Columns that you want to delete
- Right click and select Delete Cell
- Select Delete Entire Columns
- Click OK and Columns Deleted
Image By: Liya

Image By: Liya
3. Insert Rows and Columns
Insert Rows
- Select or put cursor on the Row that you want to add row
- Right click and select Insert
- Select Insert Row Above (Add Row on top) or Select Insert Row Below (Add Row below)
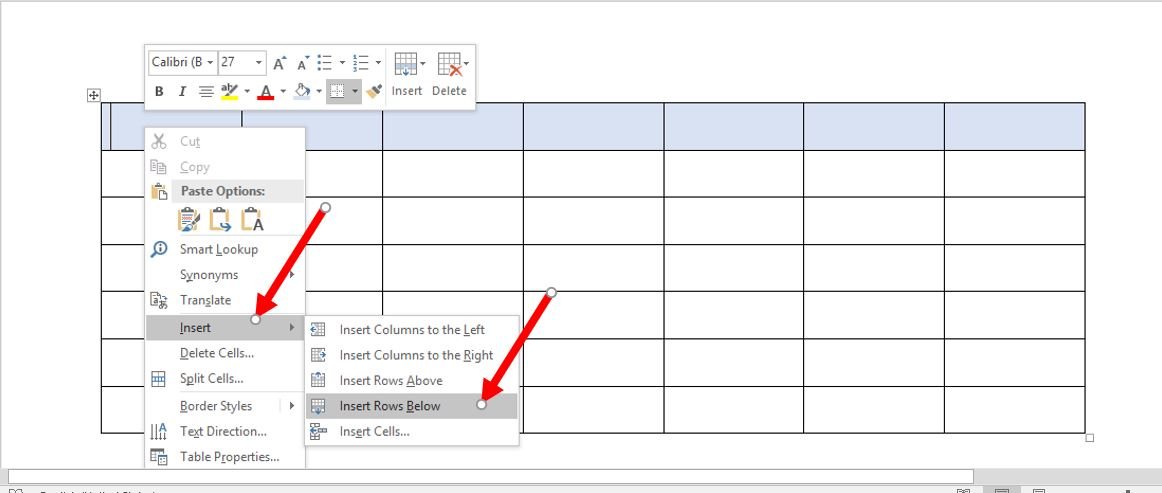
Image By: Liya
Insert Columns
- Select or put cursor on the Colums that you want to add columns
- Right click and select Insert
- Select Insert Columns Left Or Insert Columns Right

Image By: Liya
Thanks to visiting my blog, if you liked this article, don't forget to Upvote, resteem, comment, and Follow Me @liya
Nice post liya, always about education, very helpful for me. Thnks @liya
Congratulations @liya! You received a personal award!
You can view your badges on your Steem Board and compare to others on the Steem Ranking
Do not miss the last post from @steemitboard:
Vote for @Steemitboard as a witness to get one more award and increased upvotes!