🐞 Ladybug Hat to crochet 🐞 ✏️ ✨ Step by Step ✨
Greetings to all. After a long time I returned to knit, so I took the opportunity to share and teach them how to make a woven Hat with a design of Ladybug for babies with an age between 1 - 3 months. I hope you enjoy this post and of course, the next ones, inviting you to weave with a lot of patience this hat for the little ones of the house.
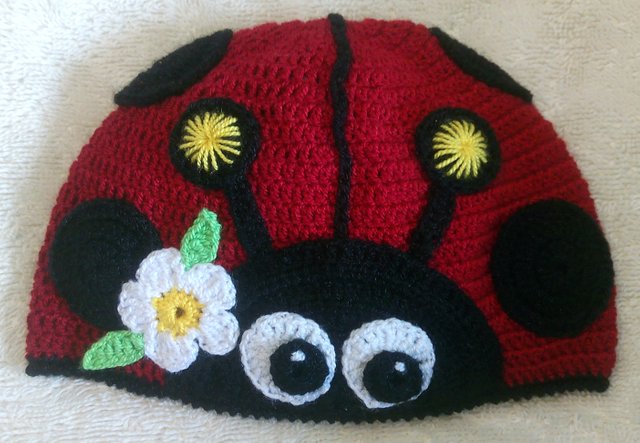
✨ Steps for the elaboration of the Ladybug Hat ✨
(For baby of 1 - 3 months)
- With red thread, tile a four-chain ring and continue as follows:
1st round: knit 16 high points (pillars) inside the 4 chain ring.
2nd round: knit 2 high points for each pillar of the previous round.
3rd round: knit two high points together at the same point and one individual, continue like this until the end of the round.
4th round: knit two pillars together and then three individual ones.
5th round: one high point for each point of the previous round.
6th round: knit 10 individual high points and two high points together, repeat this way throughout the entire round.
7th round: similar to the previous one.
8th round: weave 8 individual pillars and two pillars together, repeat this in the whole round.
9th round: knit 10 individual pillars and two pillars together, repeat like this in the whole round.
10th round: 10 pillars and two pillars together, repeat this throughout the round.
11th round: work at high points and repeat this in the following laps until reaching a total length of the 12.5 cm hat (measured from the tip of the crown to the final edge thereof) and a circumference of 35 cm.
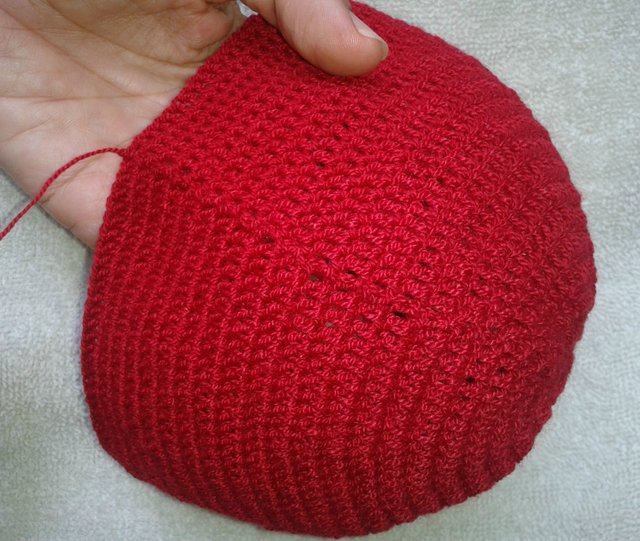
"Hat knitted to high points". Photo captured with camera with T6 pro by @arletv
- With black thread, tile a row of approximately 70 chains that will divide the body of the ladybug into two equal parts. Stitch the row of chains to the hat. Use the same knitting yarn so that the seams are not visible.
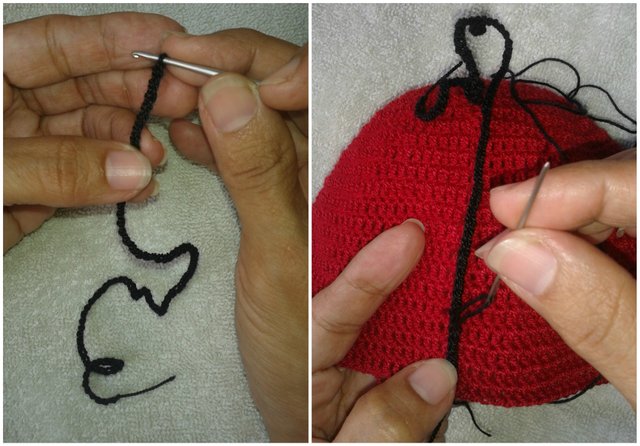
"Elaboration of chain of stitches and sewing of this one to the hat". Photos captured with camera thl T6 pro by @arletv.
- With black thread, tile a half moon (face of the ladybug) as follows: on a ring of four chains, tile 10 pillars, turn the work. On the newly developed pillars, tile a turn to midpoints, turn the work. At each half point of the previous round, tile two high points together and a single high point, continue this way until completing the half moon remembering to make the last round only at individual high points, without any increase. Sew the half moon (black) at Body of the ladybug using the same knitting yarn.
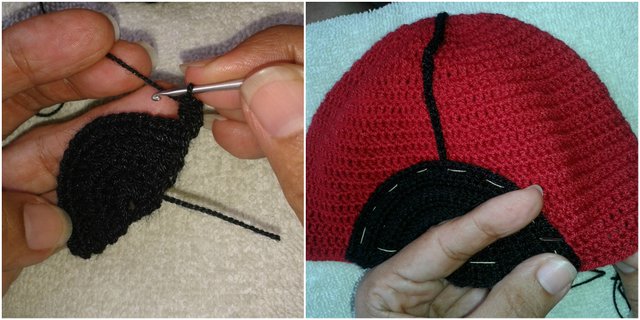
"Elaboration of the face of the ladybug and sewing of it to the hat". Photos captured with camera thl T6 pro by @arletv
- For the spots of the ladybug, make a ring of 4 chainstones and inside it work 14 pillars; then tiles 28 pillars, two on each pillar of the previous turn. Finish with a round to half points working two together and two singles. Make 6 spots (black circles) of the same size.
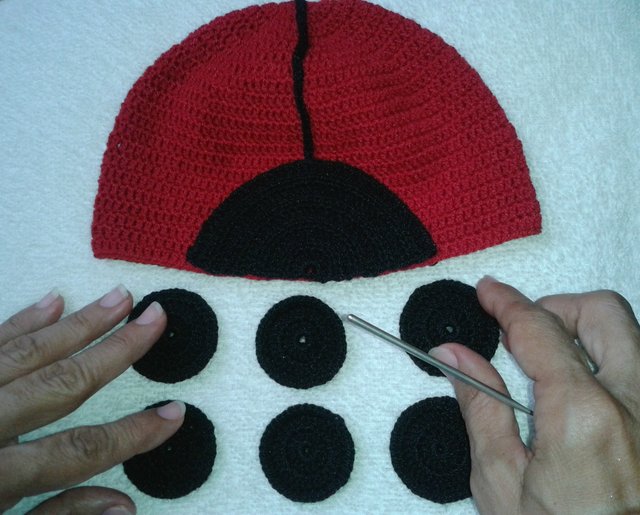
"View of the six spots of the Ladybug". Photos captured with camera thl T6 pro by @arletv.
- To make the antennas of the ladybug, with black thread, weave a ring of 4 chainstones and inside it work 16 pillars; finish with a return to half points working two half points together and two individuals. On the other hand, tile a row of 8 chainstones and on each of them tiles a half point. To decorate the circles of the antennas, edge lines with yellow knitting yarn. Sew the two parts of the antennae to the ladybird cap.
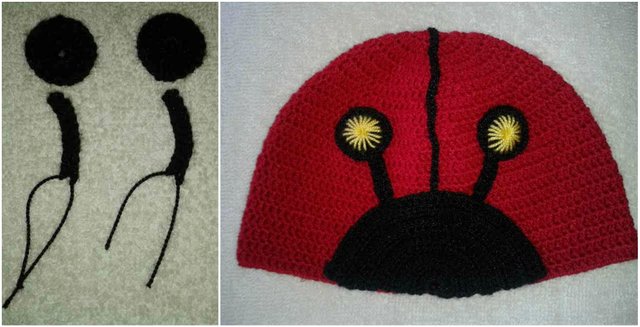
"Antennas and cap with antennae stitched to it". Photos captured with camera thl T6 pro by @arletv
- To make the eyes of the ladybug, tile with white thread a ring of 4 chains and within this work 19 double pillars. With black thread, make a ring of 4 chains and within this work 18 pillars. For the brightness of the eyes, edge on each black circle a small spot with white thread. Next, sew the two circles of the eyes over the face of the ladybug.
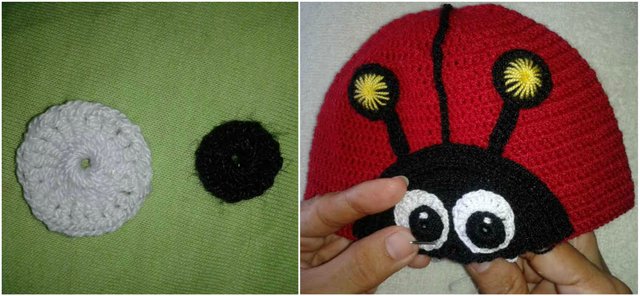
"Parts of the eyes of the ladybug and sewing these to the hat". Photos captured with camera thl T6 pro by @arletv.
- Sew the six elaborate black spots (Step 4) on the back and front sides of the ladybug.
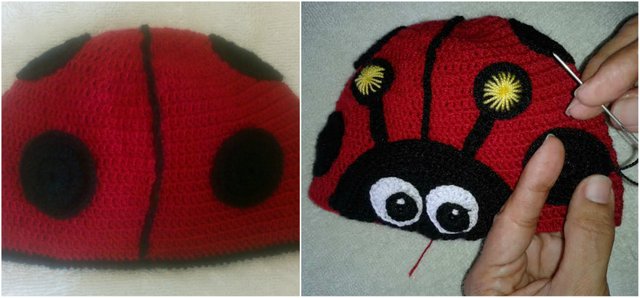
"Ladybird hat showing back and front parts". Photos captured with camera thl T6 pro by @arletv.
- With black thread, finish the edge of the ladybug with a return to low points and a return to point crab. If you want to place a flower, tile a 4 chain ring with white thread and inside it work 5 petals formed by: 1 pillar, 4 double pillars and another pillar. On the other hand, tile 2 leaves with green thread as follows: 6 chains, 2 chains to climb, 1 medium point, 1 pillar, 2 double pillars, 1 pillar and 1 medium point. Tie the ends of the threads. Sew the leaves and the flower to the hat.
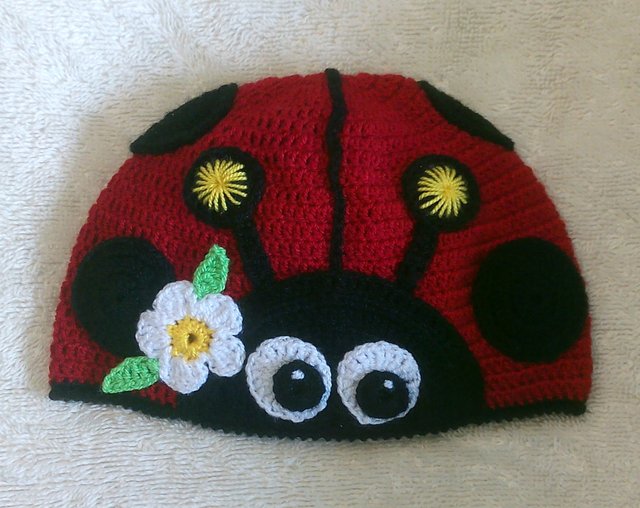
"Mariquita hat finished". Photos captured with camera thl T6 pro by @arletv.
Thank you very much for reading my post. If you liked it, I hope you can support me with a comment, suggestion, retest or your valuable vote. It would help me a lot. Without further ado, I say goodbye and wish you a good day.


Dear Artzonian, thanks for using the #ArtzOne hashtag. Your work is valuable to the @ArtzOne community. Quote of the week: Art, freedom and creativity will change society faster than politics. -Victor Pinchuk
Hello @arletv, thank you for sharing this creative work! We just stopped by to say that you've been upvoted by the @creativecrypto magazine. The Creative Crypto is all about art on the blockchain and learning from creatives like you. Looking forward to crossing paths again soon. Steem on!
Congratulations! This post has been upvoted from the communal account, @minnowsupport, by Kamilo.sin.k from the Minnow Support Project. It's a witness project run by aggroed, ausbitbank, teamsteem, theprophet0, someguy123, neoxian, followbtcnews, and netuoso. The goal is to help Steemit grow by supporting Minnows. Please find us at the Peace, Abundance, and Liberty Network (PALnet) Discord Channel. It's a completely public and open space to all members of the Steemit community who voluntarily choose to be there.
If you would like to delegate to the Minnow Support Project you can do so by clicking on the following links: 50SP, 100SP, 250SP, 500SP, 1000SP, 5000SP.
Be sure to leave at least 50SP undelegated on your account.
You've received an upvote from @slothicorn! Click Here to Read our New Curation Policy And Updated Rules
(@ghulammujtaba)