Lessons learned while 3D Printing
I've had a 3D printer for almost a year now. They're a ton of fun, and capable of a bunch of awesome stuff. Admittedly, before I bought mine, I was really on the fence about what I'd do with it, and now that I have one, I'm always looking for new cool things to print. If you're on the fence about buying a 3D printer, this post is for you! It's got details about what I learned, mistakes I made, and what to do to avoid making the same mistakes I did. Note: All of the links to items on Amazon are affiliate links. Just so you're aware.
When I started out, I didn't want to dive in too far. I wanted a simple option, something a little more plug and play, and less tinkering. My first printer was a Monoprice Maker Select Mini V2. I went with it at the recommendation of the local 3D printing guy at Micro Center because of it's ease of use. You literally pull it out of the package, and you can start printing right away. No assembly needed, no modifications required, it's literally a plug and play system.
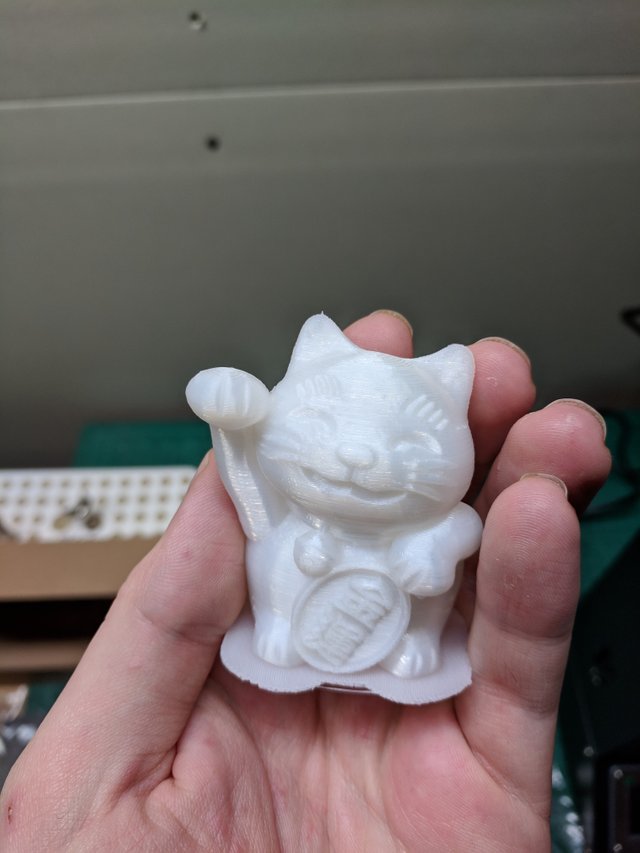
The MicroSD card includes a print for a Maneki Neko, and they give you enough filament to make it. It's a good way to start out, and it's a cute little print, too! If you want to find new things to print, your best bet is to go to Thingiverse and go explore the things people have made. I found a few items that caught my attention. These were actually the first couple big projects I did:
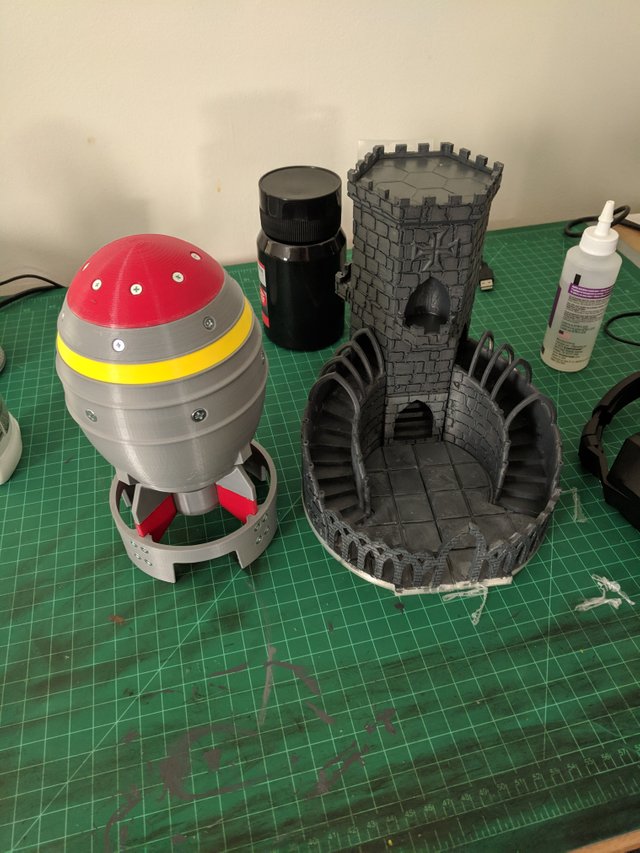
The mini nuke is hollow on the inside, and the top unscrews. I have it at work, holding a bunch of Gobstoppers from halloween. It does the job quite nicely! The castle was not actually gray when I printed it, I used uncolored filament and then painted it with acrylic paint on stream. Speaking of, you should totally follow me on vimm.. I need to do more creative schtuff on stream again... Anyways! My early projects caused me to realize something: pulling prints off the print bed can be a bit tricky! Sometimes, they don't want to let go! I wound up grabbing a putty knife and putting a bit of an edge into it. I could use that to wedge under the print. At least, until I ripped off the build surface. That's when I learned that those are meant to be replaced, and that Buildtak is a wonderful thing! I would cut one of these sheets into 4 pieces, and be just fine.
The buildtak wasn't the only thing to catch me by surprise on the Monoprice. They had this tape heat shield around the print block, and it failed in the middle of a print. I came home to a big pile of spaghetti on the print bed!
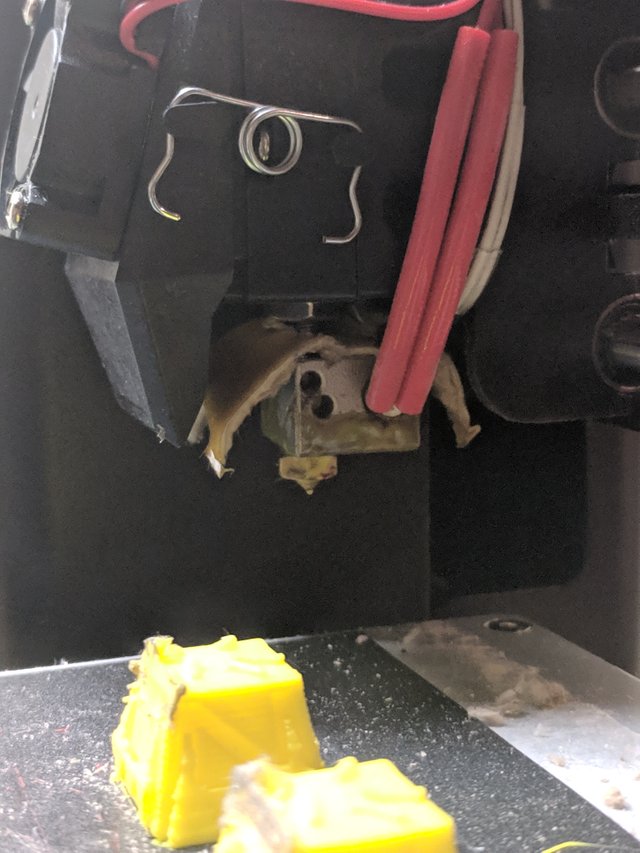
I thought I was in huge trouble with that gone, but it turns out that those are easily replaced. There are silicone boots that go over the heat block, but they're not super necessary to print. I don't think I ever replaced it...
I wound up breaking my Monoprice a few months after I bought it. The print bed moves forward and back on the Y-axis when printing. Remember that putty knife I was using? Well, I eventually started adding a mallet and some percussive maintenance to the bugger. Particularly when it came to obstinate prints. I had moved the print bed as far as it would go on the Y-axis and was hammering on the same axis. The gear that attached the motor to the print bed snapped clean off. I felt really, really stupid after that. Herp a derp...
After talking with a couple co-workers, including @scooter1010, I wound up buying a Creality Ender 3 Pro. It was a significant upgrade in print volume, meaning I could make bigger prints. It's a good printer, but @scooter1010 was right in that I needed to upgrade it right out the gate. The Extruder, Nozzles, and Leveling Bed Springs all need to be replaced pretty much right out the gate. It solves so many headaches down the line to just get it out of the way early. I didn't do the springs and nozzle right away, and I lost several prints as a result.
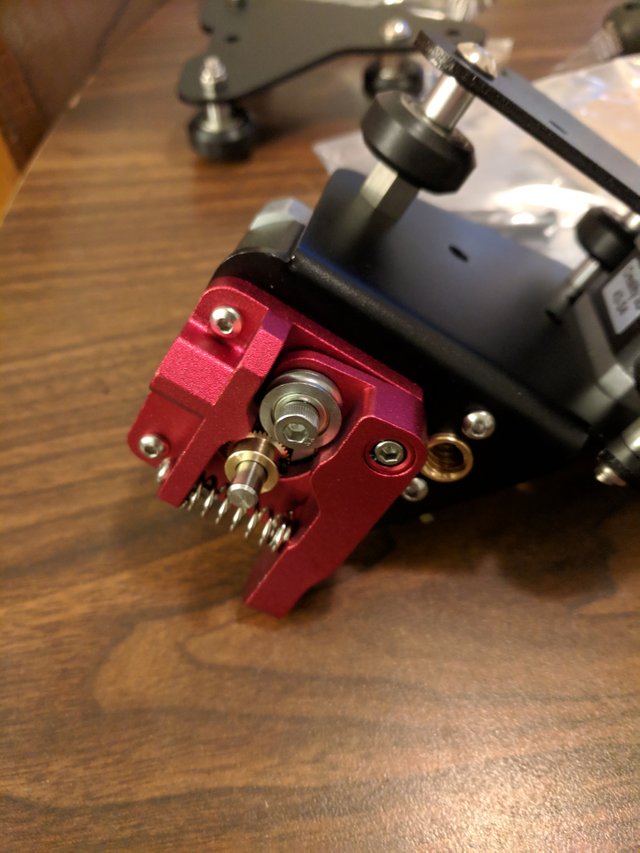
Also, assembly required on the Ender 3. You gotta put this one together. It was a fun evening project after work, sure. But it's something to be aware of when buying an Ender 3. I also sprung for the magnetic print bed, mainly because of my experience dealing with the BuildTak on the Monoprice. If I can remove part of the print bed and peel off the print, it makes things much easier!
I'm pointing this picture out because supports are a good thing for certain prints. This one is definitely one of 'em!
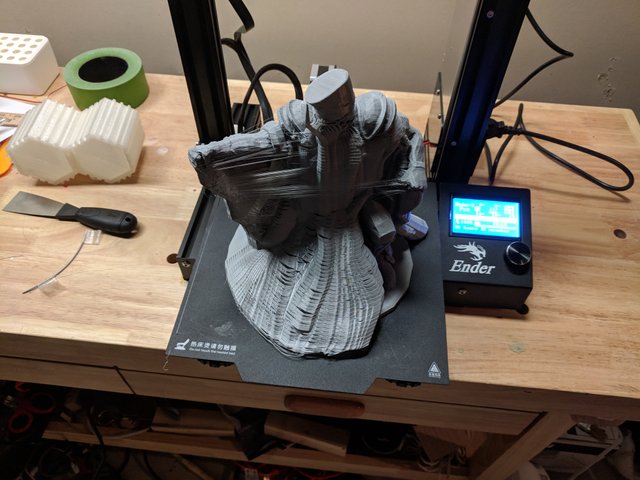
One of the problems with 3D printing is that everything has to be connected to the print bed in some way, shape, or form. So if you're printing something and it's got parts that stick out from the main part of the print, you'll need to add supports to the print. These will break away after printing is done, leaving you with the final print. In this case, the print achieved desired results:
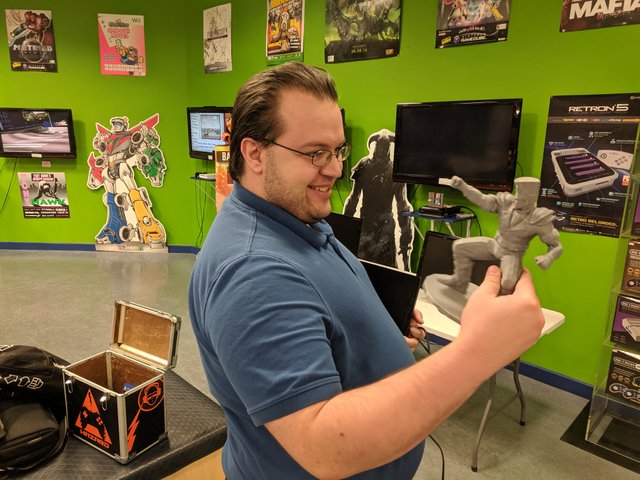
This statue of Paul Phoenix was a belated birthday gift to my buddy K0LDX. He mains Paul in Tekken, and I knew I had to print this for him. He's an artsy kind of guy, so I gave him paints and brushes with the statue so he could paint it. No idea if he did, but at least I was looking out for him!
One other thing that I've run into is probably geographic more than anything, but my house is usually pretty cool. My basement, where I print, is usually around 18°C. My print bed is usually around 65° and the PLA filament I use is usually printing around 205°. I'm fairly certain the sudden cold is causing this problem:
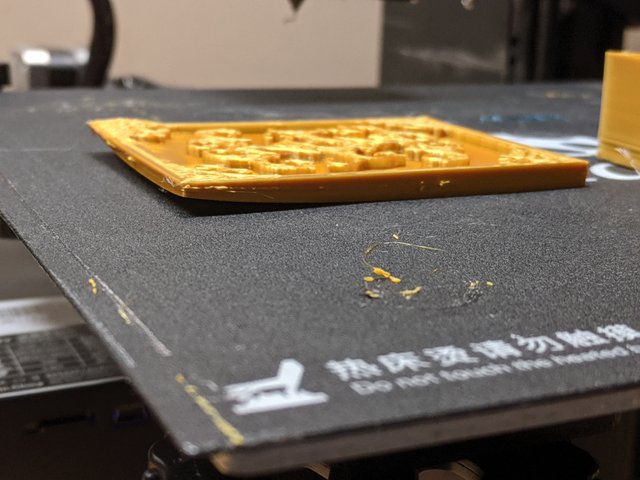
Note that I have not removed this print from the bed. Part of it is still attached, and yet the bottom layers are peeling up. I think this is due to the size of the print coupled with sudden shrinking from the upper layers causing contraction. It's certainly possible! If you're in a colder climate like myself, you may want to consider building or purchasing a print enclosure. There's several designs on Thingiverse for a modified IKEA Lack table with acrylic side panels to keep the air in the print space warmer. It might help. I've noticed that this doesn't happen with smaller prints, lending credence to the theory that the higher levels are causing more contraction.
Nowadays, I'm making rings and jewelry. I put my avatar onto a signet, even!
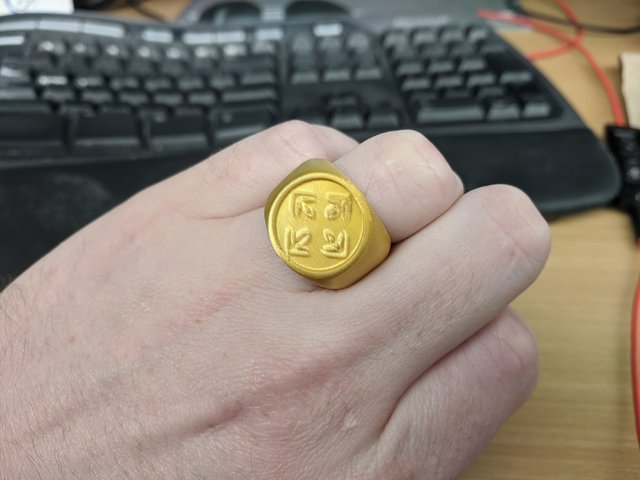
I'd love to figure out metal casting from 3D prints, that's what's been eluding me lately. I really just need to break down and buy some actual investment plaster and be done with it. But that's neither here nor there, you know?
As for other tips, things I've learned, here's a quick breakdown:
Clean the print surface
Use a little bit of rubbing alcohol to clean up your print bed. It'll remove any oils and dirt you leave behind by touching the print bed. Just wipe it off with a paper towel or something
Prints will fail, be prepared to iterate
You will make mistakes, you will throw out half-printed items because you screwed up, don't get too worked up over it.
Go easy on the infill
Save your filament, just add a few extra layers to the walls and reduce the amount you waste filling a void that doesn't need to be filled. There are always obvious exceptions, but you get the idea.
Start simple, and work your way up
Don't go out and make a super complex multi-part print right out the gate. If you are going to do something complex, make sure it's within your skill set. The dice tower (that castle up above) was done in multiple parts, but they were easy to identify which parts go where and how many should be involved. And they're all held together with magnets, which is AWESOME!!!
Remix other people's ideas
One of the neat things about Thingiverse is that people are encouraged to take items that people make, and remix them, change them, and iterate. All of my designs that I've uploaded have been modifications of designs other people have made. Modifying the designs that others have made is a good way to learn how to start working in whatever tools you decide to use. Windows 10 has a surprisingly robust 3D Builder app in the app store. I use that and TinkerCAD to make a lot of my models. Other people use Blender, zBrush, SketchUP, or other applications. There's no one right way to do anything in the 3D printing space, just find what works for you and go with it.
Not all filaments are the same
When you're looking at filament printers, you'll see PLA, PETG, ABS, PVA, and a whole bunch of other types. Most 3D printing uses PLA or PETG. They're the most common, cheapest, and easiest to work with. Different brands of filament will also behave differently. Some might be better for prototyping, while others might be better for high quality prints that you would sell or use for miniatures games. You'll need to experiment to find the brands that work best for you. Personally, I like the Inland PLA+ from Micro Center for general purpose printing. It's not super high end, but it's inexpensive and it works really really well for what I want it to do. There are other times I prefer using the TTYT Silk PLA, because I get better fine detail out of it. It's also significantly more expensive, so I don't use it nearly as often.
If you don't know how to do something, check YouTube
When it comes to 3D printer maintenance, there's a fair amount that you will need to do. It's not easy, and it can get a bit dicey if you don't know what you're doing. For example, you need to heat up the nozzle before replacing it. If you didn't know that, you'd have yourself a really bad time later. It doesn't end well. There's umpteen maintenance guides on Youtube, with everything you'll need to know. Also, a couple channels worth following:
- 3D Printing Nerd: He does reviews, tutorials, and general information about 3D printing. Good guy, informative, and entertaining.
- Thomas Sanladerer: He gets a bit more technical, but he's a wealth of information and science-y shit. Good guy, too!
- The Maker's Muse: These guys also spend a lot of time doing cool stuff with their 3D Printers, but they also help new folks getting started. Good wealth of information here, too!
And with that, I think I should probably wrap this up. Is it worth getting a 3D printer? I think so. They're fun, you can make lots of cool shit, and it's fun to hold something you designed. Should you do it? That's up to you!
Hello Hello!
The technology is incredible, we are advancing in a sensational way and people do what they like, I am delighted with your work, it is gold for me.
Greetings from Venezuela :)
hi dear @ddrfr33k, you wrote a nice informative post, it's incredible that you can print in 3D! I'm very curious to see one in action, but for now I'm not going to buy it yet. but tell me, is the printing material very expensive? congratulations on your curie rating :-)) all the best for you
The printing material itself is not expensive. The Inland PLA+ that I mentioned in the post sells for $18USD/kg, which is very, very reasonable. That print of Paul Phoenix only used about 350g, and it's about 190mm tall.
oh very well, i thought much more expensive! thank you for the reply
Oh very well, i
Thought much more expensive! thank
You for the reply
- road2horizon
I'm a bot. I detect haiku.
I have a 3d printer as well! I was making soap stamps with it! It was really fun to do. Do you have any suggestions on how to print a boat that floats? Or something fun for a two year old boy to play with?
The hard part about a toddler like that is that everything needs to be 40x40x40mm or larger so they don't choke. But to your question about a boat...I believe PLA is naturally very buoyant, so a boat should be feasible. You might need to add thinner walls to the print with a little bit of infill for stability, but if the print is modeled right, it should be water tight...
I would start with a wide, flat bottomed boat. Something that would be easy to model and print. Actually, check Thingiverse. I bet someone's already done it.
I'll try that out! There are a few creeks near where I live so I bet it would be fun to try a boat out there!
Be sure to let me know how it goes. Actually, make a post about it here on Steem! You ping me, I'll upvote it.
Posted using Partiko Android
Hi ddrfr33k,
Visit curiesteem.com or join the Curie Discord community to learn more.
This post was shared in the Curation Collective Discord community for curators, and upvoted and resteemed by the @c-squared community account.
If you are a community leader and/or contest organizer, please join the Discord and let us know you if you would like to promote the posting of your community or contest.
@c-squared runs a community witness. Please consider using one of your witness votes on us here
wow that beautiful 3D work. Besides that you have the tools and technology you also have talent and creativity! There is a conjunction of aspects in your favor. It has been a great pleasure to read this publication. Cheers @ddrfr33k
To be honest, I haven't really made very many items of my own design. I usually remix designs made by other people. I don't quite have the skills to do the really cool stuff.
Posted using Partiko Android
than! Yes you have a lot of talent. I perceive it. Maybe you have some fear but grab your pencil and you will see something wonderful you will create
Thanks for the vote of confidence...