Simple cutting technique in Photoshop Using the Pen Tool and How I Use Photoshop To Edit My Clients Work (PART ONE)
Hey guys, some of you know that I am also a graphic designer. I use Photoshop and Adobe Illustrator.
I think i am kinda good at what I do.
Anyway, I thought I should just share a simple tutorial on how I work out my magic.
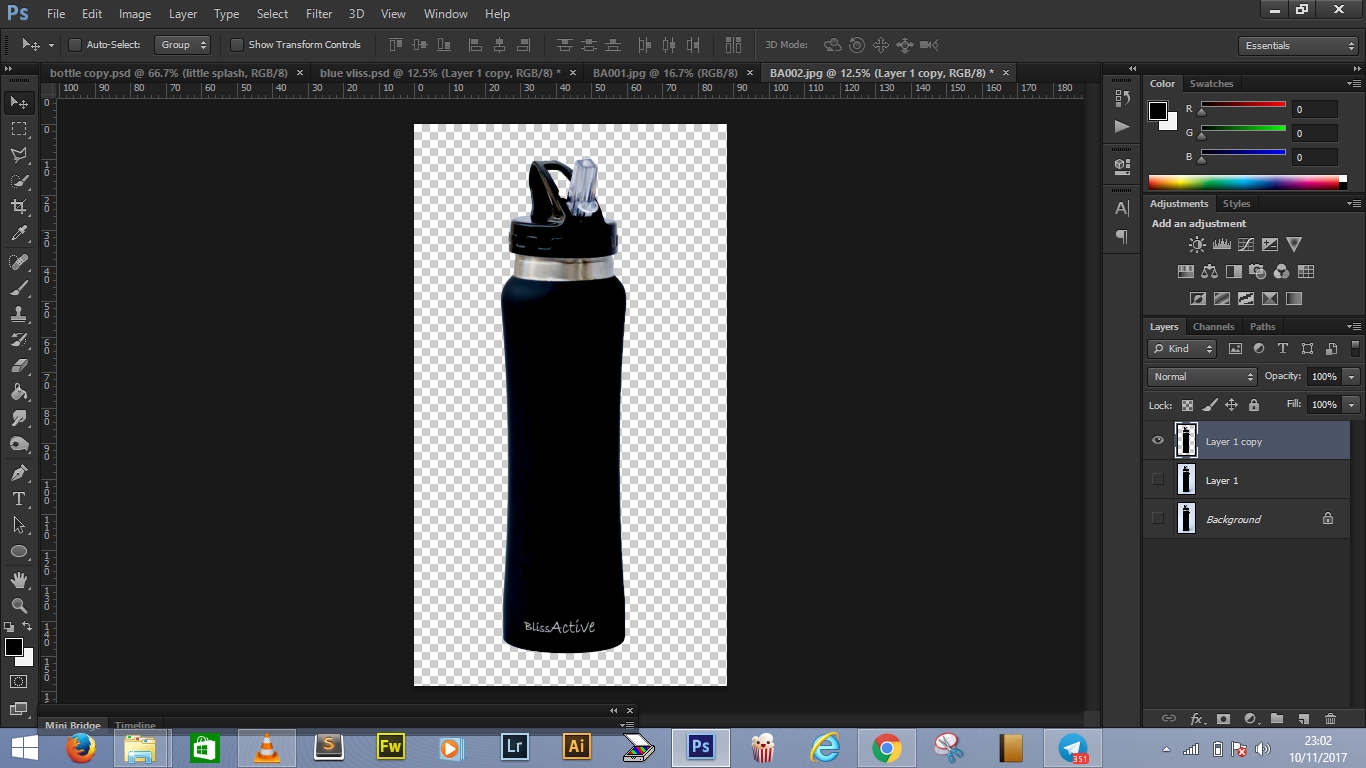
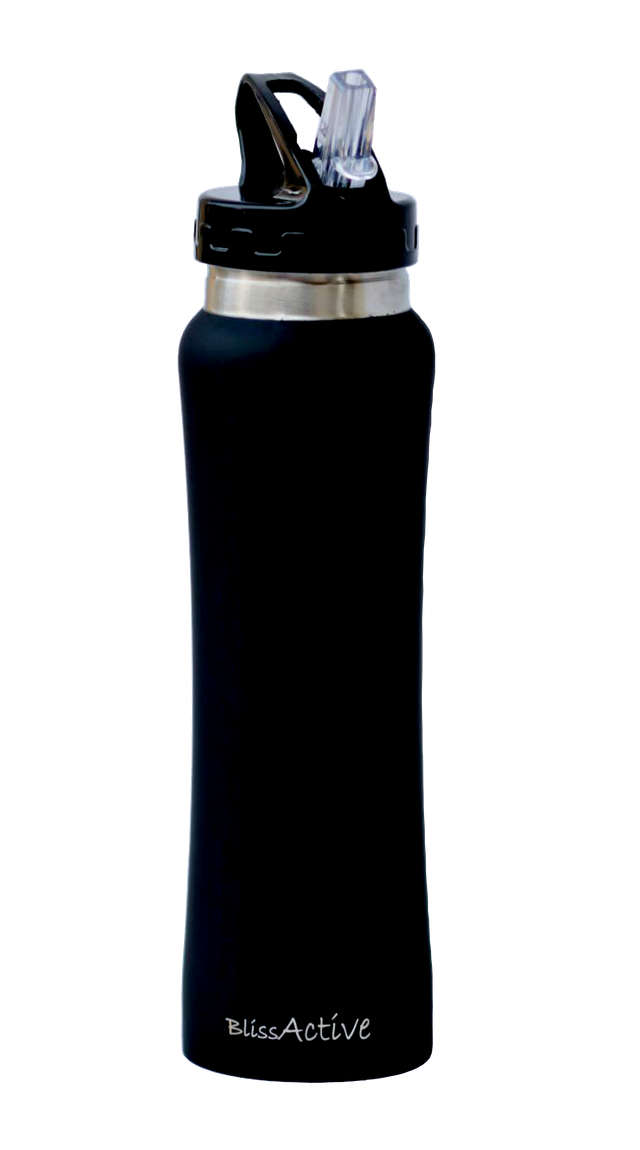
First, let me share the finished work and a link to where you can purchase the item if you are interested
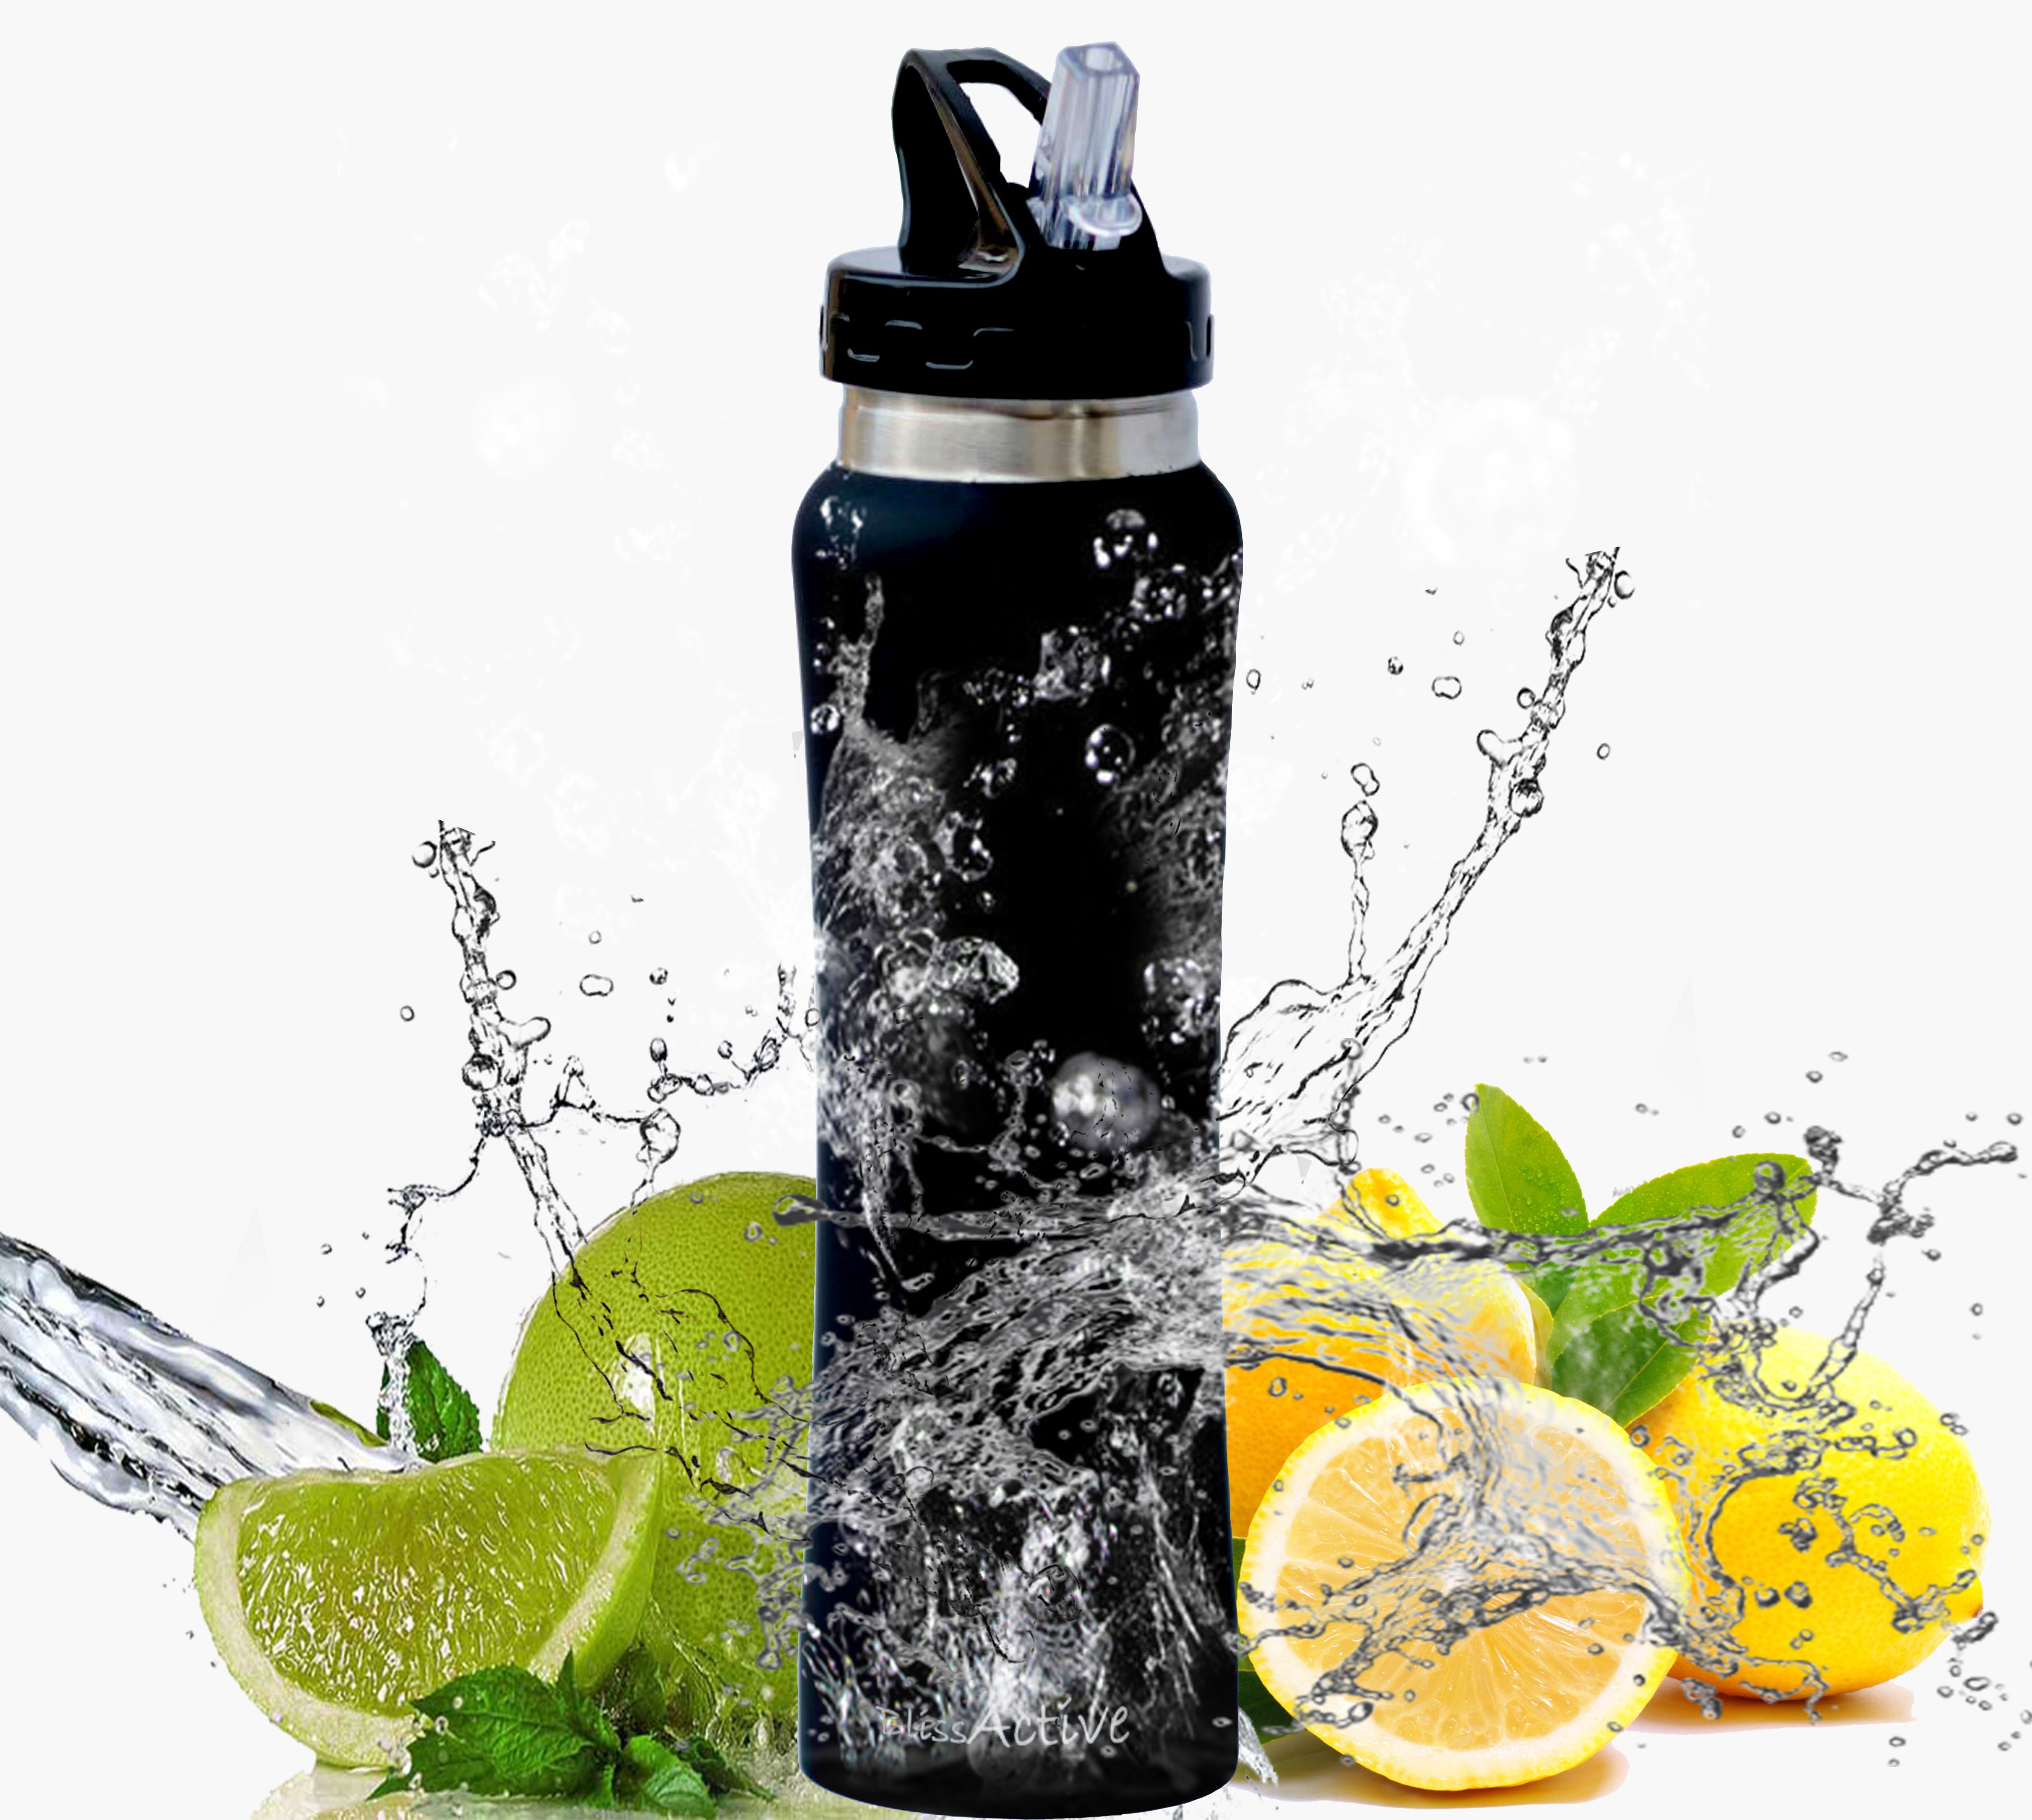

Looking good right
Step 1
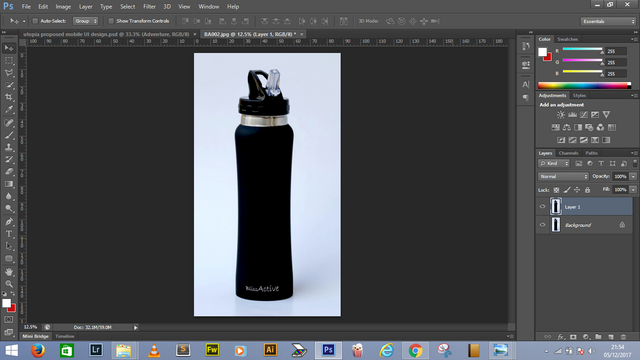
Open Adobe Photoshop. I use Cs6 . the method is also applicable in Cs5 and CC. Click on file and Open a new document. then go ahead to search for you image which you want to cut or just drag and drop it in there.
I dragged and dropped the image on photoshop

Next thing to do is to duplicate the image by pressing
CTRL + J
Step 2
Select your Pen tool as shown in the image below or hit the short cut key "P"
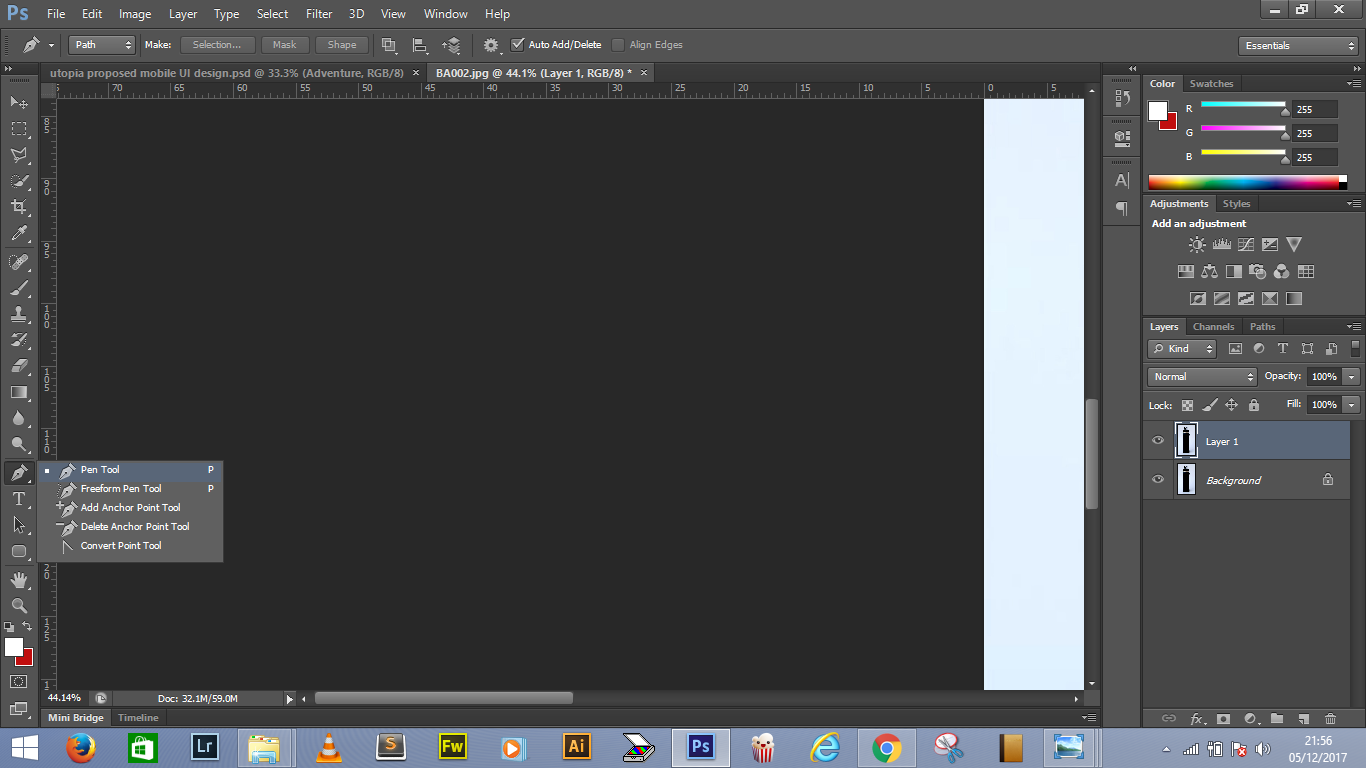
Next you start to trace the bottle by clicking around it making points and connecting them.
let's zoom in a little to see clearly. You will notice that the background is blue so the light reflection on the bottle from the camera kinda blends with the background so there is need to be a little patient when tracing
.png)
Once it the trace is completed all the dotted lines will form a traced shape or line , you know what i mean. The lines will join. You will notice this as shown it the image. I did a pro job so the lines are perfect. Nice Job @dante31
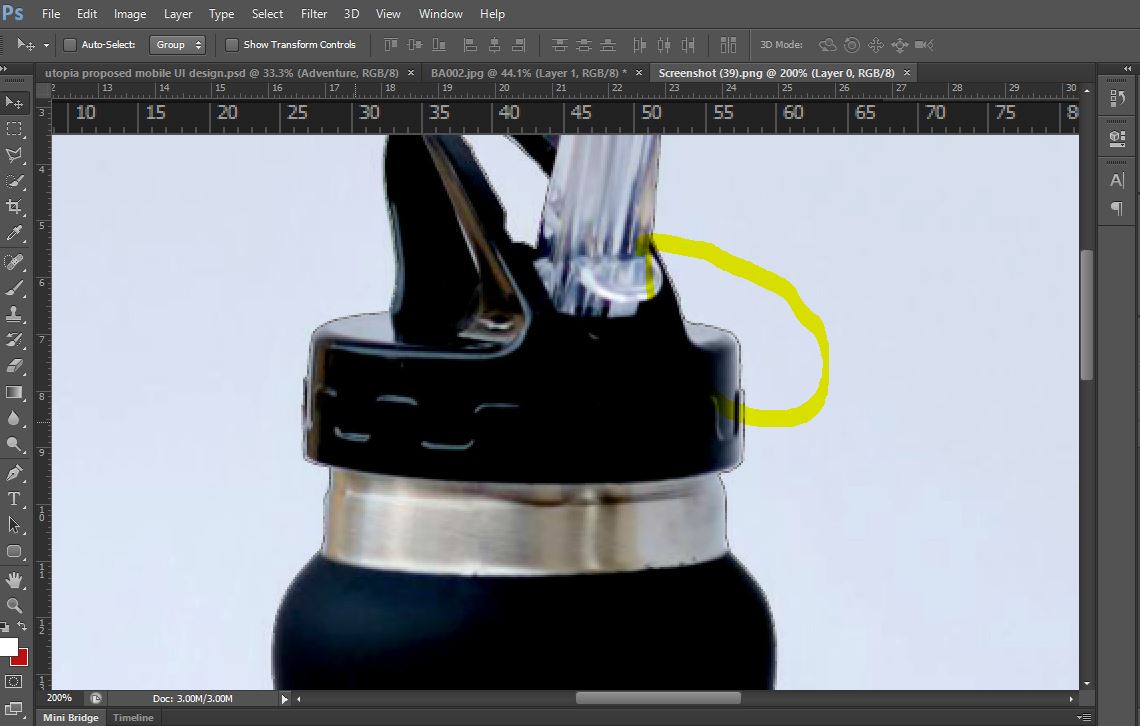
But we are not done yet. Still on the Pen tool. We will go ahead to trace another portion of the image
.png)
Step 3
Once the trace is completed and all the lines have joined
Next thing to do is to hit
CTRL + ENTER
.png)
Step 4
Here is where the magic happens
Next you go to the top of the workspace section of the dashboard on Adobe Photoshop
Click on Select. The on the drop down menu Click on Refine Edge or Use the short cut key.
ALT + CTRL + R
.png)
Step 5
A pop up menu will appear. On it , Click on the drop down menu beside the preview image icon as shown below
Next you click On Layers as highlighted in blue below
.png)
Now the above is completed. What you need to do is go to Output. There is a drop down menu there. Click On New layer as shown in the green circled area
Noticed that there is a red circled area. the section is to adjust the trace in case you did not make it perfect.
.png)
Step 6
There you have it a perfectly cut out image.
.png)
Next you save it. I prefer to save it as .png format or use the shortcut key.
ALT + SHIFT + CTRL + S
.png)
On the pop up menu you can choose to resize the image, change the image format (.gif .jpeg .png) and toggle background transparency etc. Hit the SAVE BUTTON
.png)
The Saved Image
The Image Is Huge OMG!... to be continued
This is a terrific tutorial @dante31! Cutting out an image cleanly is basically the single most useful thing to know how to do in PhotoShop for the average user and use case. Very clear steps to follow with beautiful screen caps. And yeah, the images on top look great. Thanks for sharing! You are a pro!
Much love brother - Carl "Totally Not A Bot" Gnash
@carlgnash from the @humanbot Human Certified Original Works Initiative has manually determined this post to be the original and truly creative work of the post author.
Learn more:
https://steemit.com/curation/@carlgnash/what-human-certified-original-works-means-to-me-a-totally-unofficial-mission-statement-from-just-one-person-in-a-decentralized
Thanks for being an original and creative content creator! You rock!
Hey Fam
my first original badge. I am feeling awesome.
Thank you so much for the warm appreciation
cheers mate
Thank you for sharing this post.
Will you like to join Team #nigeriaon discord server? If yes, kindly join https://discord.gg/kFDTup9
If you don't want to see this comment again kindly reply STOP
Dante's got some really good skills on the computer too!!
We love Dante!! 😉😎
Good post man, I could always look this up when I get a computer and I'm looking to do something similar
Oh fam, I appreciate you a lot.
Thanks
You're welcome bro