Lost in the night - a before and after look at one of my images
Like any other photographer, I have some hard drives that are filled with images I shot during the years. From time to time I do a little "spring cleaning" and delete some of them. Through the time I've deleted some really crappy images but I deleted some really good ones too that evaded my attention at the time. Yesterday the time to do some cleaning came again. Before I started deleting the images, I took a closer look to see if any of them would pop up. One had some potential so I opened it up in Photoshop and started playing around with it to see if I can get something good out of it.
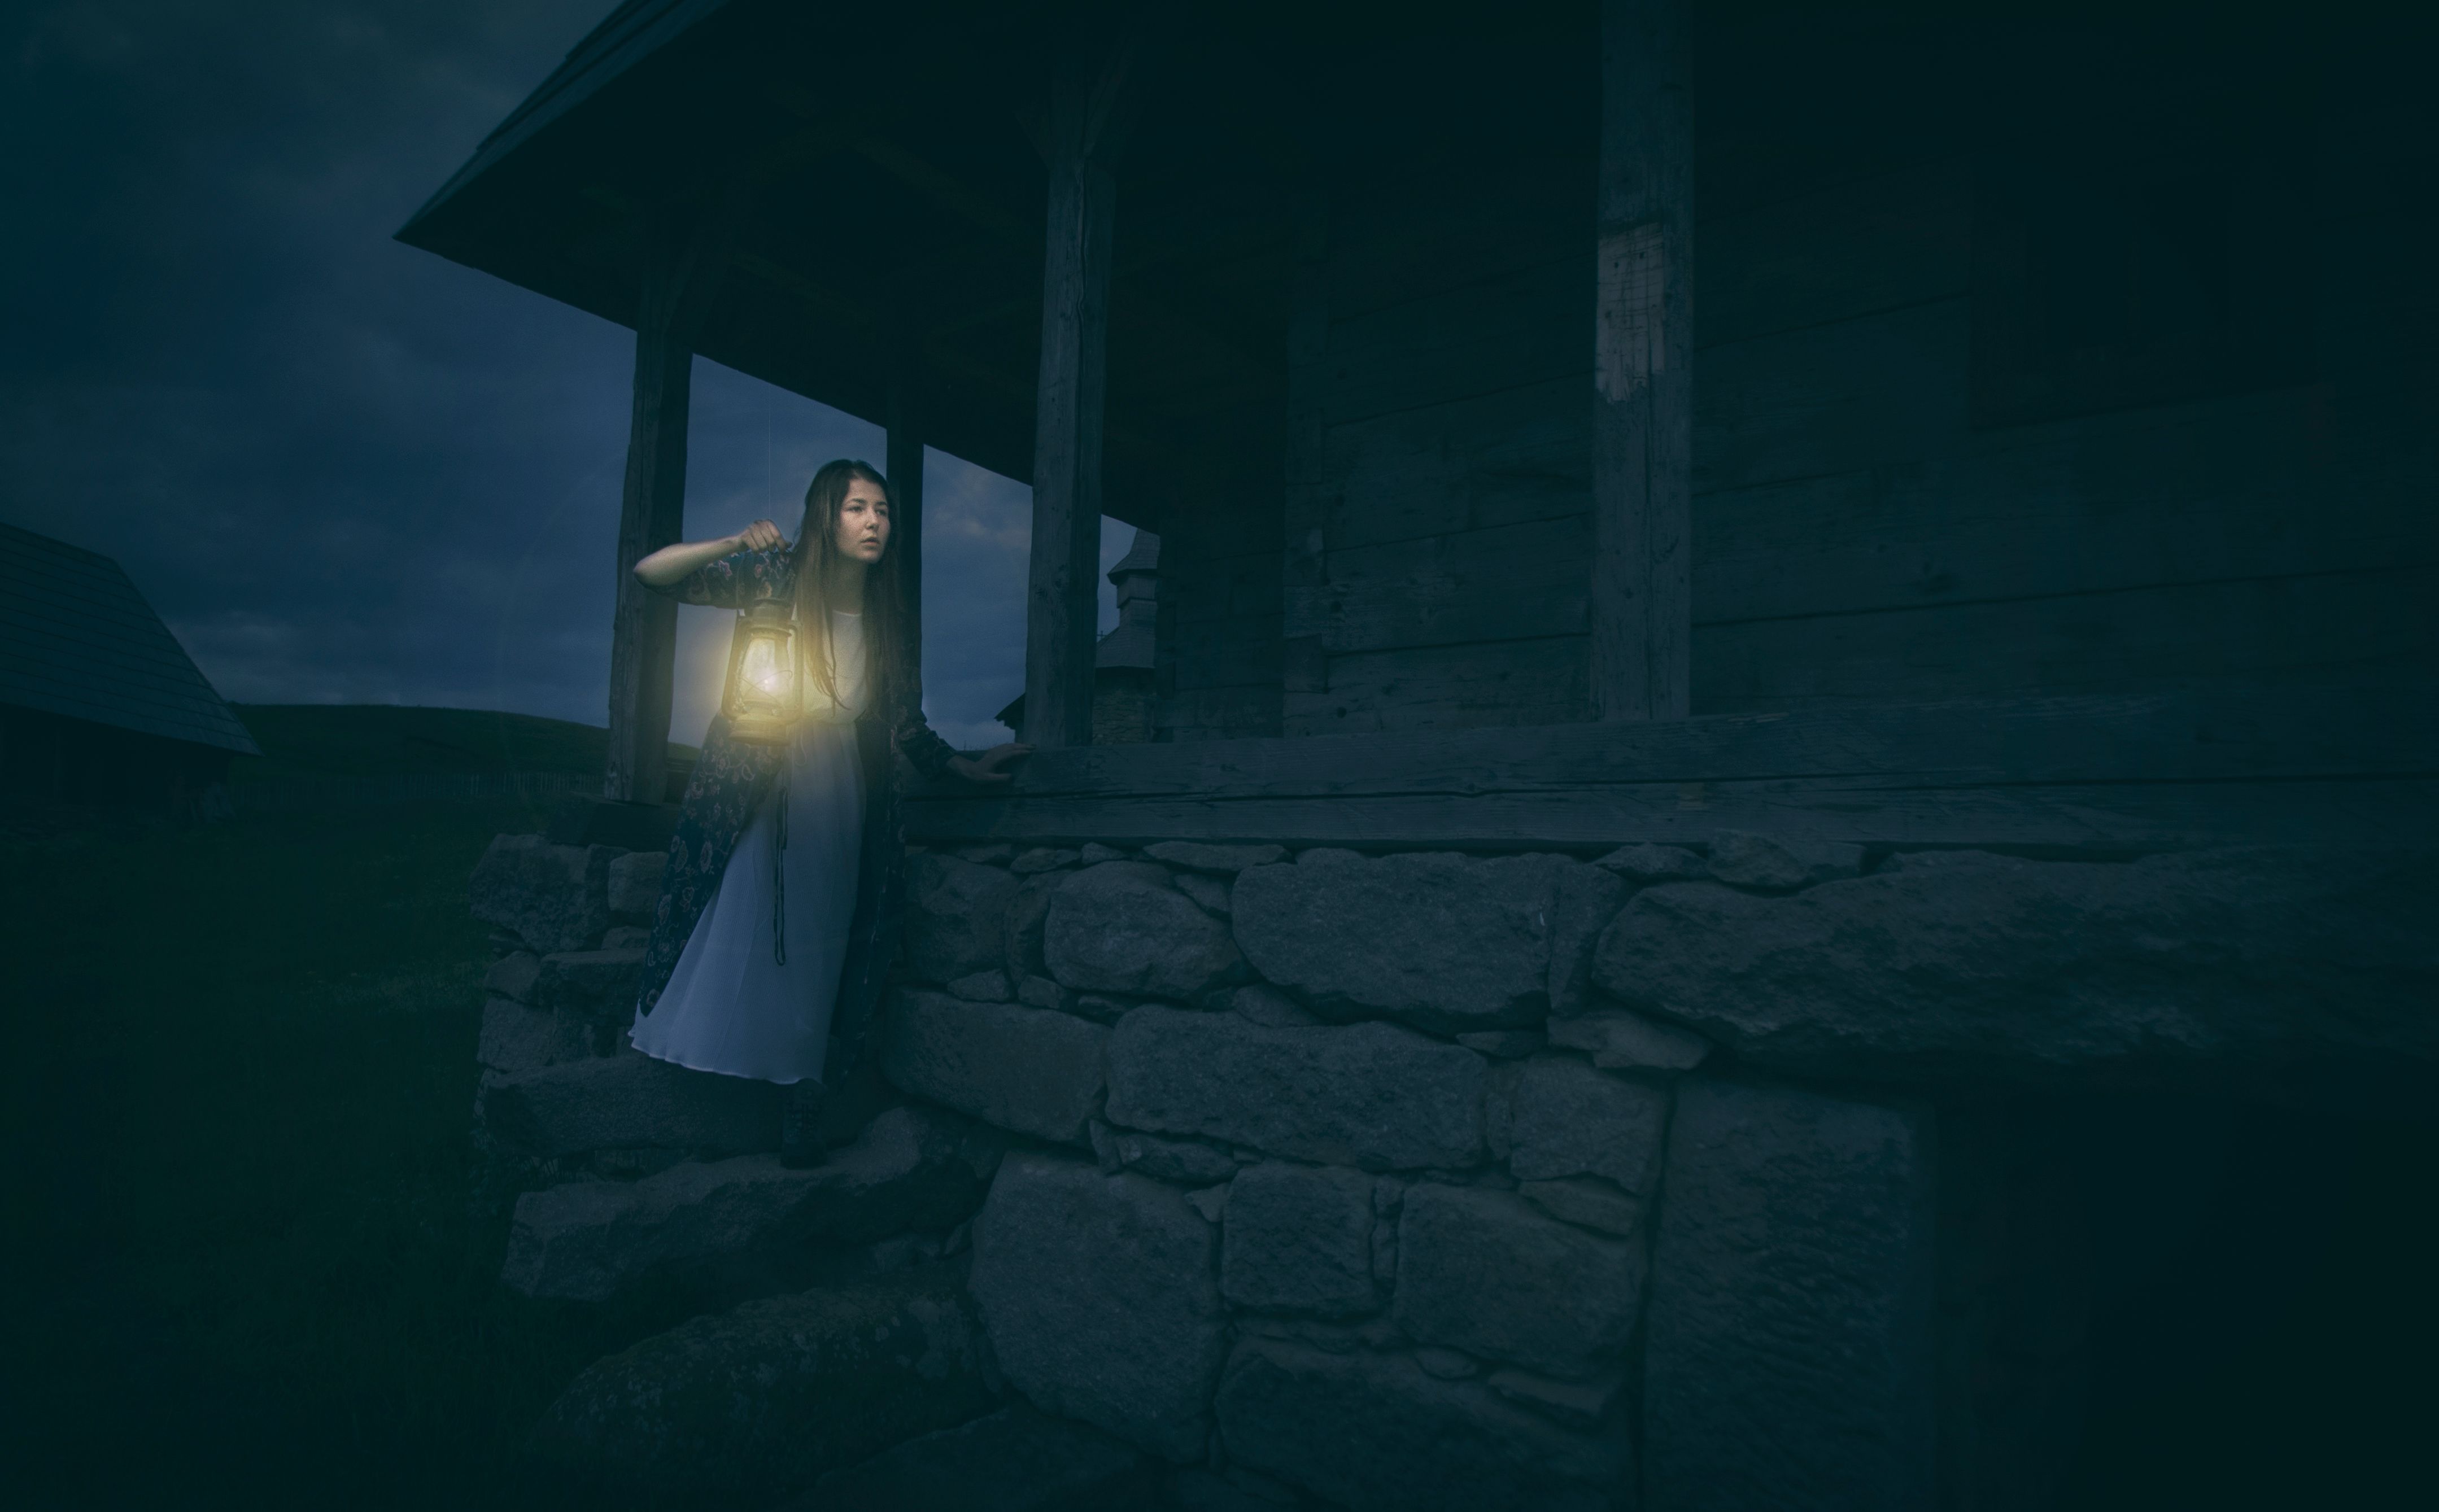
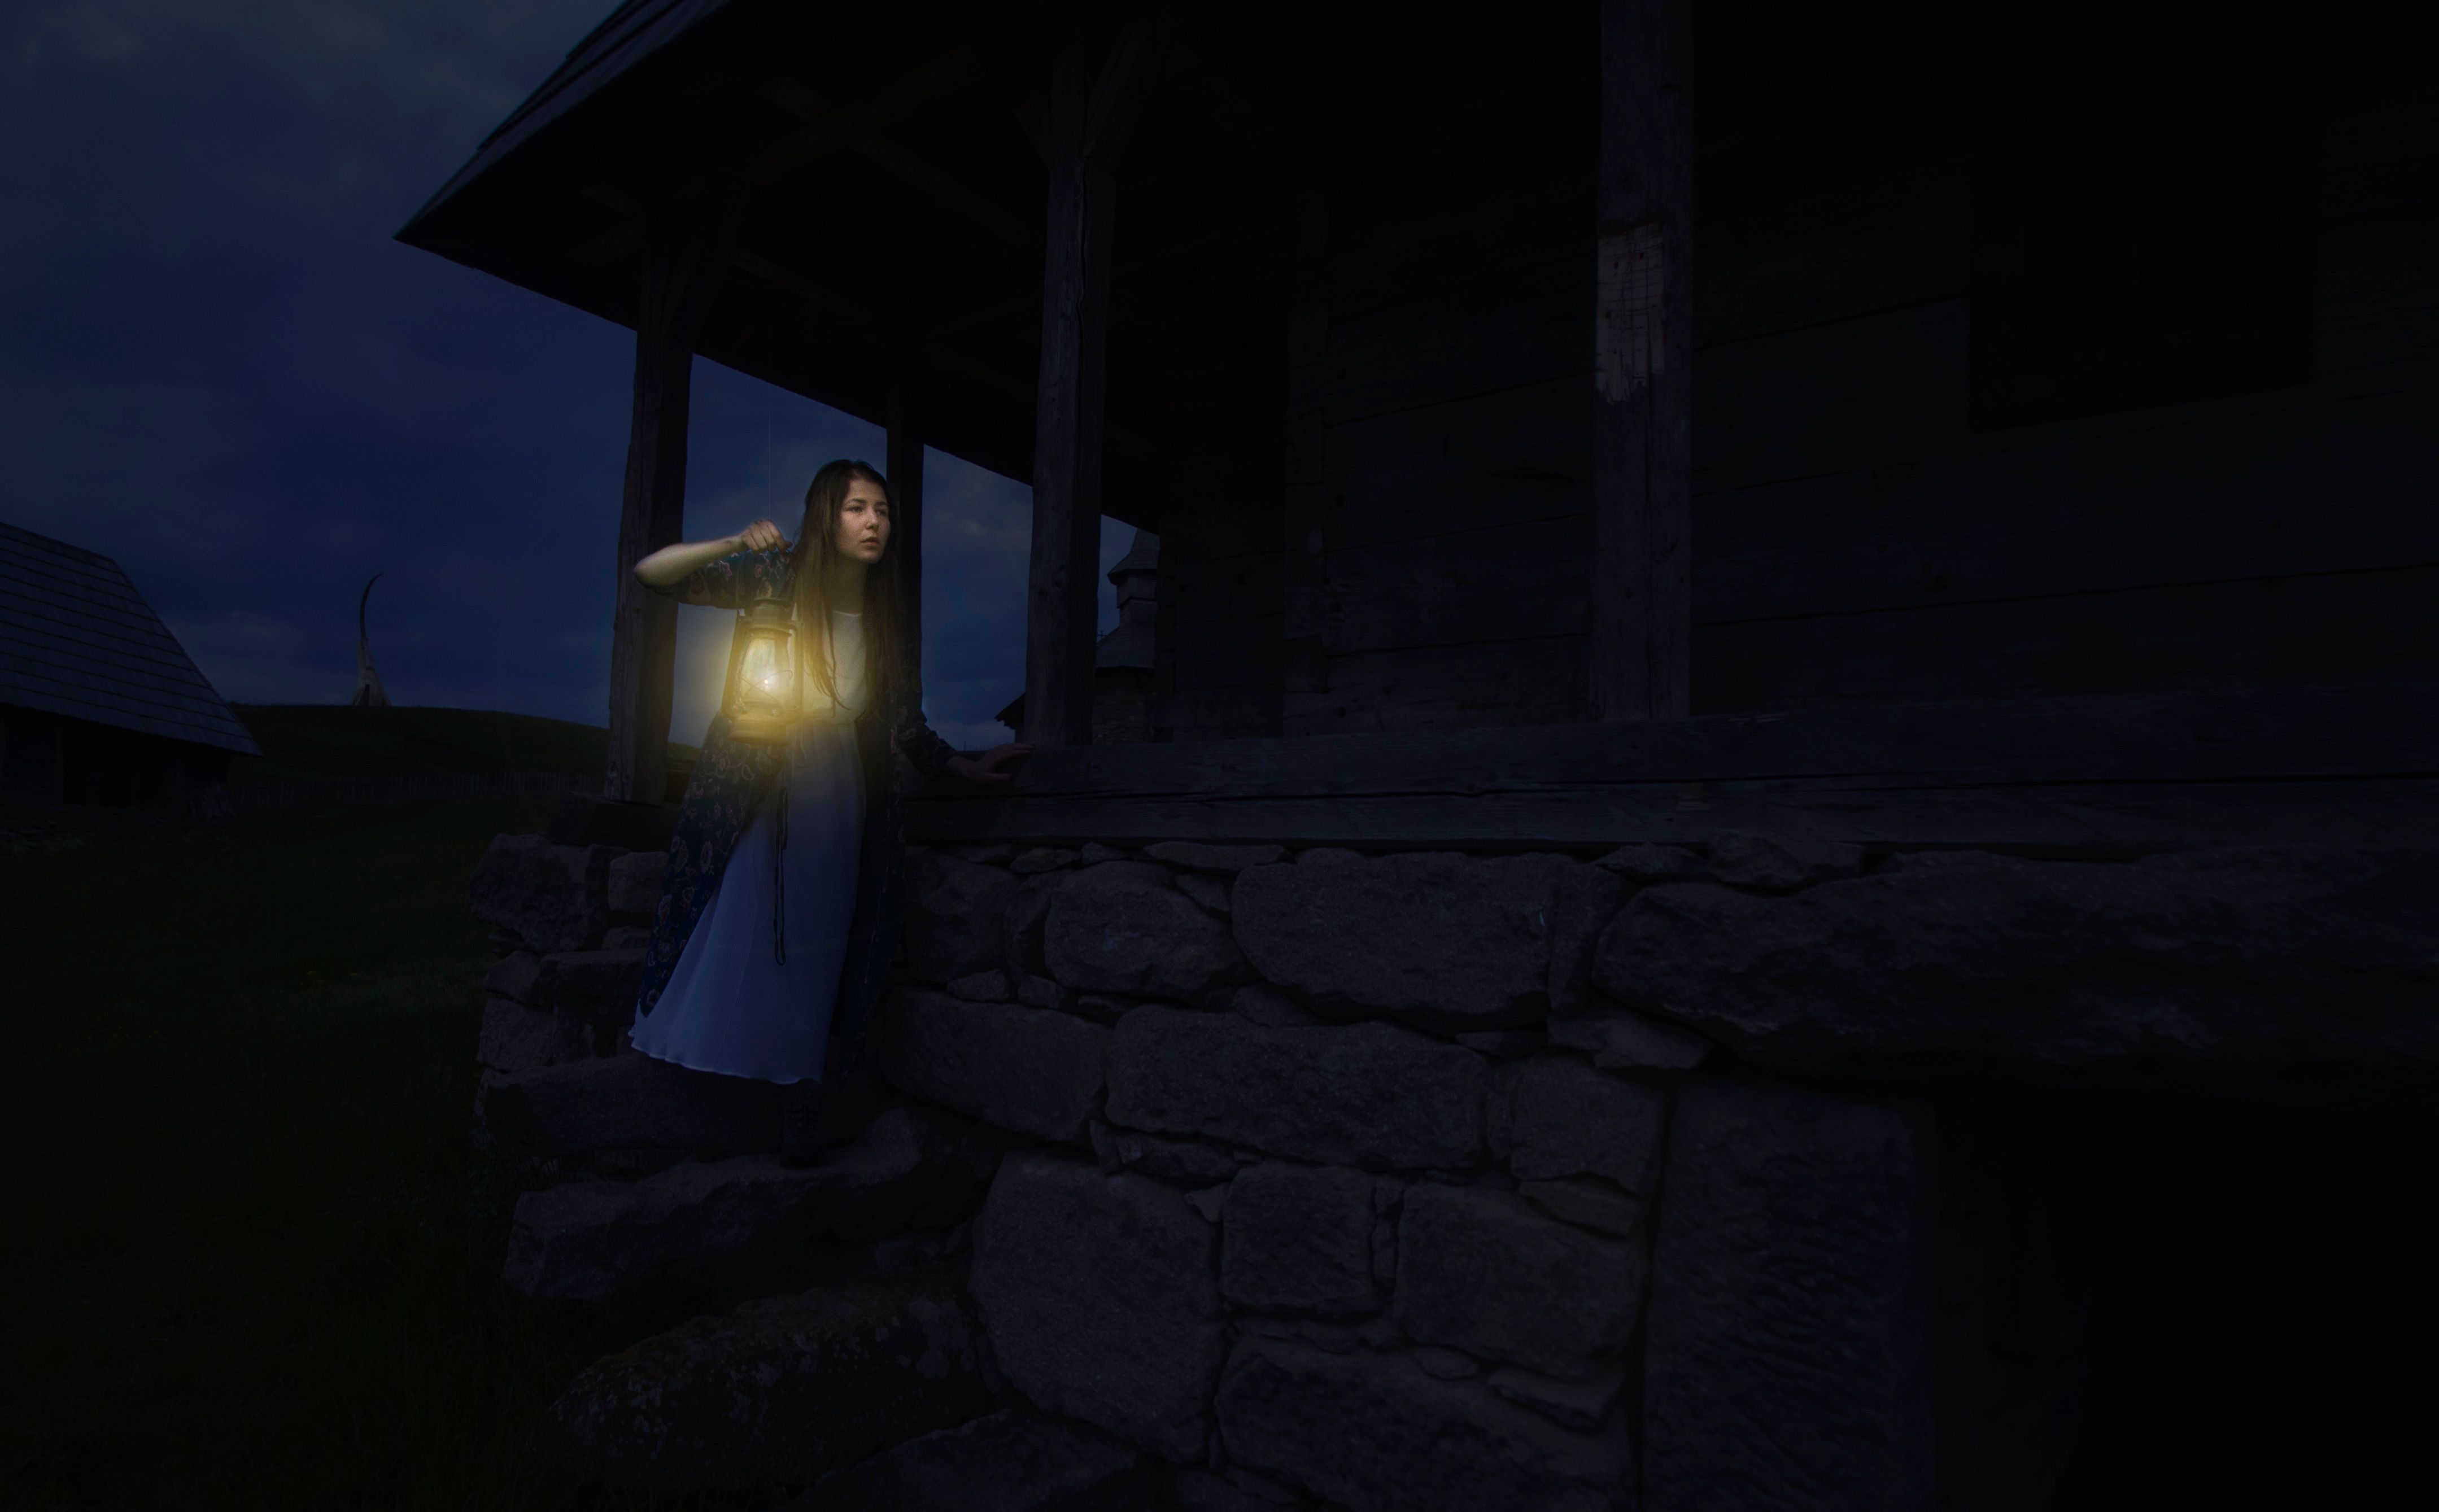
This is the final result.
I'm so sorry I didn't think of recording the editing process but I'll try and walk you through the steps I took to get to the final result.
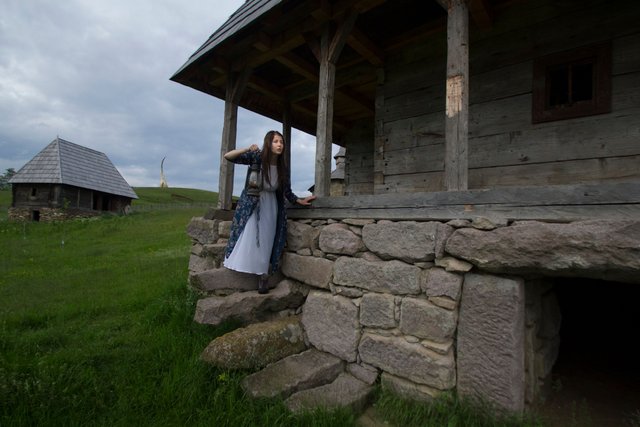
So, let's get going. The image below is the RAW, unedited image straight out of the camera.
I envisioned it as a moody, dream like image that as a final result could tell a story.
The first thing I did was to open it in Camera Raw and made the minimal necessary adjustments (white balance, contrast, highlights, shadows and curves), then I cropped it to match the rule of thirds.
After that I opened it in Photoshop, duplicated the layer and converted into a smart filter. Then I opened the smart filter in Camera Raw again and did some more adjustments. This time I cooled the image using white balance to give it a night mood, increased the contrast, decreased the shadows, added some blacks and shifted the tonality using curves. Then I hit Ok and got back to Photoshop.
Once in Photoshop I added a curves adjustment layer to further work on the mood of the image. I added some blacks in the shadows and increased the contrast and painted over the areas which I wanted to remain as before, in this case the model's face.
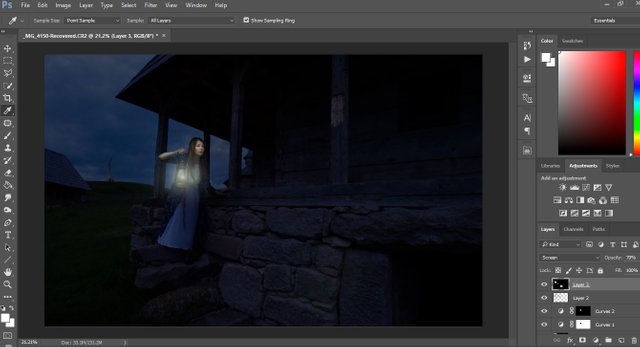
The lamp was looking a little dull, so in order to sell the feeling of night it should be a little brighter. I created a new blank layer and filled it with black then went to Filter->Render->Lens Flare and used a brightness of 40%.
This is how the image looked after adding that effect.
I added a hue/saturation adjustment layer linked to the lens flare layer and using the HUE option, I warmed up a bit the light so it would match the light of a real lamp.
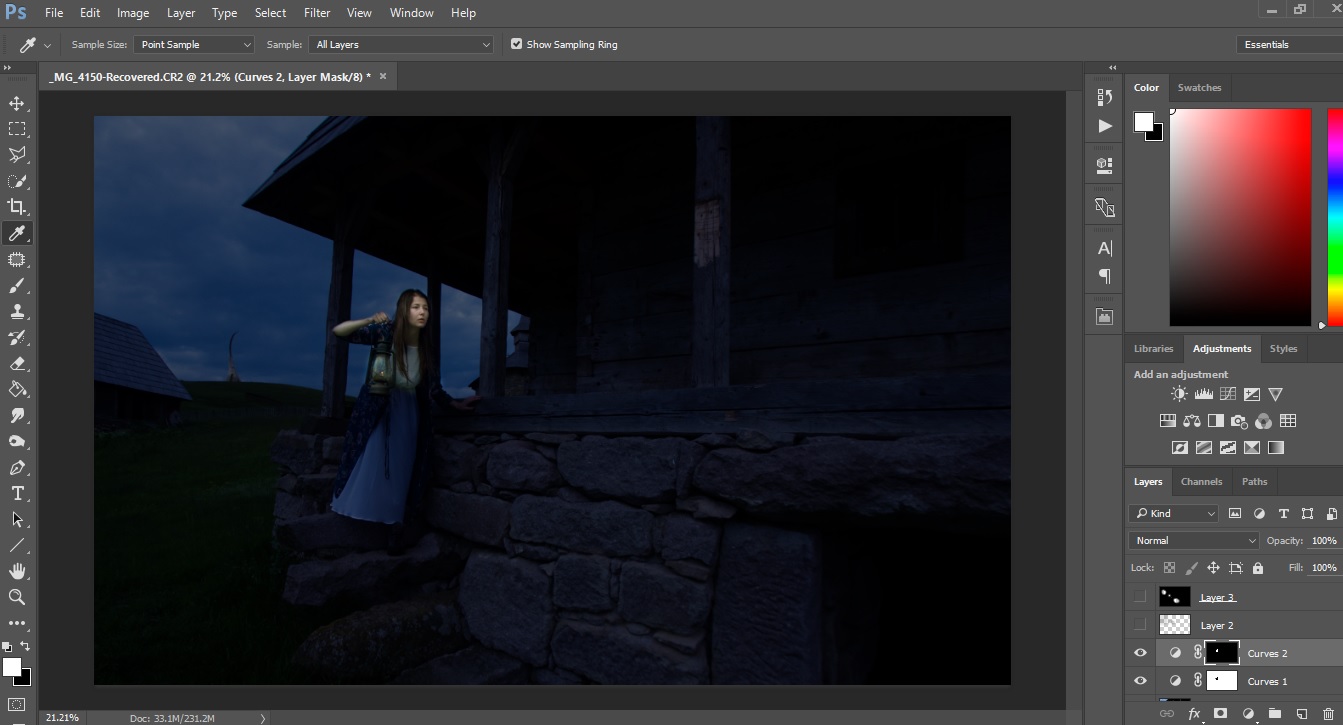
The image seemed still too bright so I added another curves adjustment layer and I further increased the blacks and contrast and painted on the mask the areas that I wouldn't want the effect to be applied. I added a levels adjustment layer to tweak some of the bright areas and used the same technique as before, and painted over the areas that I didn't want the effect to be applied.
This is how the image looked like after all the subtle changes.
In the background you can see a monument that resembles a sword. That element had nothing to do with the image so I cloned that area and removed the distraction.
As a final touch, I like that matte painting look, I added another curves adjustment layer, added three points on the line and crushed the blacks just a little.
The image seemed too saturated for me so I added a hue/saturation layer and decreased the overall saturation of the image.
In short that's how I converted an image that I would otherwise have deleted it into an image that, in the end, I really like.
Again, here's a before and after version of the image.
Before
After

Thank you for that amazing tutorial. I have been thinking about doing some before and after posts too, but I was struggling to figure out how to explain the process in text. But you have done a great job!
I also love this image, I must admit, when I saw it, I had no idea that it was taken in the day... Very impressive post-production skills. I made a tutorial on how to take night time portraits (ill link it below) but I never considered creating nighttime portraits during the day like this.
Great job :)
This is the link:
https://steemit.com/photography/@tristanoliff/photographing-portraits-at-night-in-depth-guide-4-photos
Thanks Tristan! I wouldn't have used text if I would have remembered to start the screen recording :)). I think that by using a video as a guide it would have been much more useful to you guys.
I read the tutorial you posted last night, when I scrolled through your feed :) Very very interesting tips. Some of them I didn't know and I'll sure be using them the next time when I do some night portraits. Learn something new every day.
Thanks again for stopping by and for the upvote/comment! :)
My pleasure man! I look forwards to seeing your videos. Best of luck :)
Thanks man! You too! :)
Such a good result man! And thanks for guiding us thru the process :)
Thanks Victor! My pleasure! Thanks for the help! :)
So glad you didn't through this one away!! I am so bad for doing this so this post has made me think about re-doing a few old ones of mine. Would have loved to have seen the video edit, maybe next time :)
I started looking more careful at what I'm throwing after I deleted 1Tb of images without looking what exactly I deleted, and now I'm regretting sooo hard. I always said that I should record when I edit something different but I always forget. I hope I remember next time. You should definitely have a second look through your images, you might find some hidden gems :)
Ohhh no!! That's a lot of images! Yes I hope you remember next time! Well I will let you know if I find any gems haha!
Can't wait to see what you'll find. I guess you'll be amazed too :)
Well we shall see!
Congratulations! This post has been upvoted from the communal account, @minnowsupport, by Raoul from the Minnow Support Project. It's a witness project run by aggroed, ausbitbank, teamsteem, theprophet0, someguy123, neoxian, followbtcnews, and netuoso. The goal is to help Steemit grow by supporting Minnows. Please find us at the Peace, Abundance, and Liberty Network (PALnet) Discord Channel. It's a completely public and open space to all members of the Steemit community who voluntarily choose to be there.
If you would like to delegate to the Minnow Support Project you can do so by clicking on the following links: 50SP, 100SP, 250SP, 500SP, 1000SP, 5000SP.
Be sure to leave at least 50SP undelegated on your account.