Behind the photo #1 - Photographing in the evening fog
Every photo has a story behind it, in this new feature I want to give a more detailed look on how a specific photo was made and which camera settings I used.
Today I'm going to talk about one of my favorite photos of foggy evenings I ever took. It has served as my desktop background for many months before I finally decided to replace it for something new...
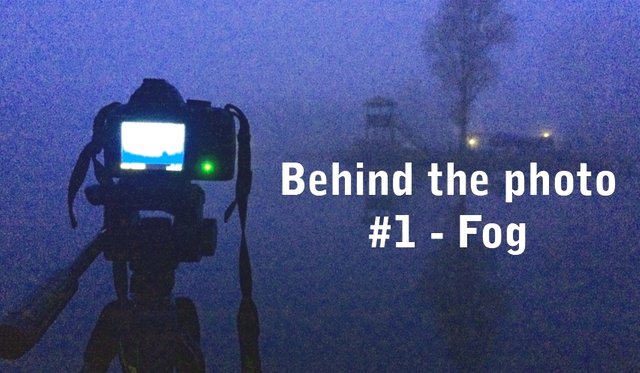 I know, the quality isn't very pretty...I took this with my phone. If anything it will give you an idea of how dark it was.
How did I get there?
Before I'll show you the final result of the above setup, let me first give you a little background story. This photo was taken very close to were I grew up. In the suburbs of Amsterdam there is a large recreational area surrounding a big lake called the Gaasperplas (Gaasperlake). This lake is so big it has parts with a little beach, a harbor and an area for windsurfing. I often went running or biking around the lake which is a lap of around 5 km / 3.2 miles.
On this evening I decided to go out for a run and noticed it was exceptionally foggy when the sun was starting to set. I hesitated for a moment, but then quickly decided I needed to run back and get my camera! I quickly grabbed everything and I thought I was a little too late but after running around for a while I found my perfect spot across from the little harbor. This is the result:
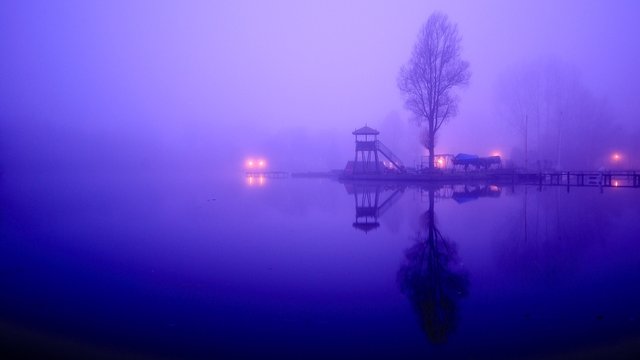 The image came out a lot more blue, but I changed that a little for dramatic purposes.
Setting up my camera
The reflection was just perfect...it took me a few attempts to get the right settings because it was actually really dark and when there is so little light available, it's always hard to get the shutterspeed right. These are the settings I used:
- focal length: 16mm
- shutterspeed: 15"
- aperture: f/5.6
- iso 100
The right angle
The first thing to do when taking a photo like this is making sure you set up your tripod on solid ground (if you don't have a tripod, it will be tricky to do this...all you can do is look for a flat spot to place your camera but this will severly limit your choice of angle) and get the right height and angle.
The aperture
For this kind of photography you would want to select an average aperture to ensure everything in the image is sharp. You would want to go for a deep DOF (if you're not sure what this means, read this post first). Anything between f/8 and f/12 would be ideal here. Unfortunately a deep DOF also means your camera does not allow a lot of light in, and in this case there was so little light I had no choice but to go a little lower to f/5.6.
The shutterspeed
Because the circumstances are so specific here, it would be best to go for manual (M) mode to be able to select the shutterspeed and aperture yourself. I recommend this for any landscape photography, especially at night. As said above, the aperture has pretty much been determined already. Because it's almost impossible to get the shutterspeed right the first time, just try a few times till you get it right. For those of you that don't know, the shutterspeed determines how fast the camera opens up and closes again. At low light situations like these, you would want the camera to open up for a long time to gather as much light as possible. The downside to this, is that even the tiniest vibration will be picked up by the camera and will result in a blurry mess. That is exactly why you would need a tripod instead of taking this in a normal fashion.
Something to remember
Ideally, you would have a (wired or infrared) remote to control the camera to avoid any vibration in the camera at the moment you press the shutter button. If you don't have one, here is a little tip to get past this problem: set your camera on self timer and set it to 2-5 seconds. This way after you pressed the shutter button, the camera has a few seconds to eliminate any vibration from your touch. I have been using this technique for many years. One last thing to remember: if your lens has VR (vibrant reduction) or anything similar, be sure to set it off when using a tripod. It sounds weird, VR only works against you when using long shutterspeeds on a tripod..
The iso
I set the iso value to 100, which is the standard you should use as much as possible. Messing around with the iso should be a last resort solution only, since it is purely artificial and won't benefit the overall quality of the image. With long shutterspeeds like these, I'd rather not change my standard iso.
Concluded
I took this photo with my old Nikon D3000 and standard 18-55mm kit lens. Even so, I'm quite happy with the result and I count this photo to be among the best in my portfolio. I rarely do anything in B&W, but for this photo I gave it a go. Do you prefer color or B&W?
 The same shot, very different result in B&W
Follow me for more and be sure to vote or resteem if you liked this post, thank you! :)
Congratulations! This post has been upvoted from the communal account, @minnowsupport, by stevcs from the Minnow Support Project. It's a witness project run by aggroed, ausbitbank, teamsteem, theprophet0, and someguy123. The goal is to help Steemit grow by supporting Minnows and creating a social network. Please find us in the Peace, Abundance, and Liberty Network (PALnet) Discord Channel. It's a completely public and open space to all members of the Steemit community who voluntarily choose to be there.
If you like what we're doing please upvote this comment so we can continue to build the community account that's supporting all members.
i prefer the b/w version great story on how things are done, resteemed
Thank you! Means a lot
Thats a great tutorial and will be useful to so many on here so thanks for taking the time to share this
you not only are a talented photography but have a good way with words
I am perhaps a serious amateur
Thanks for the kind words! I take joy in writing and explaining and I will do much more of these in the next days, be sure to follow!
just say it as I see, allready following you :)
Very good photo and tutorial!
Thanks so much!
thank you sharing .. will test it out some of the tips.
Great! Looking forward to seeing some results in a post from you
Great photo, and awesome tutorial!
Thank you so much :)
This post received a 6.25 % upvote thanks to @thephotoguide.
Heel informatief maar vooral mooie foto. Ook ik vind de Z/W het mooist...maar dat is een kwestie van persoonlijke smaak natuurlijk.
Upvote, resteem en follow heb je nu... het vervolg op mijn reeks krijg je nog 😉
Bedankt! Heb zelf niet zoveel met B&W maar vond hem in dit geval wel mooi!