How to use Flash like a Pro!
Using Flash like a pro #1
When I bought my first SLR I was blown away by the images I could produce, depth of field alone opened up a whole new world to me. Yet images I saw on a daily basis, aided by quality flash work, still left me in awe. Starting out in Live music photography where the standard ‘3 songs no flash’ rule pretty much always applies I totally ignored flash for nearly a decade. In fact by the time I started using flash I’d been a full time professional photographer for 2-3 years! So clearly flash is rarely a NECESSITY. When I was starting out I knew how to handle low light which is another crucial skill to master, but flash allows you to elevate your work to something that just screams professionalism. It can also be used as another outlet for creativity, planning out shots with off camera flash is a wholly satisfying experience.
Professional Flash = Professional Prices
I know what you’re thinking. Good flash is expensive. I’m a Canon user so for the sake of ease I’ll refer to Canon products as examples. A Canon 600 EX II will set you back a little over £500 while Canon wireless transmitters can run up to £300+ if your camera does not have the required Wi-Fi capabilities. Canon isn’t the only expensive brand, many other big brands offer similarly equipped and priced flash guns and triggers.
The good flash doesn’t HAVE to be expensive. Much like with camera’s, your hard earned cash doesn’t just go towards light output when you buy a flash. You’re paying for build quality, guarantee and other features. Plenty, if not all of these ‘added value’ features are nothing more than an additional luxury. Don’t get me wrong, if money is no issue, go right ahead, but at the end of the day for the beginner flash enthusiast all you need is light output.
I get that eTTL is a pretty handy feature, especially when the whole idea of flash settings can seem so overwhelming, so I’ll help break down all of those technicalities for you.
Are you ready for this? I’m about to share the kind of secret industry professionals would kill for.
You only need three functions from your flash
That’s it. Three buttons, performing three functions, is all you’ll ever NEED. Power (On/Off), flash power up, flash power down. Why would you ever need more? You take a shot, if you need more light, boost the flash up! Less light? Bump it down a stop! There aren’t too many situations where your flash power output will need to change that regularly and using a flash manually is not only the most cost-effective option, it also gives you the most control.
Auto = Mistakes
This will probably be a subject of great contention, so to begin, yes – I realise that PLENTY of incredible photographers use Auto. Most commonly aperture/shutter priority. The most common reasoning is that it’s faster, and I totally get that. To an extent. After 13 years and more than a million exposures (That’s just going on the shutter counts of camera’s I’ve checked!), all shot in full manual mode, I can honestly say Aperture/Shutter Priority wouldn’t be faster for me. I work in the fast paced world of weddings and I know how to dial in my exposure FAST, often without looking at the light meter at all.
Why WOULDN’T you want to learn to use your camera to the best of your ability from the start? Aperture/Shutter priority are great, as it eTTL. However, you’re putting the camera in a situation where IT is doing the thinking. It doesn’t know if you’re shooting for shadows or highlights, if you’re looking for a subtle fill or a full on key light. It’s guessing.
But I digress. The point is it’s cheaper. That’s all we really care about when we’re getting set up right?
There’s a whole world out there
Look away from your camera manufacturer and you’ll find a world of options for a fraction of the price. My personal preference is the ridiculously affordable yet incredibly reliable Yongnuo range. I’m not endorsed by Yongnuo in any way, so please don’t think that I’m saying you should go for them, but there’s plenty of similar makes including Nissin and Godox. All make flashes for very reasonable prices, especially when you start looking for models without eTTL.
The same applies to radio triggers. There are so many affordable triggers out there there’s really no reason not to get yourself equipped with a couple of triggers (3 is ideal to accompany 2 flash guns).
So that’s my start up kit advice, two flash guns (You shouldn’t need to spend more than £40 each MAX) and three triggers (£10-£15 would be pretty standard for each) and you’re good to go.
Where to start?
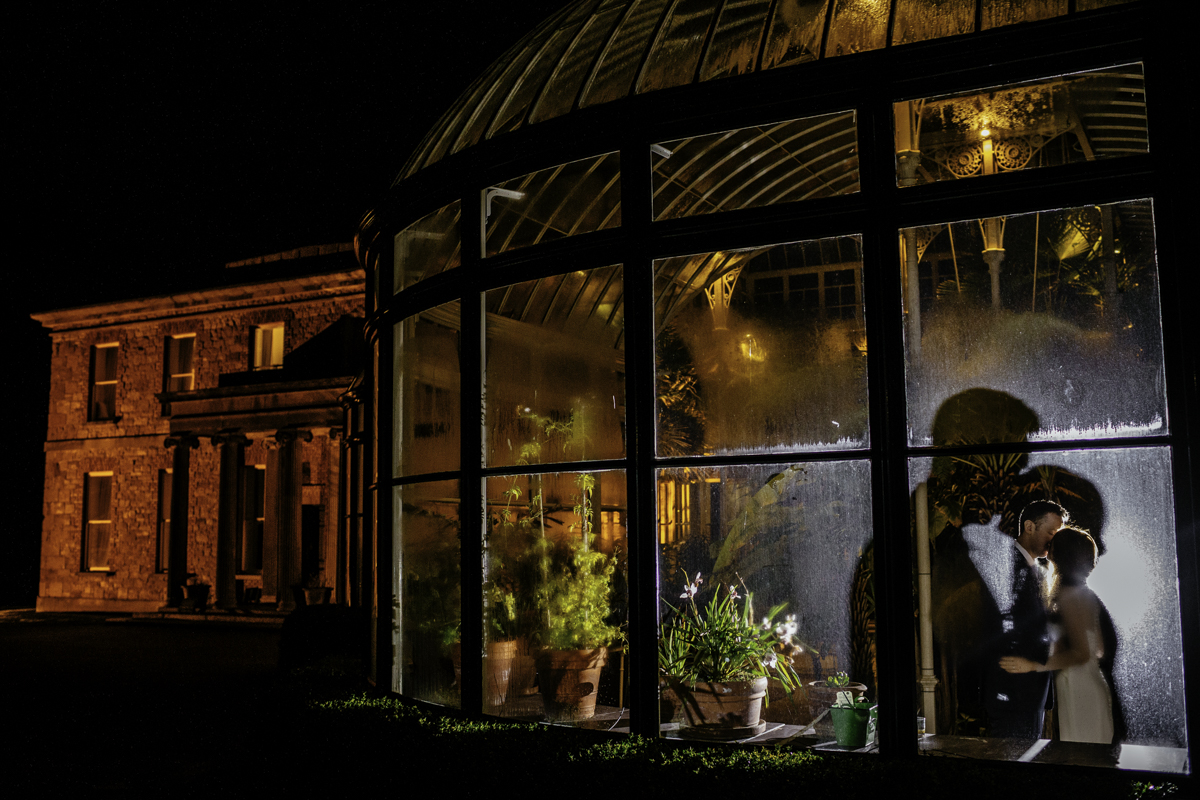
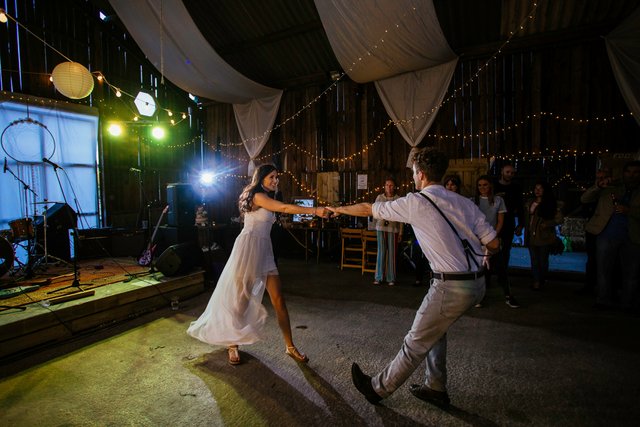
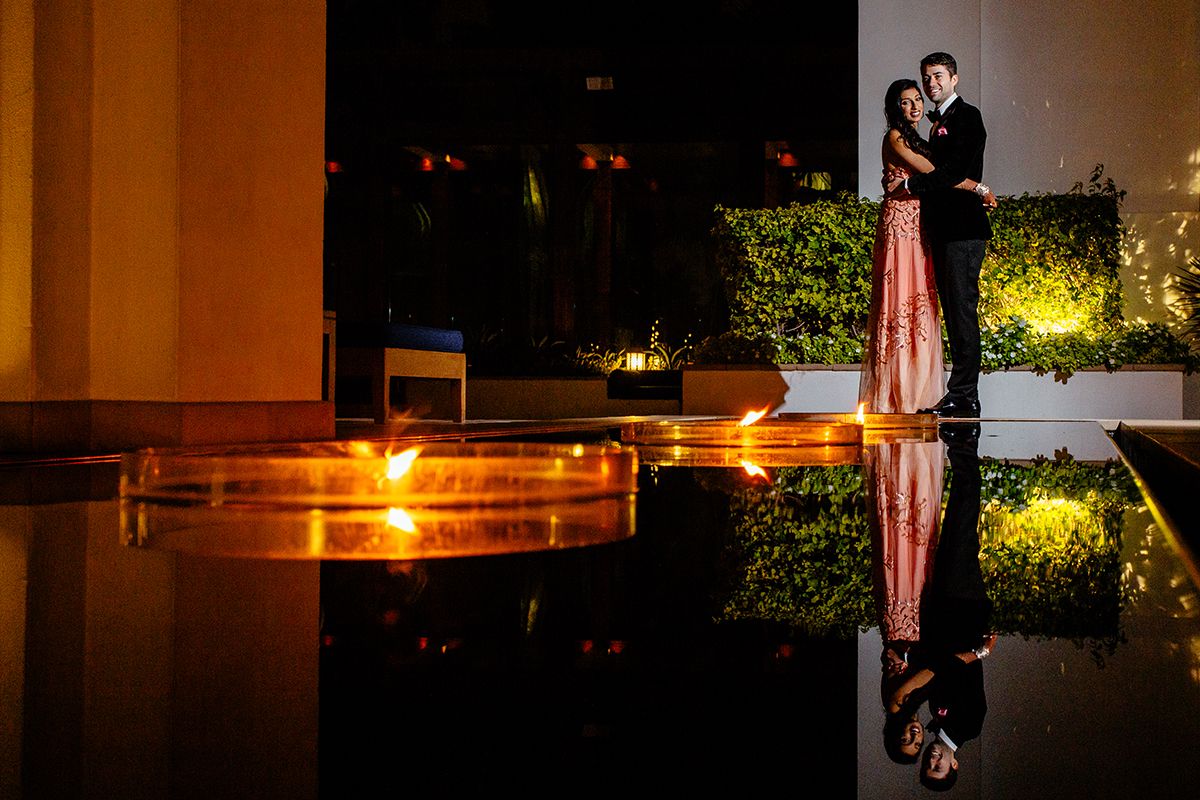
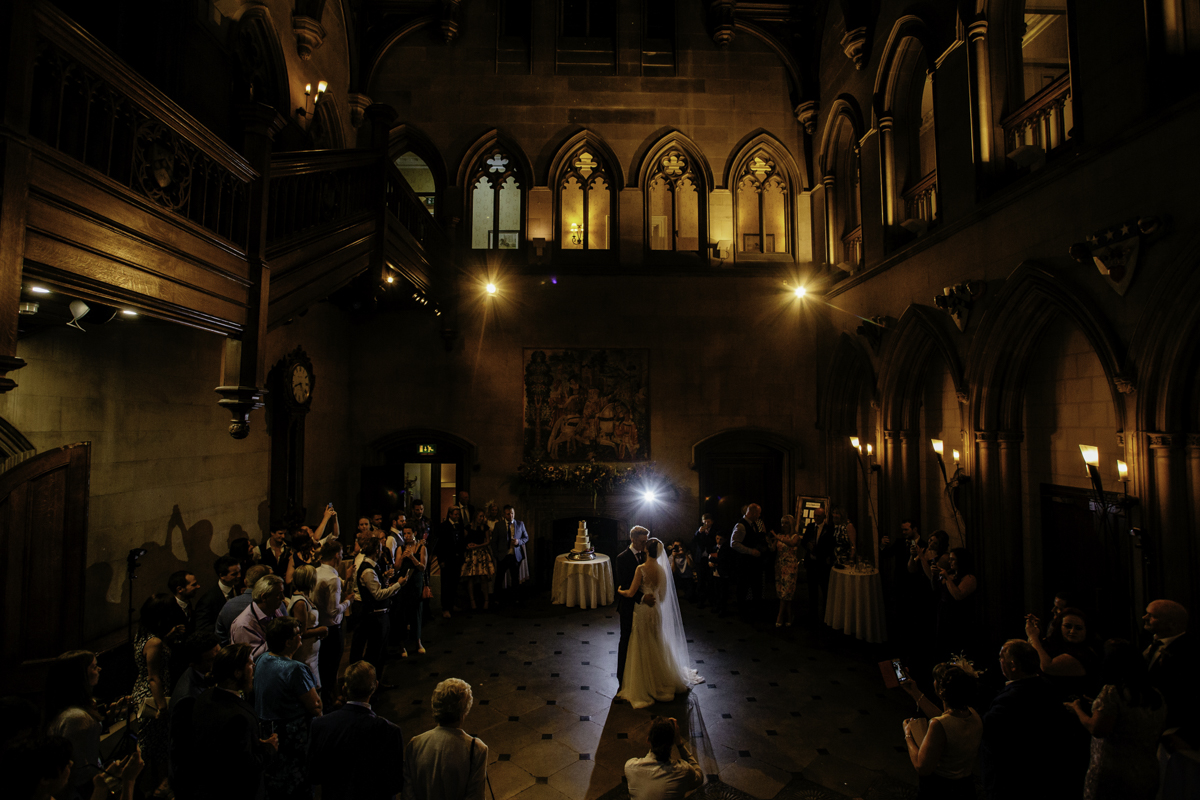
The reason I suggested triggers is that flash just looks better when it’s NOT coming directly from the camera. Off Camera Flash is a technique that confuses photographers all over the world, but it just doesn’t have to! For your basic off camera flash setup, something like the first dance shot above, you’re looking at one flash off camera, and a diffused flash on camera. It’s a simple and reliable setup that professionals around the world use every day.
Generally I have my Off Camera Flash set one full stop higher than my on camera flash (One stop = double the exposure) to really give a nice rim light, whereas my main, diffused flash will light the shadows on my subject. In terms of additional kit I use Magmod equipment with my flash, so a softbox style adapter called a Magsphere as well as a light-stand to raise my flash up to a little above head height.
Basic Flash Setups – One Light
Ideally for a one light setup we’d have the flash around 45 degrees to our right or left, off the camera and entering the frame from the side. If you’re posing a model always remember to make sure they angle their nose TOWARDS the light, we don’t want any harsh shadows on that part of the face! (I’ll do another post on Posing down the line!) If you want, you can add in a reflector to the opposite side of your subject if you need a little fill light.
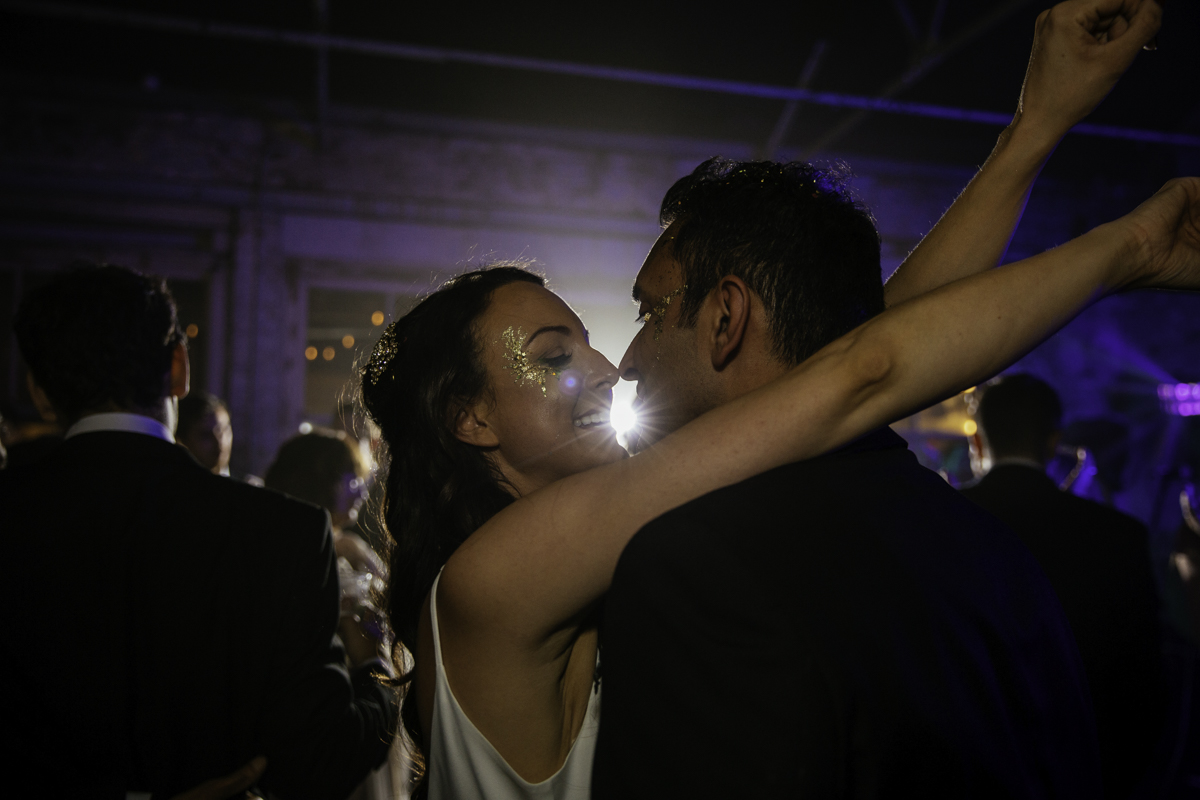
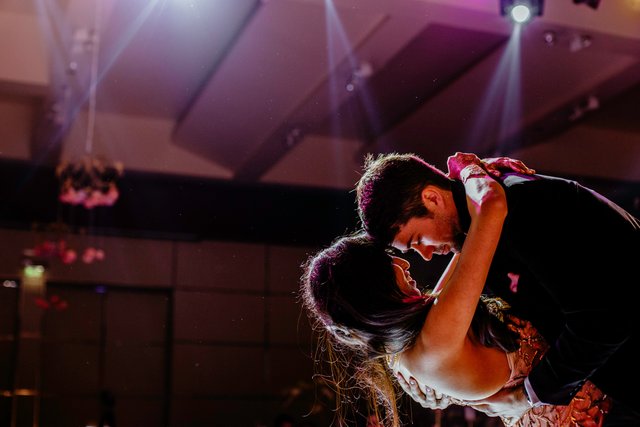
One light setups can work really well for couples, in the shot above my wife held a flash at above head height just out of shot to the right of the frame. Often with these kinds of shots it doesn’t really matter if the light blends perfectly with the scene, we’re creating a spotlight effect which can work just as well, if not better, than balancing natural light and tungsten (flash).
Basic Flash Setups – Two Lights
The most basic setup here is two 45 degree flashes to camera left and right. This creates a well lit, somewhat flat shot perfect for catalogue type shots. The great thing about a two light setup is that you can keep one light in front of the subject (your ‘Key’ light) and move the other around to fill in shadows (‘Fill’ light) or even create a highlights (‘Rim’ light)
Two light setups, as I mentioned before, are a go to for wedding photographers worldwide and the perfect example of this technique. The Key light is always to illuminate our subject, giving us a clear sharp image with no detail accidentally lost in the shadows. That second light can be used to really get creative, as a rim light it provides a totally different shot than to a fill light (Typically a Fill would be half the power of a Key light whereas a Rim would be double the power). The main thing to remember here is that you’re controlling the shadows created by your key light. You can choose to emphasise or relieve those shadows as you see fit!
Modifiers - Softbox
If you’re getting into flash then modifiers are always a good purchase. They allow you even more control over your light and usually can be picked up pretty cheaply. The softbox is a fantastic option for anyone looking to shoot portraits or product shots. The key here is that the larger and closer your light source, the softer the light will be. When using a softbox you’ll want to get the box as close to your subject as possible without intruding into the frame. This will help create that even, smooth light you see framed on walls in family homes across the world and on the products filling catalogues and websites globally.
Modifiers – Reflectors
One handy hint here, scrunch up some tin foil then stretch it out again. The rumpled surface makes the perfect budget reflector, but for those of you working with paying clients (or just wanting kit that will last) I’d recommend a cheap reflector from a retailer of your choosing. A reflector will act as your fill light when you don’t have an extra flash to hand or when you’re just looking for a little hint of light rather than the glow a flash provides. Golden reflectors can warm up a shot whereas silver ones will cool it down a touch. Most reflectors are double sided for even more flexibility. They can also be great for adding light to a backdrop for portrait sessions.
Modifiers – Gels/Grids
Gels and grids, two modifiers that – for the sake of this blog post – I’m bunching together. Gels add colour to your flash, fantastic for creative portraits but also invaluable for balancing light. You may have noticed that flash combined with natural light looks a little weird? That’s because Tungsten light, or flash, burns at a different temperature to sunlight, therefore it gives a different light. This is essentially what your camera’s white balance is all about. By putting a gel on your flash you can warm up the otherwise typically blueish light and compliment natural light with your flash.
Grids on the other hand dim your flash a little, softening the light in the process. Even cheap flashes are powerful! Especially if you’re working in the evening even the lowest flash power can often be too much, leaving shiny highlights on foreheads. Grids help to eliminate these shiny foreheads by covering the light source a little. They also allow you to control the output of your flash as much as possible and give you the flexibility of just a hint of light.

As always – Go for it!
As has become traditional with my Steemit posts, my last bit of advice is – Go for it!
Flash, just like photography its-self, is all about practice. Use these tips to get yourselves started and experiment for yourselves! Flash really doesn’t have to be as complicated or daunting as it may seem. It’s a fantastic way to practice your craft and one of the best ways I can think of to elevate your skillset and your images in the process!
I’d love to hear your feedback as usual, and if you need any advice just drop me a comment!
You have some my dream photographs RIGHT HERE and thank you for showing us what to aim for next time. I can't stress enough how much I value this article. Thank you so much for the tips and I hope to catch up with your posts all the time.
Dude! This is an incredible post... and exactly what this platform needs!
I can't say anything else until I mention, a lot of these photos are really incredible... your style is so much darker and moodier than a lot of wedding photography I've seen... but that photo about the 'Softbox - Modifiers' section is absolutely to die for. It might actually be the best wedding photo I've ever seen. The light outlines are just amazing.
I got right into Strobist when it was a thing... and I think it expanded everyone's viewpoint on flashes.. but this guide is super great! Well done!
I've get to somehow make myself a curator so I can support these sorts of great articles.
Thanks man, really appreciate that! I've got a book of ideas and I try to do one every few days. It's tough with so much competition but it's great to hear the effort shows through :)
Looks like someone must have agreed with you anyway because it had a healthy boost last night! Ah man, Strobist, that's a blast from the past! It's amazing how much the internet has changed the flash game, especially with cheap off camera flash now so freely available!
Thanks for the kind words dude :) better get to work on my next one now!
This is awesome... congrats on getting the @curie vote. I know a couple of curators and so I was going to suggest this post to them... but I wasn't sure if you'd qualify (you've had a couple of comp wins) so I didn't mention it.... so I'm very, very happy to see they found you and awarded you anyway.. I'm so wrapped with that!
Just had a re-read... man your photos are inspiring.
Could you do a post on sneaky little spots you use to buy gear? I want a really decent camera (don't mind if it's second hand) but it seems to me that ebay and Craigslist almost seem to overvalue cameras...
Yeah, a Curie vote seems to make a huge difference, no idea how you get on their radar but it seems to be about the only way to compete with the established bloggers, always a bit frustrating when you work really hard on an article and see an iphone photo of someones shoe trending! That said a couple of Curie votes has really helped me gain a bit of traction, still a million miles off the big guys but every little helps right!!
On terms of second hand gear that's a really tricky one as I'm over in the UK! We have a couple of great shops for used gear with warranties (CEX, WEX and Mifsuds are three of my favourites, CEX have a habit of badly underestimating the price of older gear AND they accept Bitcoin which is handy!)
Not too sure about the US but over here Facebook groups are like the new eBay, there's usually some good bargains with the added bonus of kind of knowing where the kit has been, and if it's been looked after!
awesome tips and tutorials! I've barely played with flash photography, but I want to start. Do you think the softbox is the first modifier I should look into?
I know you're not asking me specifically... but you will absolutely not regret adding a softbox to your kit. 10,000%. They are so good.
thanks adam! :) any input is great!
It really depends what you want to do, for portraits I'd definitely say yes!
i love portraits and so I will definitely check it out :)
Really great tutorial! Never learnt so much about flash!
That's great news @martinamartini, that's great to hear! I aim to post useful articles so it's always good to hear someone's learning!!
World of Photography Beta V1.0
>Learn more here<
Thank you for participating in #goldenhourphotography, the weekly selection will be released on Monday.
You have earned 6.10 XP for sharing your photo!
Daily photos: 2/2
Daily comments: 4/5
Multiplier: 1.22
Server time: 18:58:20
Total XP: 877.82/1600.00
Total Photos: 42
Total comments: 118
Total contest wins: 14
Follow: @photocontests
Join the Discord channel: click!
Play and win SBD: @fairlotto
Developed and sponsored by: @juliank
Nice teach, useful for me, thanks.
You're most welcome! Glad you enjoyed it!
Your photos are breathtaking! Each has this kind of glow that makes me feel like I'm there. It does need a lot of experience, skill and art to reach this level. I'm out of words!
Your postn is very cool, I like