Food Photography: Behind the scenes!
One of the most common questions I'm asked is how I photograph food for my blog? What makes it look so good? Well, I don't claim to be an expert, but after 2 years of photographing recipes, I've learned a thing or two. 😎📸 For instance...
If there's one thing that every food blogger knows, it's that you need to capture the "yum factor."
If you aren't familiar with that phrase, you might already have an idea. It's pretty close to what it sounds like... it's that element that makes people look at a picture of a recipe and go, "YUMMMMMM! I wish I could eat that right now!" You've especially hit the jackpot if it's a picture of food that not many people like (i.e. brussels sprouts), but they're still drooling over it.
So what's the magic behind my food photography?
First of all, I want to make clear that you don't need fancy pants equipment to take great pictures. It takes lots of practice and the knowledge of how to use the equipment you do have. Ask any photographer, even (what some might call) "old fashioned" film cameras can take better photographs than the fanciest new DSLRs if you don't know how to use them.
The camera.
Budget definitely played a huge role into the decision of what DSLR I wanted to purchase, but after absolutely loving my Canon point-and-shoot, I knew I was going to stay brand loyal. After some conversations with friends that do photography professionally, I landed on the Canon Rebel t3i. It was discontinued at the time of purchase and cost roughly $600. (image source)
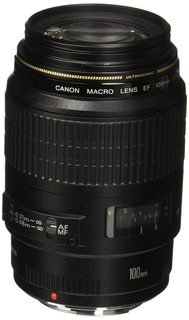
The lens.
Again, after weeks of research, deliberation, and counsel from my photography friends, I decided on a few things:- I wanted to go with a fixed lens (this means that to "zoom" I would actually have to move. The lens itself can't be adjusted.)
- My style was likely going to be "macro," as in "up close"
- 100mm would be ideal; it's suggested by many other food photographers as well according to my research
The final purchase was a Canon EF 100mm f/2.8 Macro USM Fixed Lens for about $700. (If you'll notice, the lens cost more than the camera itself. Crazy, right?)
The setup and props.
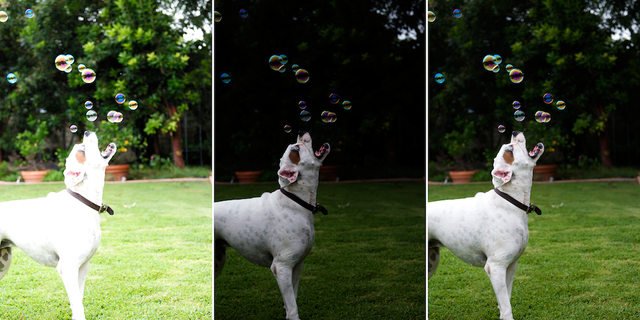
This is where things start to get fun. After the camera and lens, you really don't need to splurge on your "supporting players" i.e. the props. Some photographers might argue, but for most purposes, you can save your money and just get crafty.Before I dive into that, one thing to always remember is that food photography looks best if you use natural, diffused light. There are many reasons for this, but the most obvious is that fluorescent or incandescent indoor lighting tend to cast either a blue or yellow/orange hue to the pictures, which can make certain foods look much less appetizing. In general, though, you don't want an extra overlay of any color messing with the pictures. On the other hand, direct sunlight is very harsh and can wash out your photos, like the image on the left:
 (image source)
What you want to shoot for (pun intended) is solid shade with a reflector to bounce the light. I achieve this in the most "ghetto fabulous" way:
- a few Crescent boards to bounce the light (depending on lighting needs that day, sometimes I use one covered with crumpled aluminum foil)
- plastic patio chairs to hold the boards in the perfect position
- an unused bulletin board as a level base
It looks a little something like this:
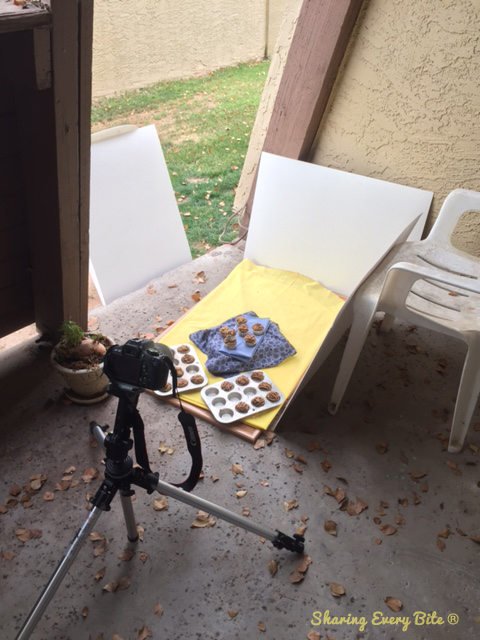
Let me just say... you probably will have access to much better lighting conditions, which would make your rig even easier. But, either way, this is half the fun!
Play around with the light coming from different angles, various times of day, and how much you bounce (if any at all). You'll find that some recipes look great with lighting from only one angle, while others need illumination from both sides. It does take some practice to find that sweet spot, especially with your camera, lens, and location.
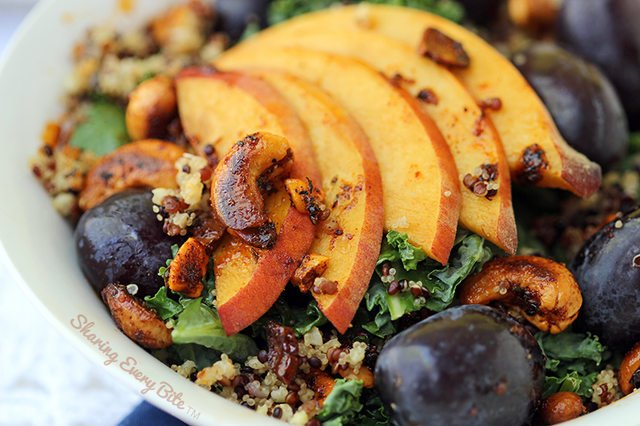
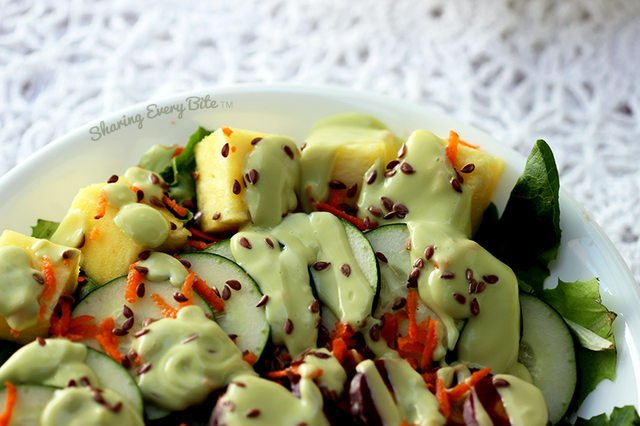
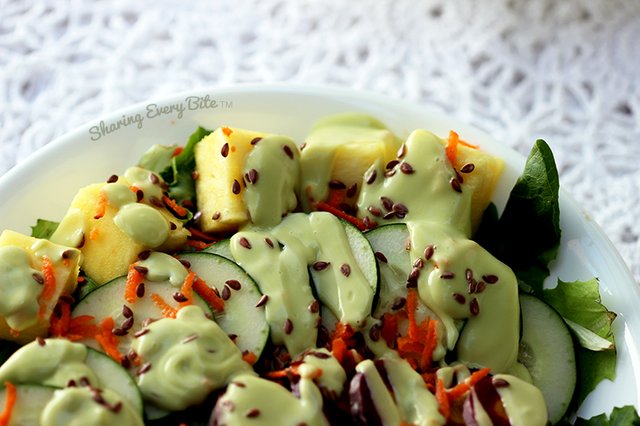
The results.
Before photographing food myself, I would look at what I considered "professional food bloggers" and wonder how they got so good!? Or do they just hire a professional to shoot each recipe they post? The more I practiced with my Canon t3i and 100mm lens, it was clear that if I worked hard at mastering the craft, I could create high-quality pictures, too.These pictures are the result of all the elements detailed above.

Hope this breakdown helped some fellow food bloggers a little, especially those just starting out (or thinking the same things I did before diving in!) Do you know any tips that I didn't mention? I'd love to know how you get up close and personal with your recipe photography. 😋
All the best,
Britt

Very cool post on composing a food photo shoot. I have had many questions about this topic and you have knocked it out of the park. Thank you for posting. Que tengas un buen dia!
I'm glad you enjoyed it! I remember first starting out having SO many questions. I imagined that food bloggers must have professional studios and catalogue-ready kitchens, but it's nice to know you can take great pictures without all that. :) It would be nice to have that catalogue kitchen someday though. 😋
Thanks for the behind the scenes look. I've tried a bit of food photography with mixed results, will try some of these tips!
Do you find it better to shoot wide open @ f2.8 for shallow depth of field?
Hi @dreamstream! To be honest, it very much depends on the food you are shooting and what results you want. ISO and shutter speed also play a role as well.
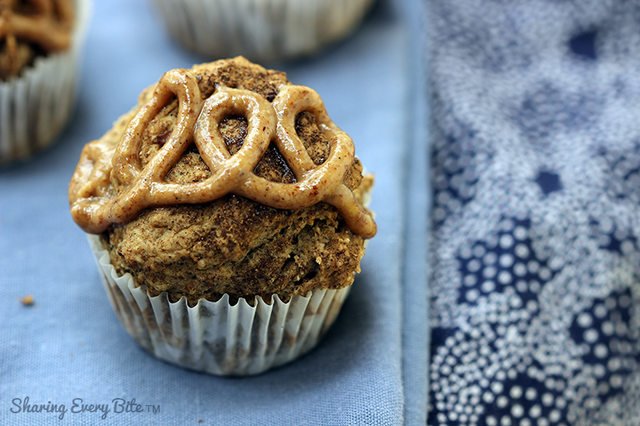
For instance, this picture was shot at: 1/20 of a second, f/4.5, ISO 100

You can see how there's only a small portion of this mini muffin that's in focus because I wanted to show the texture.
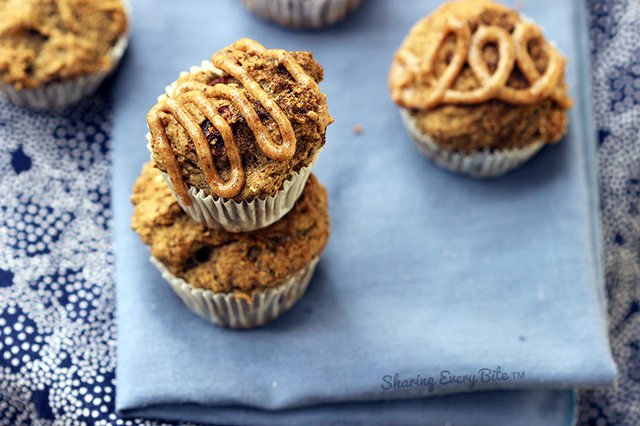
In this picture, it was at 1/320 of a second, f/2.8, and ISO 100. You can see there's much more light and more of the recipe is in focus.
It can seem a bit complicated at first, so I recommend diving into this book (Plate to Pixel) and just getting your camera out and play with it as you read! Hope this helps 😄
awesome, thanks for the book recommendation and examples
here's one I liked that I posted on my blog (oreo cheesecake was created by my wife)
That cheesecake looks delicious! Do you know what the settings were for those pictures? For something like the cheesecake, it could be improved by adjusting the f-stop or widening the focus so the full front and part of the top looks clear. On the individual slice, I'm thinking if you played around with the focus so it's off center, that would make the tip of the pie more of the focal point. :)
Yeah, looks like this was all shot at f/1.8 hence the minimal focus area. I tend to shoot on the wider scale or with minimal DoF.
I'll play around next time with some different settings and see how it goes - thanks for the helpful suggestions.
And the cake was quite good too :)
Wow,you are really good at cooking.Lovely portait and food pic,makes me hungry. Welcome check my foodie in Melbourne,https://steemit.com/travel/@dixonloveart/living-in-melbourne-a-lazy-afternoon-in-cbd
So hungry right now! lol