Simple Trick to Make Your Landscape Images Amazing - Focus Stacking Landscapes
Photoblog by @runrudy
Focus stacking is typically talked about when doing macro photography. Focus stacking is the process of taking dozens of images and layering them on top of each other in Photoshop, creating one image where the entire subject is in focus.
You can use this same technique in landscape photography but in a much simpler way, just using two images.
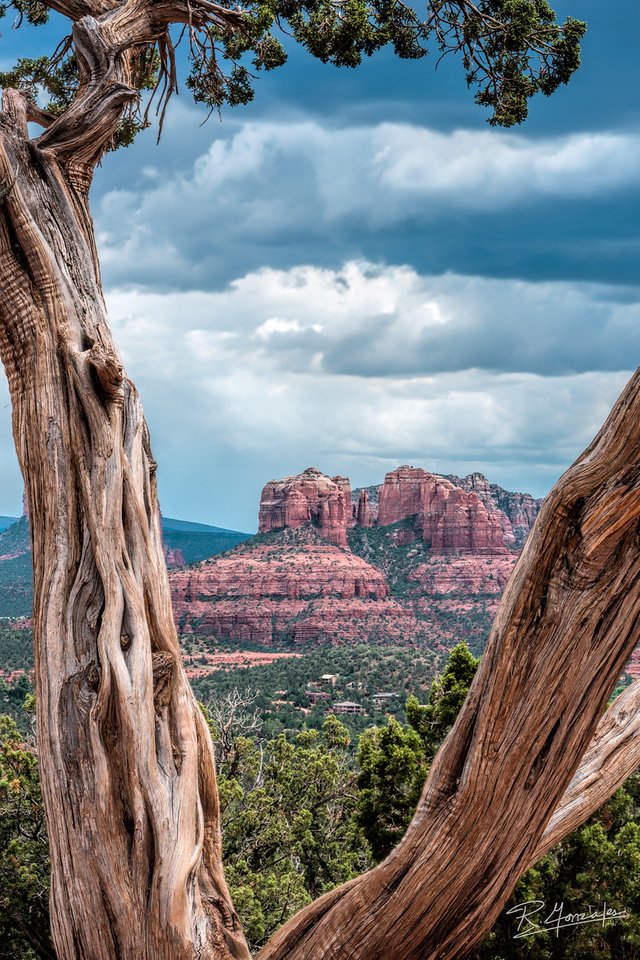
This image is of the Cathedral Rocks in Arizona. I framed the mountain with a really beautiful textured tree. The only way to get the tree and the mountains both in sharp focus is to do a focus stack.
How To Do It:
For the best results, you will need a tripod to focus stack. You will be layering two identical images on top of each other. One image will have the background in focus and the other image will have the foreground in focus.
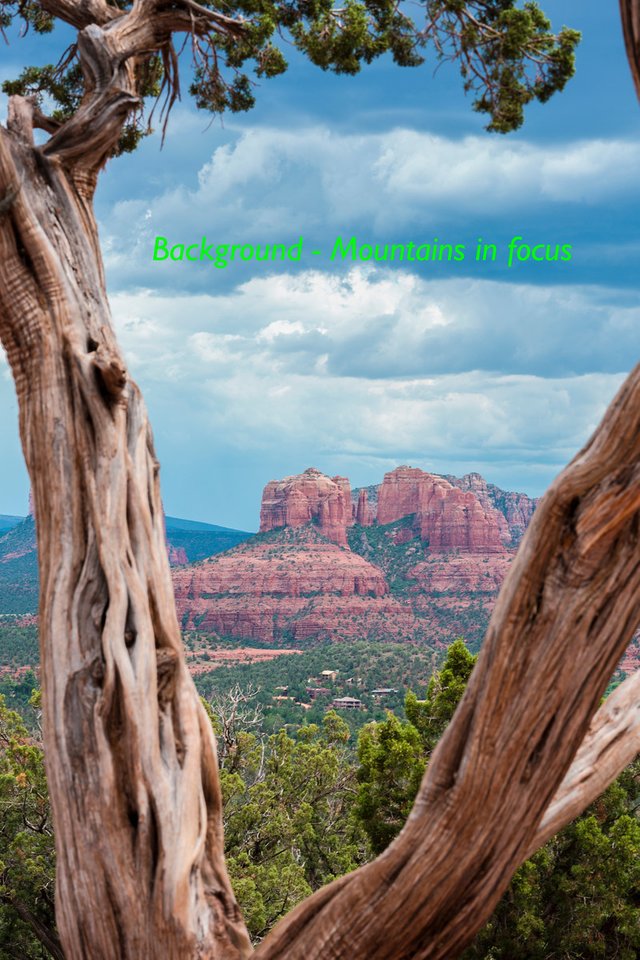
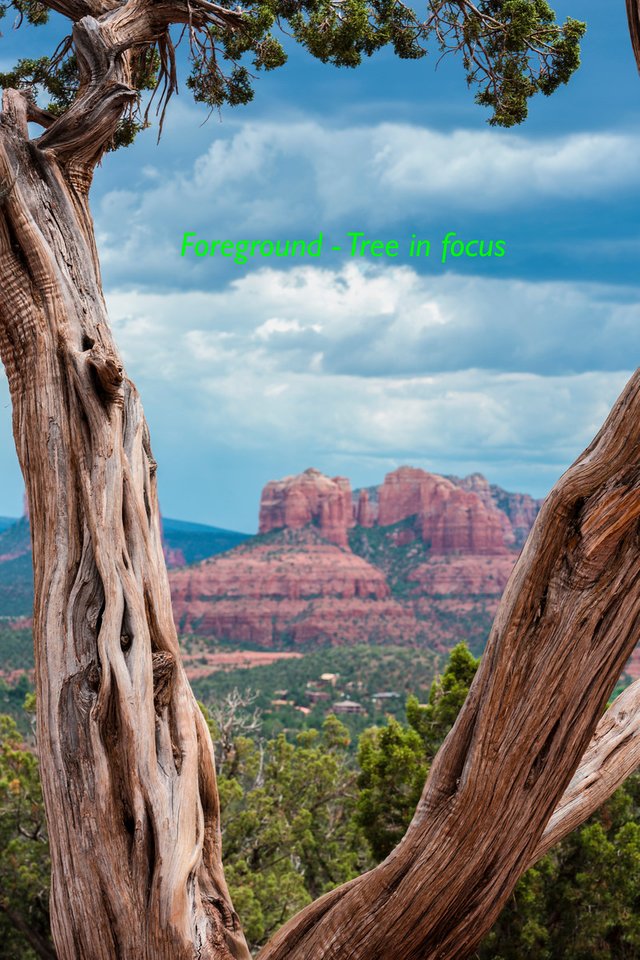
The two images below look identical but notice the differences of what is in and out of focus. In this scenario, the first image shows the mountains in focus. The second image, has the tree in focus.
I manually focused each image, while the camera was on the tripod. (Very important, tripod!)
We are going to focus stack them or blend them together to get one 'all in' focused image.
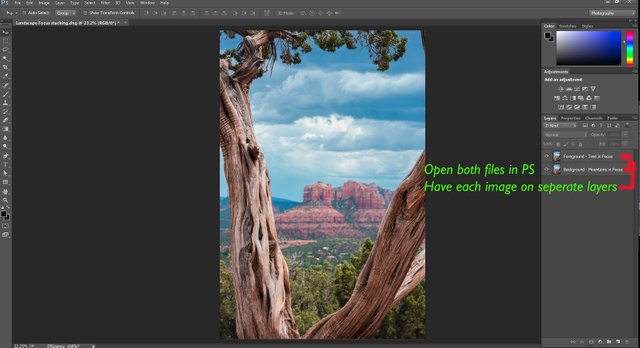
Take these two images into Photoshop.
Have each image as two individual layers.
I labeled the layers: Background and Foreground accordingly
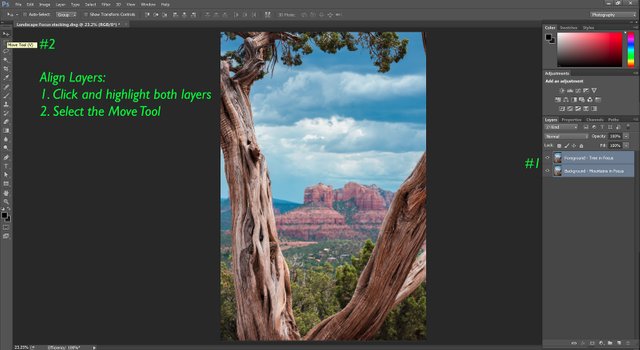
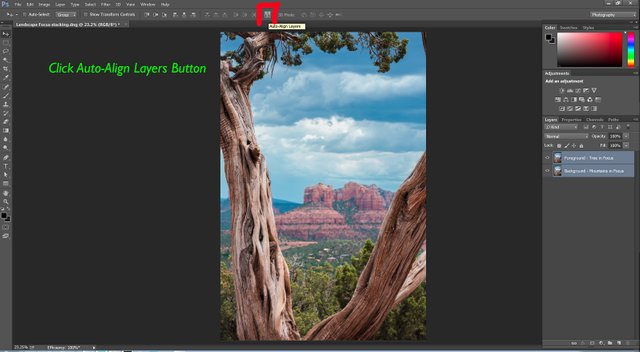
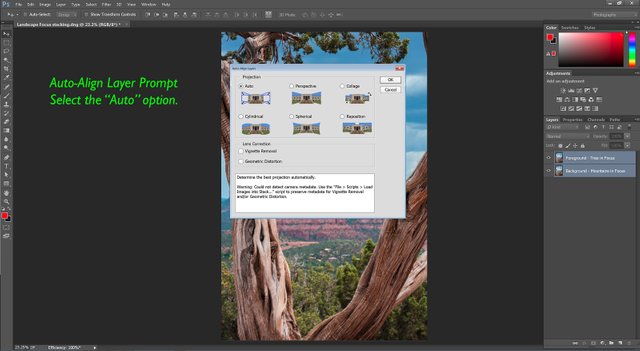
Next step, we are going to align the photos. To make the effect work best, we need to make sure each photo is going to perfectly layer on top of each other. That is why having the camera on a tripod will give you the best results and make the process much easier.
Follow these steps below.
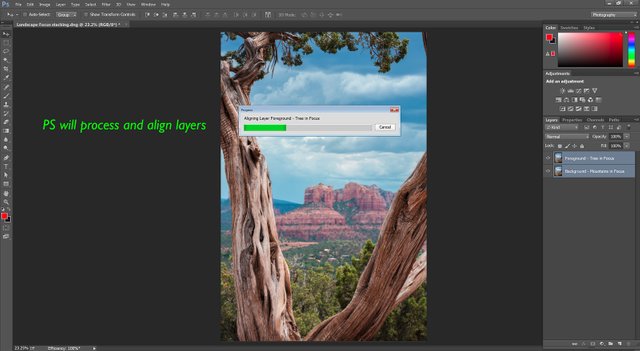
Now that the layers are perfectly aligned on top of each other.
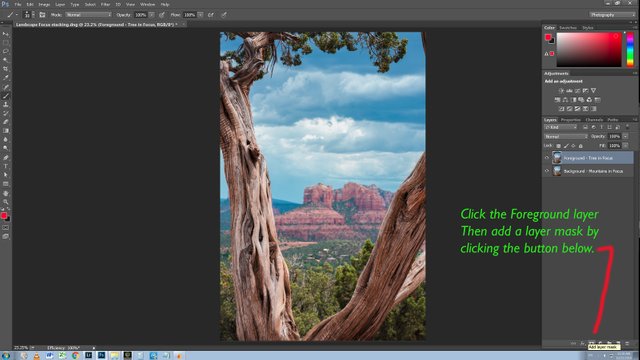
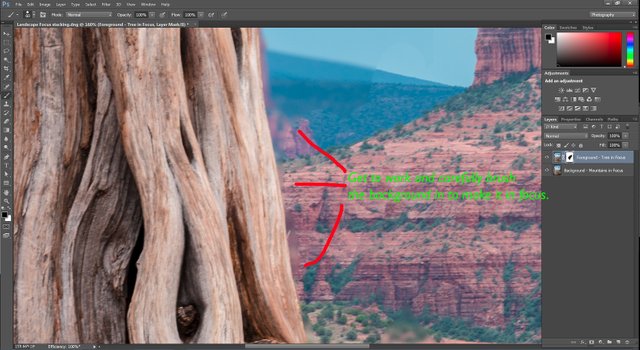
We are going to create a layer mask for the foreground layer. Make sure you click the foreground layer to highlight it.
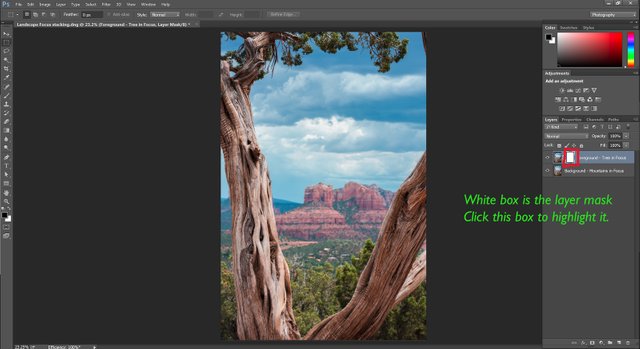
A white box or layer mask will appear on your foreground layer. Click this white box to select it.
Next, we are going to do some layer masking.
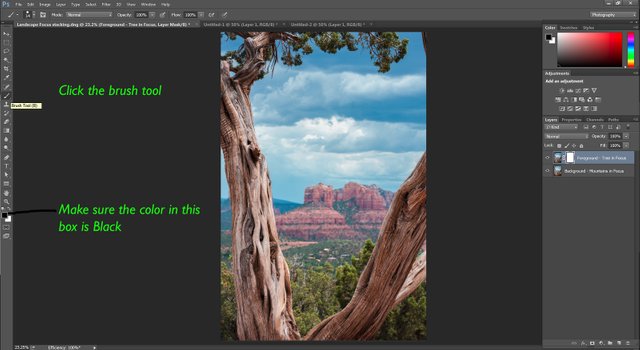
Select your brush tool. Make sure that the brush color is black.
Now that you have your brush tool selected, color is black, and white layer mask box selected: You are going to just paint over the out of focus points, to bring them into focus.
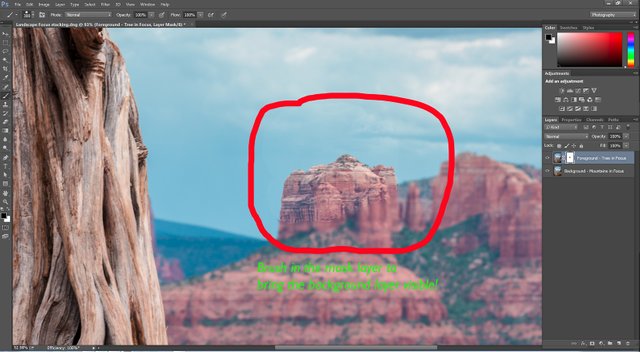
What a layer mask does is non-destructively erase the top layer (foreground) so the bottom layer (background) is visible. It is non-destructive because that whatever you are masking out (erasing), that part of the image and data is still there.
If you make a mistake, you can easily bring back that part of the image. Just change your brush color from black to white. Then brush the white color back over the desired areas for correction.
Zoom into the image to get all the detailed parts to create the desired effect. This is the fun part but also can take some time depending how perfect you want it to be.
When you finish, you should have a photo with the background and the foreground all in tack sharp focus.
Final step is to go, share your image, and impress all your friends :)
If you are new to Photoshop, this might seem like a lot of steps but it is not as hard as you think.
Give it a try, experiment, and keep learning. That is the way I learned and the quickest way to become a better photographer.
I am here to share and help if you have any questions. I'm looking forward to seeing your results.
If you liked this:
Upvote / ReSteem to support my work.
Thank you in advance,
Rudy

All images © 2016 Rudy Gonzales. All rights reserved.
I just hiked Cathedral. Amazing place. Great energy. Quite the aggressive hike. Now every time I drive by it I am amazed that I got to the "saddle" to watch the sun set. Great tips too. Thanks for sharing. Wouldn't you love to live in one of those houses in the canyon?
Hey @mazi, I wish I could hike it. We drove through some neighborhoods trying to find a clear spot to just take a picture. I agree, some of those homes look like places to retire and live out the rest of your days.
these shots r just wow
Hi @doitvoluntarily, thank you!
Excellent post and amazing photo! Thank you for the tips! Is it possible without PS?
Thank you @boddhisattva. Hmm... I don't think so but there maybe an app that I don't know about? This is the way I do it. Maybe someone can share if they do it an alternate way. I'm always looking for a new tool in the toolbox. : )
Hello @runrudy that's just awesome!
I never would have thought of doing that!
I'm going to see if I can get out in the weekend and give that a try.
Hi @trevor.george, I am glad to share and I hope it helps. Looking forward to seeing some cool results. Cheers!
Thank you! Great post 👍🍀
Thank you @streetartgallery, and much appreciated for the resteem!
This is really interesting - an amazing image too
Glad you liked it @ajh. Welcome to steemit.
Thank you for the good tip!
Glad to share and hope it helps. Cheers.
Excellent post, everyday I'm doing a "today in the spotlight" segment on my post and today I will feature this one!
Thank you @daveks! I really appreciate your support every week. Cheers.
Great post @runrudy! Is it my imagination, or is that a lion or some little animal face carved into the left fork of that tree about two thirds of the way up?
Hi @cognoscere, I do see some carving. I don't remember noticing that, ha! You go some great eyes. Thank you for the resteem! Cheers.
This post has been linked to from another place on Steem.
Learn more about and upvote to support linkback bot v0.5. Flag this comment if you don't want the bot to continue posting linkbacks for your posts.
Built by @ontofractal