How to: Shoot Aurora Borealis / part 1 – The gear
First subject of my 'How to' series will be full tutorial about night photography - shooting of northern lights.
If You dont know me yet - please read my first post About Me
All the tutorial will be shown in few parts - in this one I will tell You what kind of photo gear You should choose before leaving in the night journey. Ready? Let's go!

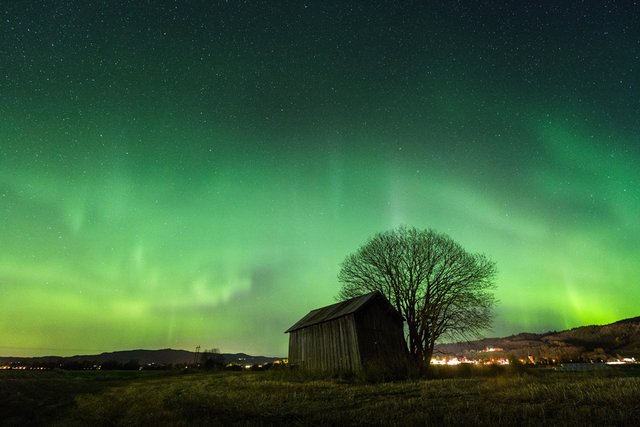
Fot: Beutiful reflections in flowing river, Aurora over Selbu in middle Norway.
1.The gear:
Photo Camera – here the thing is simple – if You want to get the best quality of images, You have to think about Full Frame (FF) camera. Quick explain – in night photography we have to use high ISO values to catch all the available light we can get. High ISO is generating image distraction called "noise". Because in compact cameras phisical sensor size is much smaller than 35mm, it generates much more noise in the process than FF cameras. It is of course possible to catch Aurora with all other cameras, but the quality will not be the best...or even won't be good. Every camera with Manual Settings of exposition can do the trick, but about settings- in other parts of the Tutorial.
Fot: Aurora over Selbu, middle Norway
Lenses – main rules is – the brighter, the better. Lower values means that the lens is able to send more light inside the camera body on the sensor. Brighter lens means we can use shorter time of exposures, lower ISO values and catch more details on the sky – overall quality is going up like crazy ;). The problem is the price – but the money is quite individual matter so I wont talk much about it.
Other aspect we have to focus on is focal length of the lens. For the north lights, which sometimes appear on the whole sky at once – wider = better. BUT in my opinion all "fish eye" type lenses gives very unnatural distortions and personally I do not reccomend it for photography – it is only my opinion and if You like this kind of images – You have right to do so ;).
Examples of perfect lenses :
for Canon – Canon Lens 16-35mm f2,8 would be perfect
for Nikon – Nikkor 14-24mm f2,8 even better!
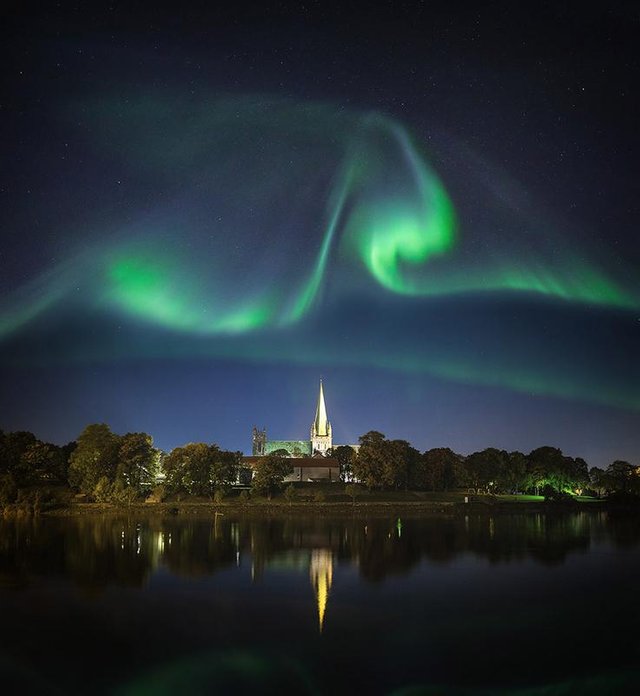
Fot: Aurora Borealis above Nidaros Cathedral in Trondheim, Norway.
All the shots You can see on the article was made with my Canon 6D camera with Canon lens 16-35 f4.0. Could be better but I am quite happy with the results...
2.Extra gear:
Most important thing is Tripod! Without it, You have almost no chances on shooting Aurora. You can use the ground, rocks, bushes, backpack to stabilize the camera but believe me, after coming back home and checking the photos on big screen – 99% of them will be shit. I know, because I had some situations where I founs myself in the middle of Aurora show without proper Tripod. Really big pain. About Tripod – must be stable! So heavy tripod or the once we can make havier by hanging on backpacks below – are the best. Shooting Aurora means shooting outdoor, many times by the sea or lake, in the mountains, where You will experience all kinds of weather. When You use exposure time like a few seconds – even the weak breeze can destroy the sharpness if the Tripod is moving. Personally I use Velbon Sherpa – quite economic but stable thing. All kinds of Tripods can do the trick when used properly.
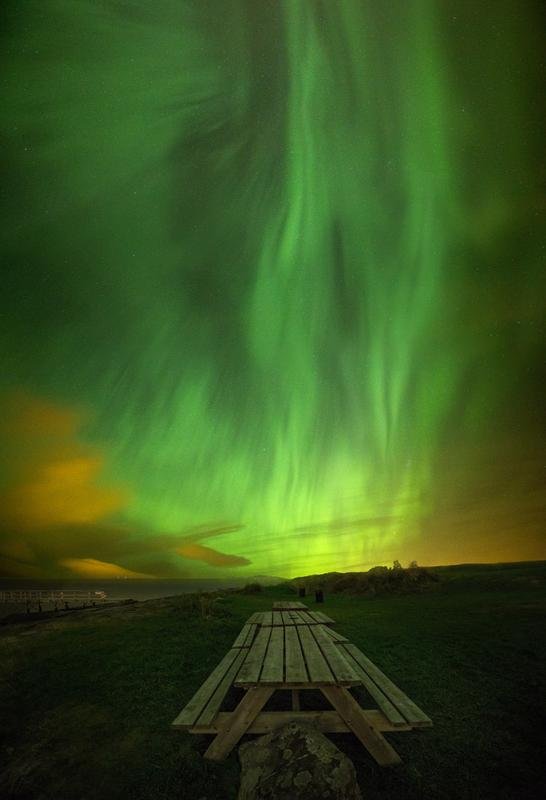
Fot: Picnic table - nice spot by the beach in Ranheim, middle Norway.
Another thing which is not maybe necessary, but gives You more comfort when shooting is remote shutter release for the camera. The one with the cable is enough. If You want to invest more money – You can buy better stuff with electronic screen, timer and many other settings. BUT remeber- electronic needs battery, if You are shooting in winter time, be prepared and always have buckup batteries in Your pockets. I am using remote electronic shutter release and as a backup always have my old cable remote ready.
EXTRA TIPS: If You are going out for night shooting always remember about light source – all the head lights are the most handy. Always have extra batteries – for the camera, Your light source and shutter relaser if used. I wont even mention about proper clothes, extra rain cover and spikes on shoes – because there is nothing worse than dropping the gear and fall to the sea during night shooting, believe me (and NO, this never happend to me ;)). Just one more – something tasty and hot in thermos and You are ready to go!
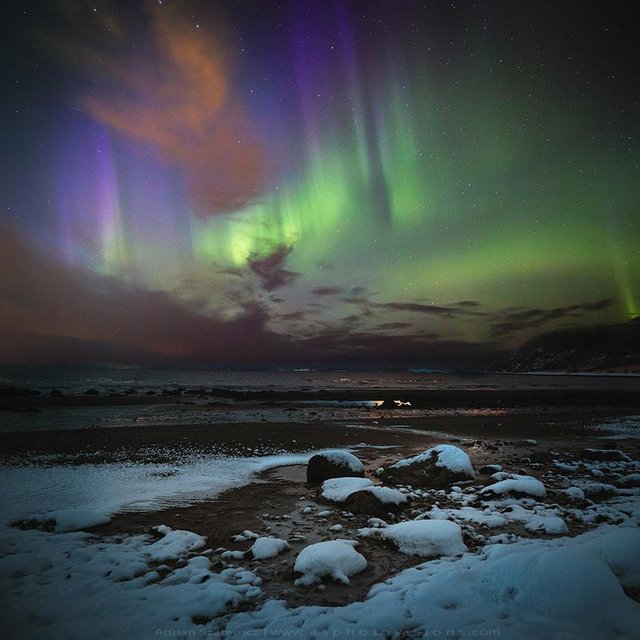
Fot: Snow on the shores of Trondheimsfjorden, winter time in middle Norway.
I hope You found the article useful.
In next chapter I will talk a little bit about settings of the camera – something that is most tricky in the matter. Follow the page if You wish to catch the next posts.
If You have any questions, maybe You would like to add something, maybe I am wrong about something – please write a comment. Have a great day everyone!
Interested in my works? - visit my portfolio page: www.asphotovisions.com

Fot: Aurora over Skarvan og Roltdalen national park in Norway.
Great work with stabilized photos. Nice job
Happy You like it. Thanks!
Norway is damn perfect for all kind of landscapes. Hope will visit sooner or later :)
Love the purple in that second last shot.
I know I have just mentioned in another post, but I really am glad I found your account. Lovely work.