Let's learn about photography - Aperture - #02
Where to start?
Together with the shutter speed and the ISO setting, the aperture is one of the three main settings to control the exposure of your photo. It defines how much light your lens lets through to the sensor. To be more precisely: It determinates the diameter of the opening hole of your lens. Let’s start with a simple explanation first: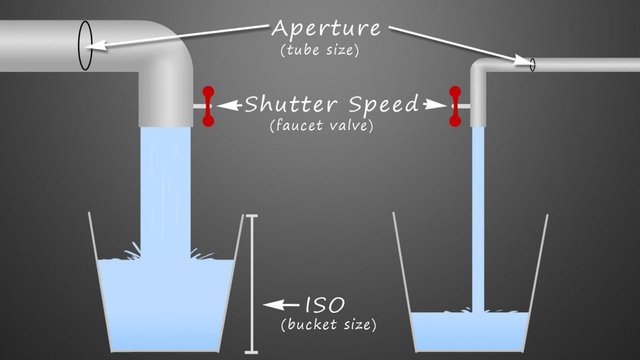
In the picture above the bucket is your sensor, the water your light photons and the aperture the diameter of your tube. Lets ignore the shutter speed for now. What can you do to get more water in the same time frame in the bucket? Easy: You just enlarge the tube. That’s exactly what you do in photography. You just open up your aperture. Now we just need a system of measurement for it.
What about those F-Stops number?
Of course, there is a measuring system: F-Stops! That is probably old news to you. A low F-Stop number like F1.8 means a lot of light, a F-stop number like F22 means that very little light is going through the lens. But do you also know what this numbers actually mean and how they compare to each other? Let us beginn with the classical F-Stop range: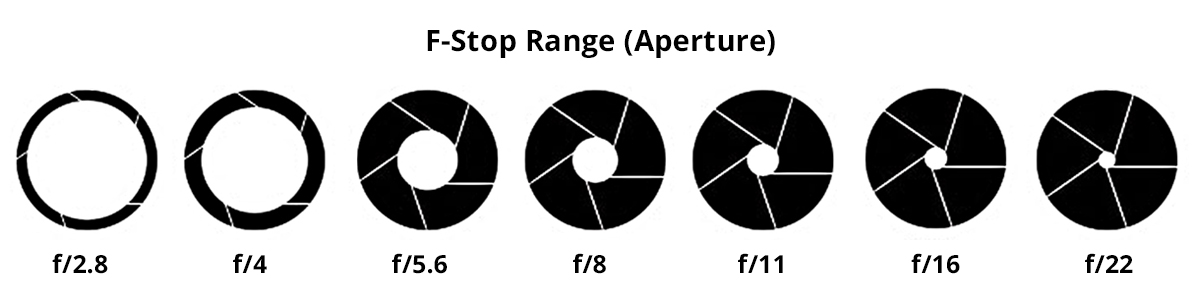
These are the typical full stop F-Stop values. I know, modern camera/lenses let us set various values between, but for the sake of simplicity we just going to focus on these right now. If you calculate the difference between these numbers (1.4 to 2, 2.8 to 4, and so on) you will notice that the value difference is always round about 1.4 times. To be more precisely: The square root of 2.
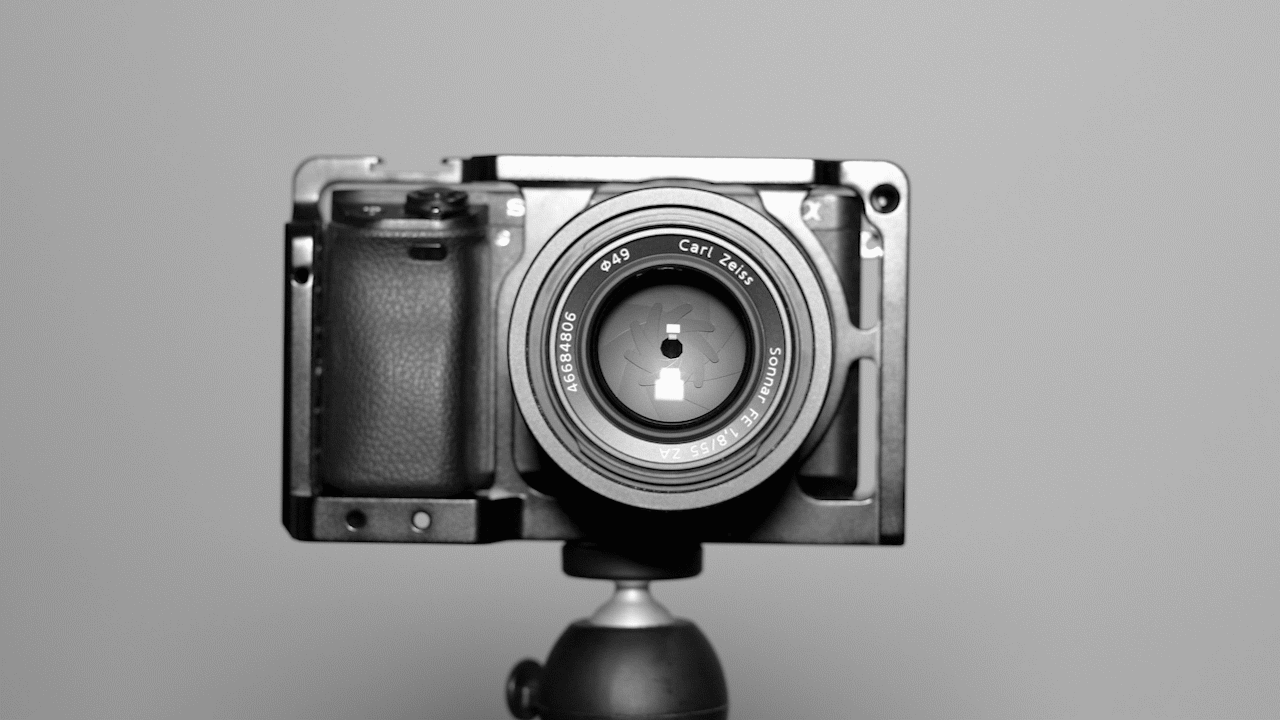
The letter F in F-stops stands for the focal length. So together with the number value, the F-Stop is always a ratio between the focal length and the opening diameter of the aperture.
To give you a few examples:
- A 50mm lens with an F-Stop set to F2.0 has an opening aperture diameter of 25mm (50mm divided by 2).
- A 24mm lens with an F-Stop set to F4.0 has an opening aperture diameter of 6mm (24mm divided by 4).
That is the reason why long lenses with a low F-Stop number have those huge front elements. Just look at this Canon 400mm F2.8 Lens:

How to calculate F-Stops / the light amount
Changing the F-Stop value by one stop doubles/halves the amount of light that comes to the sensor. Still referring to the F-Stop range picture from above:Don’t forget, the F-Stop number is directly related to the diameter of the “hole” that lets through the light. The hole is an area. Therefore, doubling the diameter means that the area gets four times as big. Basic math! To only double the area size, you need to increase the diameter by the square root of two: 1.41! So here it all comes together.
If you want to calculate the difference between certain F-Stop values you can do that like this:
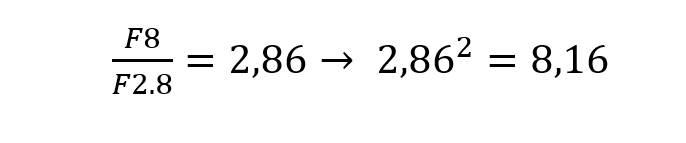
That means F2.8 lets about 8 times more light through the lens than F8.0
It also works the other way arounf of course:

F8.0 lets only 12,25% of the light through. To check this calculation again, you can just simply calculate 1/0,1225 = 8,16.
What should I remember?
At this point you probably asking yourself: How the hell am I supposed to remember all of this or do calculate everything on the fly? Don't worry, you don't have to. Most photographers, even successful ones, probably do not know all the detailed information of this subject. All I would suggest is, to learn the F-Stops range picture from above and remember that one stop change equals doubling/halving the light amount. Or doubling the F-Stop number means a light amount change of 4 times. That can be the difference between a photo with ISO 16000 (probably unusable) and ISO 4000 (usable). Basically: You need to start thinking in F-Stops.F-Stop vs. T-Stops
Little nerdy knowledge here: F-Stop is not the only system used to clarify how much light lenses let pass through. There is also a T-Stop system. This is normally used on really expensive cinema lenses. As we just learned, F-Stops are just roughly calculated due to the focal lengh/front diameter. This is not really precise, because you do not know how much light actually passes through as a tiny amount of light is always reflected or absorbed by the different lens elements. An F1.8 lens with a lot of correction elements can absorb a little more light than a different easier F1.8 lens design and therefore deliver a slightly more darker picture in the end.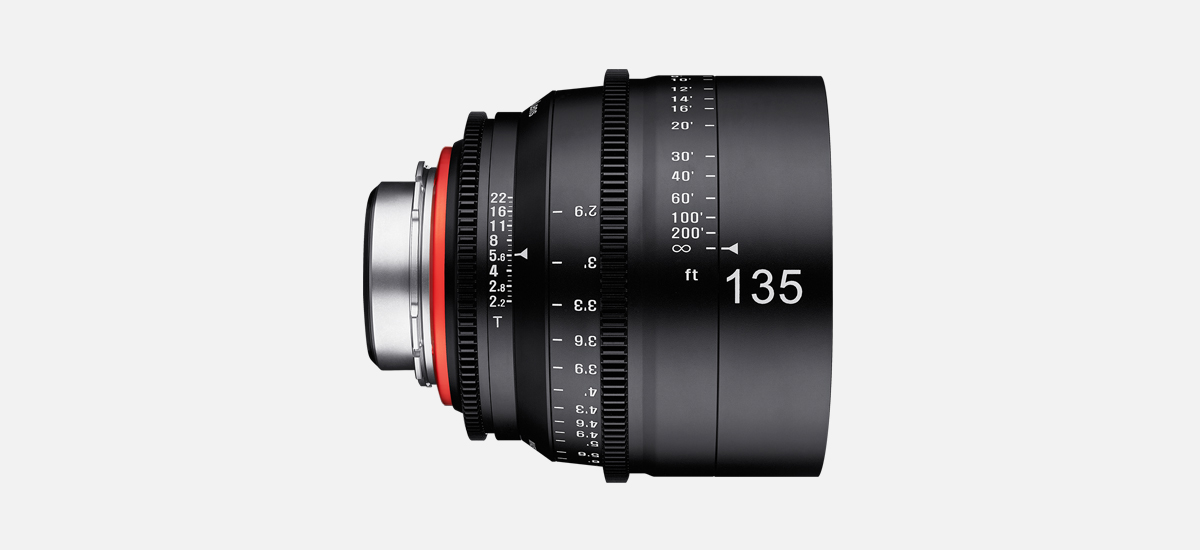
That is where T-Stops come in. They are defined by actually measuring how much light is coming through the lens. That means that a lens with a T1.8 (T-stop of 1.8) will deliver the exact same exposure as a different T1.8 lens. This makes the workflow with different prime lenses much more easier and precise. Typical sets of cinema lenses have the same T-Stop value over all different focal lengths. You can see the letter T at the first ring at the lens above.
The creative part!
A little break of all the mathematical and technical parts. As I mentioned in the beginning, the aperture is also a major tool to express your your creativity. I created this little animation as an example: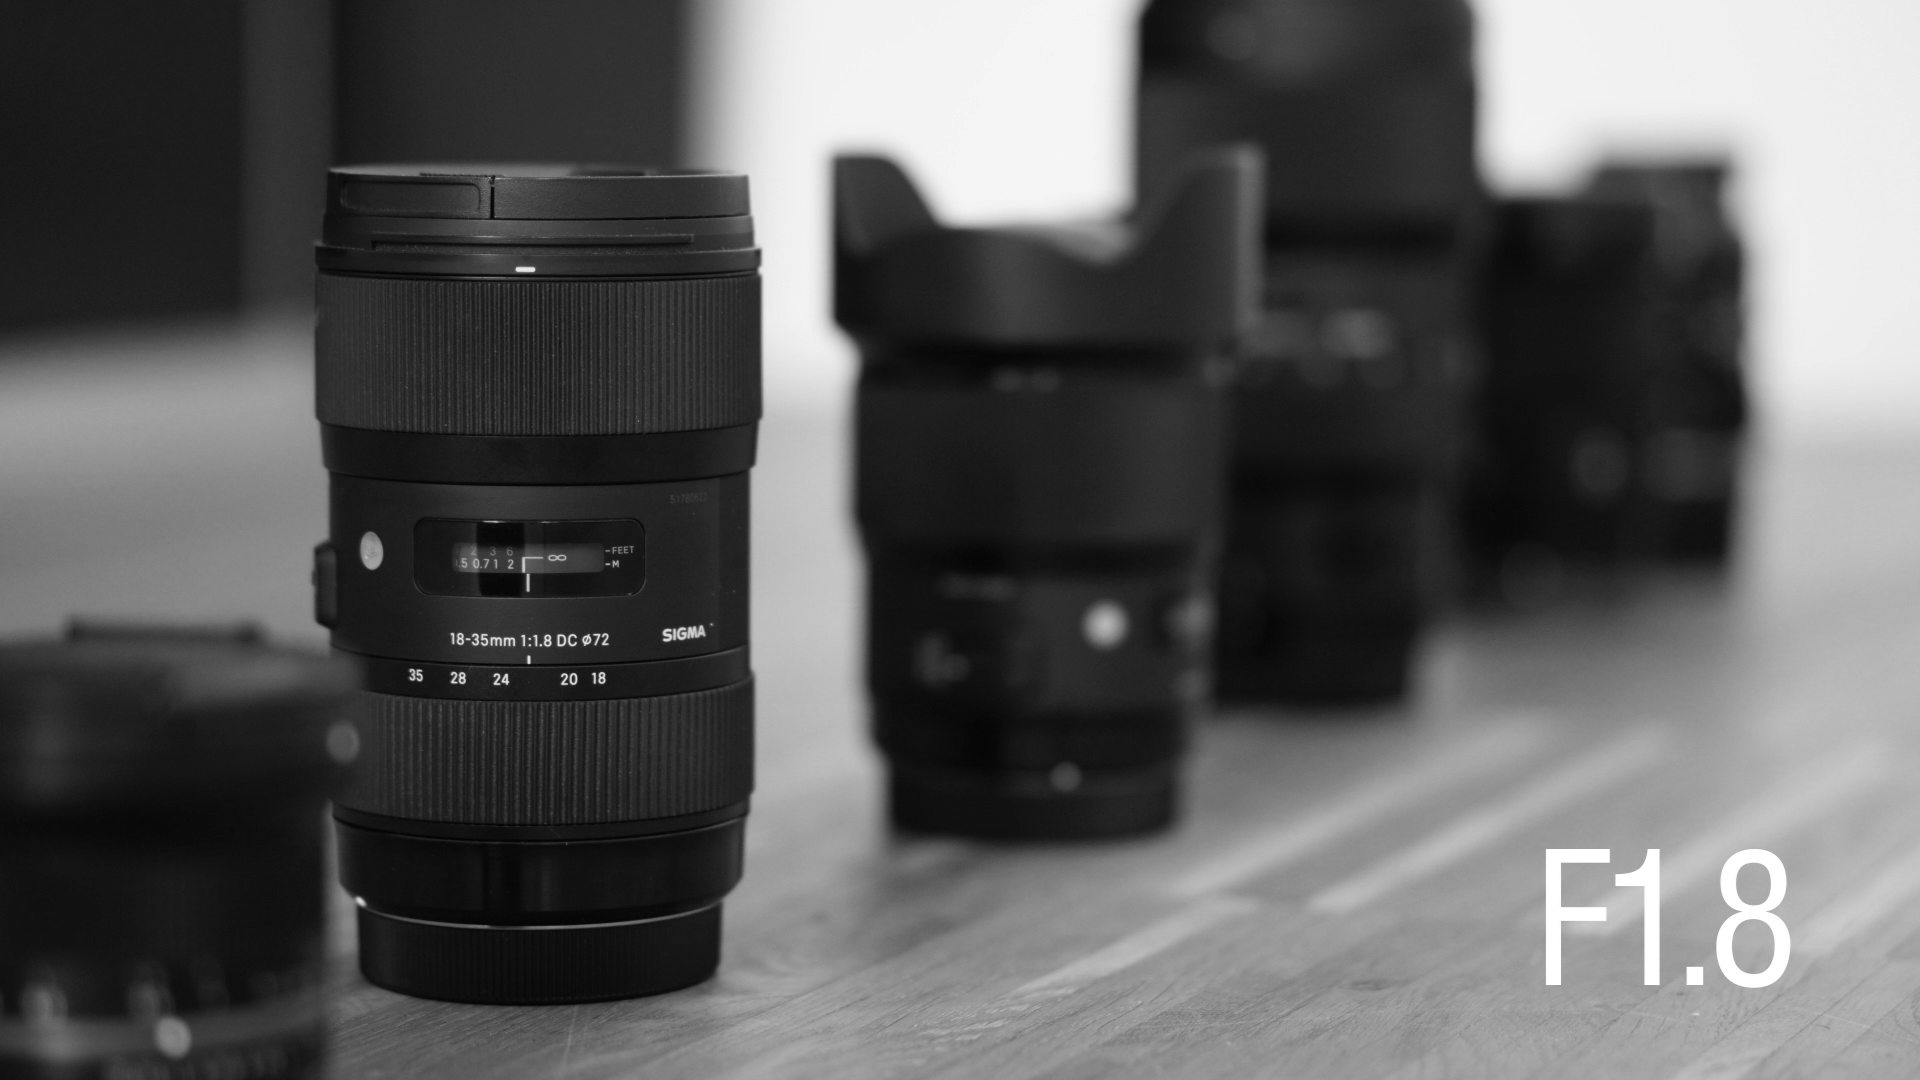
The aperture values defines the depth of field. This means the distance in a picture where objects appear acceptably sharp. This lets you isolate subjects from each other or force the viewer to look at that one motive you want them to see. This is extremely powerful and should be one of the first techniques you are going to need to practices.
I am not going to explain to you physically why this phenomenon is happening. This post is already way too long and I do not think that it is so important at this point. I want you du understand one important relationship when it comes to depth of field: Sensor size.
As bigger your sensor is, as easier it gets to get a very shallow depth of field. As I already mentioned in my previous post, there is a so called crop factor which also effects this subject. At the same aperture setting, the bokeh (aesthetic quality of the out of focus part in a picture) will always look better with a bigger sensor. That is the reason why manufactures like Apple or Samsung are integrating fake bokeh options in their smartphone cameras. Even though that the smartphone cameras are improving on a rapid pace, they can not create something which is a physical based effect. You only can fake it.
A phenomenon with flaws.
If you really want to understand the subject of aperture in photography, you also have to deal with types of aberrations that lenses have. Of course, the aperture itself does not cause these aberrations, but it depends on the aperture setting whether these aberrations have a greater or lesser impact. I'm just going to touch on this topic here. You could delve deeply into physics, more precisely into optics, for an explanation. I am just going to tell you what you need to know as a photographer.But first, the higher the quality of the lens, the less the aperture setting will affect unwanted other parameters. However, since I suspect that here the majority here is not working with 5000€ expensive Zeiss Masterprimes or similar lenses, this topic very much of relevance. There are several flaws that lenses can show, the two following are one of the most common ones:
Chromatic aberration
This aberration has surely been discovered by every one of you who has checked his pictures in an enlarged form. A typical motive where you can recognize this problem is, when for example you want to photograph a treetop while the sun shines strongly. You are going to see clear colour fringes on the edges of the branches in the pictures. These are mostly kept in a strong purple or green tone. Rudimentary explanation: The respective colors (i.e. wavelengths) of the light are refracted to different degrees and hit the sensor in an offset.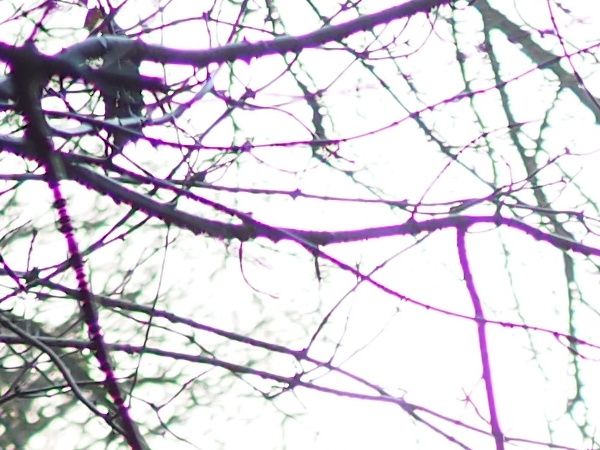
And here the aperture plays a role. If you take the same picture with F1.8 or F8.0 you will notice huge differences in chromatic aberration. Even with a slightly closed aperture, these aberrations are massively reduced or even completely eliminated.
Spherical Aberration - The sharpness is changing.
No, I'm not talking about the effects on the depth of field, these are the most obvious effect of the aperture anyway. Aperture adjustment has a direct effect on the sharpness of an image. If you take a photo of the same subject with a maximum open aperture and a closed aperture setting like F8, you will notice that there are differences in sharpness. Of course, the focus must be exactly on the same point. If you look at the same point on a strongly enlarged photo you will possibly recognize directly that this point is much sharper illustrated on the "F8 photo".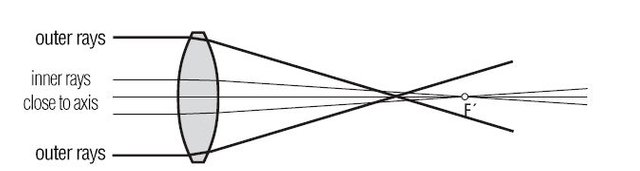
This is quickly explained in the figure above. The inner light rays are deflected perfectly to the desired focal point. They are therefore sharply reproduced on the sensor. The outer rays are not directed correctly into the focal point and thus create a certain blur. This is simply because the lenses are not ideal for deflecting the rays perfectly across the entire width. That's the difference why some people invest thousands of Euros in lenses. You do not have to deal with this aberration with high quality lenses because of perfect workmanship/material quality or expensive corrective lens units.
But if you now simply filter away the outer rays through a slightly closed aperture, you would save yourself this blurring effect. On the other hand, you lose a lot of light and no longer have the depth of field you might want. Such a theoretical graphic is always nice and good, but the best way to imagine it is with a practical example. I quickly made one for you. Of course, I have absolutely no laboratory conditions here, but even so I can show you a difference.

I have photographed the same subject twice with the same lens. Once with maximum open aperture and once with F8.0. Both times with ISO 100. I compensated for the missing light with the shutter speed plus an external lamp. I used a tripod and set a time delay for the shutter release to avoid motion blur. Focus was manually set exactly to the center. Here is my setup and my results. I advise you to look at the results enlarged:
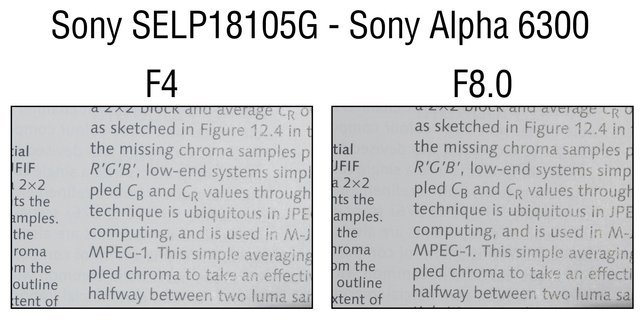
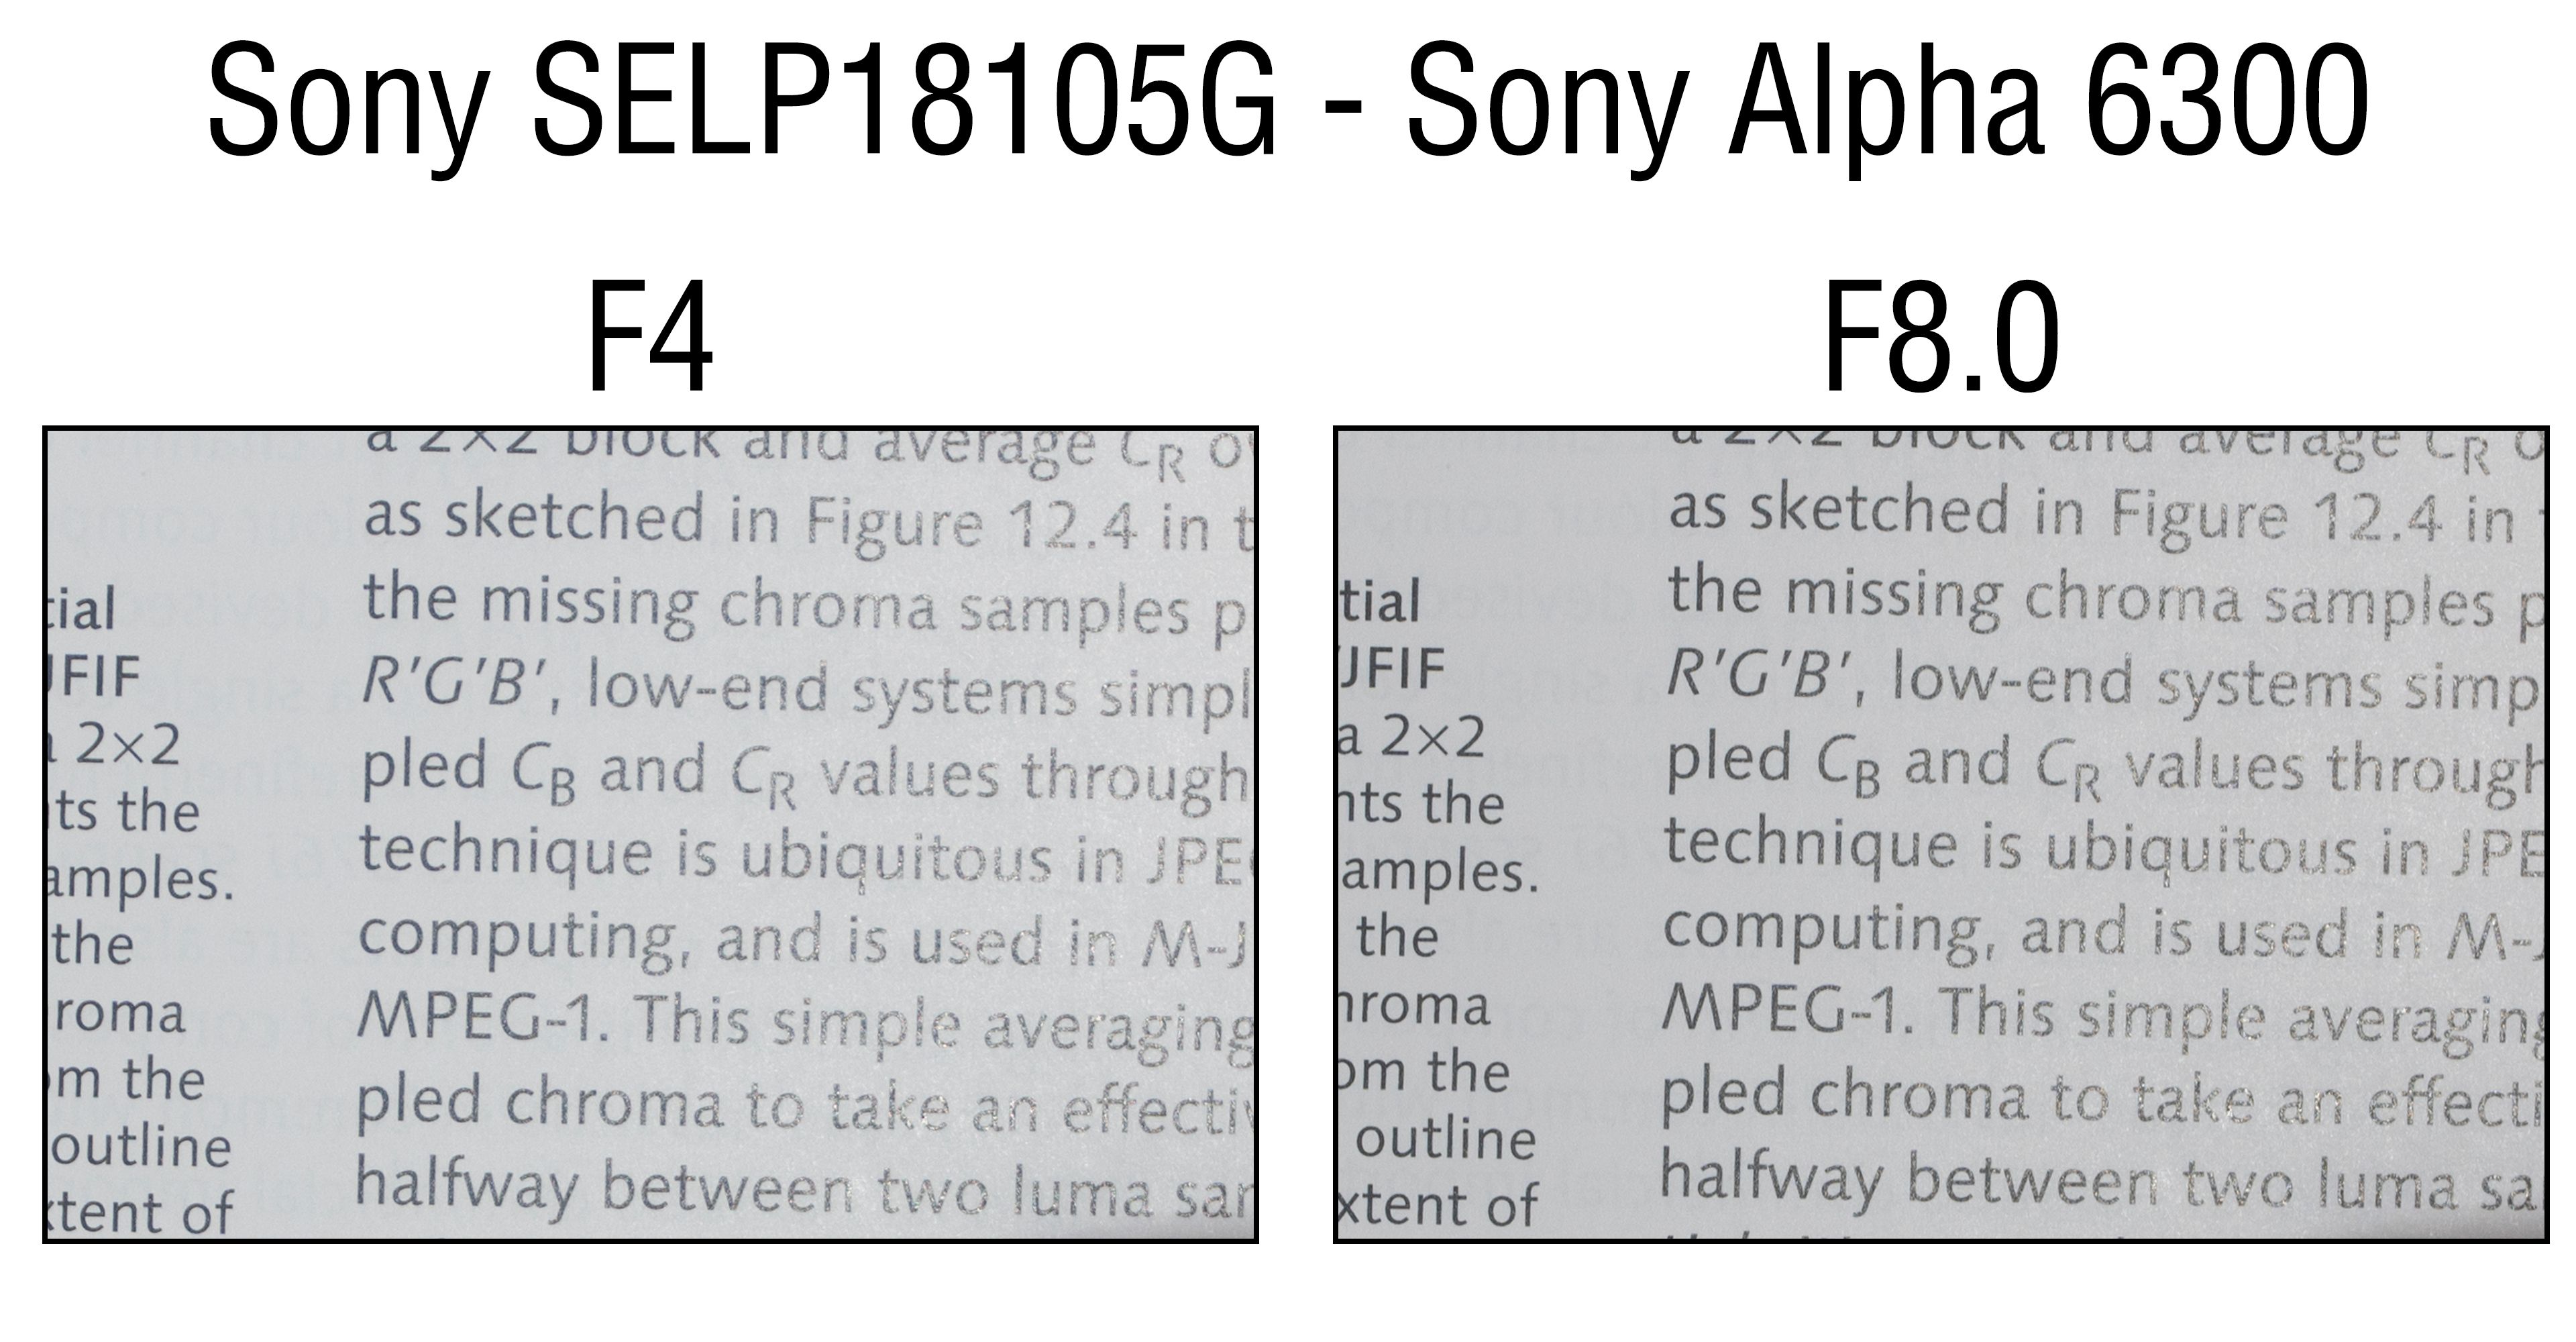
If you look closely, you will certainly notice differences. Not only in sharpness, but also in contrast. In addition, two exciting facts are illustrated by my lens selection. The Sony Zeiss 55mm lens is an incredibly sharp lens and even at F1.8 very strong. One reason for this is the high price. A difference is nevertheless noticeable. The cheaper zoom lens shows much larger differences, although the differences in aperture settings are much smaller due to the maximum F4.0 aperture. After all, a difference between F1.8 and F8 are over four f-stops. That is 16 times the amount of light.
Maybe you're thinking: "Yes Toby, I see a difference, but nobody notices that anyway". Well, you got a point there. If you don't necessarily print out your photos properly or crop hard, you won't notice these effects and can ignore them accordingly.
At some point, however, you are in a stage where it is no longer possible to dismiss because you have customers who want maximum quality. Or you want to get a small advantage with this 2-5% more image quality/knowledge from others. Besides, you must consider that my lenses no longer correspond to the lowest price range. With the typical cheap 50mm F1.8 lenses I have already seen very bad values in this respect.
And no, I don't want you all plundering your piggy bank and go buying totally expensive equipment, that's not necessary. As I said, this is all about raising awareness of the issue, even if it can be a minor issue. Do not forget, it can also be a major issue. Like the swimmer who regularly indulges in a full body shave to gain maybe a one percent advantage. This will probably seem totally crazy to the hobby swimmer. But maybe the hobby swimmer will become a competitor on day, even if he doesn't know it yet. Everyone should handle this as he/she wishes.
Closing Words
Okay, this post got really long and I could have been even further detailed in certain aspects, but I think that everything is covered that 90% of the photographers need to know. I can only repeat myself: Try to start thinking in F-Stops. That means when you first picture of a scene is underexposed or overexposed think of how much you have to change your aperture setting to fix the issue. Just stop turning around this setting without thinking first. You will notice, even after a short time, that it will become very natural.
If you are really just starting out with photography then try to master the depth of field topic first. Try our who you can not only change the look, but also the story of a picture just by masking use of depth of field. More experienced photographers should check their lens selections for any kind of aberrations. Going though the F-Stop range and the calculating process again can also be a very useful activity.
I would be really happy If someone of you can use something from my post to improve his hobby. If you have any further questions, please do not hesitate to contact me. Any kind of critique, as specially in form of a comment, is very appreciated.

Sources:
T-Stops - Source: FStoppers
Definition of bokeh - Source: Merriam-Webster
Depth of field - Source:Wikipedia
Calculating F-Stops - Source:Paulorenato
Youtube
Servus,
du hast von mir ein Upvote erhalten! Ich bin ein Curation-Bot und meine Mission ist, hochwertigen Content unter #steemit-austria zu fördern. Hier kannst du mehr über mich und meine Funktionsweise erfahren. Wie du an meinen Curation-Rewards mitverdienen kannst, wird dort ebenfalls beschrieben.
Übrigens: Wenn du den Tag #steemit-austria verwendest, finde ich deine Posts noch leichter!
Auf dem dem Steemit-Austria Discord-Server kannst du nette Leute kennen lernen und deine Beiträge promoten.
Zum aktuellen Tagesreport