Before & After #2 - Step by step with pictures showing how I edit my images
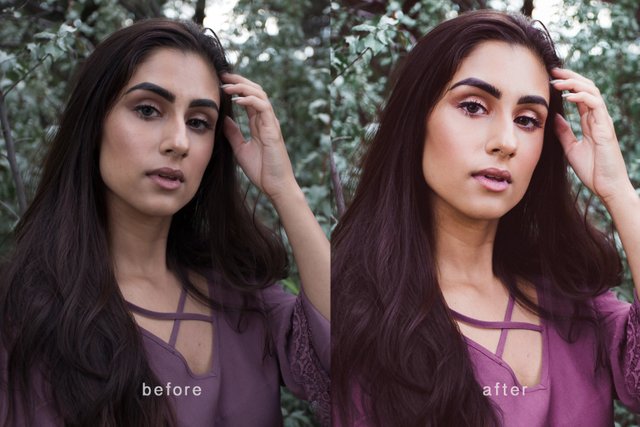
This is my second Before & After, I hope you guys enjoyed the first one. Last time I did a wedding image (link at the bottom) and today I would like to show you how I edited this portrait.
Last time I used both Lightroom and Photoshop, today I just used Lightroom so I won't be jumping between the two. Alright lets do this!
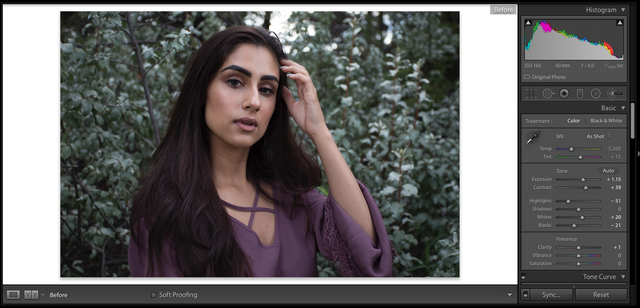
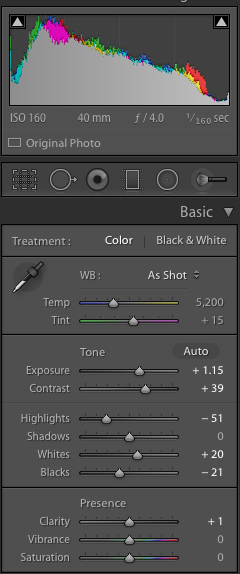
So that is the image before I started and then I made these adjustments first that are shown above. The picture was a bit underexposed and dull so I started by adjusting the exposure slider to make the picture lighter and added in some contrast. I also like to take down my highlights, up my shadows and play around with the blacks to get a nice balance that I prefer. The result is already much better and brighter.
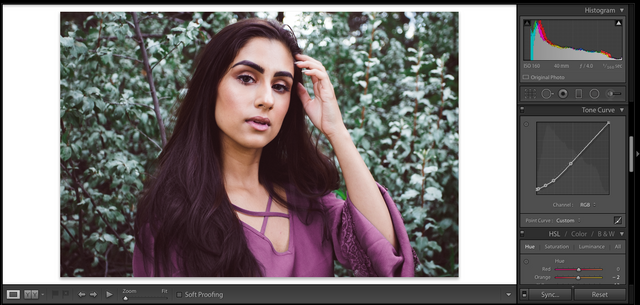
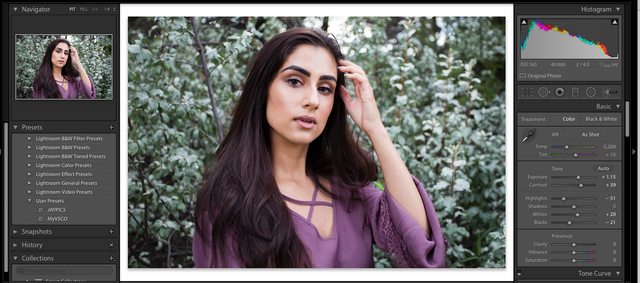
Next I adjust the Tone Curve by making a point at the bottom of the curve and bring up the blacks. Then I add more points to make a curve that looks like this. I make this curve in a lot of my images or at least close variations of it. It gives the picture a more matte/film look that I really enjoy right now. Play around here and see what suits your image best. You can get really interesting results but adjusting this curve.
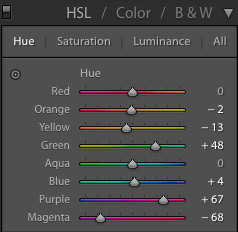
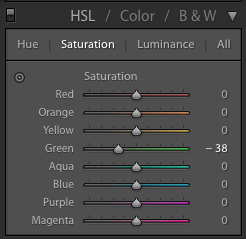
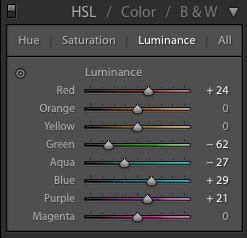
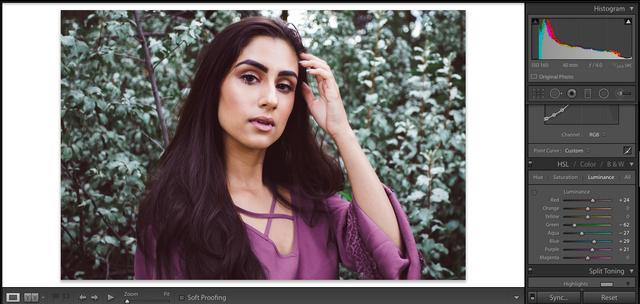
These are the Hue, Saturation and Luminance adjustments I made. For this image I wanted to focus on the shirt colour as well as the leaves. I made the shirt more of a pink colour by adjusting the purple and magenta sliders, I also wanted the greens more turquoise so I adjusted the green slider. For saturation I wanted to dull any really bright greens so I just took some of that colour away. Then the luminance I brightened the red, this is a great trick for skin if you want to make it brighter since skin is always in the red and orange sliders. Be careful here though because if you do it too much the skin can start to look really strange! I also brightened the purple and blue which brought highlights onto the shirt and parts of the leaves and darkened the greens because I don't want that colour to stand out.
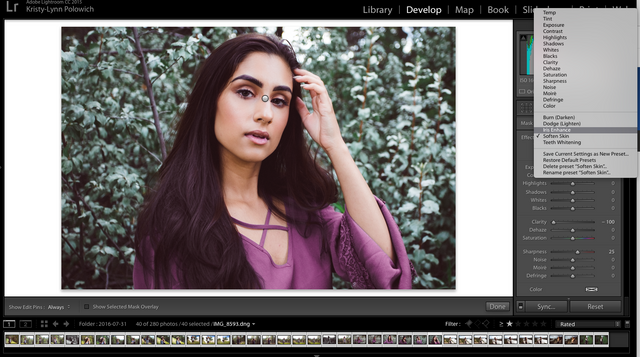
Once I was done with colour adjustments I wanted to soften the skin, brighten the eyes, and add some contour. Here is how you do that in Lightroom:
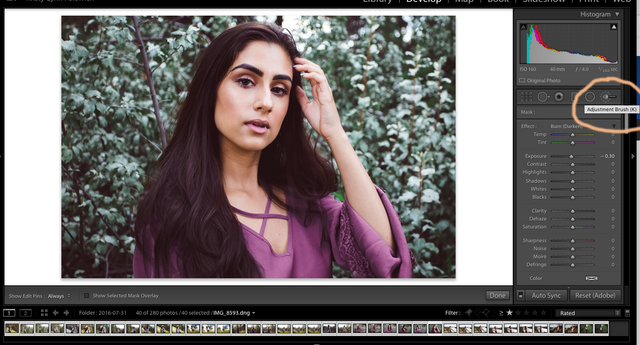
Go to your adjustment brush
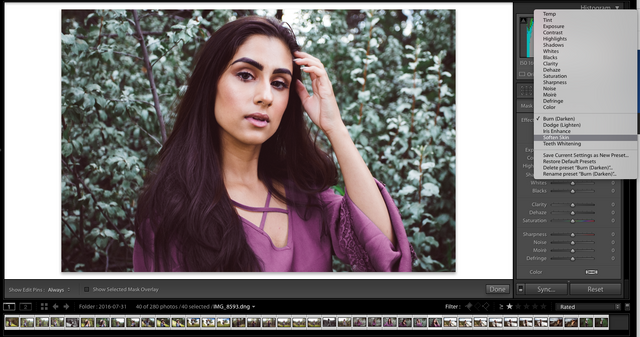
Click on the menu and select soften skin
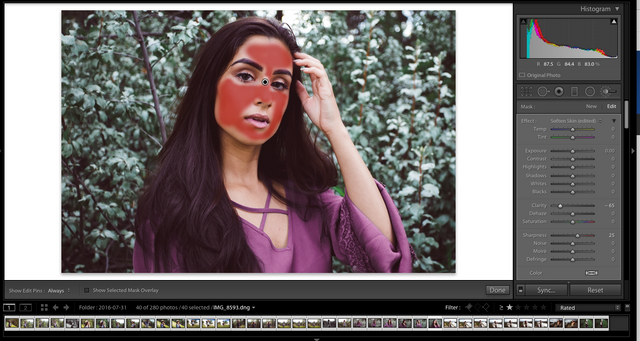
Then brush onto the area you want the skin to be softer and more even. Here I will adjust it to my liking by using the clarity slider because sometimes it is too strong. This is a great tool though and much faster then photoshop if you need to do a quicker job. Once your finished press done at the bottom right of the image.
I then make a new brush and go to the menu and select iris enhance. I colour the brush on both the eyes and it makes them brighter and sharper. This I will also adjust in the sliders to the side so it is more realistic.
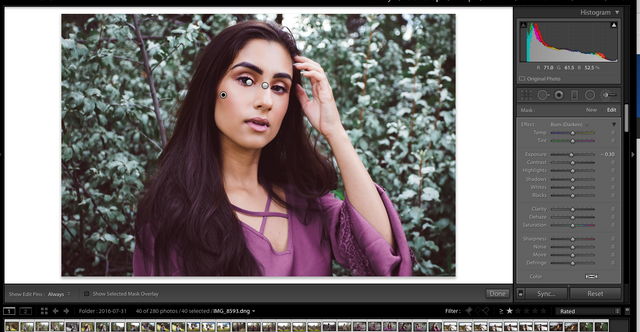
Here I selected burn/darken from the menu and added some contour on her cheekbone
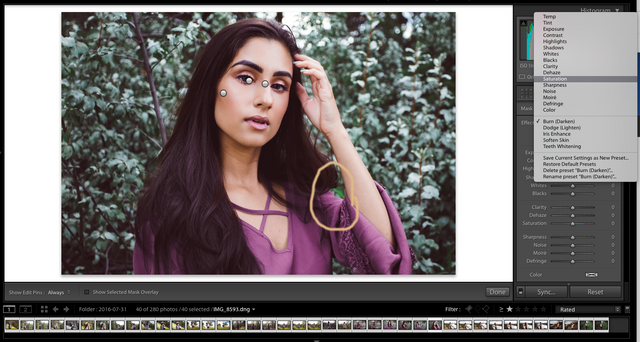
And lastly I wanted to get rid of the bright green spot by her arm so I made one more brush and lowered the saturation in that area.
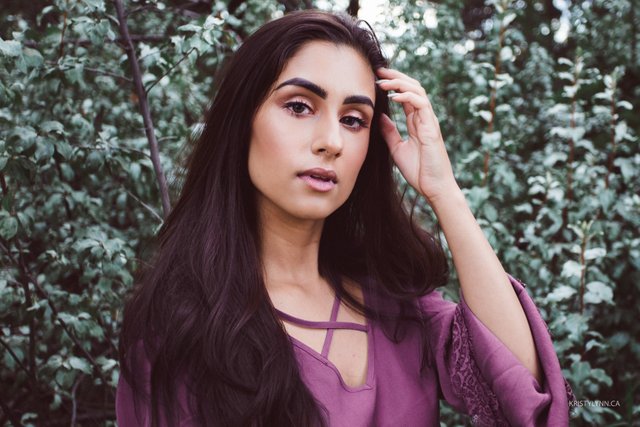
This brought me to my final image!
I hope this was helpful, if you have any comments or suggestions I would love to hear them. If you want to check out my Before & After #1 click here: https://steemit.com/photography/@kristylynn/before-and-after-1-step-by-step-with-pictures-showing-how-i-edited-my-images
Follow me if you like! Have a great weekend everyone!
Thanks for this tutorial, I've been reticent to go deeper into photoshop and lightroom but this really makes it feel more approachable, keep up the posts! I'm most interested in photoshop.
Actually, I'd also love to hear your preferences for photoshop and lightroom - which you use for what kind of photo or correction and why. Thanks!!
Yes definitely! I can do some in Photoshop and others in Lightroom. They are both great for so many reasons and a lot of the times I end up using both. I'll keep them coming! :) Thanks for the feedback!
So why do you want to be white?