Fit for Life #2 - Building a Campervan
%20(2).JPG)
Hello Steemit!
If you read my first post, you'll know that this new series is about being fit for life with exercises both inside and outside the gym. But it's also making my life fit for purpose. It's about getting out there and making the best life possible and creating the life I want to live. It's not just about getting physically fit, but improving my skills, mental abilities and everything else that helps me lead the amazing life that I live and want to continue living.
In today's post, I'm going to be working on the later. I want my life to contain freedom, fun and the outdoors. I want to get back to nature, be on the road and explore the world. In today's post, I'll show you the first step I took to being able to achieve this - building my very own campervan with the fiancé!
The Planning Phase
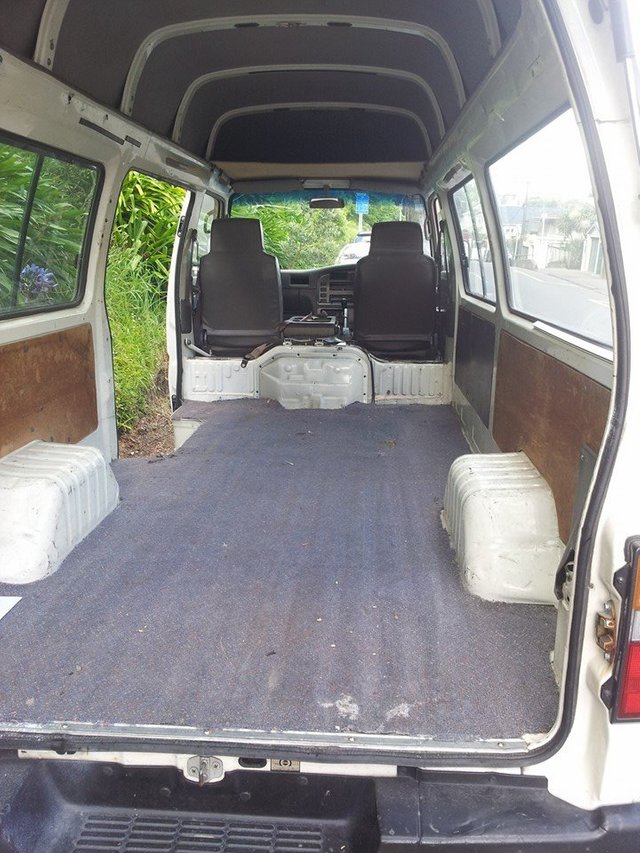
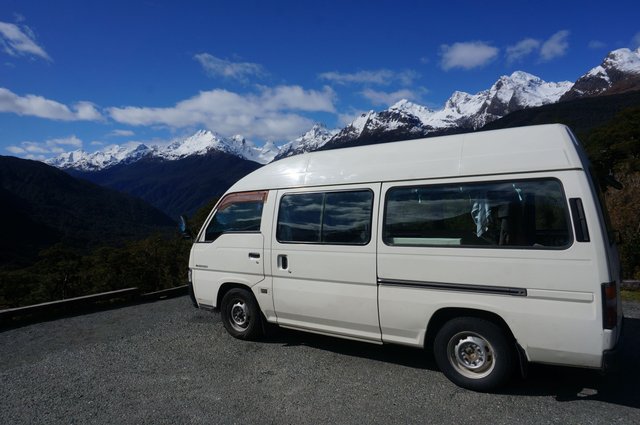
So check it out, I started with an empty double glazing van that I bought from a guy for like £3000 or $6000 New Zealand Dollars as it was since I was living in New Zealand. Together the fiancé and I completely stripped the van which left us with this lovely hollow shell.
I knew I needed my van to be able to do a few things. It needed,
- A sink and a place to store water.
- A place to cook our meals.
- Somewhere for us to sit and relax, at least big enough for two.
- A bed where we could both sleep comfortably.
- A table to eat from.
With this blank canvas, a little larger than a traditional VW Campervan, I got to work with my planning.
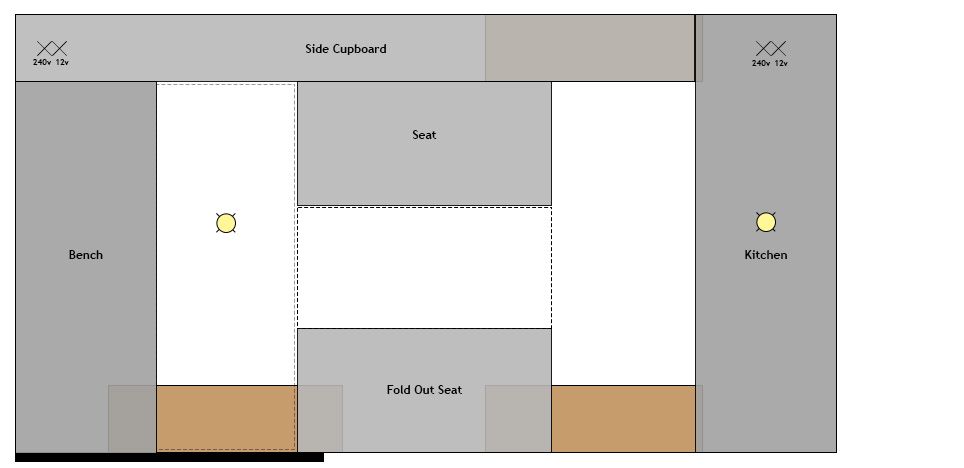
I booted up the old Photoshop and started drawing boxes and circles on a blank canvas, everything scaled down to size. I think I made each 1 metre about 10 centimetres on my drawing so that I knew everything would fit properly and be big enough.
As you can see on the left hand side and in the middle I had three benches. The little dotted lined show where the left hand bench would fold out to meet the two middle benches, and how the bottom middle bench would fold out to meet its partner. This would create a bed around 130cm wide, which is just a little smaller than a full sized double bed - plenty of room!
On the right I'd planned out some space to have a kitchen with a sink and cooking facilities. This was at the boot or trunk end of the vehicle so you'd be able to access the sink from inside or outside depending on the weather. I also added a cupboard that would run along one side of the van for storage, and for the table!
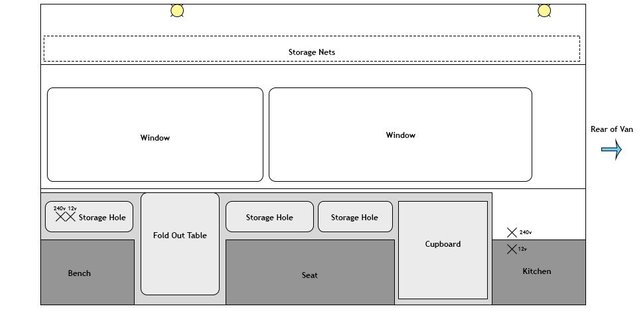
The side view is perhaps a little harder to understand if you hadn't been staring at these drawings and imagining them for weeks while I tried to get everything planned. The key on the side view for me was showing where the electrics would go for both our battery and mains power, and to show how the folding table would sit within the side cupboard that would be able to be folded out if needed. You'll see photos of that later and be thoroughly impressed I'm sure.
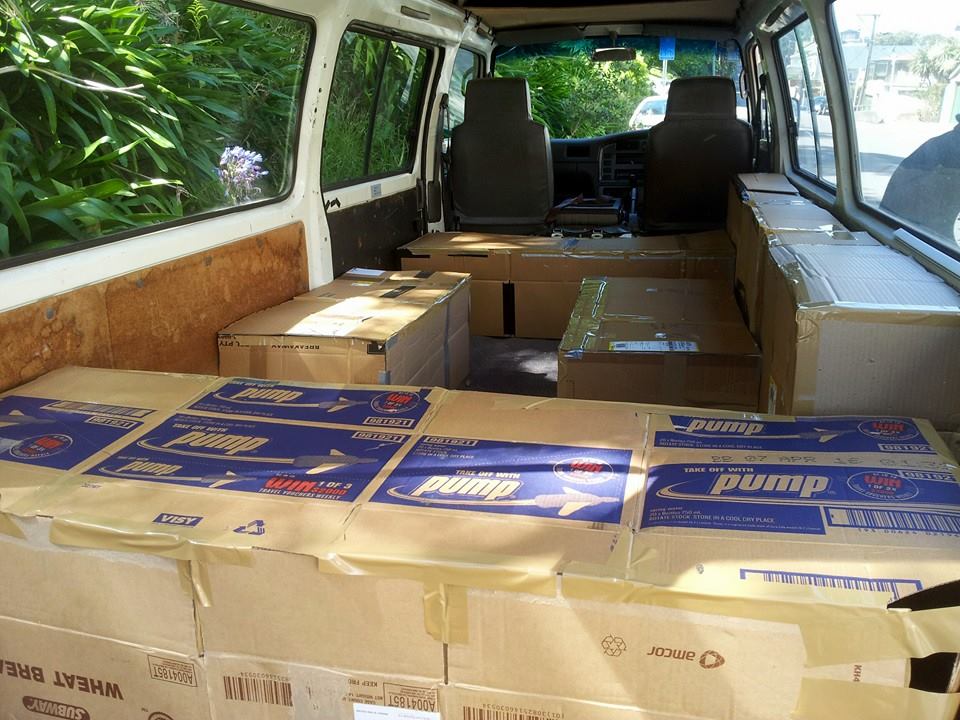
Finally, and the pièce de résistance of my planning phase, was the prototyping. Amy and I jumped in the car on Tuesday night at around 10pm and drove down to the main central business district of Wellington where we were living at time to scavenge boxes. Wednesday morning was apparently the cardboard recycling day so all of the businesses left hundreds of boxes out on the pavement to be collected - we collected a few for them!
Once we got back, we piled all of the boxes into the back of the van and that weekend we set about building the boxes in to exact scale replicas of the seating, kitchen and cupboards on my plan. This let us walk around the van, make sure there was enough room to move around and to cook and that the seats felt like the right height and that we could cook on the kitchen out the back at the right height too!
It took us hours of cutting and sellotaping everything together but it really helped. I even built replicas of the folding out bed out of cardboard which you can't quite see here. Happy that everything we wanted would fit and that we had plenty of room for living in it, we started the construction phase!
The Construction Phase
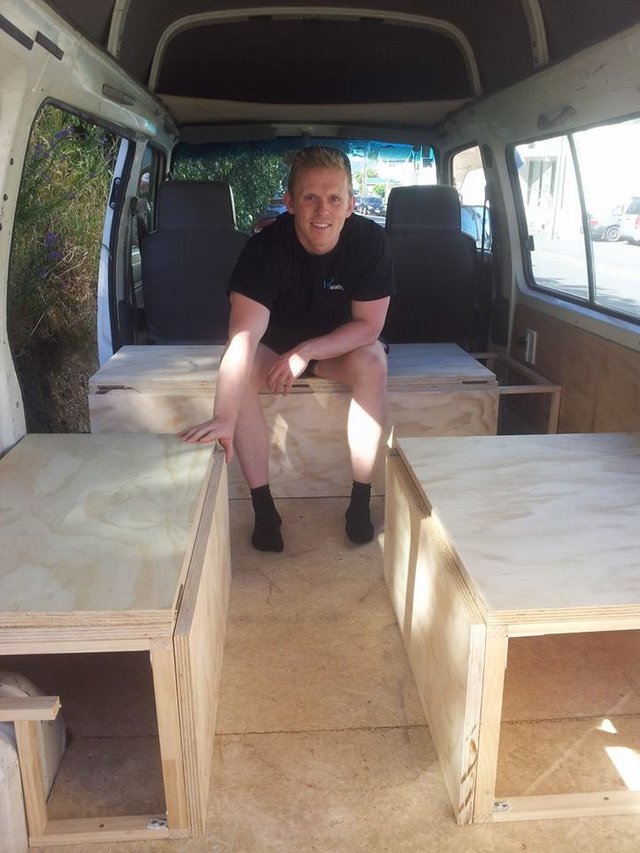
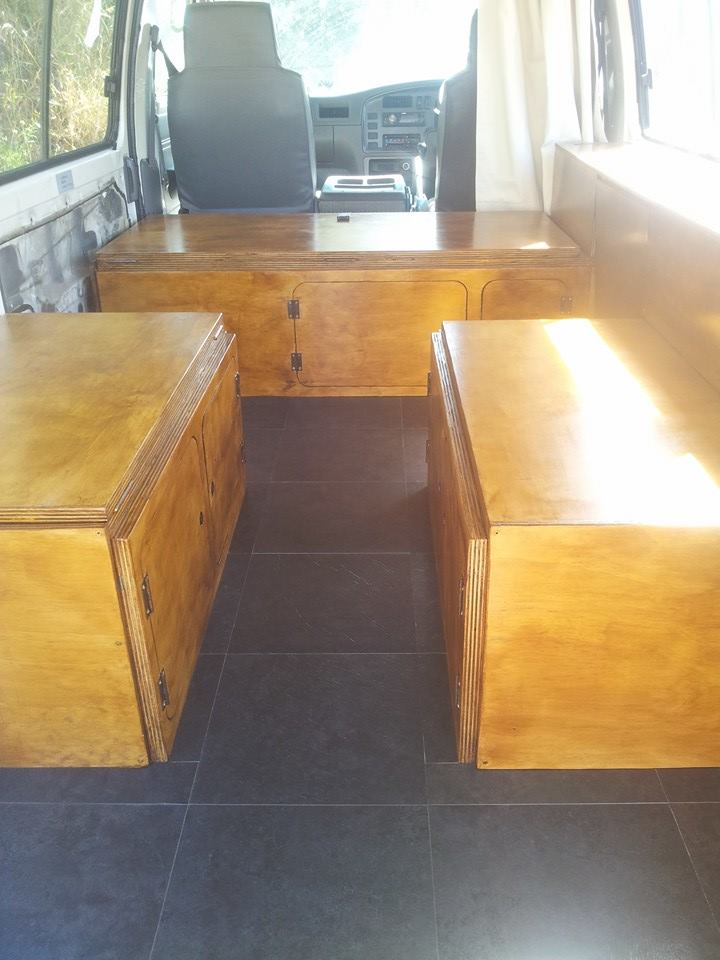
And so the work began. I haven't got as many photos as I'd have liked of this process because I was too busy trying to get my head around how everything was going to work. This is the first progress photo I have since after the cardboard prototype. First I'd laid down a solid chipboard floor because the floor underneath the old carpet was lumpy and I had to get it flat. I screwed that to the metal of the floor so it wasn't going anywhere once I started to build things on top of it.
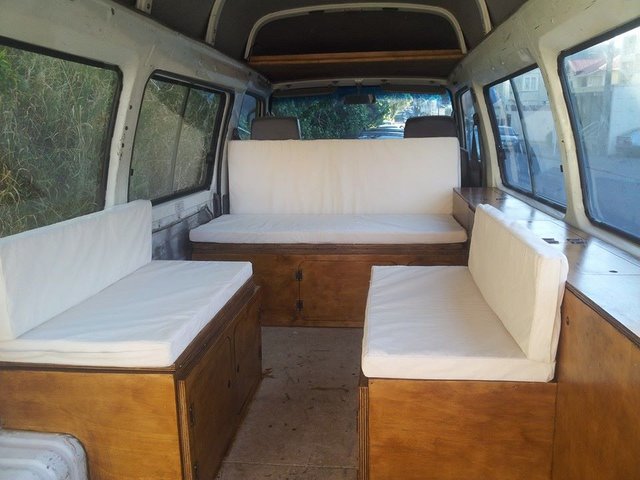
Next I built baton frames for all of the cupboard and seats and then cut the tops and sides to size to clad the batons with to make benches. Here I am with the first bench tops screwed down to their baton boxes and with the hinges attached so that the bed can fold out. If you look closely you'll see I designed the sides of the boxes to sit out rather than flush. This was so that the bed would have a little lip to rest on when we folded the bed out.
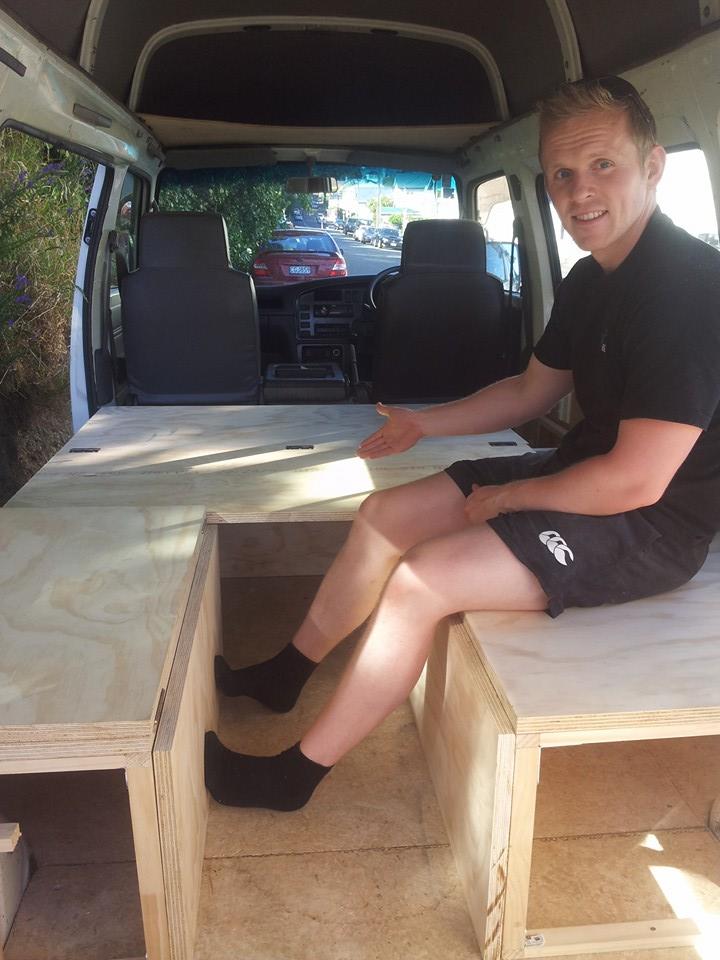

So as you can see, once the benches have had their tops folded out, you get a perfectly flat, and very large feeling double bed. I made this bench top/bed top out of 22mm ply wood so it's absolutely rock solid. It wouldn't matter how much you bounced around in the night or how heavy you were, this bed and benches will support you happily.

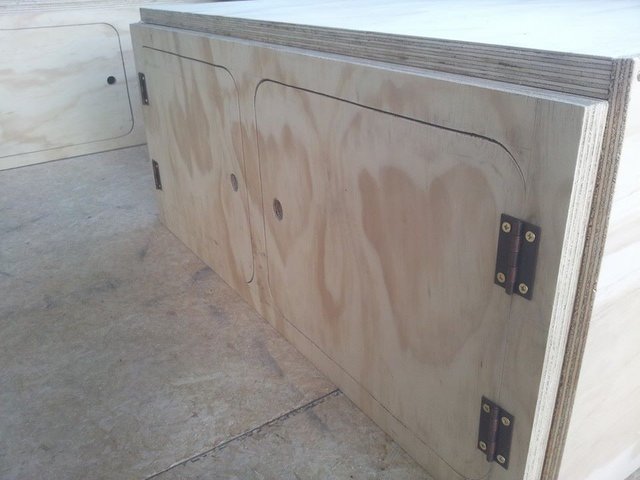
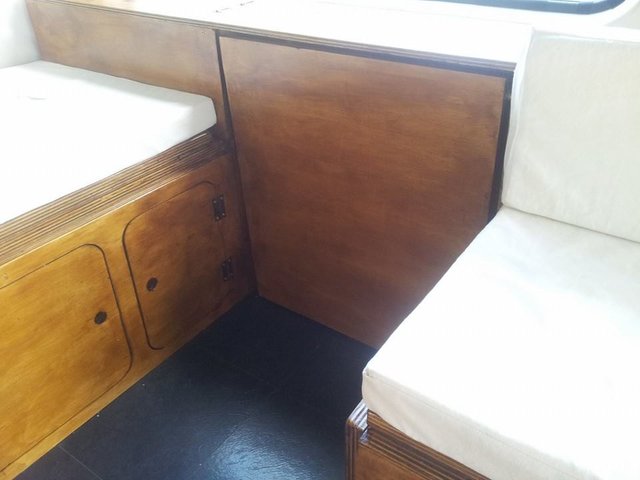
Next job was to make some storage out of the benches. If you're taking your life on the road then you need plenty of space to store clothes and food. I wanted the cupboard doors to be flush with the cupboard itself so we wouldn't catch the doors with our legs by accident as we walked around the small space. I couldn't quite work out how to do this so I went for this option which seemed too simple to work properly - but it did!
All I did was draw the shape I wanted my cupboards on to the front of the cupboard and then took a Jigsaw and just cut around it. That left me with a big hole in the wood, and a piece of wood that had once been in the hole. I then just re-attached that piece of wood with hinges and there you go - doors!
We now started to produce the soft furnishings. We went to a foam manufacturer where they cut us the exact foam sizes that we needed to make comfortable benches, but also so they'd all fit together perfectly to create a mattress for a bed once we had laid it all out! My beautiful fiancé did all of the covers for the foam, it took her hours, and she had to learn to use a sewing machine from scratch to get all the work done.
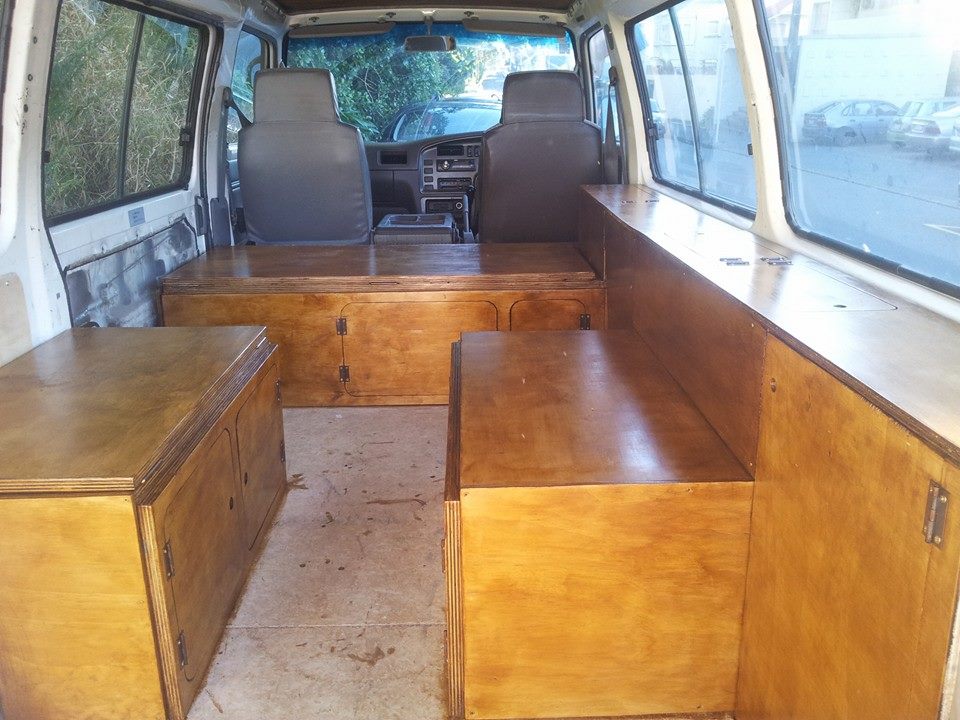
The contrast between the dark stain on the wood, the rustic brass look hinges and the bright cream soft furnishings started to look really cool. You can also see that we've installed a shelf above the driver's cab which would allow us to store our bedding. In addition, the side cabinet has now been installed to the right of the benches which also have storage on top.
The next step was to put down the flooring. We bought these fake slate vinyl tiles which I think makes it look quite rustic and like an old country kitchen. So now, I know the exact thing you're thinking right now is 'so where's the table?!'. Well, look at the next two photos!
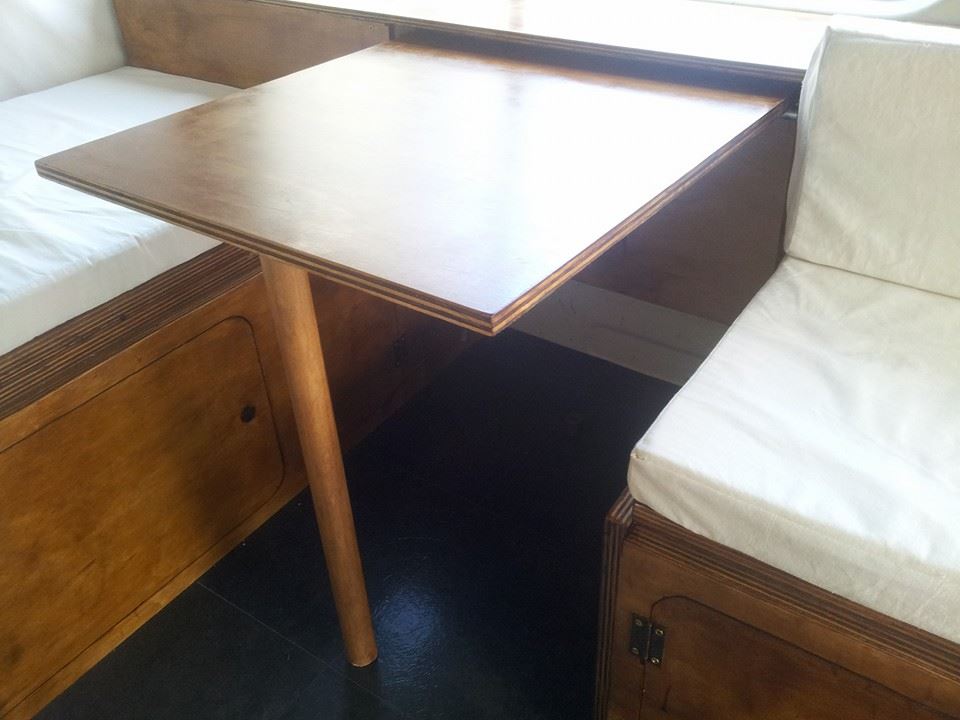
The table hangs completely invisible to the side of the benches as one side of the side cabinet. All you need to do is grab the bottom of it and it swivels up, the leg goes in a notch on the bottom and there you have it - you're little table for eating on!
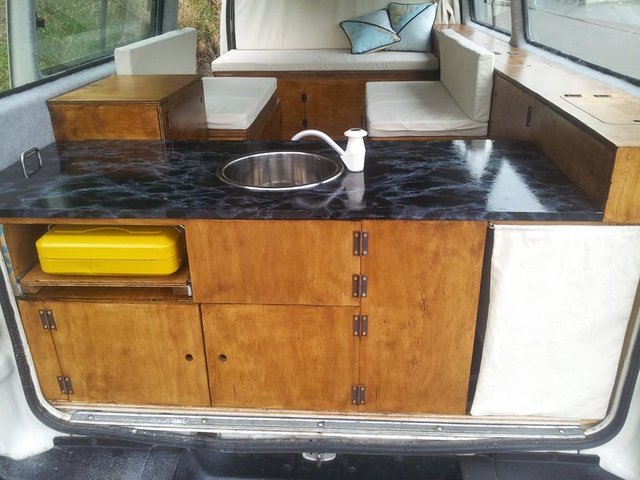
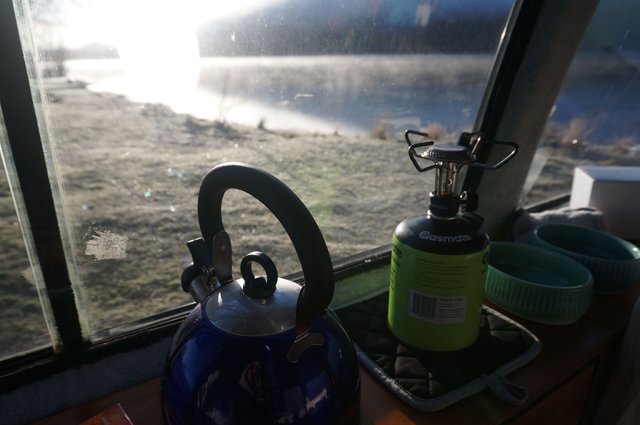
I'm not sure what I am most proud on on this van, but the kitchen may well be it. It was very complicated to make a sink, fresh waster, waste water, a fridge and a hob all fit in such a small space. But I managed it.
I don't have any photos of it right now but there is a 25L water tank stored under the right hand side with the curtain to access it, which feeds the tab with fresh drinking water. The sink then drains itself in to the 25L waste water tank which is in the bottom double cupboard.
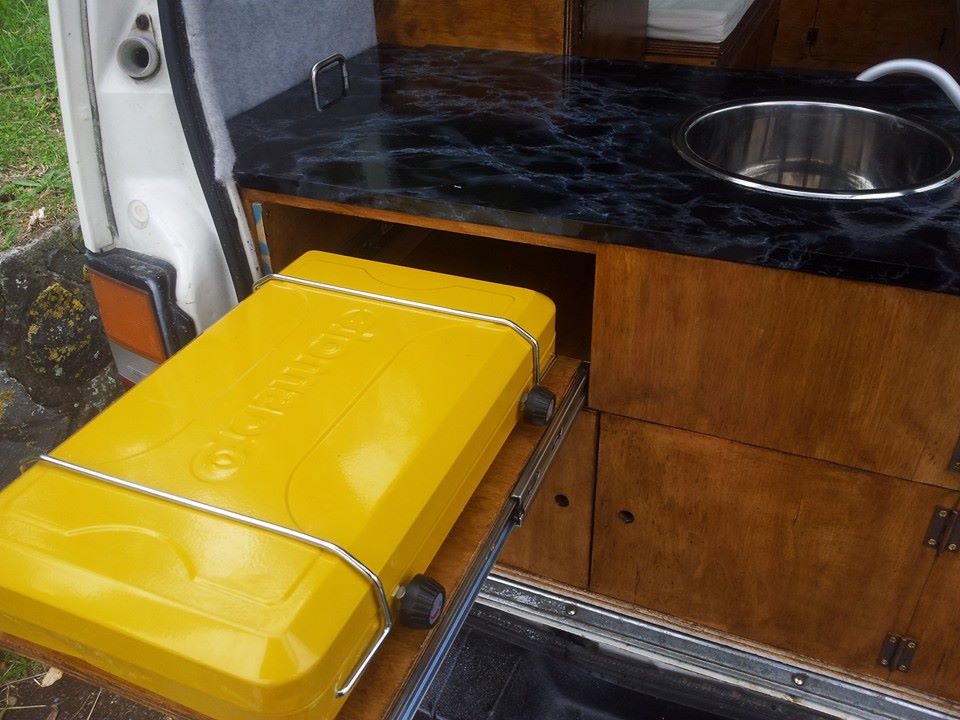
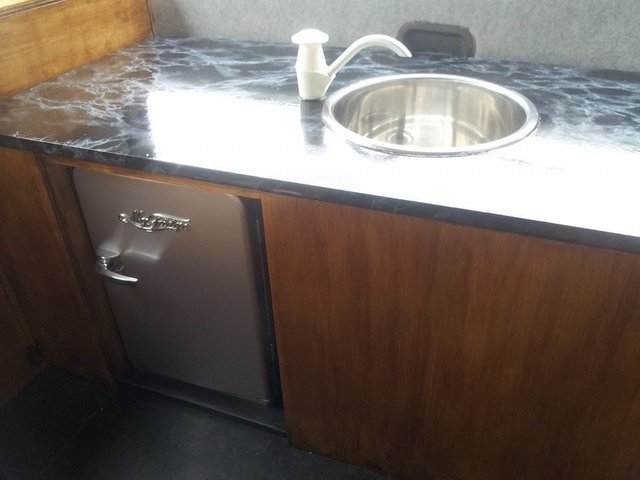
The fridge is on the inside of the kitchen which you'll see in the coming photos and it can store quite a bit of food, even for its small size - we usually have to shop once every two or three days for fridge items. Anymore and they wouldn't all fit. Finally, the double gas burner slides out to allow you to cook, while the new cupboard to the back left houses the gas bottle.
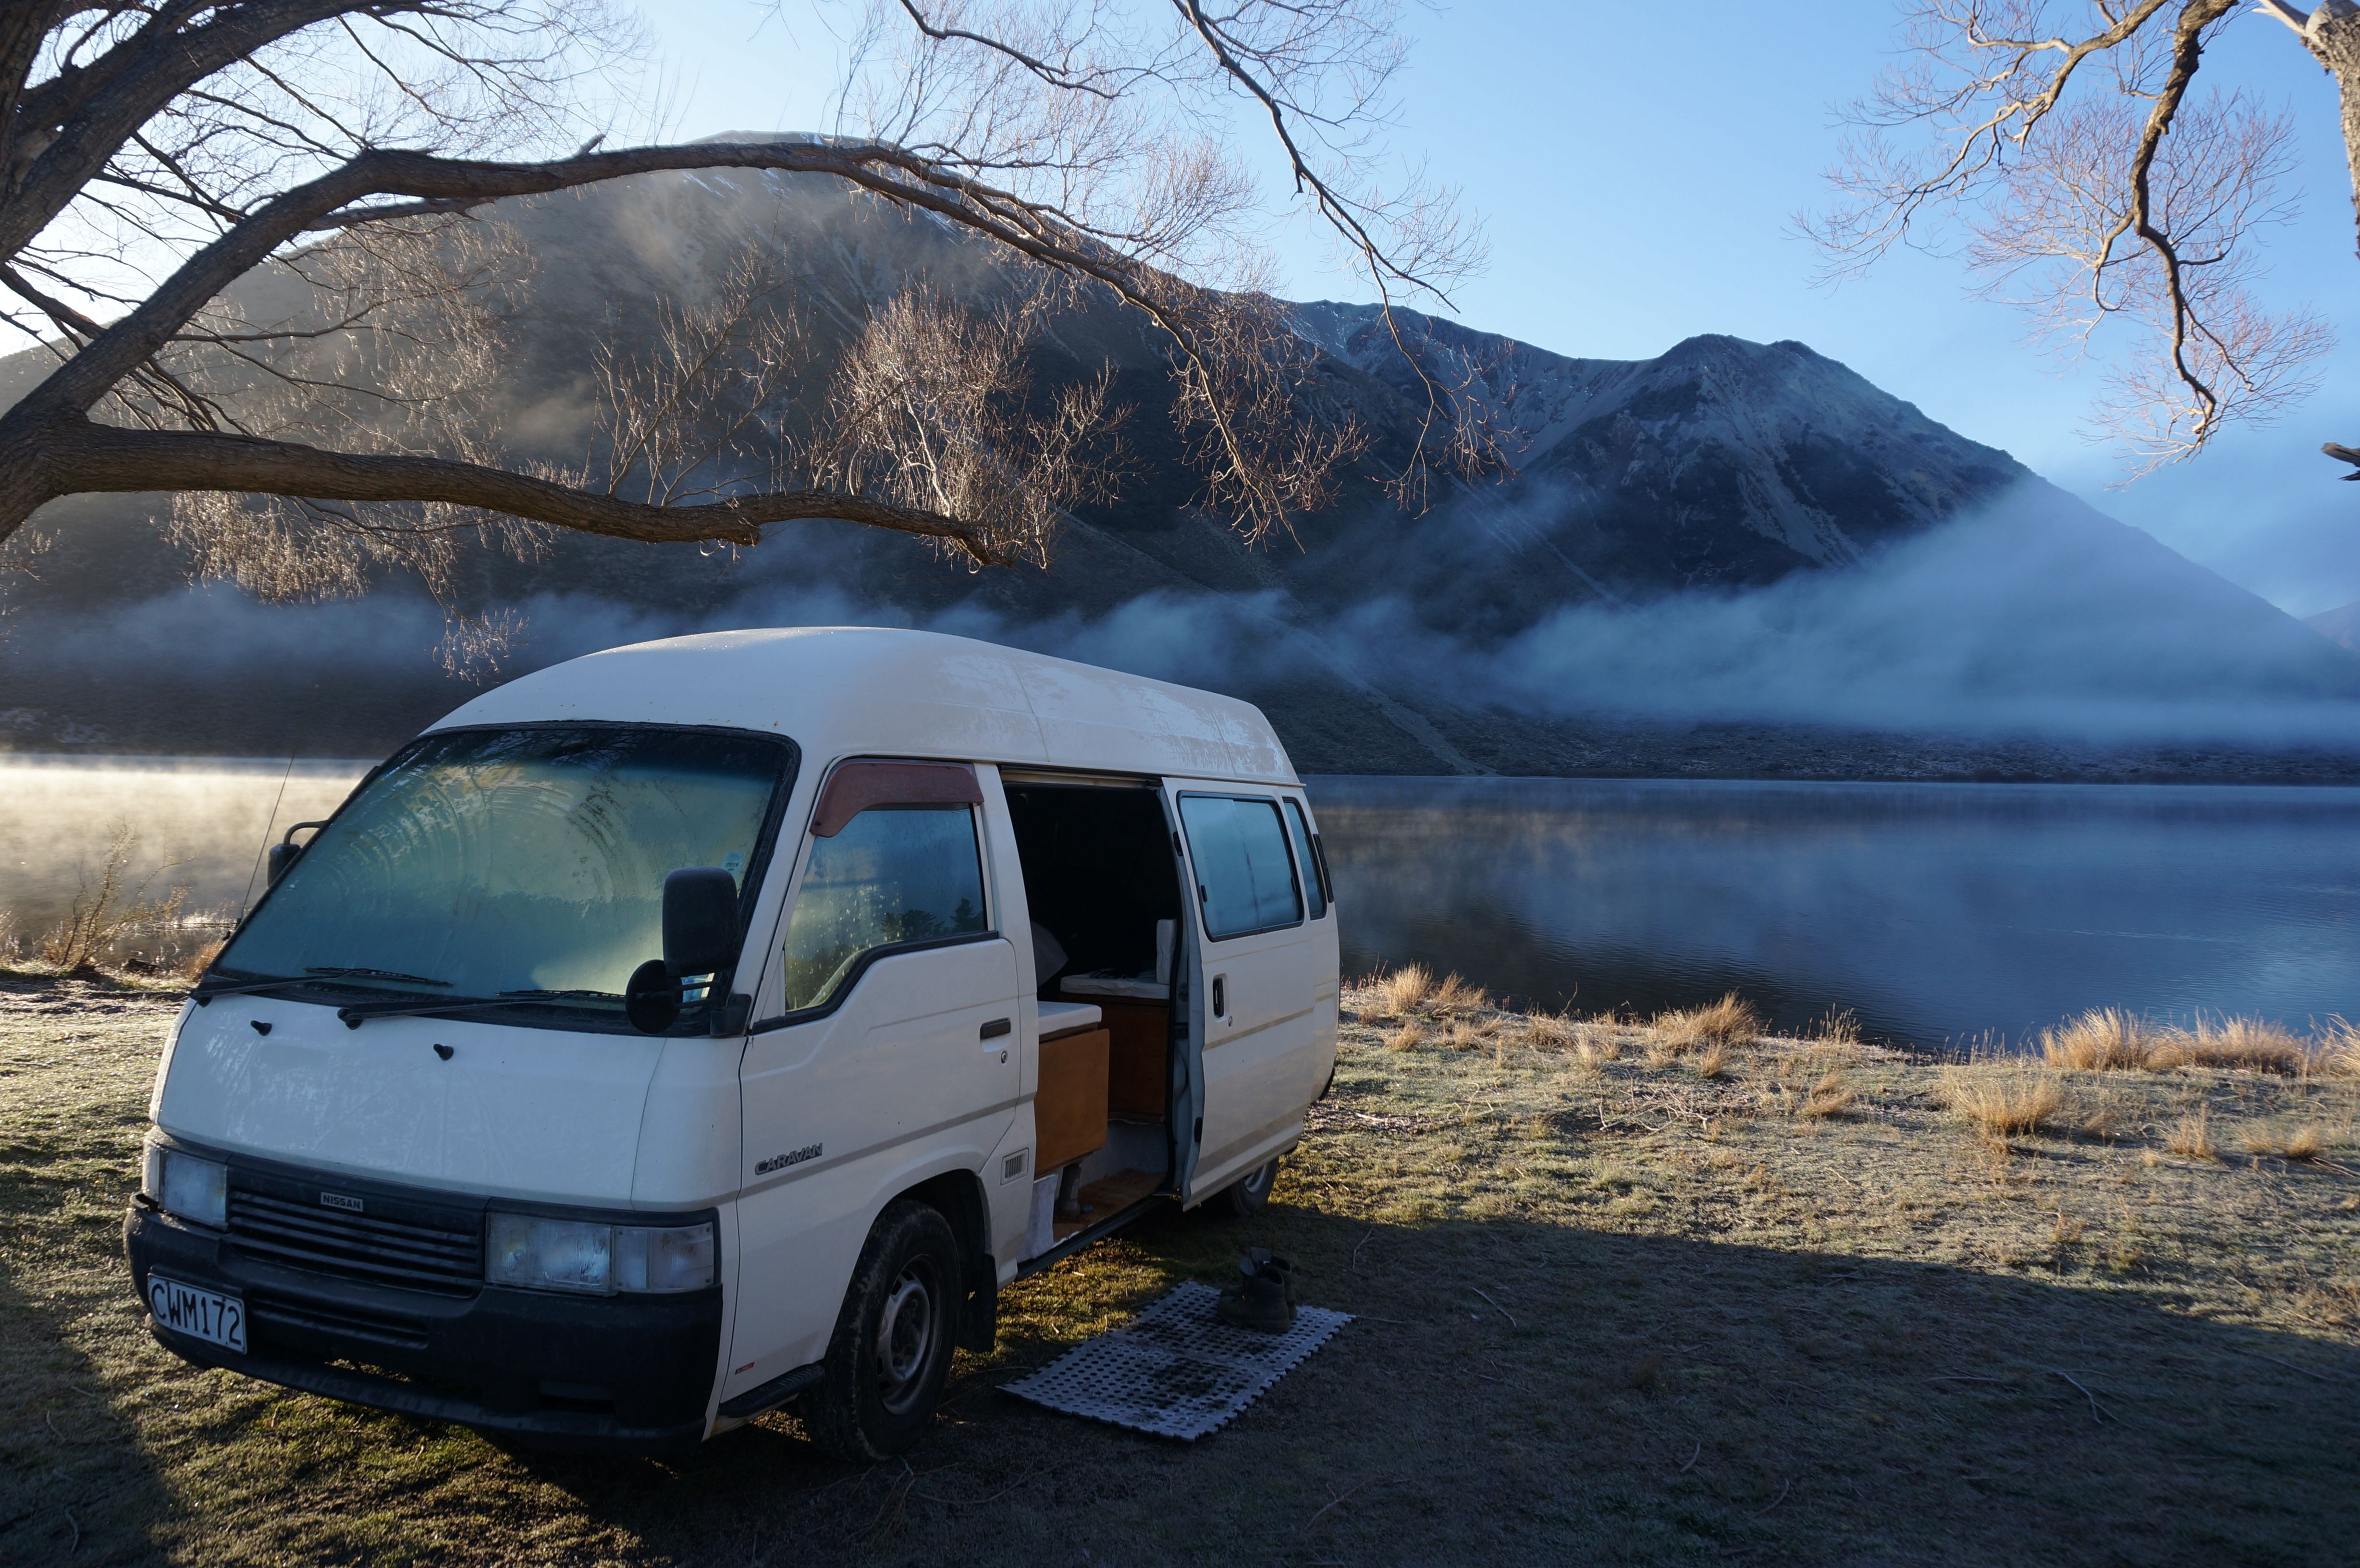
So there you have it! It took a little over 9 months to create but we managed to build a beautiful little campervan, by hand, with pretty much just wood and fabric. We called him Peter Pan the Van because we felt like we never have to grow up while we're driving around in him, music blaring and getting out to nature.
Making this van really helped me feel Fit for Life. I had to learn new skills and remember old ones. I worked for hours and hours, just with my hands, making something I would keep forever - and that's a skill I'll always keep. I loved shaping the wood and planning the design and my life is better having learned all of these new skills - I am not a carpenter of any kind, I only wanted to learn and have a challenge.
As for our lives now, we shipped Peter Pan the Van home from New Zealand to live with us in the UK. We couldn't leave him behind. I love this van and the freedom it gives me. When I first started the project I wanted to gain more freedom to see the world and to shape my life as I wanted it - Peter Pan the Van helps my life feel fit and well and interesting.
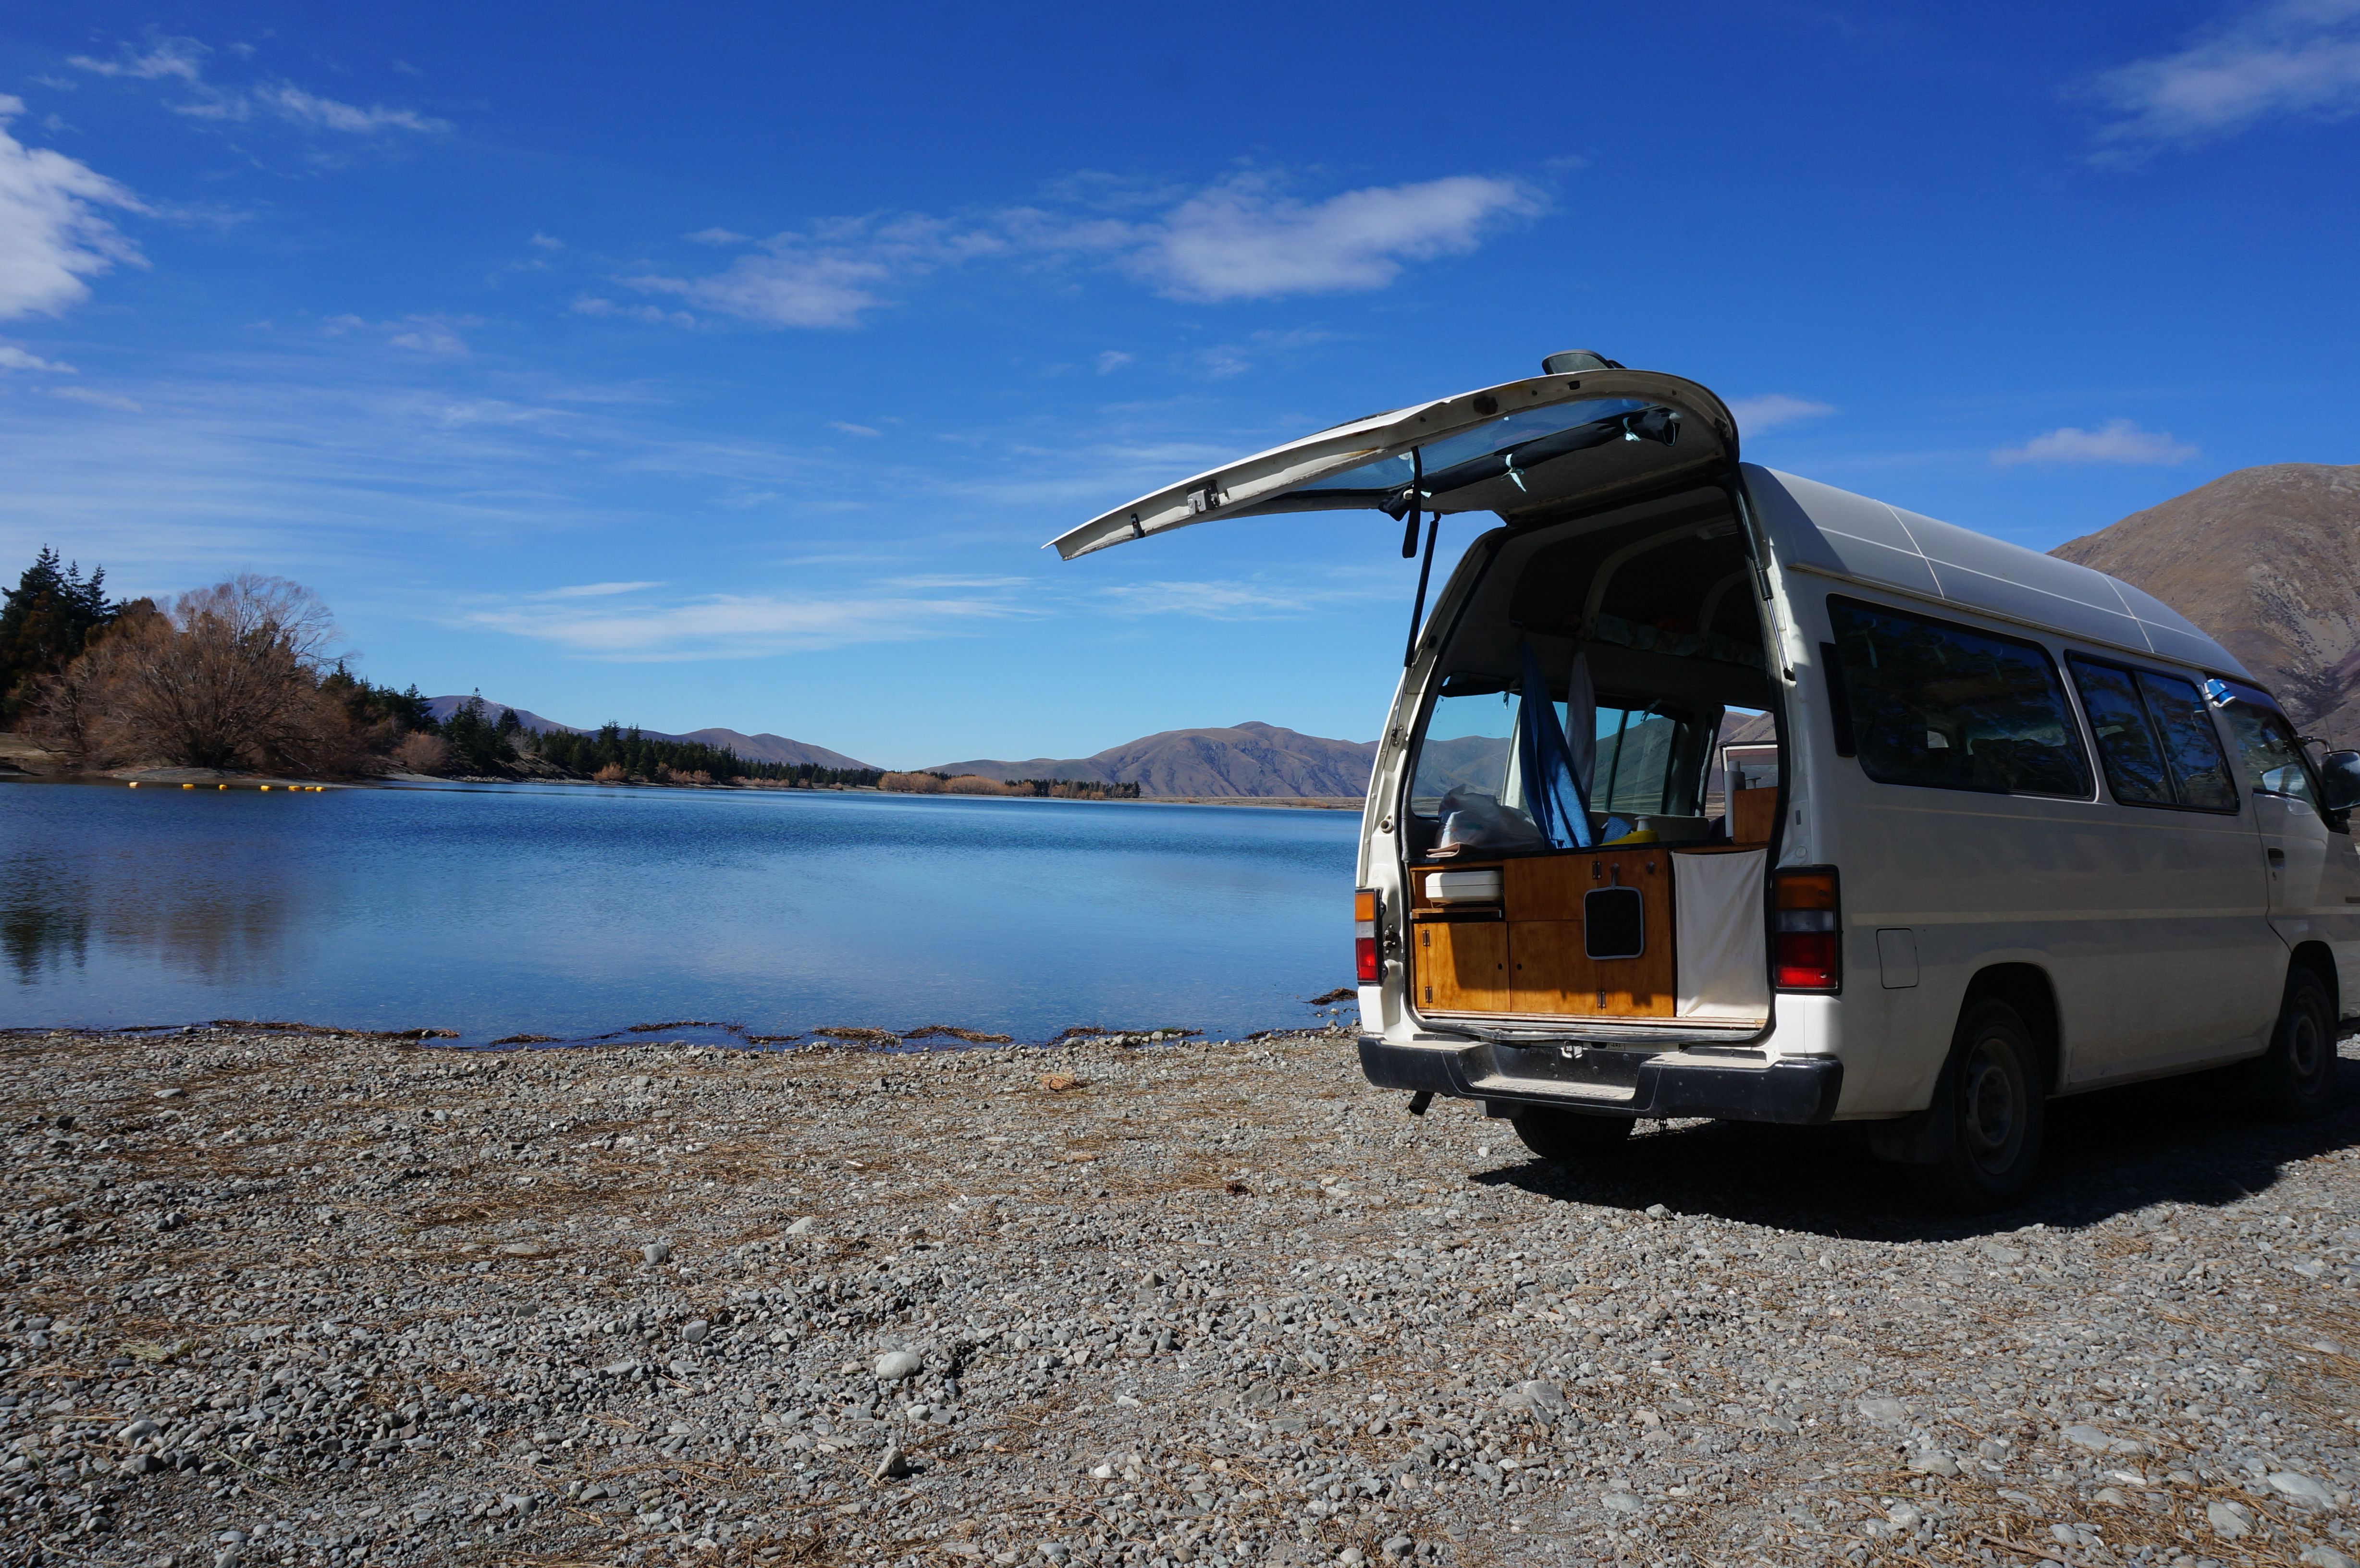
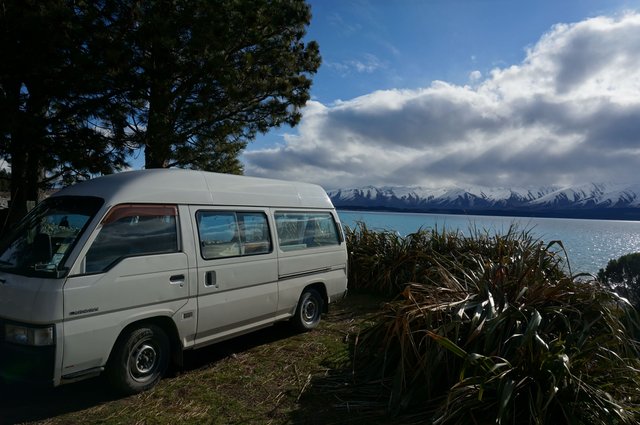
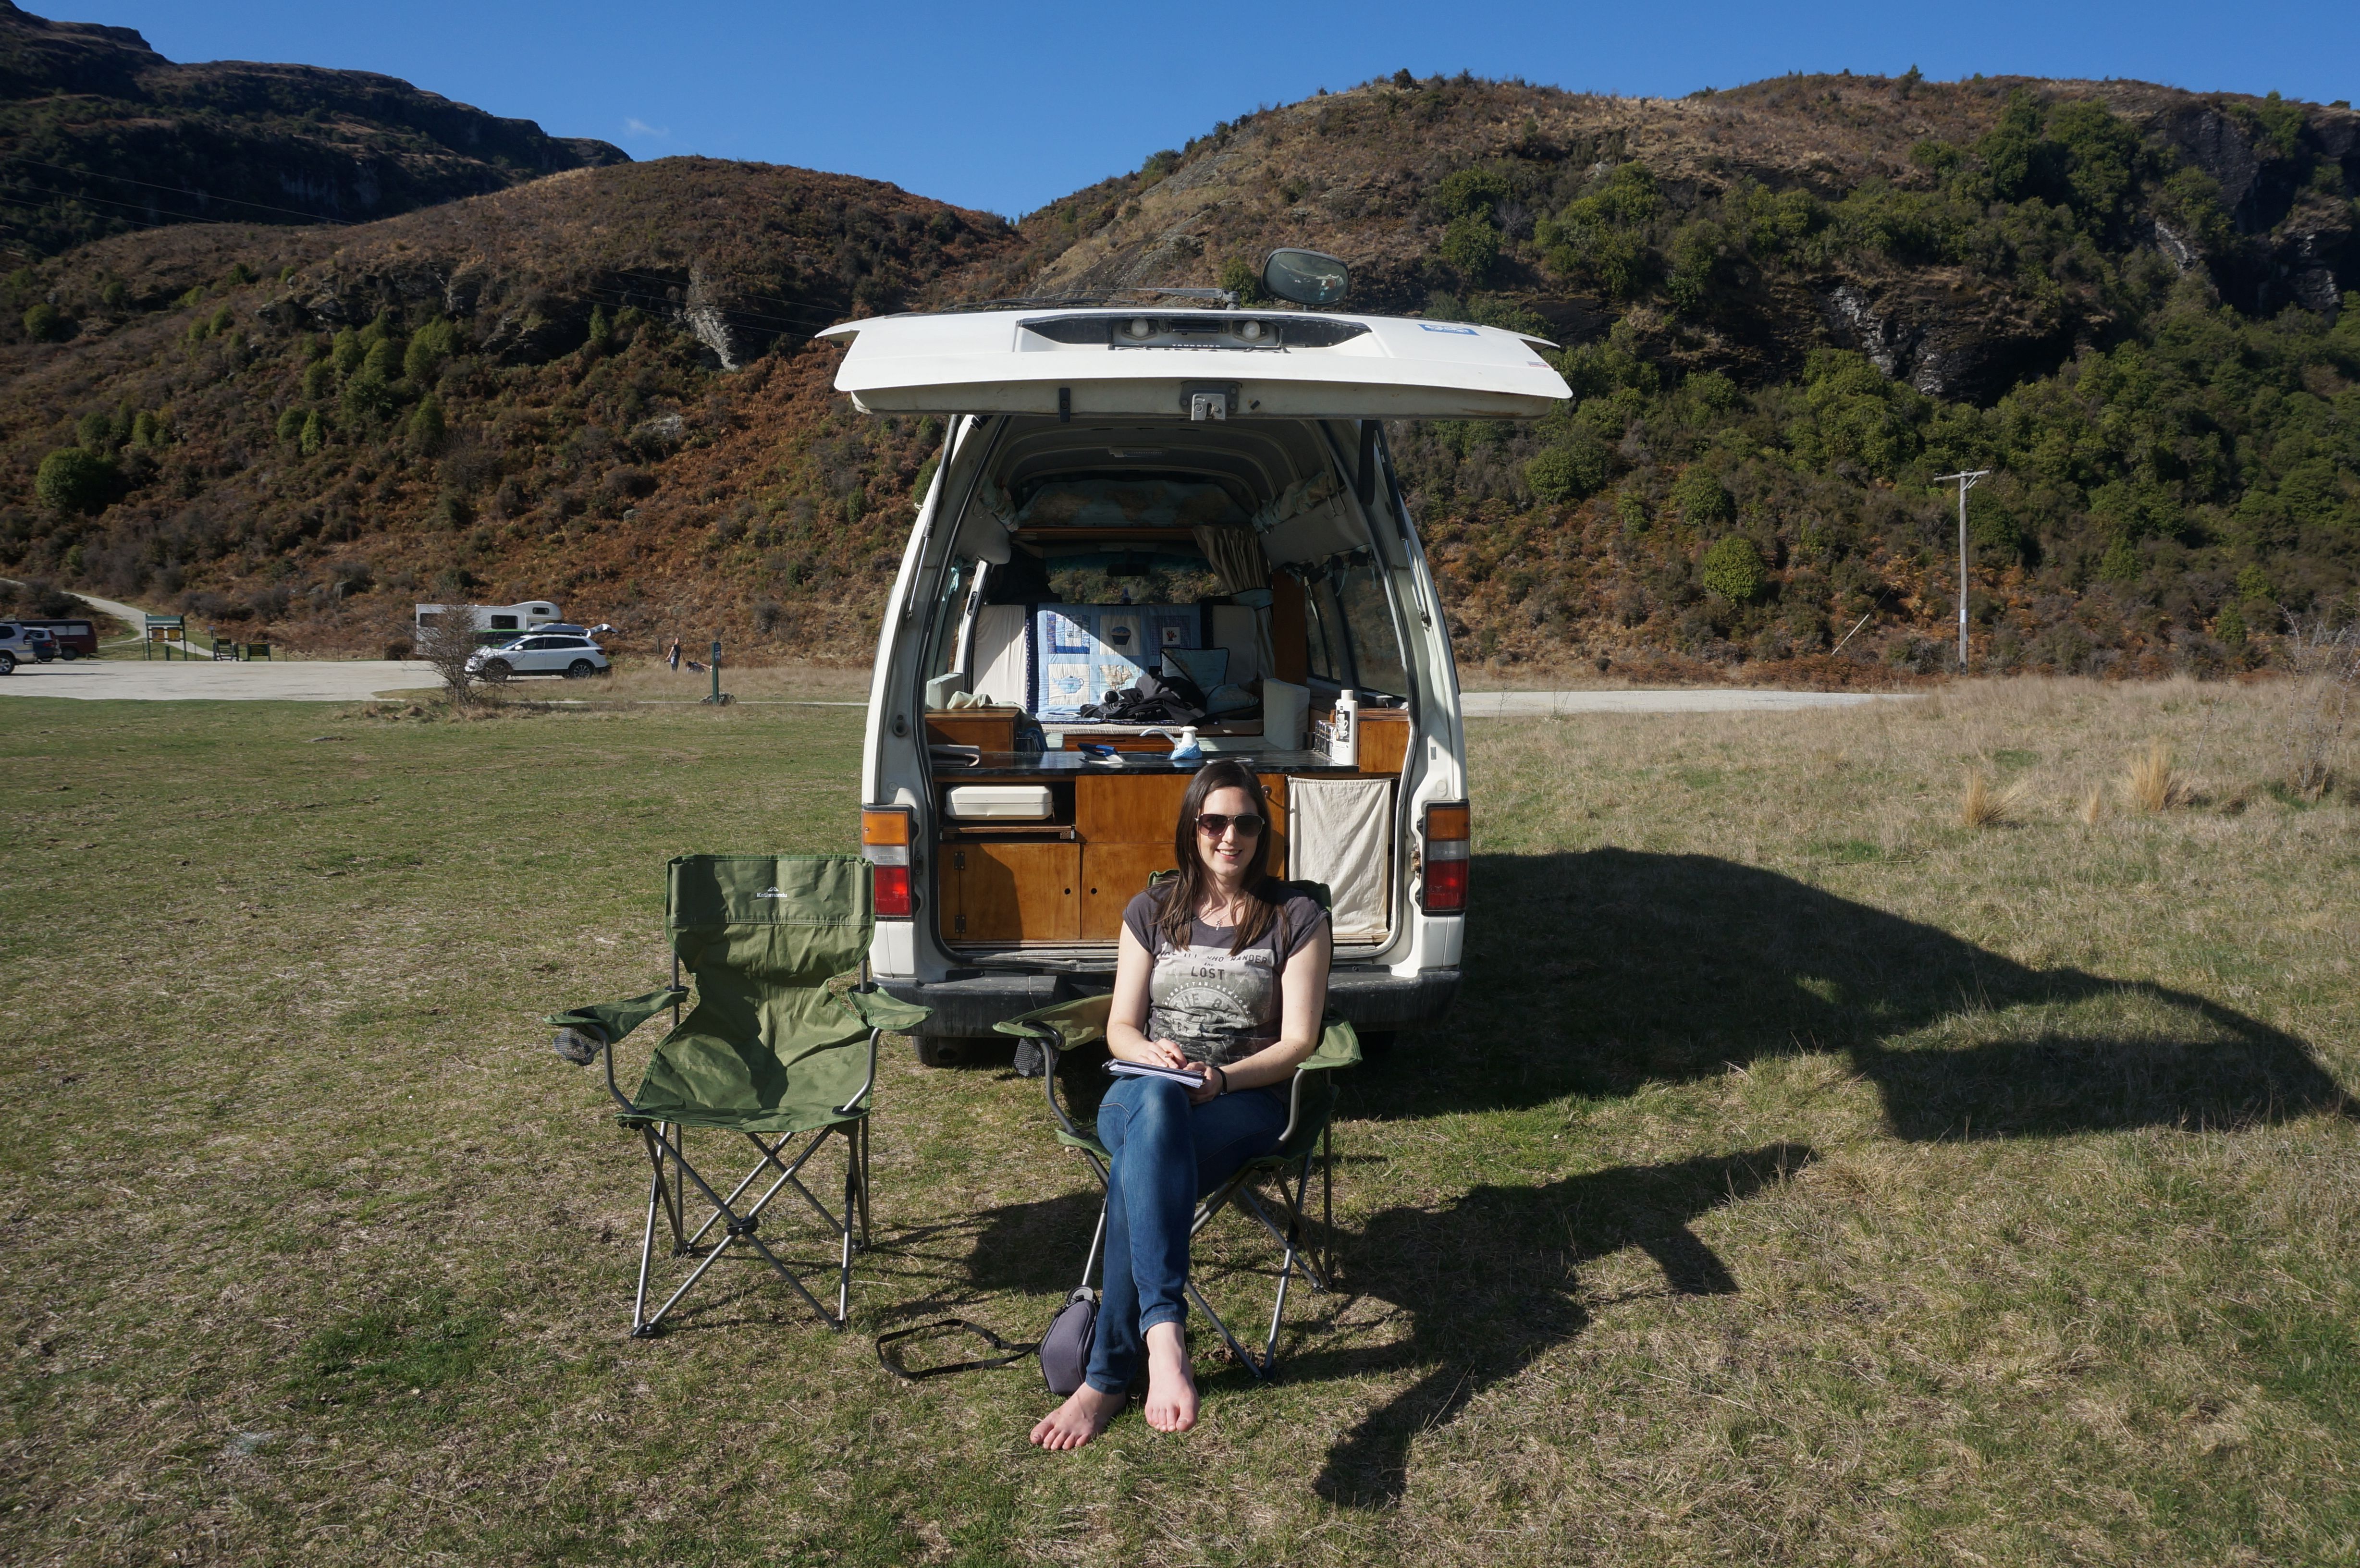
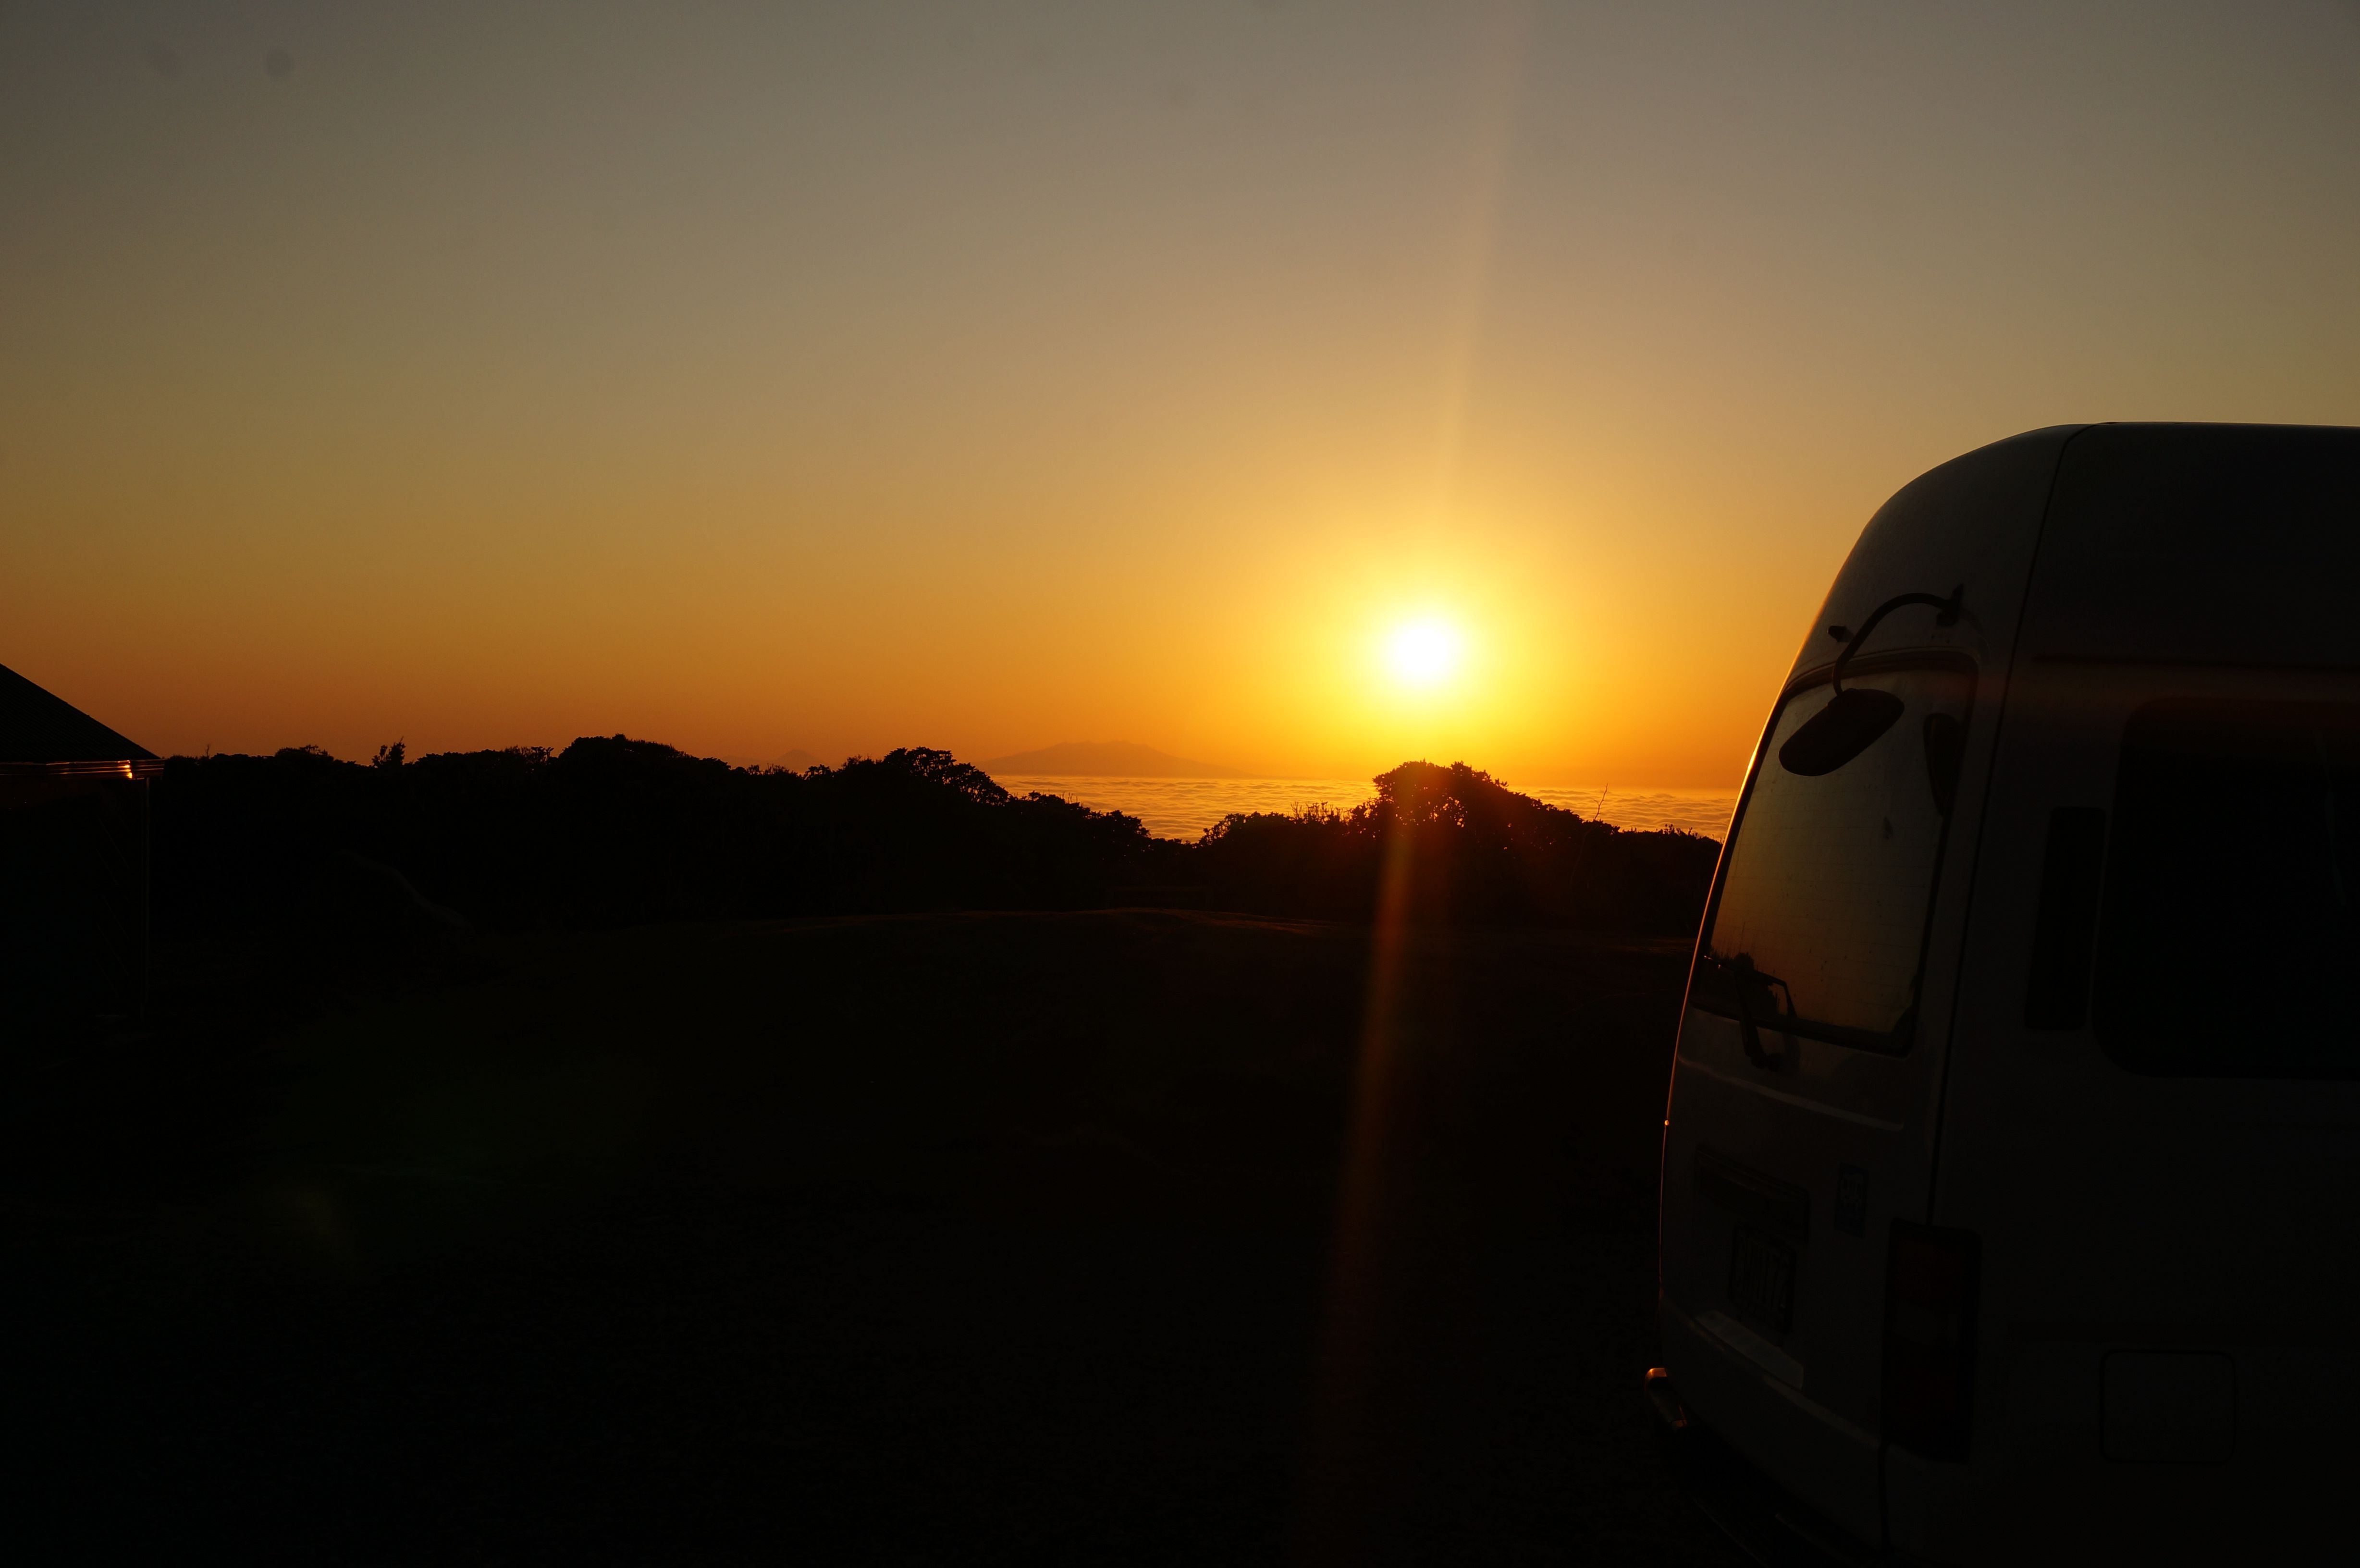
That's all I've got to type for you today but please to enjoy some of the photos of Peter seeing the world that follow,
Yours in health,
Coach Ben
Wow...not only are you a fitness coach but an engineer as well! Happy travels!
Doing my best to do and understand a little bit of everything in life - part of what this series is about! Self improvement :) Thanks for the comment
I WILL UPVOTE AND RESTEEM YOUR BLOG POST TO MY 35,000+ FOLLOWERS. JUST SEND 0.5 SBD OR 0.5 STEEM TO a-0-0 WITH YOUR BLOG POST WEB PAGE ADDRESS IN THE MEMO.
LIFE IS RACE......WHERE YOU GO YOU NEED MORE KNOWLEDGE MORE POWER JUST RUN AND RUN BUT IT DOESN'T HAVE ANY PLACE TO TAKE SOME REST.........
Run so hard you get capslock stuck on :D Sometimes resting helps you run the race faster but it should always be purposful!
This post has been upvoted and picked by Daily Picked #37! Thank you for the cool and quality content. Keep going!
Don’t forget I’m not a robot. I explore, read, upvote and share manually ☺️
Thanks again @dailypick :)
Unbelievable, what a transformation! Before this project, did you have prior experience doing home improvements? I'm blown away. Peter Pan is a great name for your van and for all of your adventures!
Hey @loveself, no I hadn't done much really. I helped my dad do some DIY when I was a kid and saw how he worked when he did so, but most of it I had to figure out in my head and from a little bit of youtube!
Amy had never used a sewing machine either but we bought one and just tried our best! Obviously we were a lot slower than professionals and made a lot of mistakes which we then had to fix but that was part of the fun and the learning :)
Thanks for the comment! Lovely to hear from you as always x
I am trying to get a camper van too. I am going to buy a used one instead of building one.
I had one in the past where I just put a mattress in it to go out in nature for a few days for R&R.
Even if you buy a used one there may be some little things that you want to do with it :) You might find you want to decorate it a little different or add some extra lights or just make it more suitable for you! Don't be afraid to give it a go.
Thanks for checking out the blog post!
This is a great example of how to use small space on a proper way.
Well done for organizing stuff inside, and good luck on your journey! :)
I have a bit of an obsession about small spaces now after making this van! I love the challenge of trying to make less space work better. We have a show in the UK called George Clarke's Amazing Spaces where he visits loads of different small spaces, from caravans to treehouses. It's amazing to see how innovative you can be and have to be when space is limited!