Permaculture, Homesteading, and Community Building // How to Make Your Own Sauerkraut
Hi friends! I've been having a blast making my own fermented probiotics lately. I started my food fermentation journey as most people do, with sauerkraut. It is so satisfying to grow my own cabbage, harvest the cabbage, shred it up, pack it in a mason jar, and wait for 30 days for the fermentation process to create the most delicious and crunchy sauerkraut I could as for. This is how I make my own sauerkraut ::
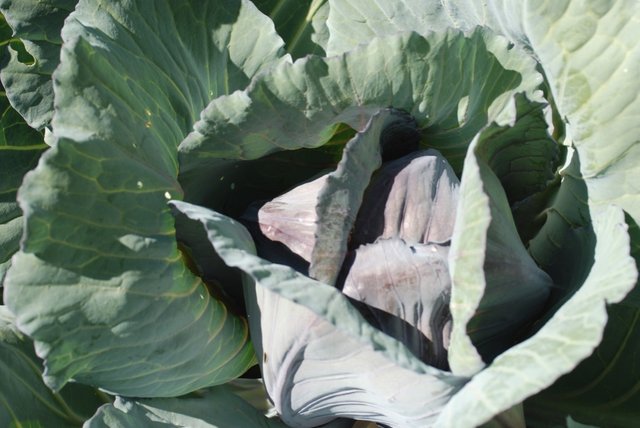
Step 1 - Grow Your Own Cabbage
Okay, I guess this is an optional step ;-) But it is so fun and easy! You can get cabbage seeds or starts from most nurseries, plant them in the ground, and within 2-3 months you will have beautiful cabbage heads ready to be harvested. I grew organic, non-gmo red express cabbage from High Mowing Organics. You can find the seeds here : https://www.highmowingseeds.com/organic-non-gmo-red-express-cabbage.html.
Step 2 - Prep Your Cabbage
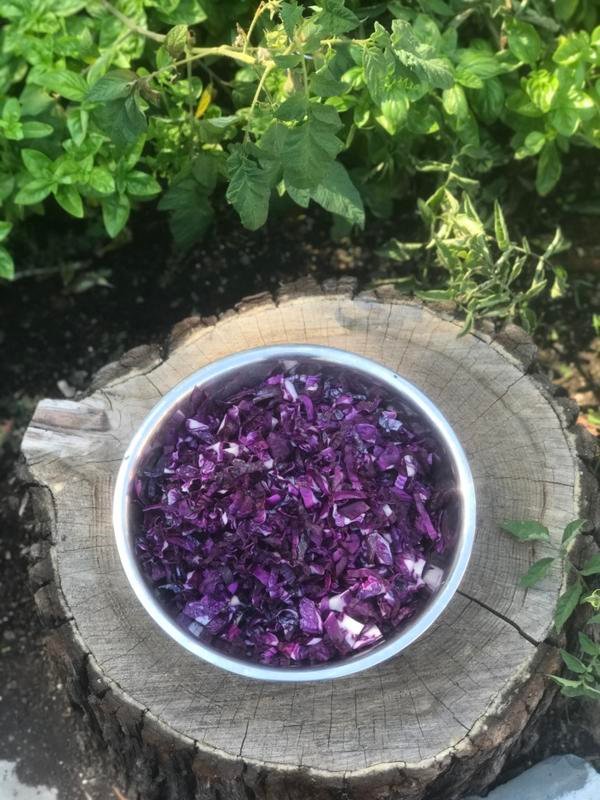
After harvesting my cabbage (in my garden or local farmers market or grocery store), I prepare my cabbage by chopping and shredding the veggie into small pieces.
Step 3 - Add Salt
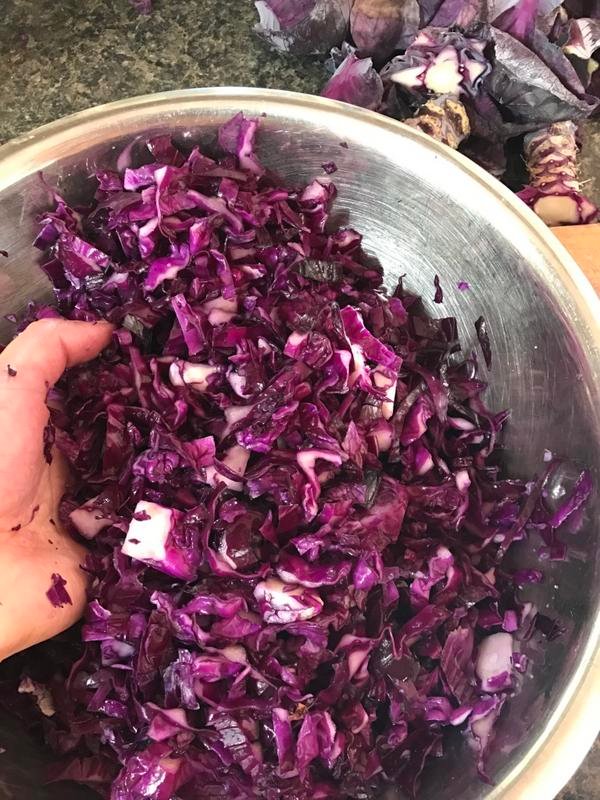
I add 1 tablespoon of salt per 1 medium head of cabbage. I start to work the salt into the cabbage by massaging the cabbage until it is soft. I then let the cabbage sit in the salt for 30 minutes to allow the salt to draw more of the cabbage's water out. This will make the next step much easier.
Step 4 - Pound Down the Cabbage
Now it's time to pack the cabbage into the container that it'll be fermenting in. I like to use half gallon mason jars. I stuff the cabbage into the mason jar and use a kraut crusher to pound down the cabbage (here is an example of a crusher - (https://nourishedessentials.com/products/kraut-crusher). You can also use your hands or any other kitchen tool that you like. The goal of pounding down the cabbage is to draw out the cabbage's liquids and make sure that all of the cabbage ends up submerged underneath its own liquids. This step is vital to the process, because if any cabbage is not submerged underneath the liquids then its contact with air increases the chance of mold contamination.
If, for some reason, pounding the cabbage does not release enough liquids to submerge all of the cabbage, then you can add brine. Brine is filtered water (it is important that any chlorine has been filtered out of this water) and salt. I use 2 tablespoons of salt dissolved in 1 quart of water. Also, leave 4 inches of space at the top of the mason jar to allow for expansion in the fermentation process.
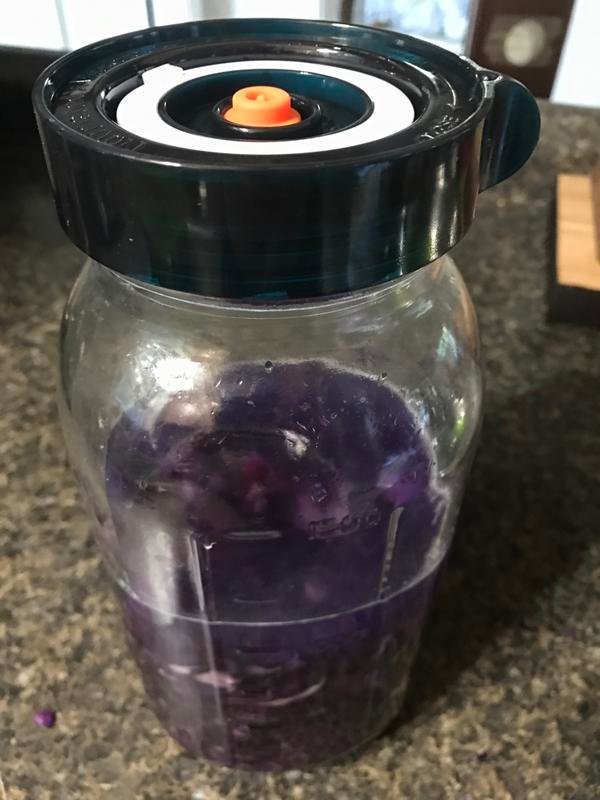
Step 4 - Add Your Top to the Jar
I am a big fan of the Easy Fermenter lid. This lid allows for carbon to escape during the fermentation process, but does not allow for oxygen to enter into the jar. It eliminates the need for "burping" your fermentation jars. It also takes up very little space, so the jars still fit nicely on my shelves. You can find the lids here : https://nourishedessentials.com/pages/nourished-essentials-products
Once I screw the jar lid on, I take note of the date. Then, I let the cabbage sit on my shelf out of direct sunlight for 14-30 days, depending on how fermented I want my kraut.
Step 5 - Eat and Store!
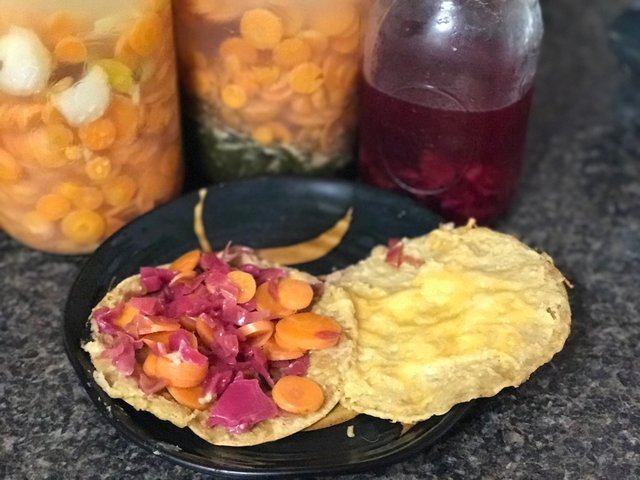
It's sauerkraut time, yum! My first batch was the perfect mix of crunchy, tangy, smooth, and salty. I ended up letting it ferment for 18 days. Then, I moved it to my fridge to stop the fermentation process. Sauerkraut can also be kept in a root cellar. I now add my sauerkraut to almost every dish that I make... Happy fermenting!
I remember my grandma had a huge crock she'd use to make sauerkraut. She'd pack so much in it.
It was the best sauerkraut I'd ever eaten.
Thanks for bringing back the fond memory!
Nothing is better then garden fresh vegetable/salad. Eat as you like.
Thanks for sharing
AJ picked your post @anwenbaumeister for his #TOP5 FOOD POST. Visit AJ's FOOD ROUNDUP to view where your post is ranked.

Very nice tutorial!
We have also experimented with making sauerkraut and it is pretty straight forward. Once you get the hang of it you can start experimenting with adding other ingredients to change up the flavor profile. One of my favorites is lemon dill sauerkraut! Yum!
Awesome post! Not sure if you read my last comment asking you to do a canning post, but this definitely fit the bill! I will probably end up purchasing everything you specd out here. I'll have to buy my cabbage though until Spring rolls around and I can plant my own. Thanks again for the info!
Thank you so much for the walk through & the leads to handy tools.
I've been wanting to start making my own fermented foods, but haven't gotten brave enough yet. A delicious kraut may be beyond temptation, especially since I've never had it with purple cabbage before. Yum.
Great post!! Thanks for sharing this
making Sauerkraut is on our task list for next week :-) we are using barrels made of clay (our smallest holds 5 l and the biggest 30 l)... it is soooo great to read posts like yours!!!! thankful for your post and following for more :-) Cheers from the seven mountains in Germany
Sorry, I know very little about sauerkraut, but I did TRUELY enjoy your singing in a couple of previous videos. You story about being told that you were 'tone deaf' was sad. I was told I could not sing in the 7th grade... hmm I did not sing for several years after that, but I went on to sing in Opera, bands and solo :) I am so happy to hear that you are finding your lovely voice again.
Please sing, often and loudly :) and when you feel ready, I would love to sing with you :) You can find me here and in the PAL discord music channel :)
All the best,
Bucky
I always wanted to learn how to do this stuff. My grandpa knew, but by the time I grew up and showed interest - it was already too late to ask him...
By the way @anwenbaumeister thanks for upvoting my post yesterday, means a lot!