Miniature Painting: A Guide for Beginners
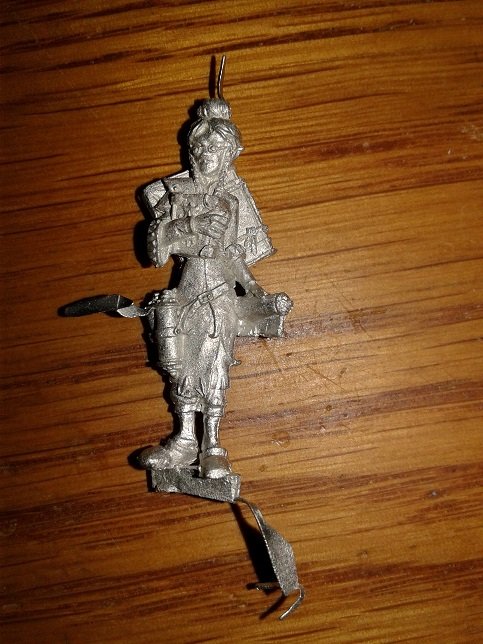
Many a gamer has been bitten by the miniature-painting bug. Here, I will provide a walkthrough of how I painted an Elf Librarian from Stonehaven Miniatures. I previously offered a brief review of that company here.
First, a look at tools that may be needed for miniature preparation:
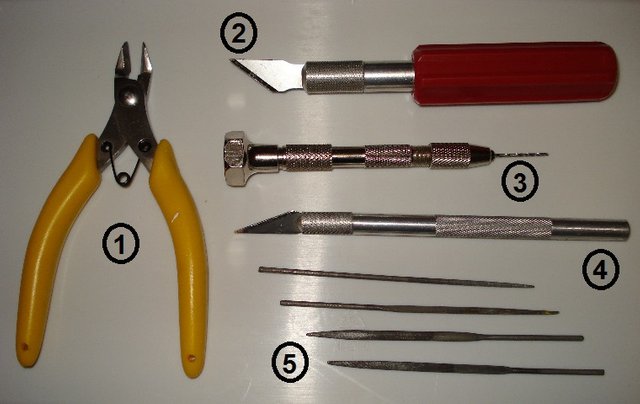
- Flush cutters: clippers designed to leave a smooth finish on one side of the materiel clipped, rather than leaving a burr. These are often available at better prices through a hardware store than a hobby shop. Harbor Freight tools are adequate for the job and quite budget-friendly.
- Hobby knife: This type has a large handle, and is designed to accept larger blades and small saws. It may be more comfortable for some hobbyists, and the larger chuck helps expand options for specialty tools.
- Pin vise: a small hand drill for creating holes that hold place metal pins to reinforce a model. Also useful for drilling out gun barrels and drilling pilot holes for other tools.
- Hobby knife: This is the common type that resembles a surgical scalpel. X-acto is the most well-known brand. Most brands carried by hobby and craft shops are sufficient to the task. This “number 11” size will be best for most uses since it is easier to manipulate in tight spaces.
- Jeweler's files: Small needle-like files for intricate parts. Often more useful than a hobby knife for model preparation.
Step 1: Prepare the Model for Painting
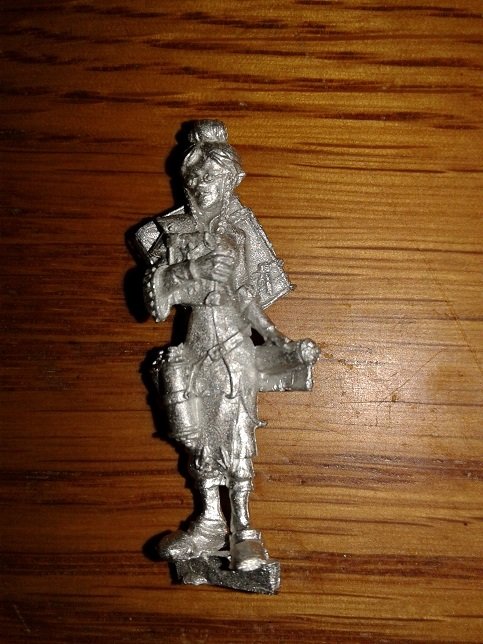
Before painting, the model must be prepared. Whether metal or plastic, the model should be scrubbed with a toothbrush and dish soap to remove any release agent residue from casting, fingerprints from handling, and dust/debris that may have accumulated. This helps paint adhere to the finished model and ensures the details are as crisp as possible.
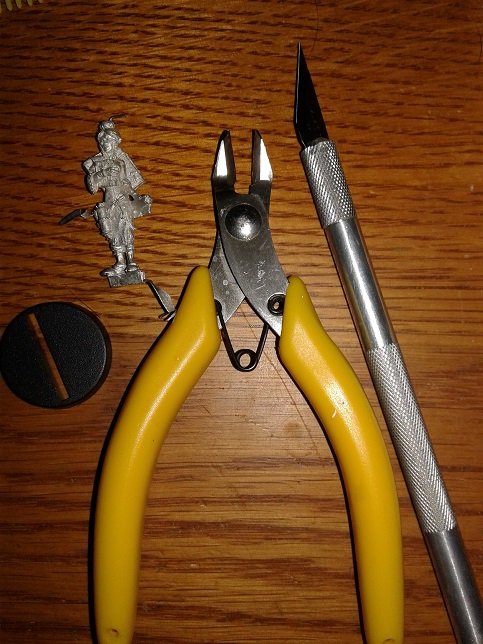
This model has metal tabs left over from the casting process that need to be trimmed off. A set of flush cutters is usually the best tool for this job. A hobby knife and files clean up any leftovers the clippers can't properly trim away. If a lot of cleanup is required, do this first and scrub afterward.
Before
During
After
I also decided to trim the tab flush with her shoes in order to simplify assembly with the base once I decided how I wanted that to look.
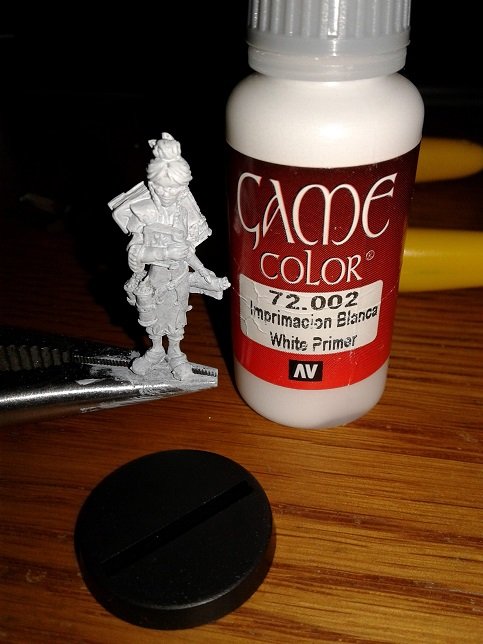
Step 2: Priming the Model
A primer is chemically designed to help the following coats of paint adhere properly to the object being painted. The name derives from the Latin word meaning “first.” Failure to use a good primer results in chipping or peeling paint and uneven coats, because the acrylic paints commonly used by hobbyists adhere poorly to metal and most plastics.
Because it is too cold outside for spay primer, and I am only preparing a single model, I chose to use a brush-on primer from Vallejo. I thinned the primer with water and used a relatively large cheap brush. Primer is nasty stuff, and it likes to adhere to everything. Cover your workspace to protect it from spills!
In the image above, you can see my Leatherman pliers being used to hold the tab of the mini. Not only does this let me paint the primer coat more easily, but it also keeps paint off the surface of the tab that will later be glued to the base. Gluing painted surfaces is always a bad idea and should be avoided by either not painting such surfaces, or later sanding away the paint to ensure a good bond.
The color of the primer matters. Most acrylic paints are semi-translucent, so a dark primer can dull the tone of paint above it, while a light primer can make the paint above it brighter and more vivid. Some painters spray a dark primer from the base of the model and a light spray from the top to begin simulating light and shadow. Alternatively, colored primer can often simplify a painting task by also providing the base color for the model. I would recommend white primer as the best all-purpose option though.
Step 3: Assembly & Basing the Model
When using a spray primer, this step usually comes first and priming comes later. However, this project is different. I used a sheet of textured plastic card from Evergreen Scale Models to create a tiled floor effect, and I know from past experience that paint adheres well enough without primer.
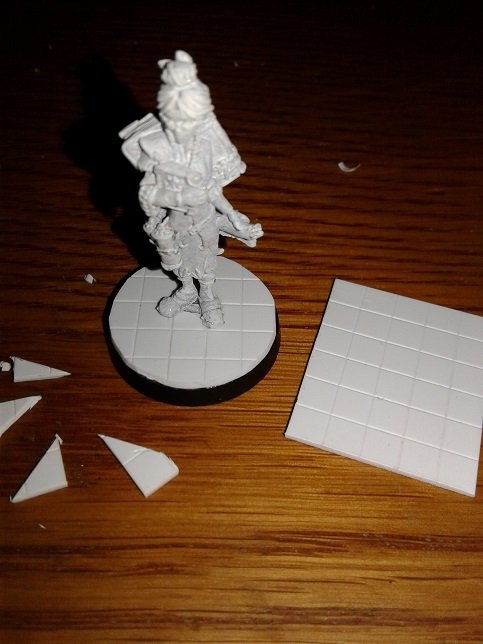
Assembly is simple or this model, since it was cast in one piece and has a nice tab for affixing it to the base. In the image above, you can see a square like the one I initially glued to the base along with the scraps that were trimmed off that square after gluing. I used the pin vise and hobby knives to create a slot large enough for the tab on the mini after the plastic was affixed over the slot in the base itself, and everyone has different ideas on how do do it. Feel free to experiment and find out what you like.
After taking this photo, I sanded the edge to smooth it out a bit more. Had I wished, I could have allowed the card to extend over the edge and then given it a chipped and broken edge. Basing minis is an art in and of itself.
Step 3: Painting
Finally, we're getting to the point where paint gets involved! I used an assortment of paints from Reaper, Vallejo, and Army Painter. They're all good model paints, and work together well. I tend to prefer these dropper bottles over paint pots for painting individual miniatures since I can add just a single drop to my palette, or mix custom colors as needed with a repeatable recipe.
First, I applied a base coat using the colors I was considering. THIN YOUR PAINTS! This is just to get a rough idea of how the finished model will look, and all colors are subject to change at this stage. I used a fairly small brush of the type sold in hobby shops as a "basecoating brush." It works for the job it's named after.
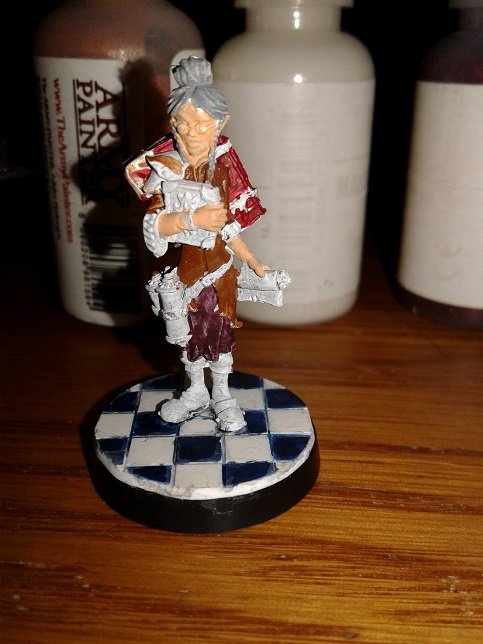
I continued adding layers of thinned paints to develop the color scheme for the model.
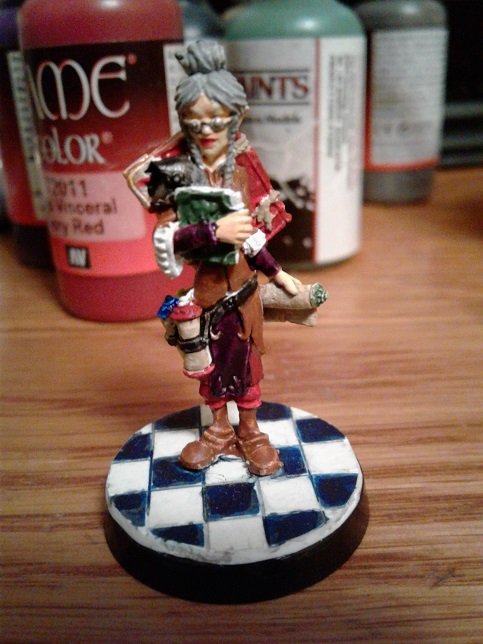
The final step for this model was adding little details and accents using careful painting, a bit of drybrushing, and a little ink for texture. I also used a Micron pen for the glasses frame and the lines on the scroll. An ultra-fine .005 pen is perfect for adding this kind of detail to a model. Unfortunately, I don't think I have a final picture after ink, but I find that a thinned Vallejo sepia ink works wonderfully for adding some shading and dulling overly-bright gold paint. Games Workshop and Army Painter also offer products for shading models, but I prefer to work with what I have on hand. Unfortunately, this model has been given away as a gift, so it is unlikely that I will be able to offer a truly final image.
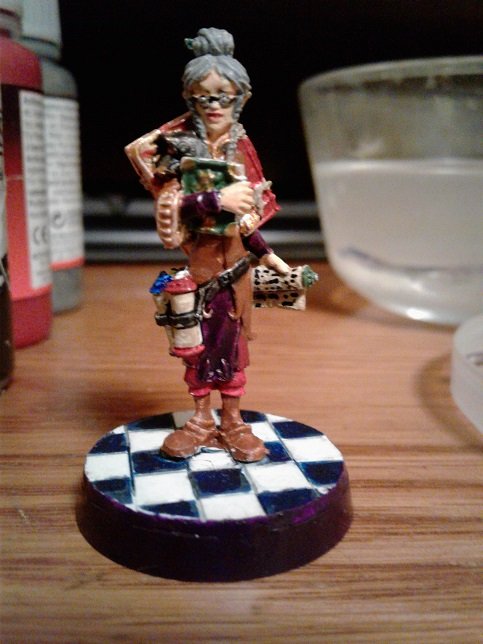
So, now you should have some idea what it take to paint a tabletop-quality miniature, and may be able to work up to a skill level that exceeds mine. Go win yourself a Golden Demon award, and thank me! Or just have fun with your new hobby and paint minis for whatever game you prefer.
very nice! i like the tutorial. i am a mold maker/caster by trade, well one of them anyway. i've been on hiatus for a bit, looking for my dream job.
you might like to try a curved blade, for cleaning the mold line, flash and extras. i have other tool tips, but i don't like to bore. well done, thank you.
I usually use the needle files for cleanup in detailed parts. Stonehaven's caster does a good job in locating vents for easy cleanup though.
sometimes i forget about the fun of cleaning a new model. i guess cleaning master castings like an assembly line makes it a bit mechanical after a while. thanks for reminding me of the newness. i've cast over a million parts since then. i'll have to take a look at Stonehaven. cheers.
Another note: I saw no part lines requiring cleanup. The caster did a superb job on these models. Of course, I got some early production examples as a Kickstarter backer, but the recent purchase I made for another Elf Librarian during the Christmas sale still looks clean. Stonehaven is absolutely awesome.
i guess i'm just a bit obsessive from eyeballing masters under a jewelers loupe. here's one of the models i've worked on. this is not actually mine, but it is highly likely that i cast some of the parts or made the molds to cast them.
Nice! Airbrush user, right?
Wicked detailing!!
some, yes.
I bought an airbrush. I need to give it a try.
I always wanted to collect and paint Warhammer40k miniatures but never got the chance to do it. There are some really cool looking models there.
The best way to get into the game right now is the Kill Team set. It includes the main rule book, the Kill Team supplemental rule book, and models for Space Marines and Tau for a starter skirmish game. These kits can be expanded, or another faction can be purchased instead, depending on how you want to play.
I am sorely tempted to build a Harlequins Kill Team, since that faction isn't a complete army anyway and doesn't have most of the forbidden units for a Kill Team skirmish game. Most of the Start Collecting or Armored Assault kits are good options, and the included vehicles can either be traded to another wargamer or kept on hand for future expansion into the full 40K game if they don't meet Kill team criteria.
Cool! Thanks for remembering me.
When I was in high school I did a project sort of in the same vein -- a scale-model car in a diorama. I had a lot of fun working on it. I really enjoyed painting all the tiny details - after all the prep and planning was finished. I think the beginning stages are as much fun as the actual work.
Thanks again for sharing - I love a good thorough post by someone who knows what they're talking about ;)
Wonderfull long post.........
"Happy New Year"
Happy arbitrary calendar changeover to you, too!
It's beautiful image ..Good job @jacobtothe :)
very nice dude...