Gold prospecting Hammer mill - DIY
Hammer mill DIY
part 1
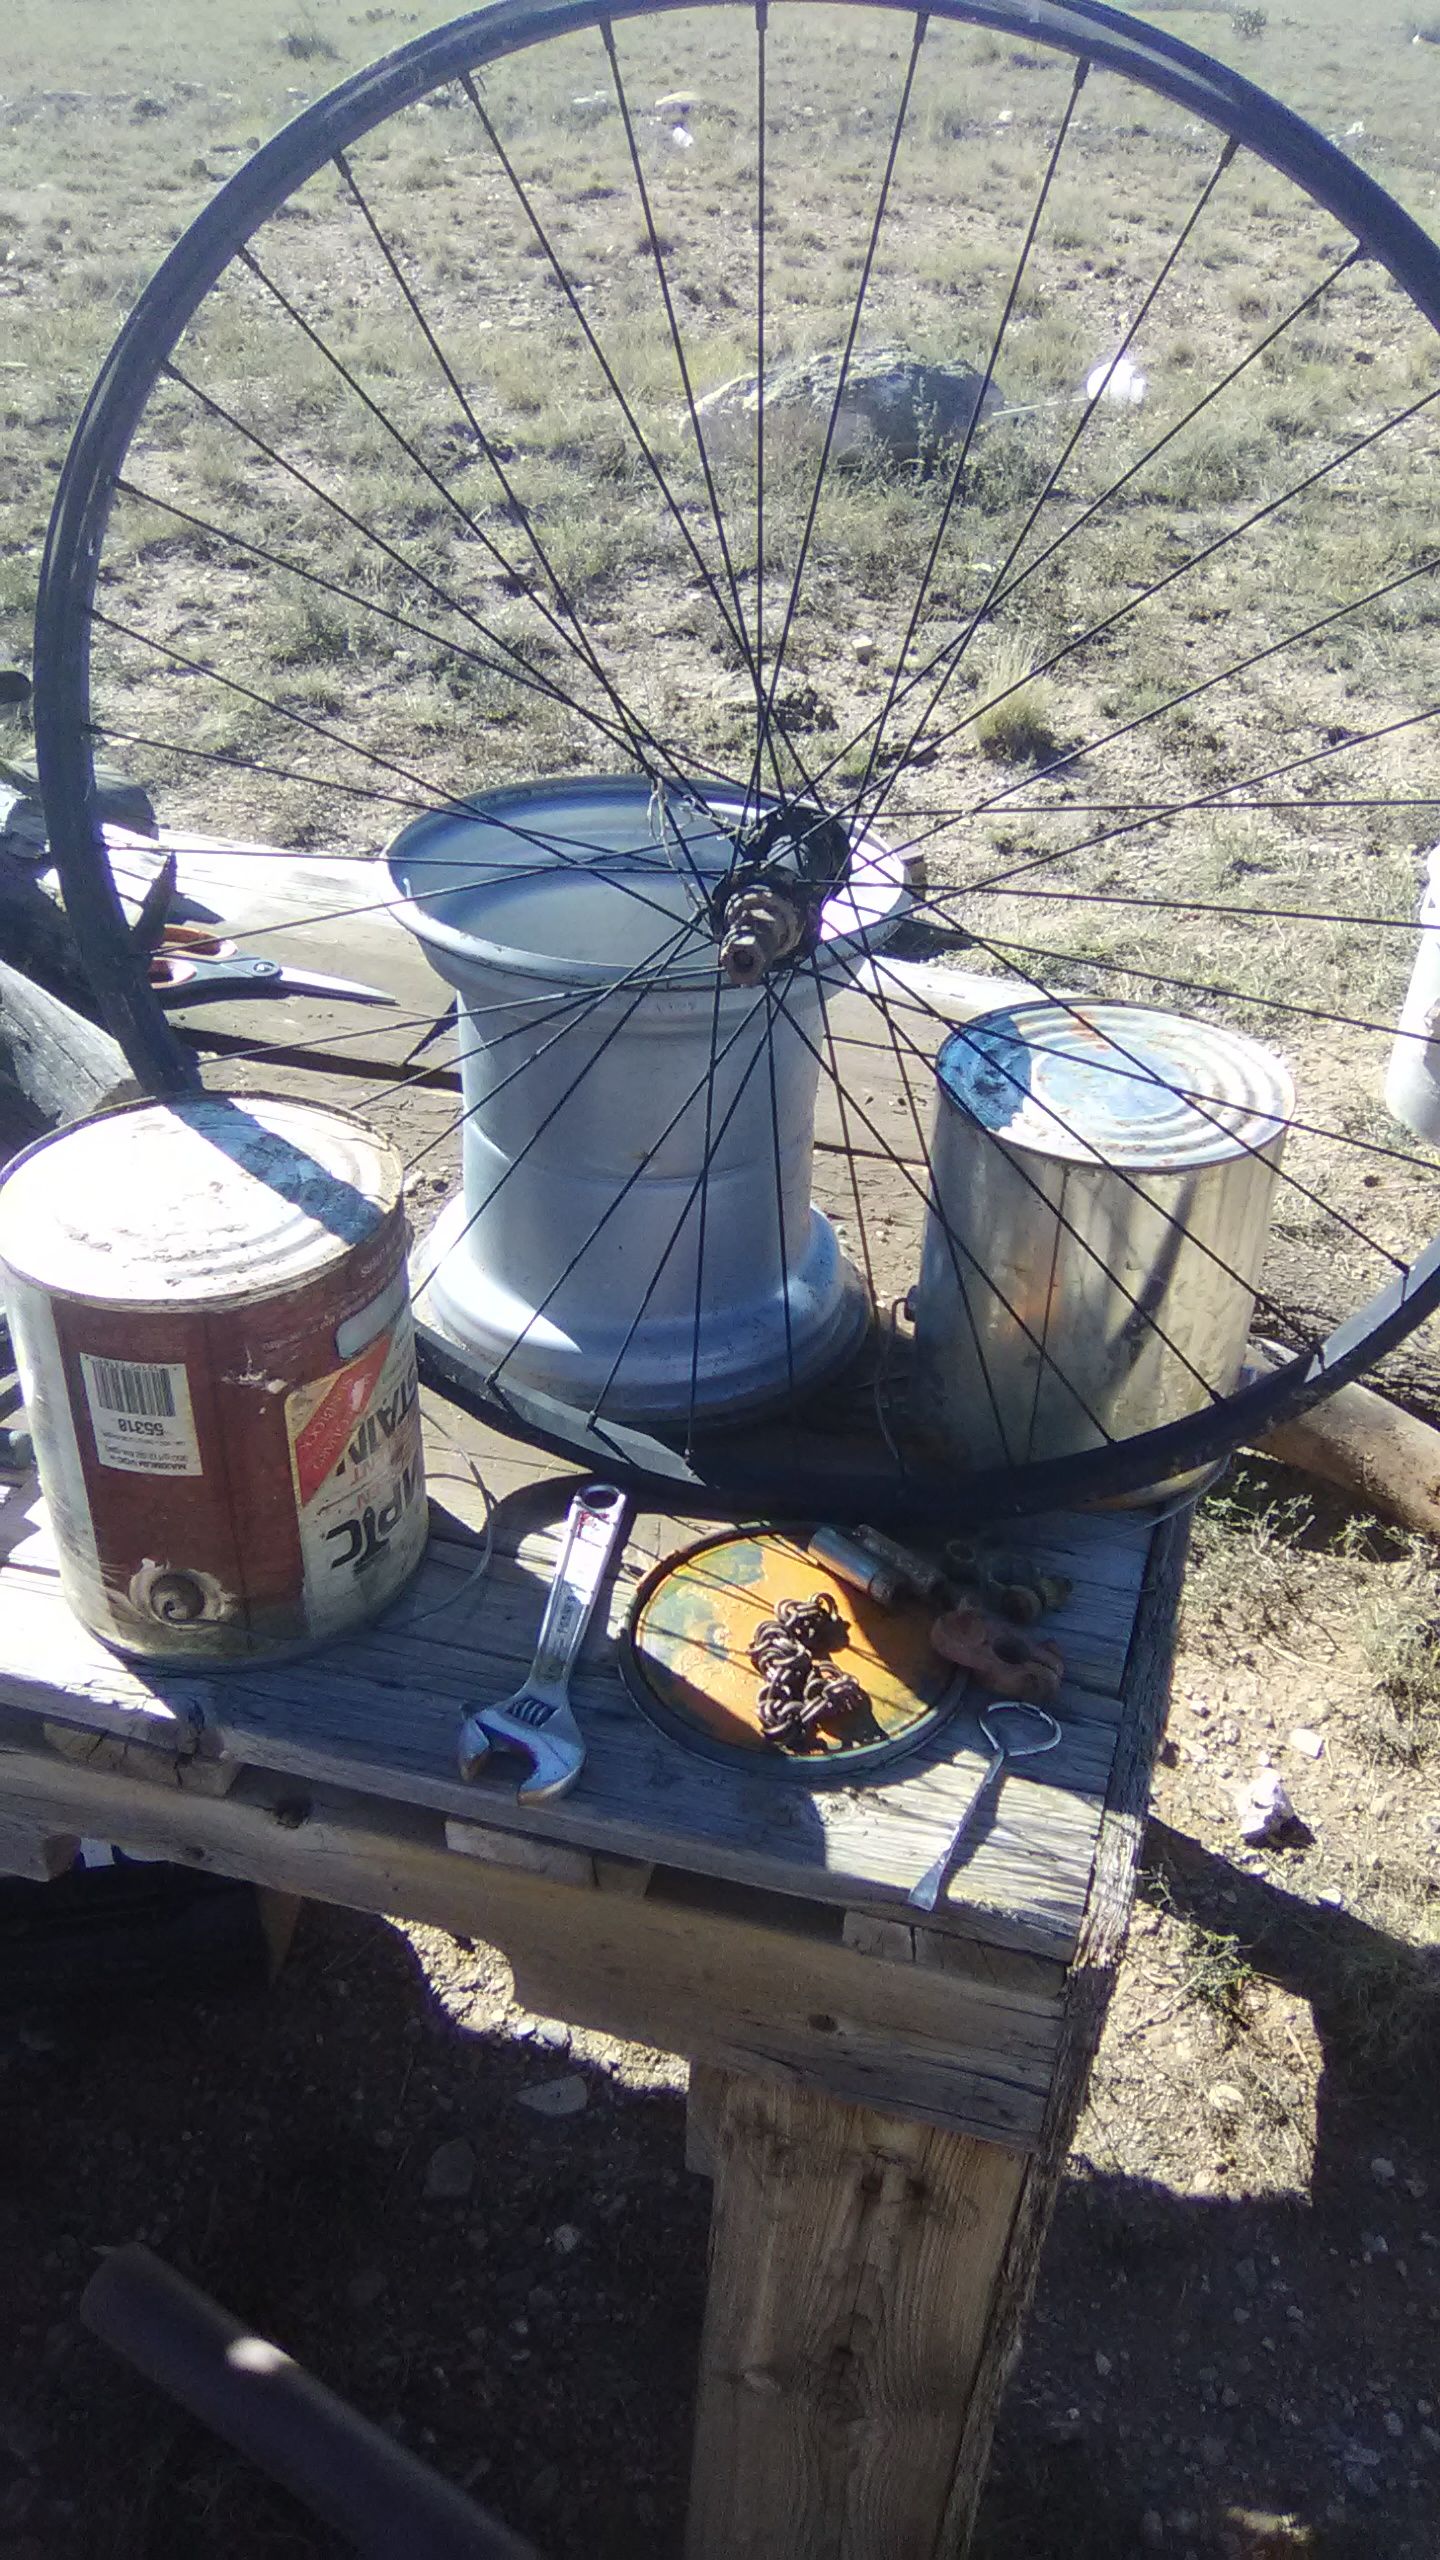
First collecting materials you going to need out of scrap so that you can assemble the entire project in one shot. This project will take approximately two and a half to three hours depending on your skills and past experience.
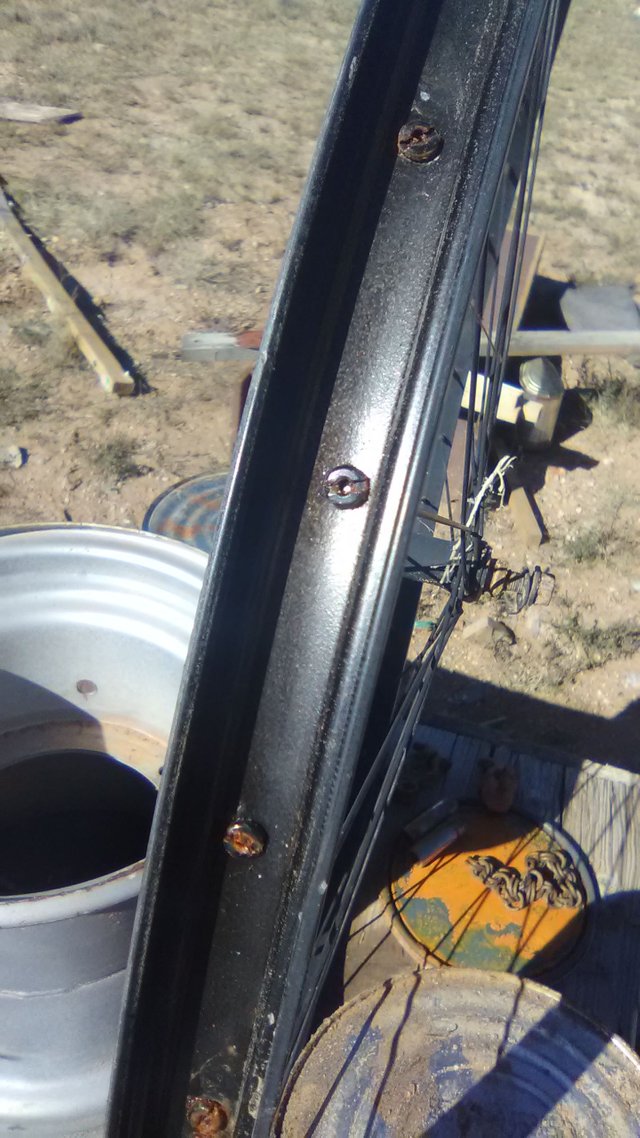
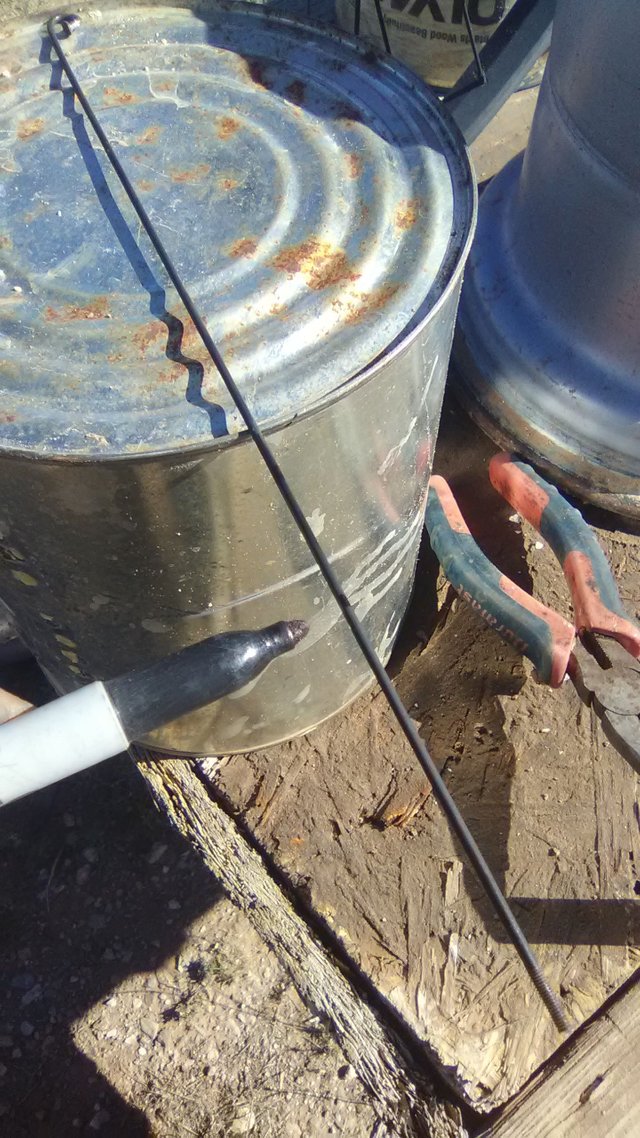
You will need two bicycle spoke you will need two coffee cans or three it depends on the approach you take in this case I’m using two because I also have the rim from an old ATV.
you will also need two sockets of the same size and length impact sockets probably work best I recommend 12mm or 13mm
you will also need a bolt between 6in and 9in long 9 be better
along with three nuts three washers also rubber washers or gaskets… yeah

There are several items in this image that you won’t need for this project but it gives you an idea of my thinking process. Basically you need some kind of weight on the end of a swingarm or chain.
I was considering these to 12 mm sockets and I was also thinking about using the battery posts for weights and I have a chain there but I ended up being more problems than it was worth
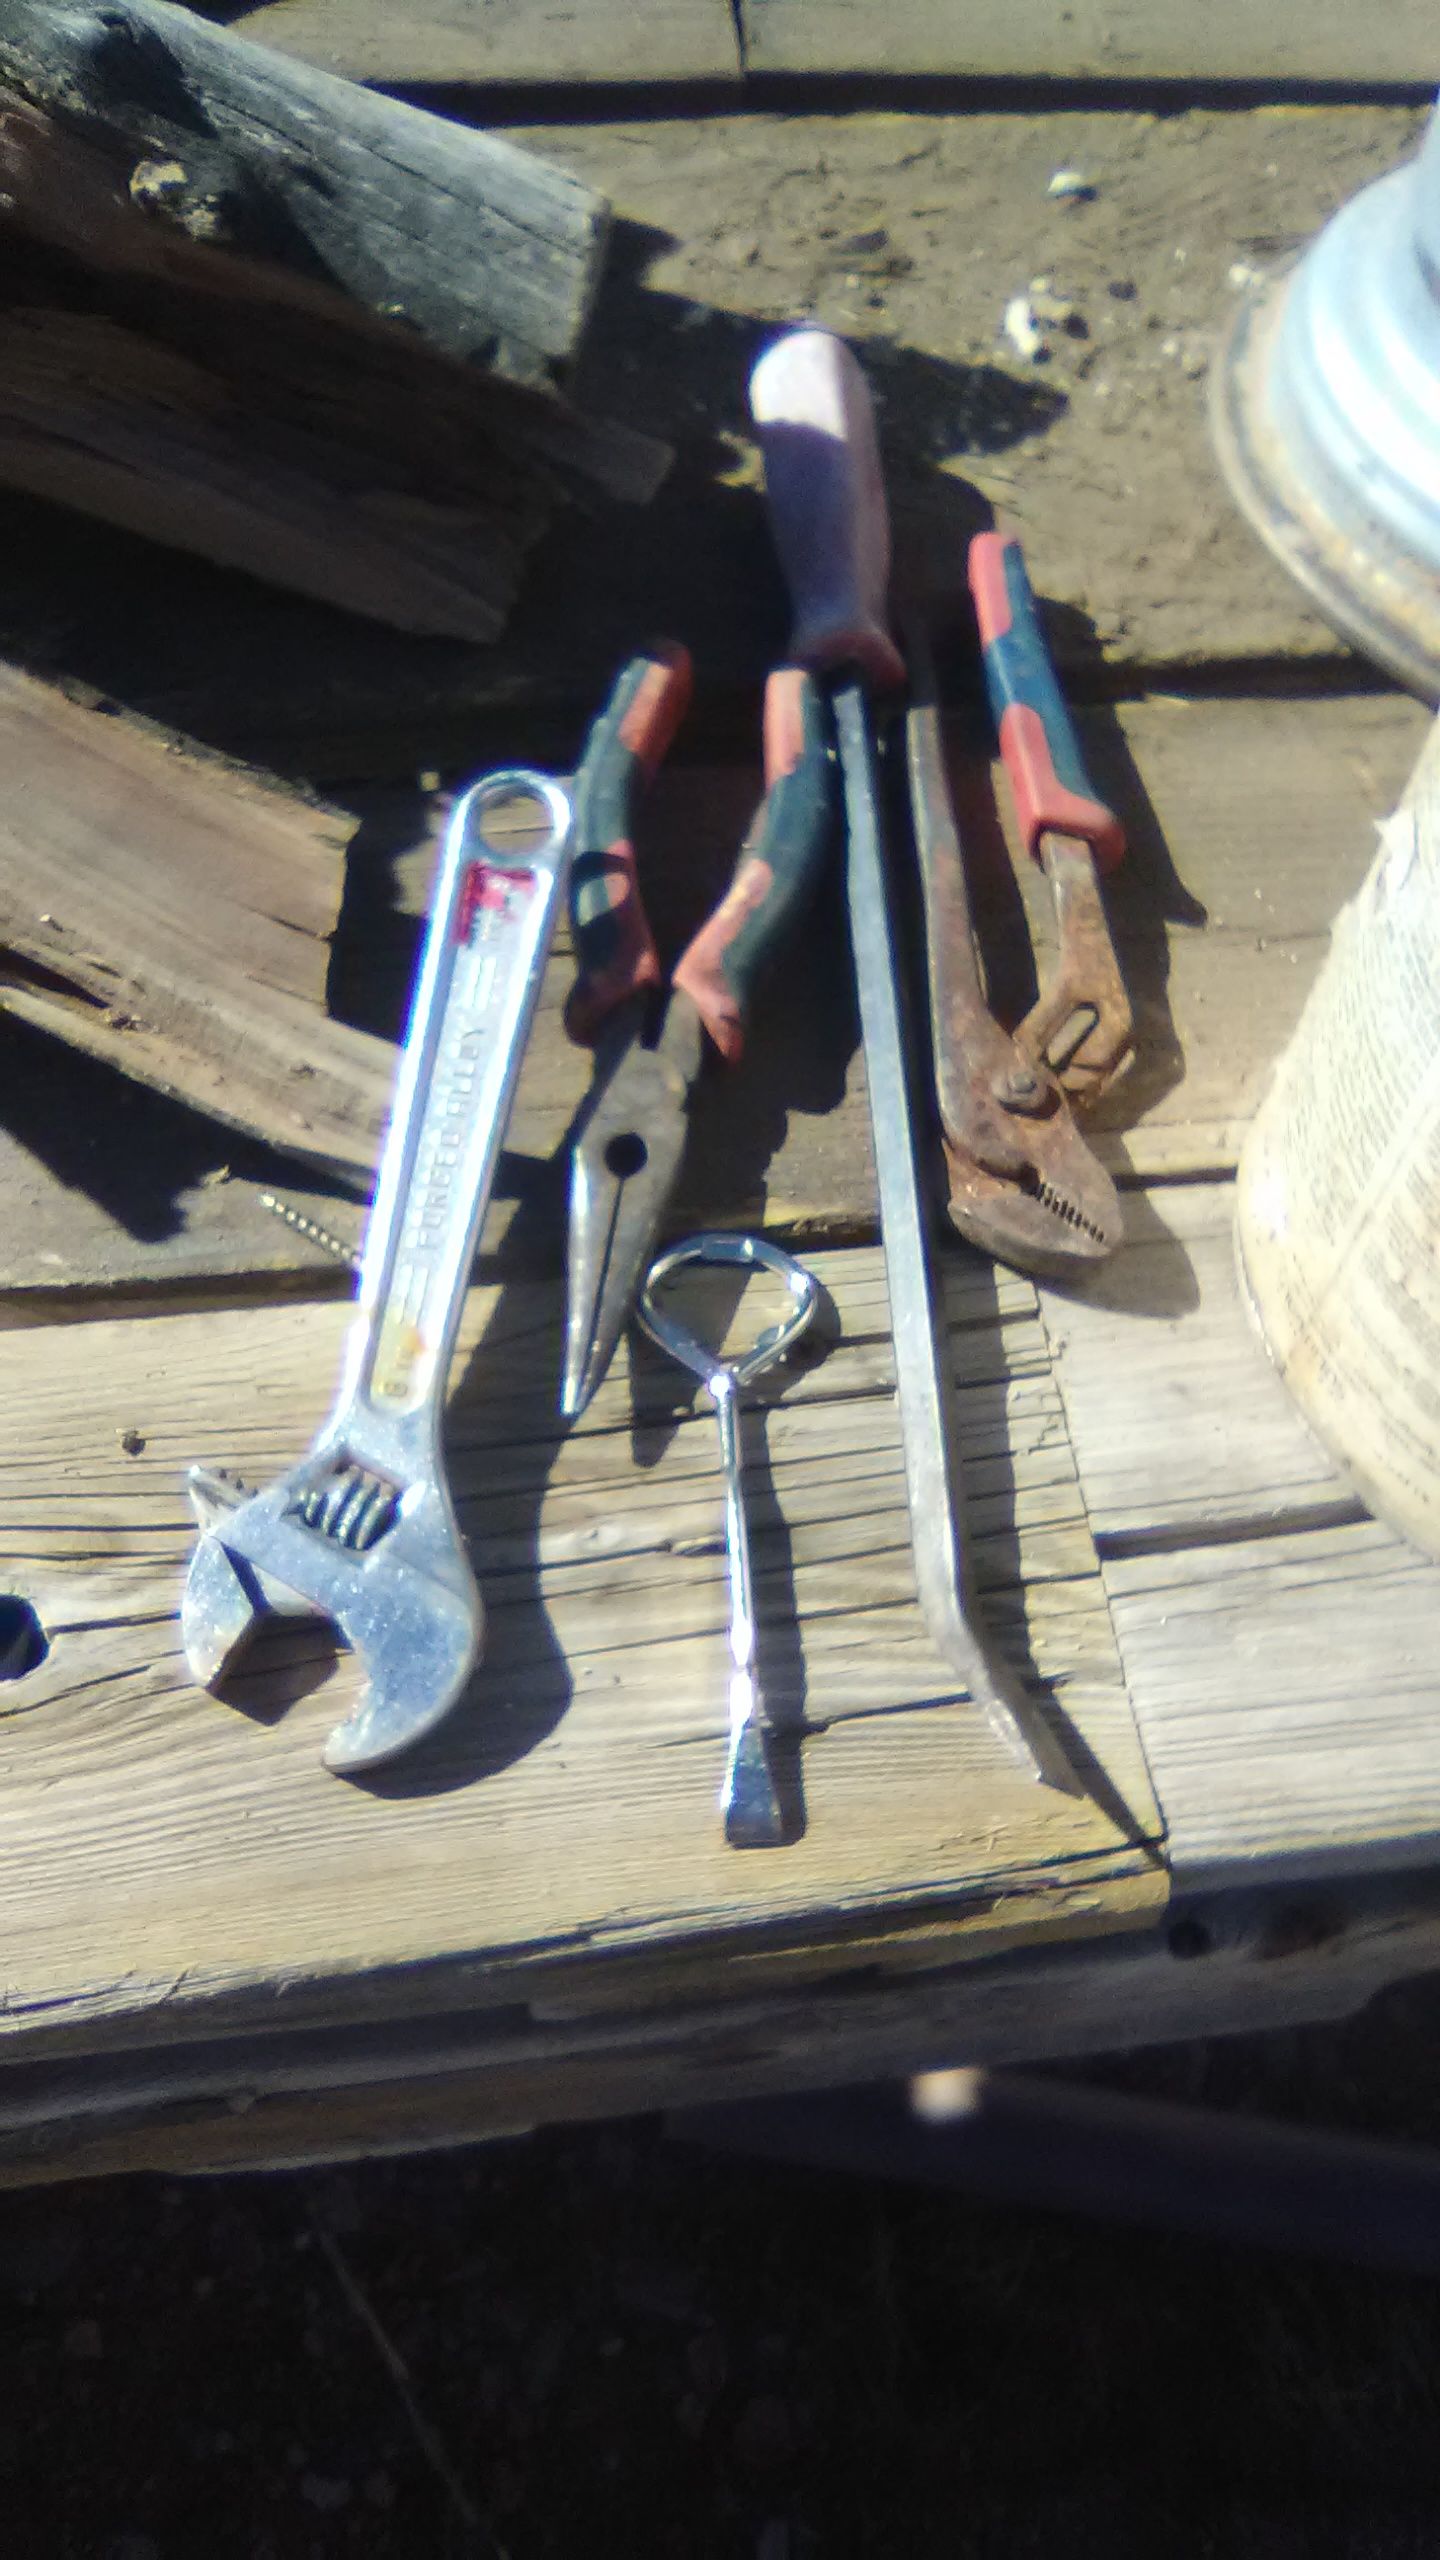
You are going to need most of these tools to build this project don’t really need the crescent wrench though but the needle nose pliers and the channel lock pliers are necessity absolutely
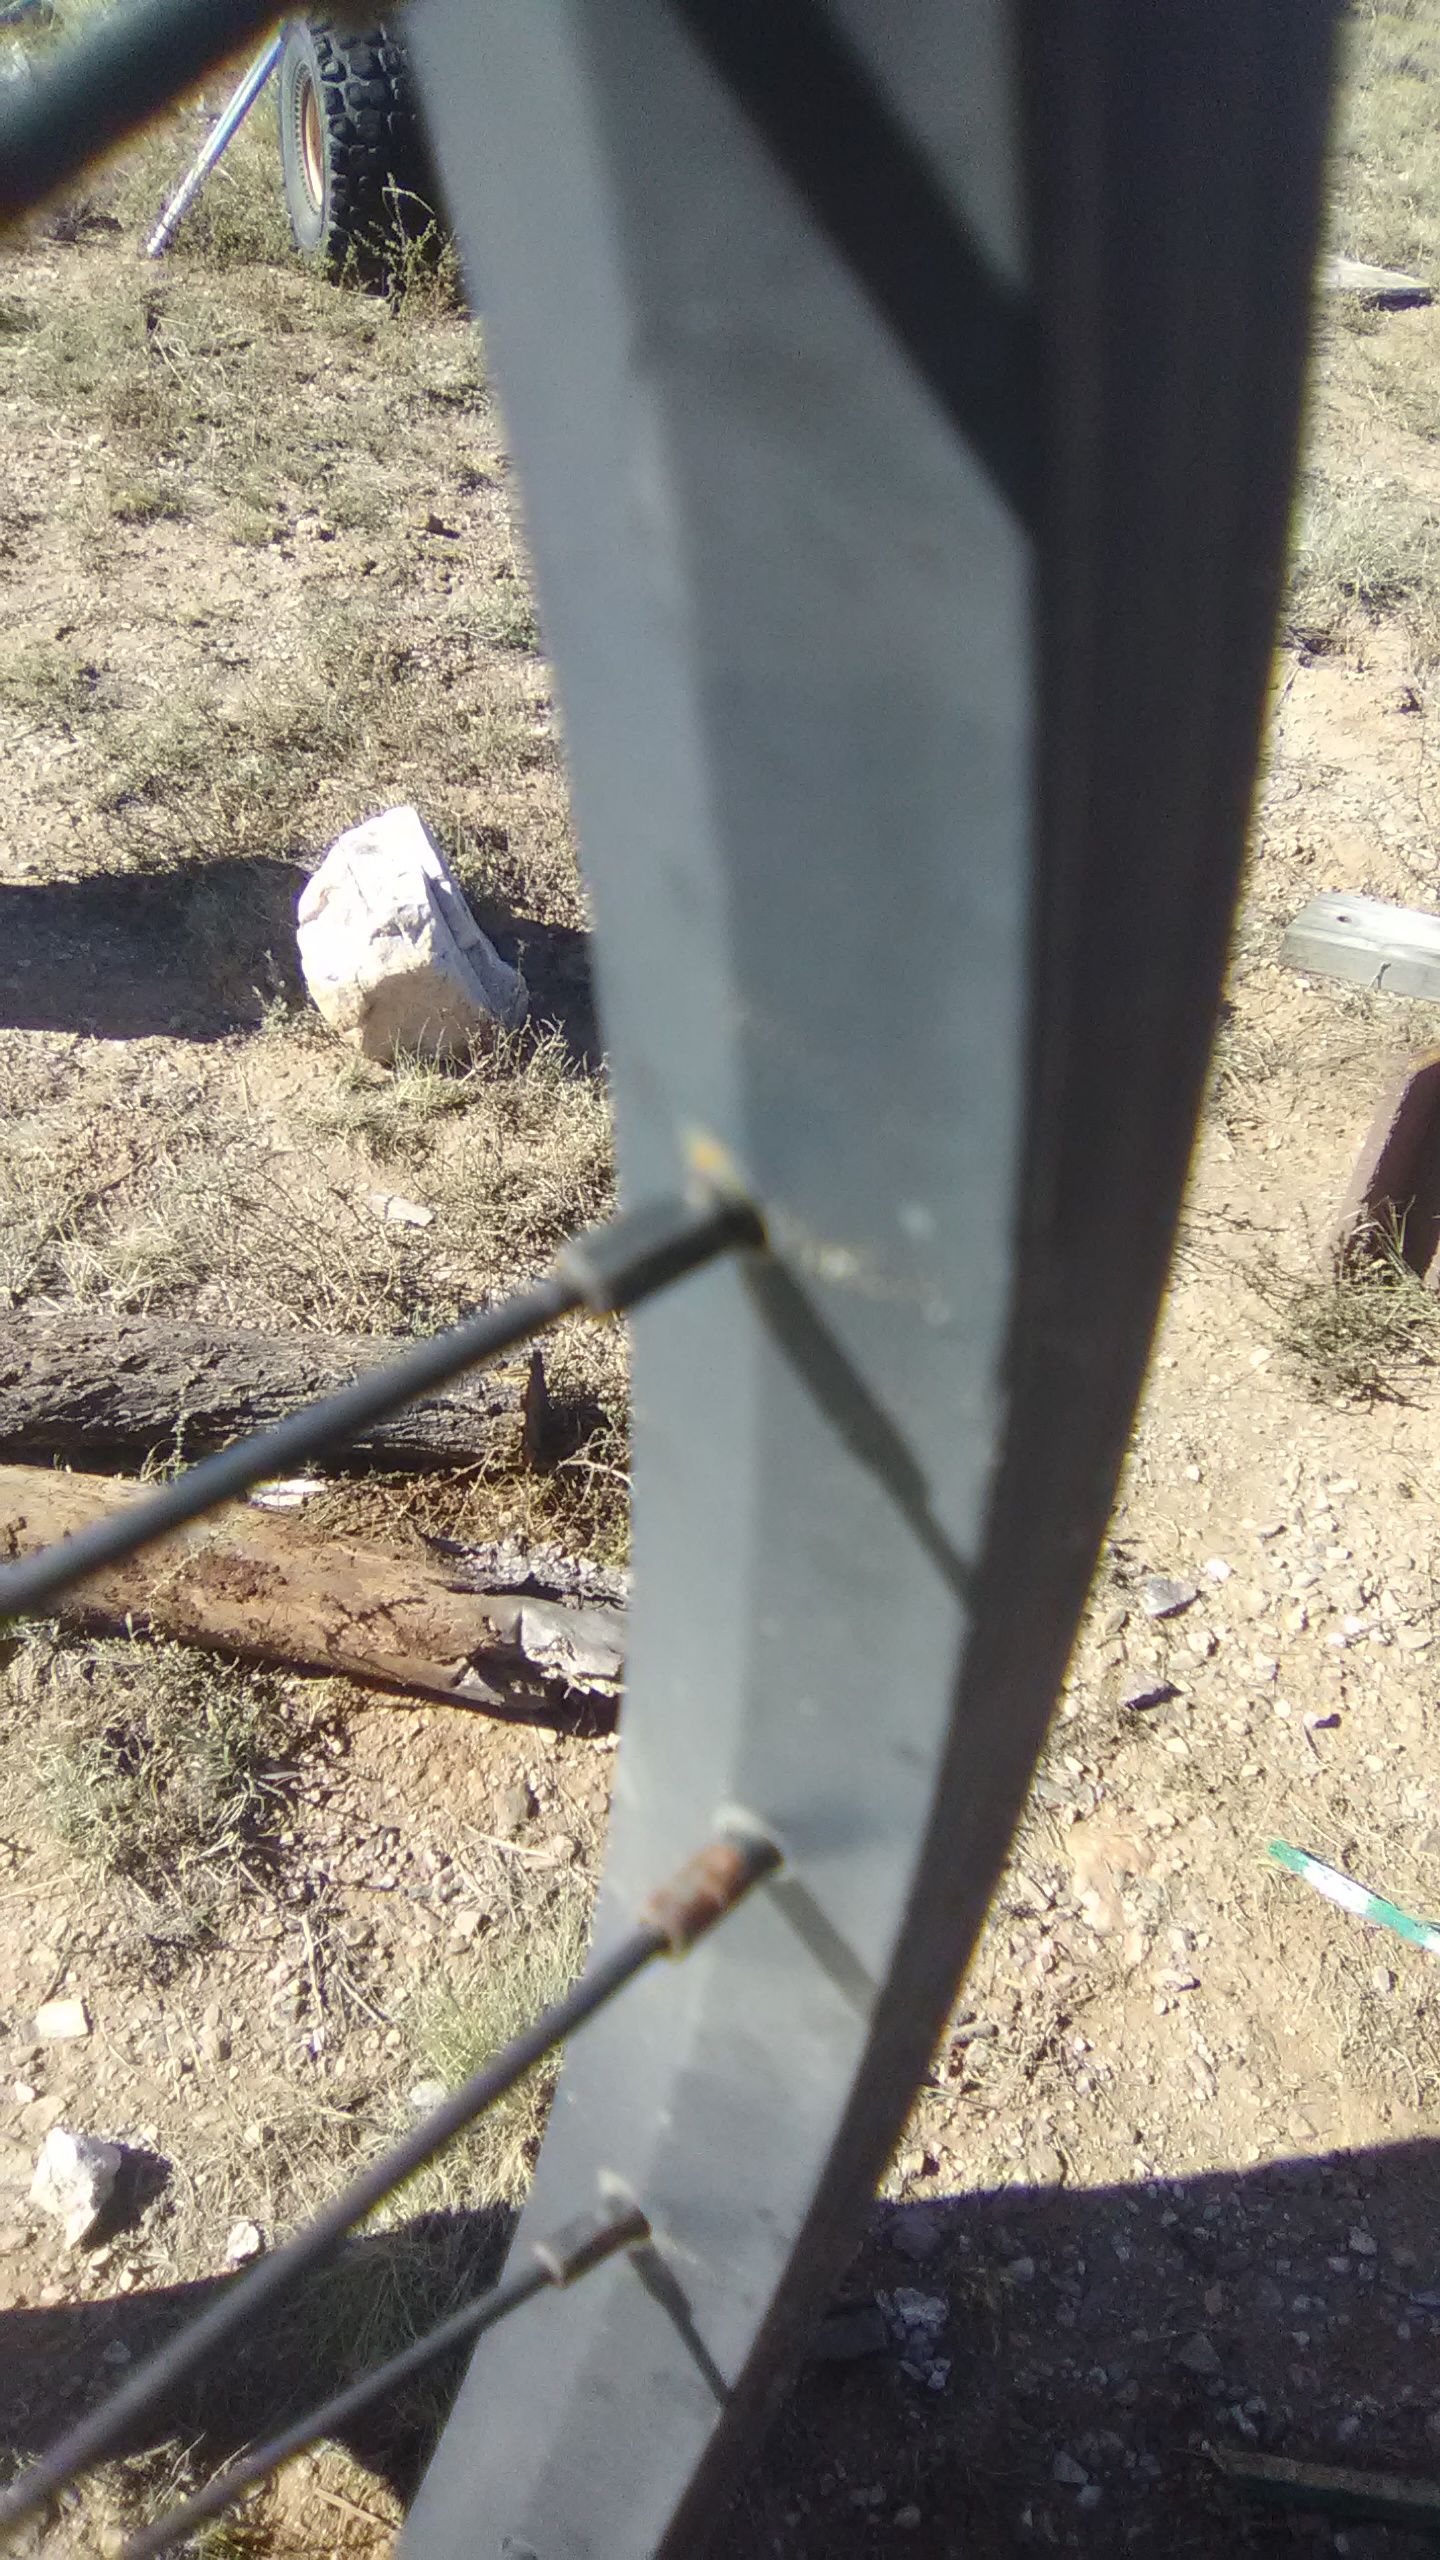
I’m going to go on the Assumption you already know how to take the tire tread and Tube off a rim so we’ll start here.
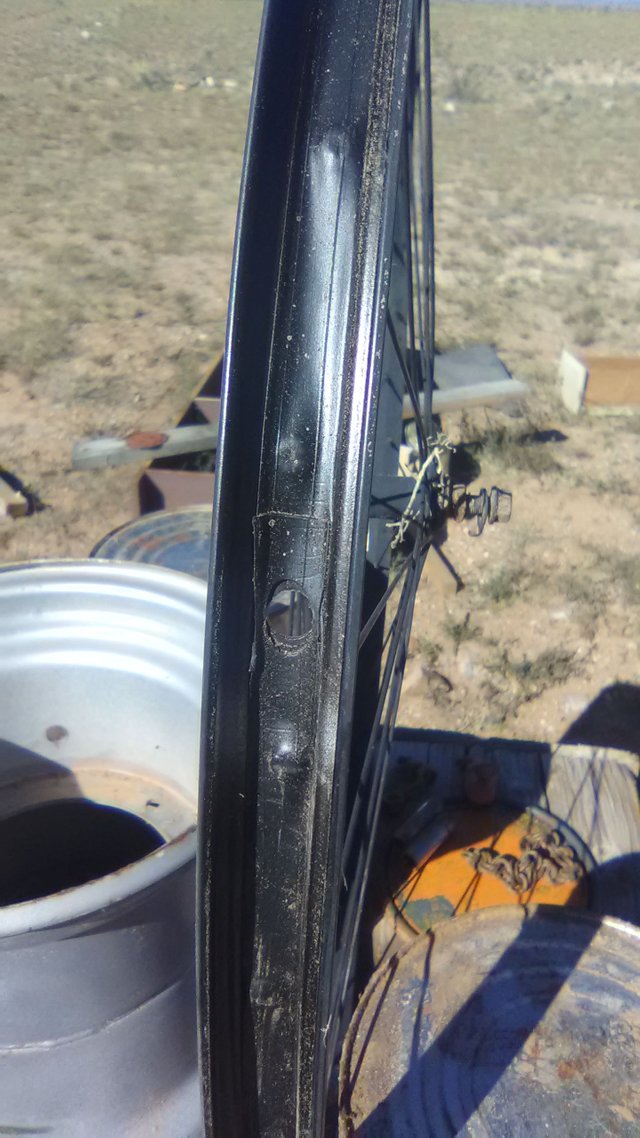
to get the spoke from this tire rim you have to first remove the thin plastic lining that protects the inner tube from the spoke nut shown in the picture is the lining inside the rim
Using my paint can key I have pulled back the rim lining for easier view you can also do this with a pair of needle-nose pliers or a flat head screwdriver
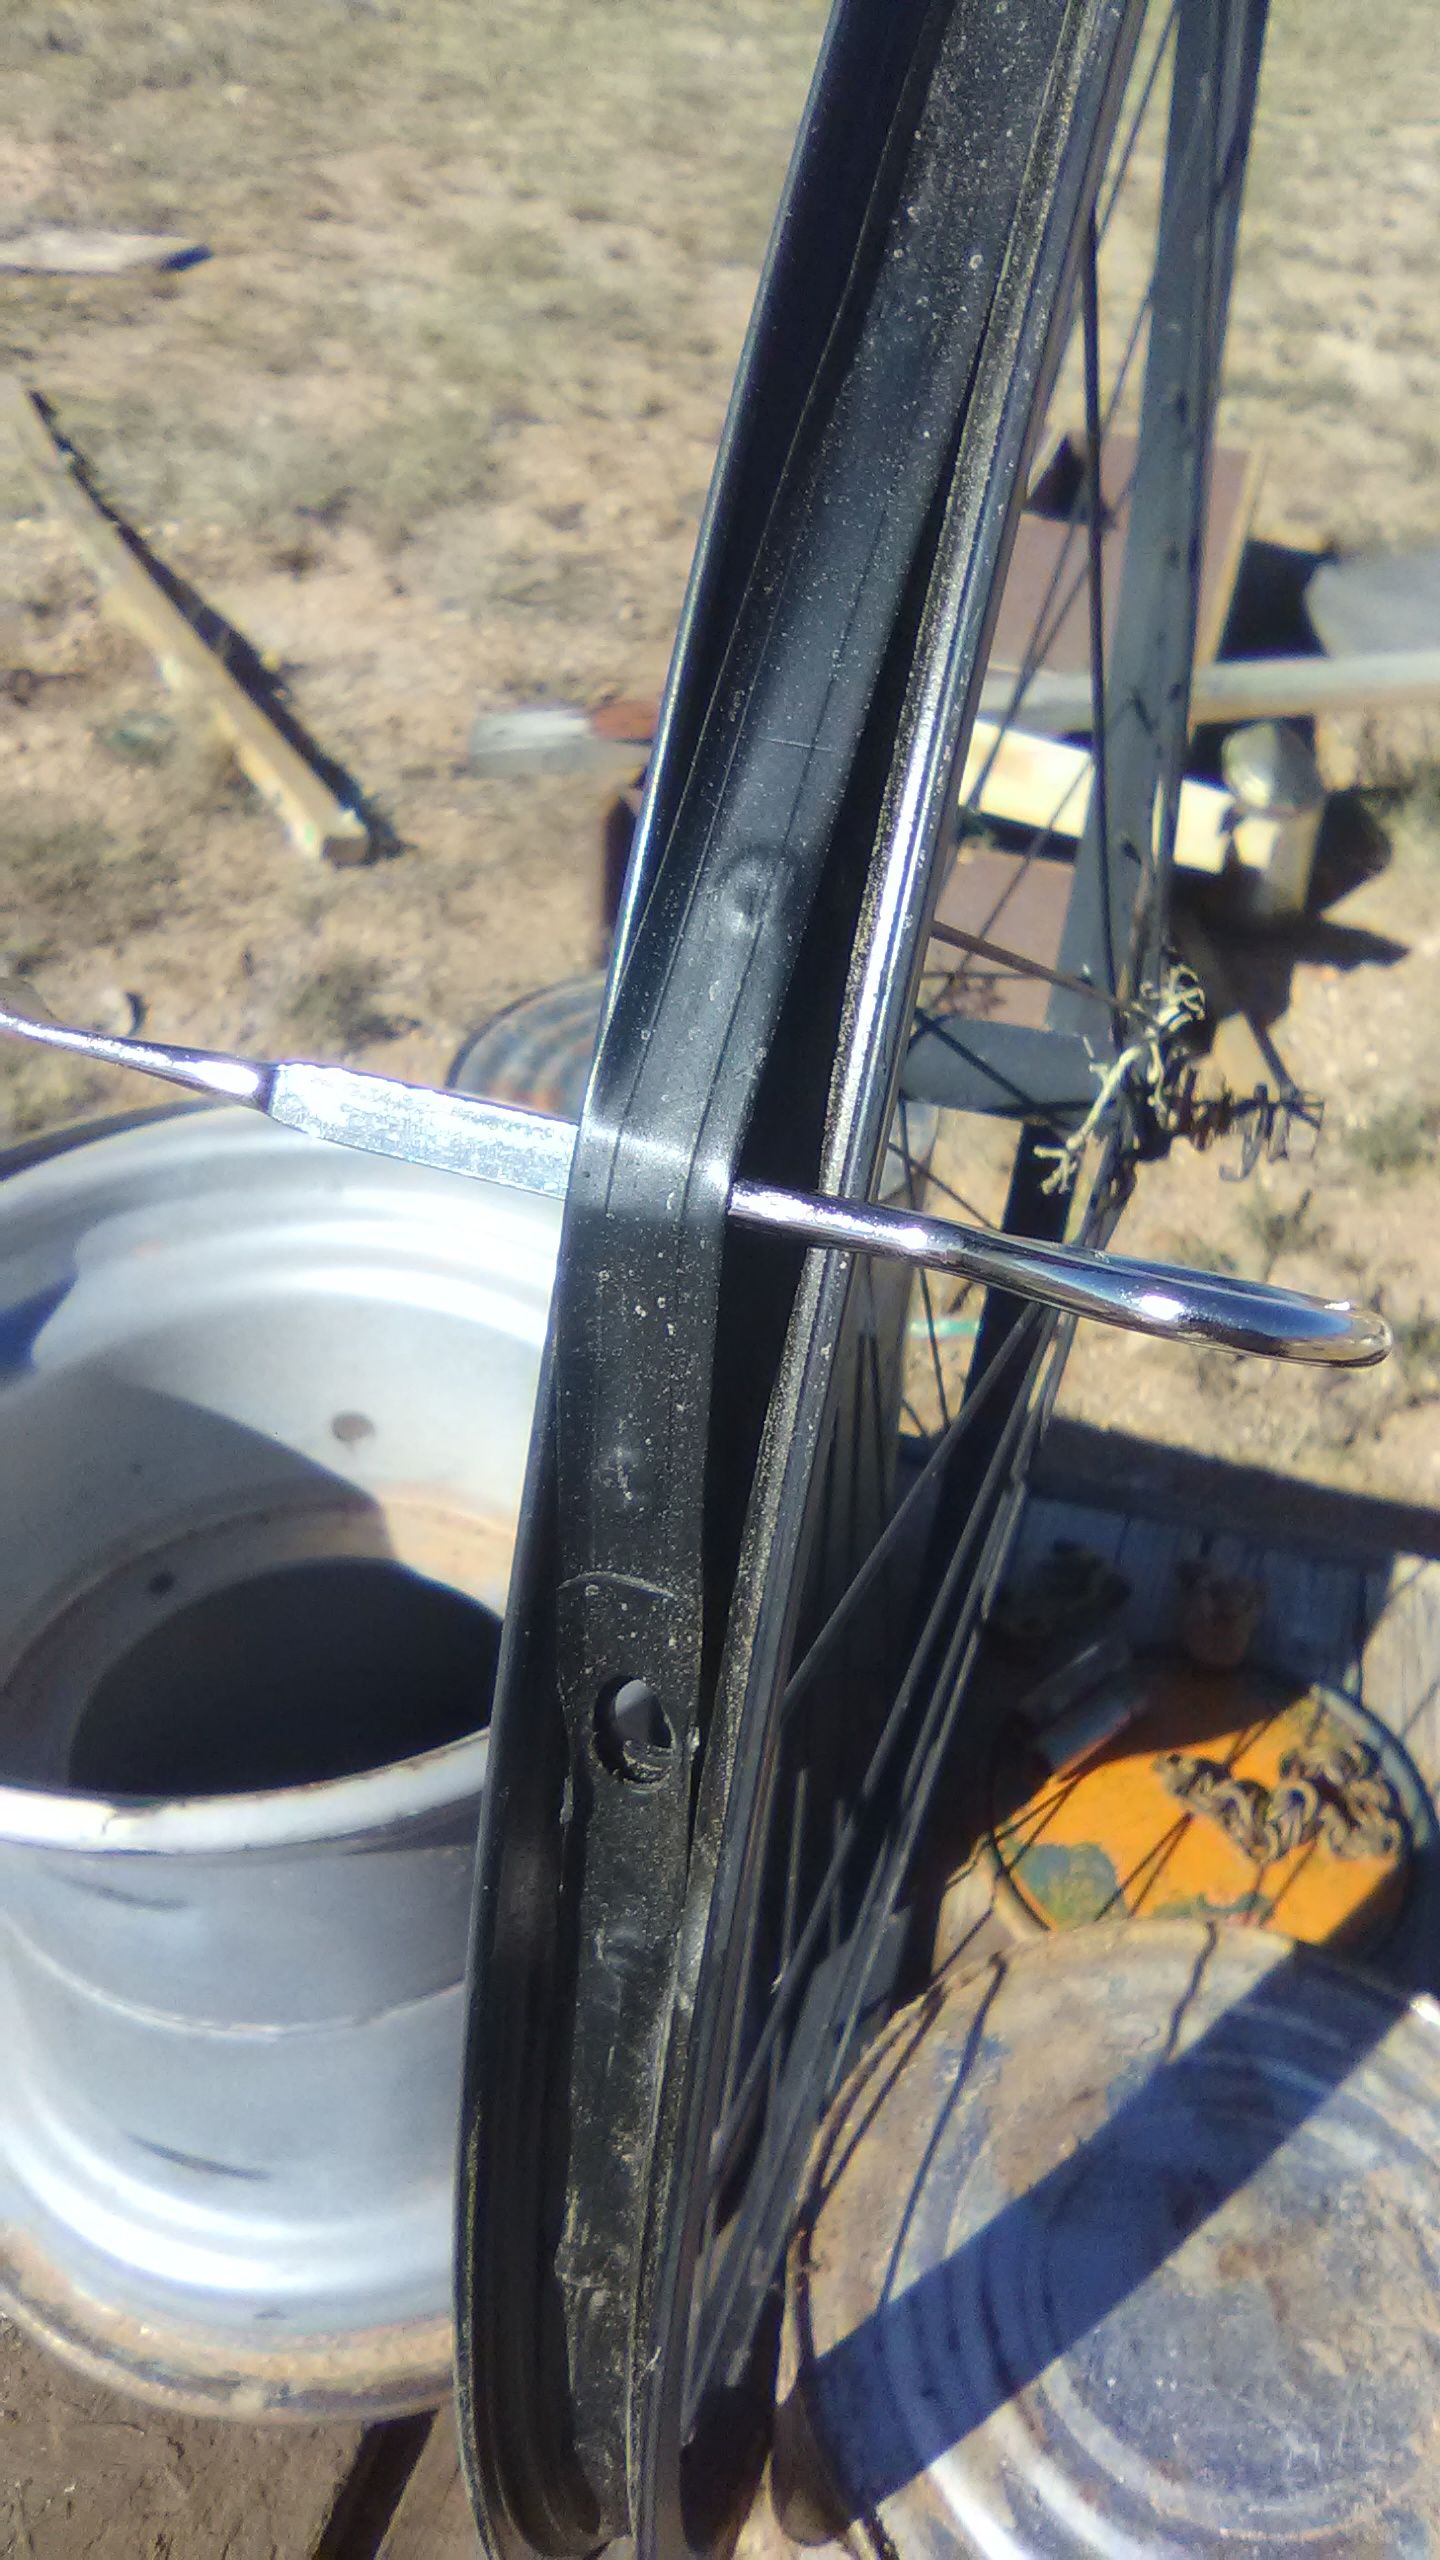
In this image above you can see the exposed spoke nut that holds the bicycle spokes into the tire frame
In this image above you can see the spoke not from the in side of the tire rim… note that it has a hexagonal side which can be griped with pliers
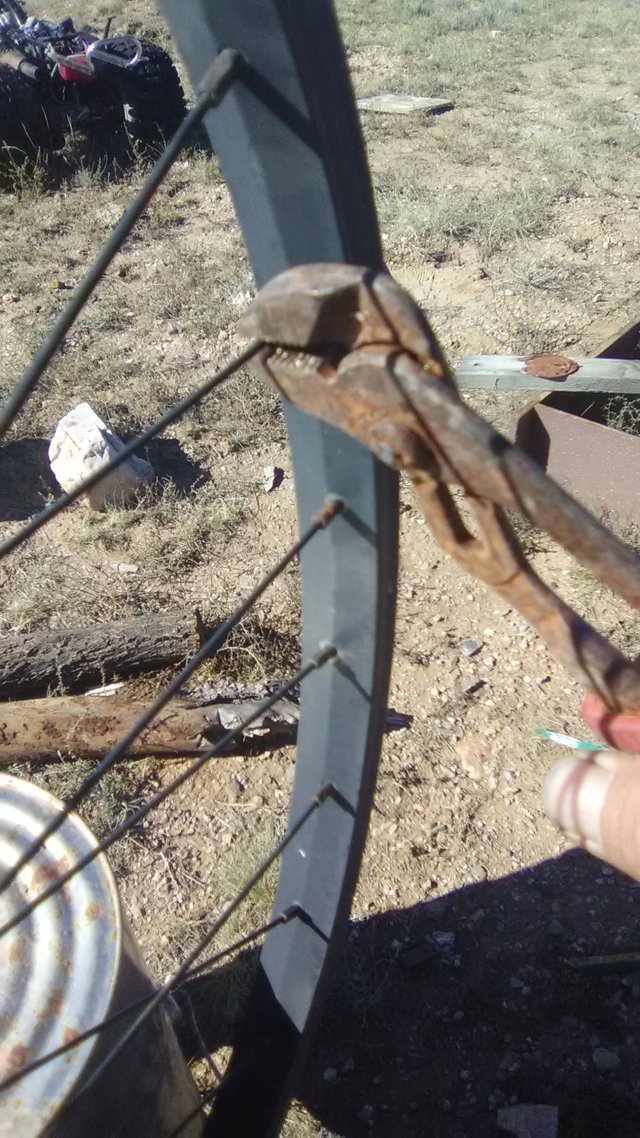
.In this next image above I’m using a pair of channel lock pliers to Twist Off the spoke nut from in side of the rim.
~ remember righty tighty lefty Loosey PS little shot of WD-40 doesn’t necessarily hurt
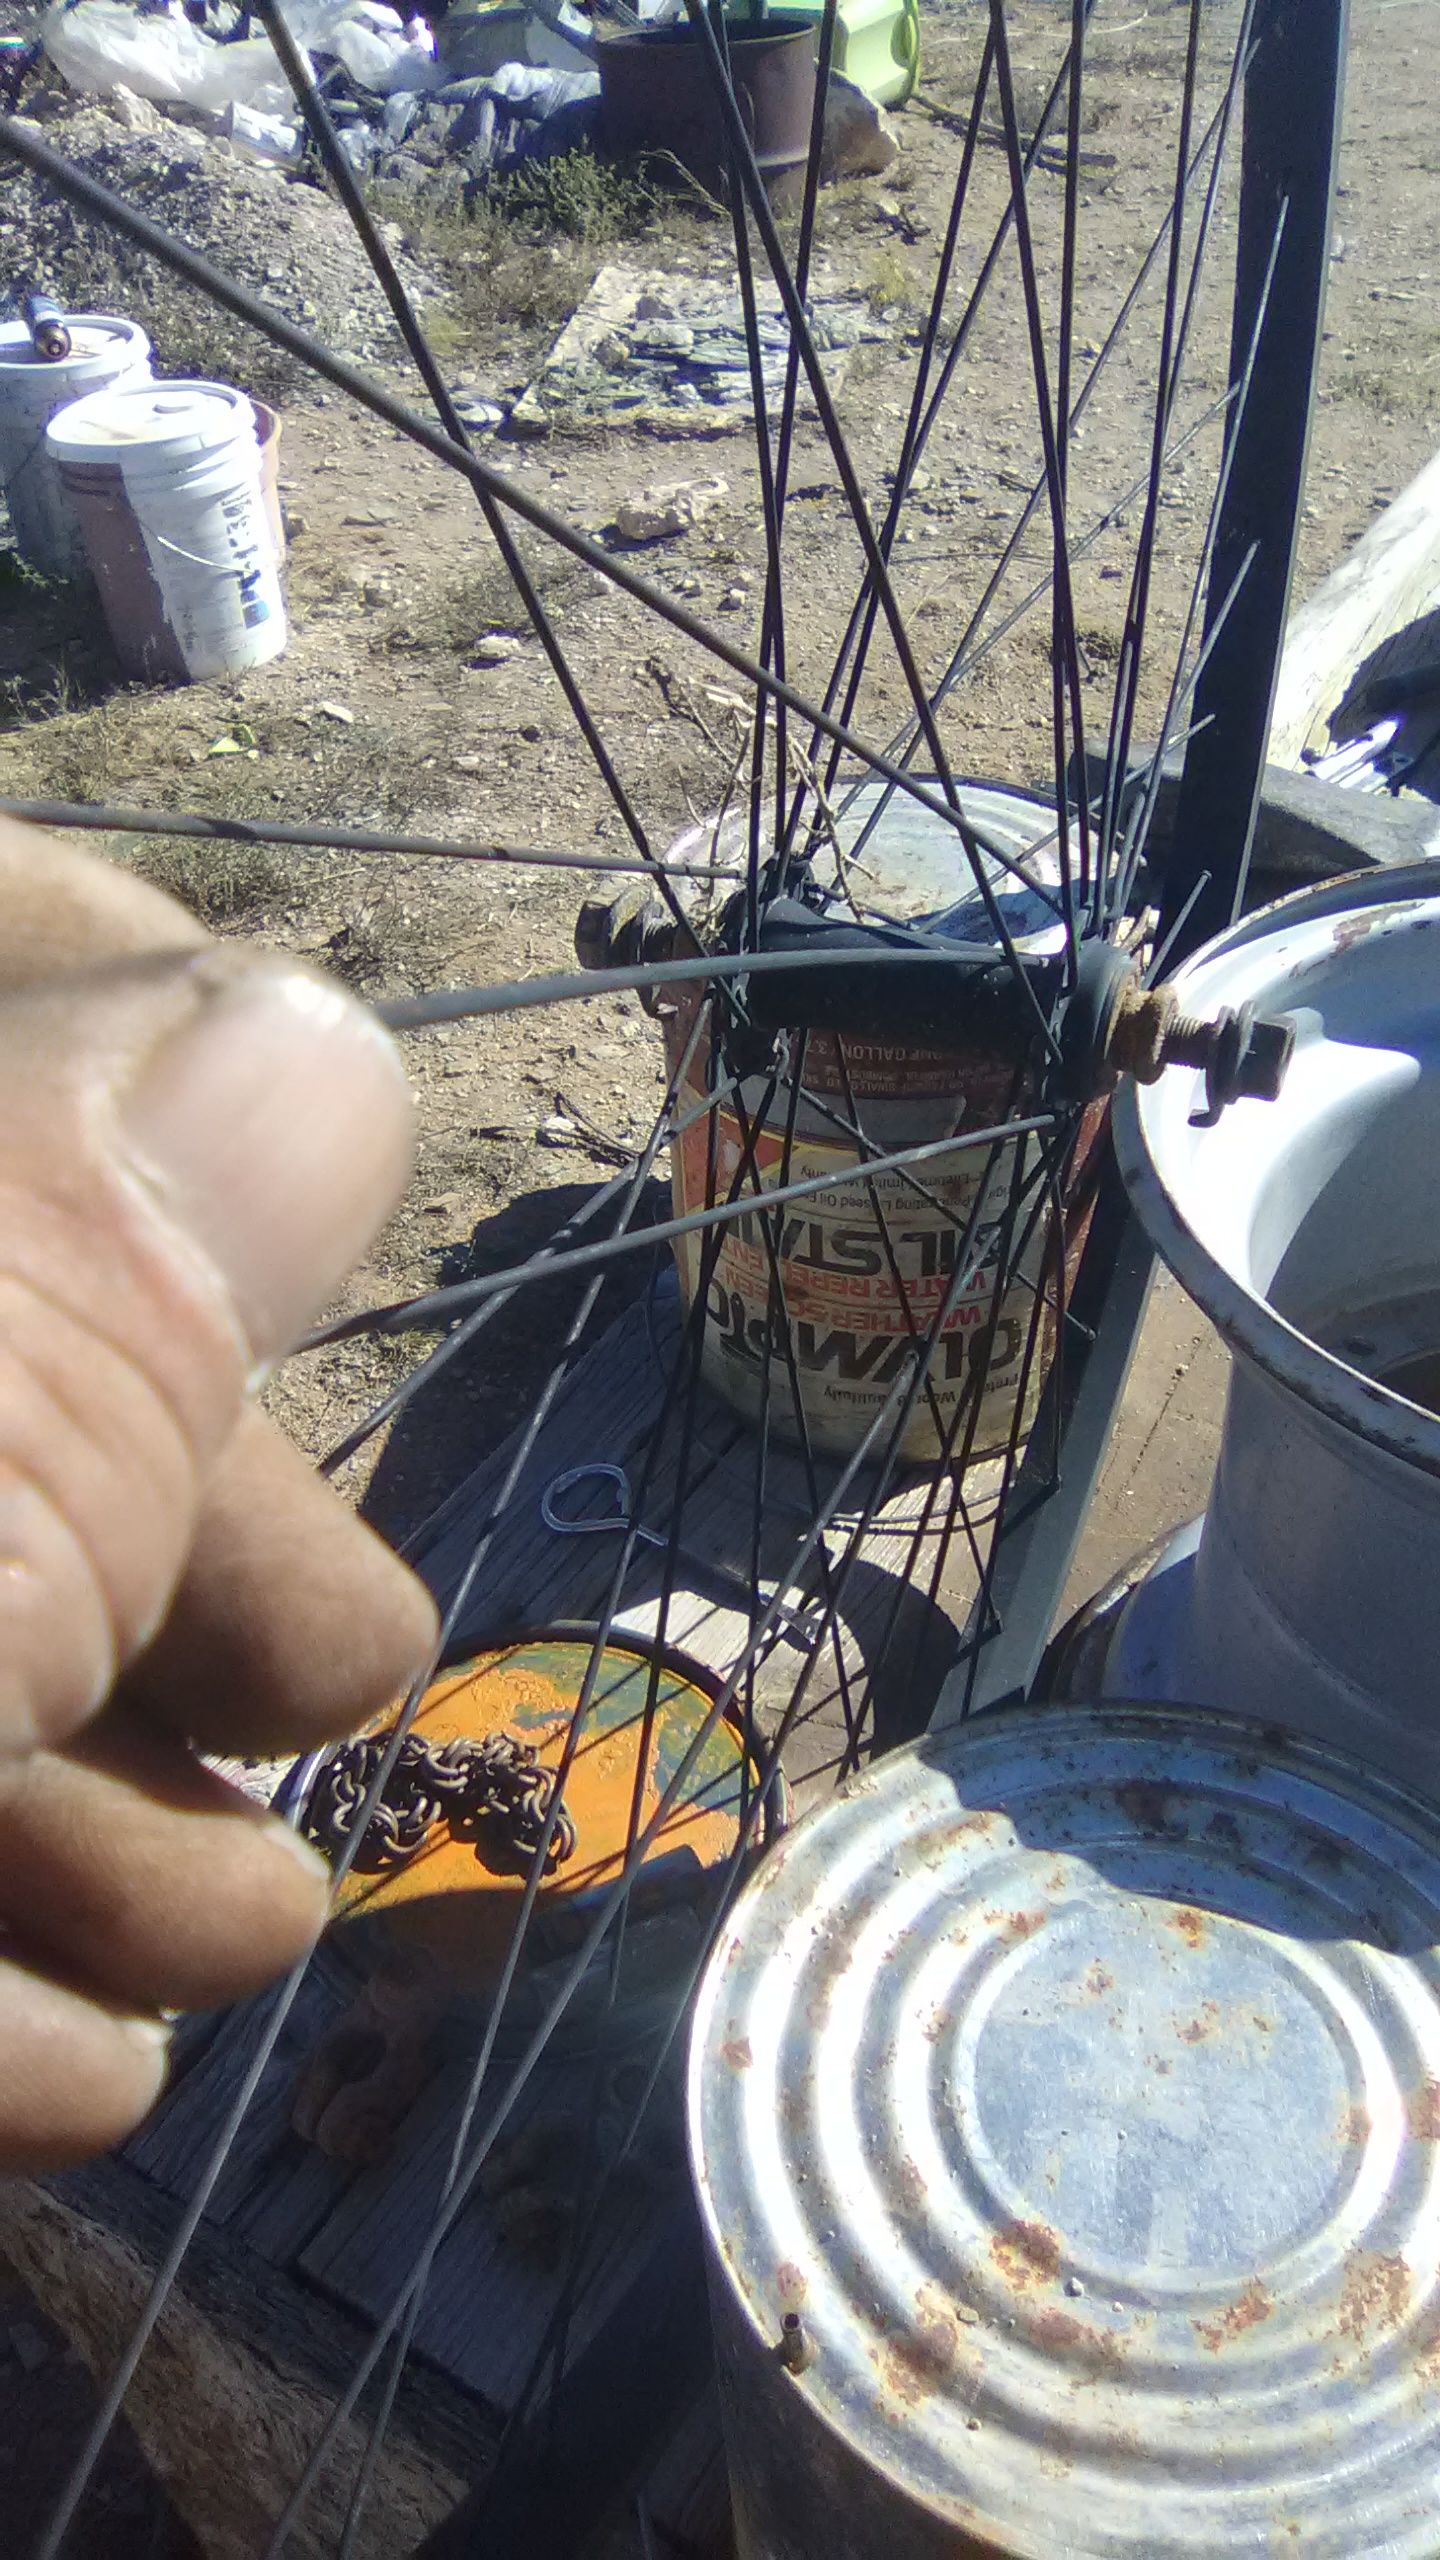
In this image above you can see that I have taken off the spoke nup and I now have the spoke free from the exterior of the tire rim
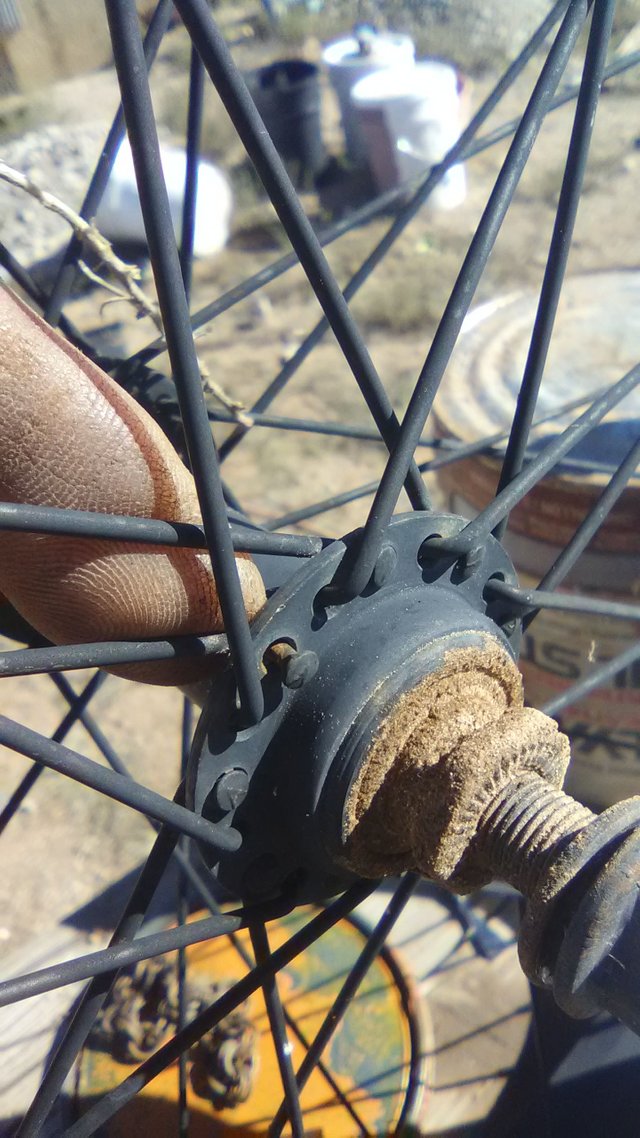
In this image if you look closely you’ll see that my finger is pushing forth the loose spoke this is the way that you’re going to remove it from the tire hub. Take note of the Hub nipple at the Hub end of the spoke
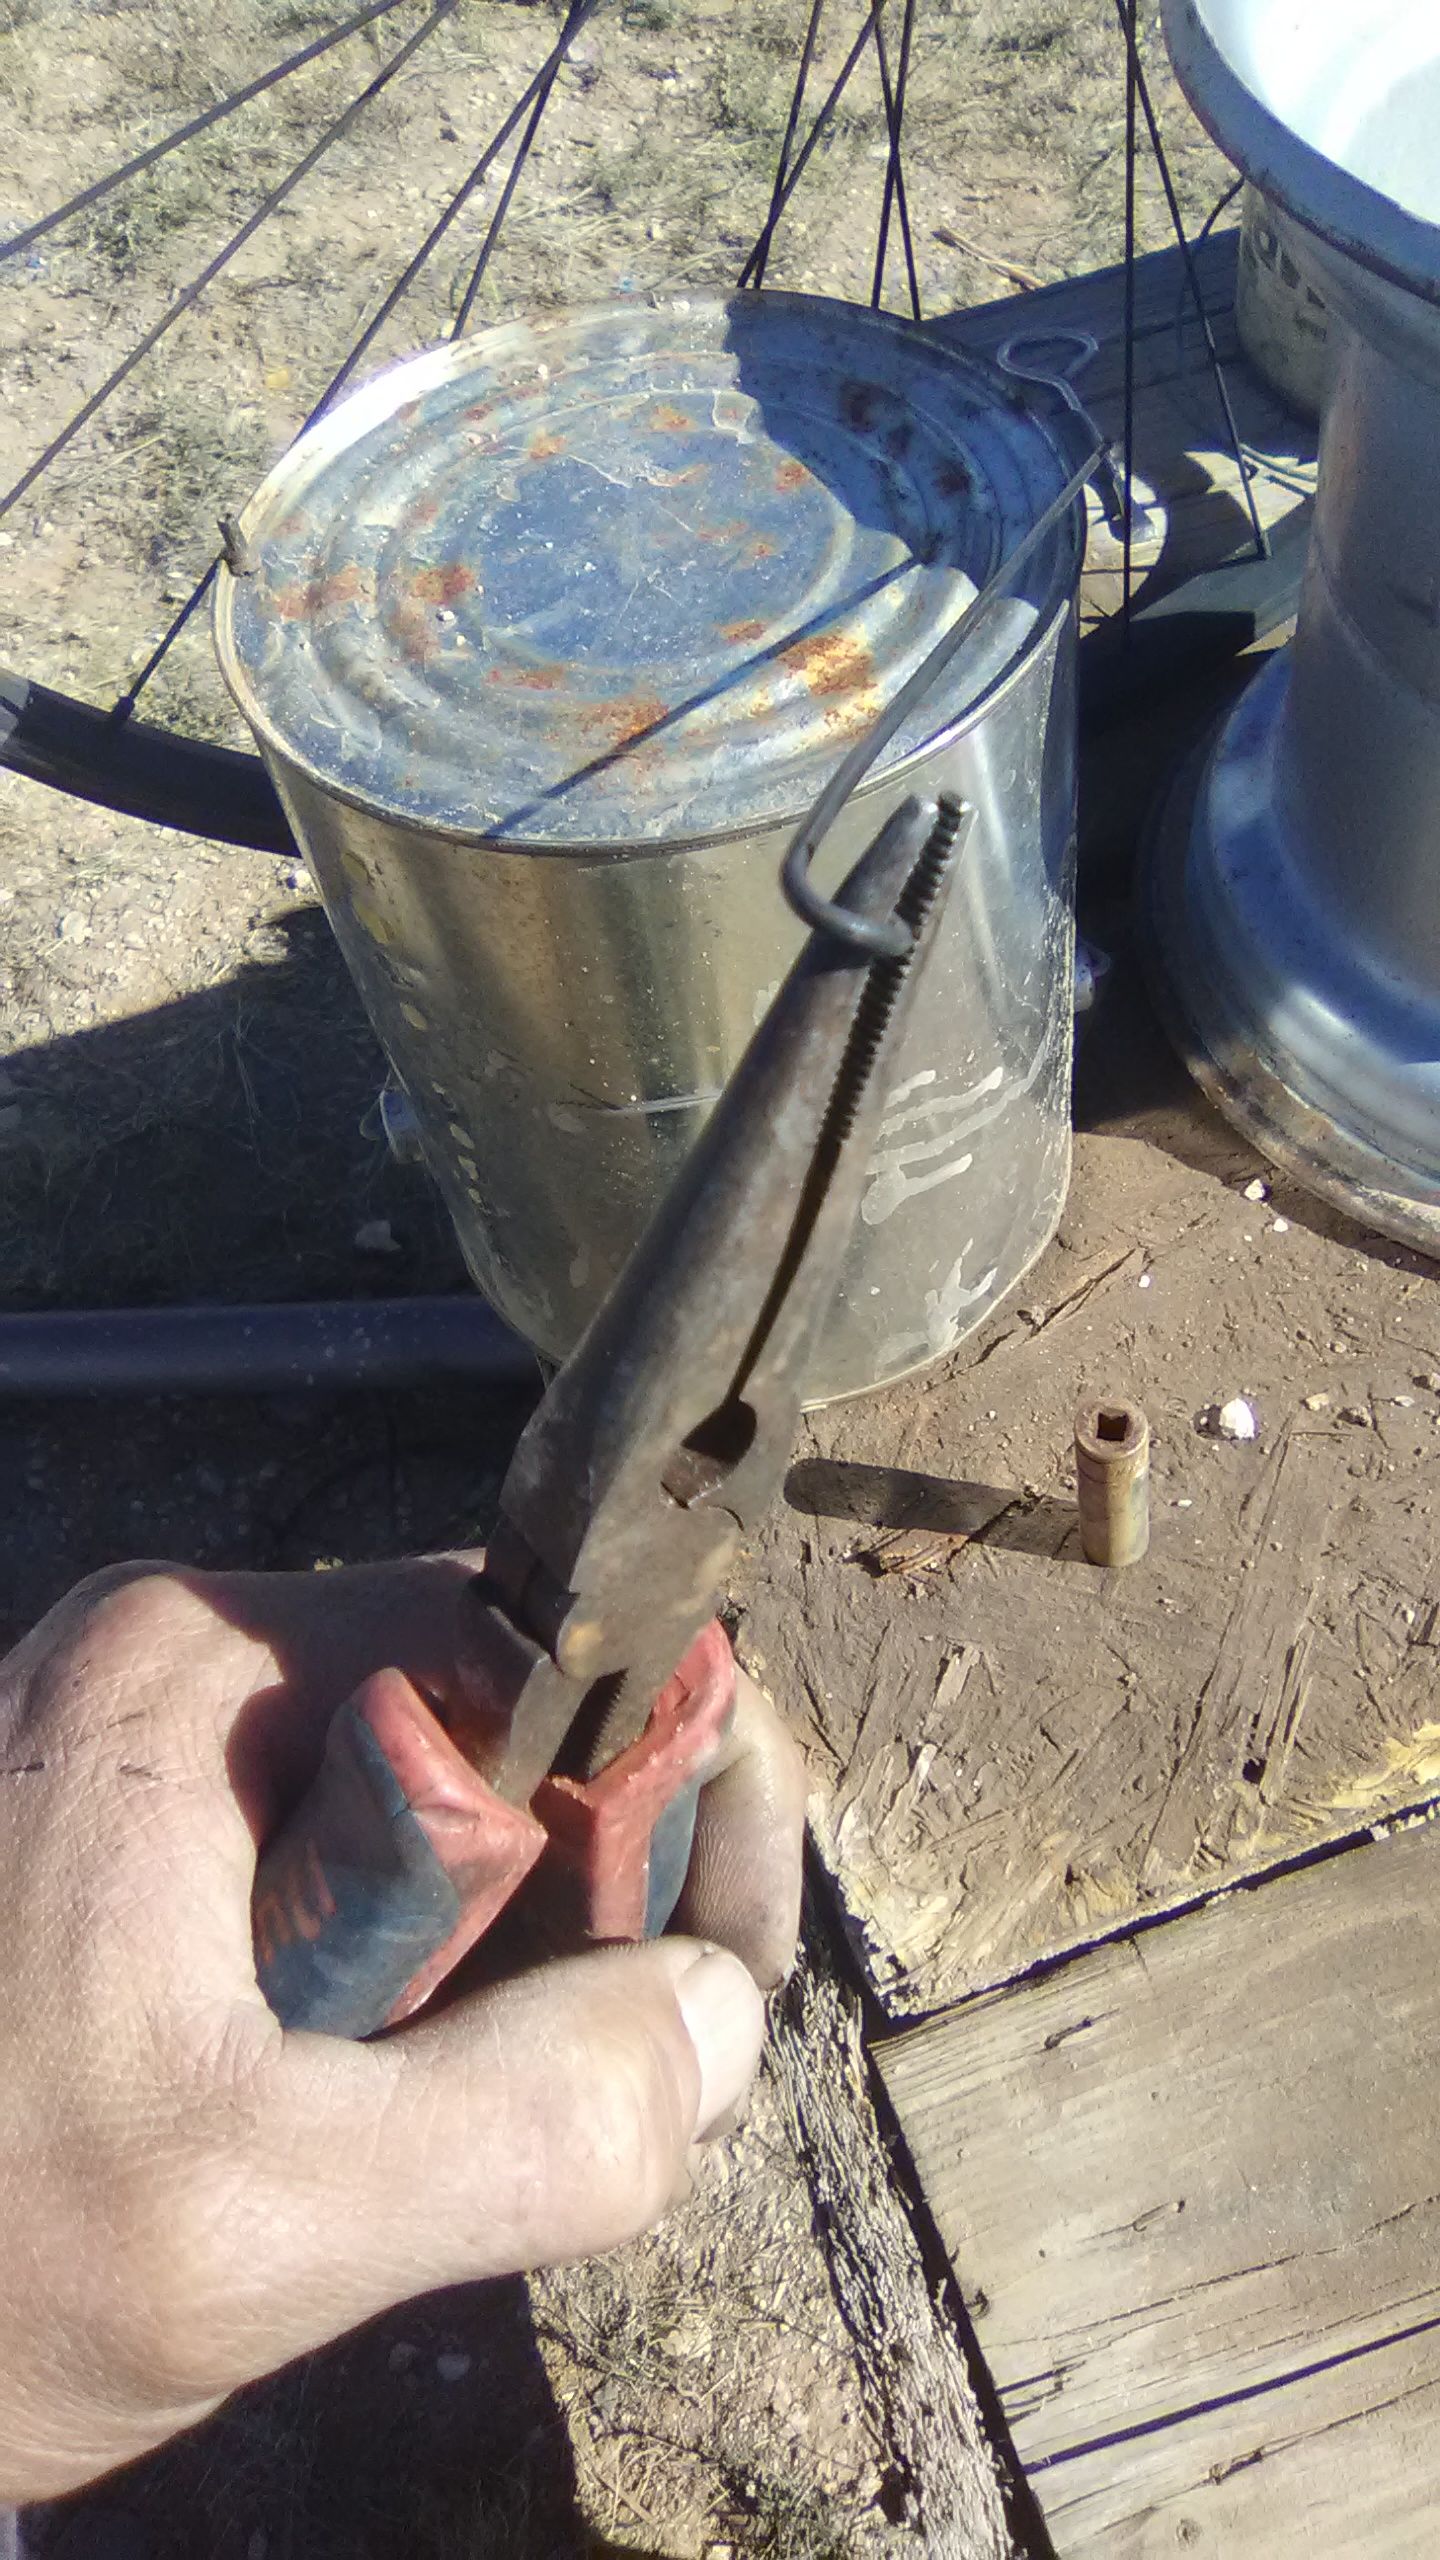
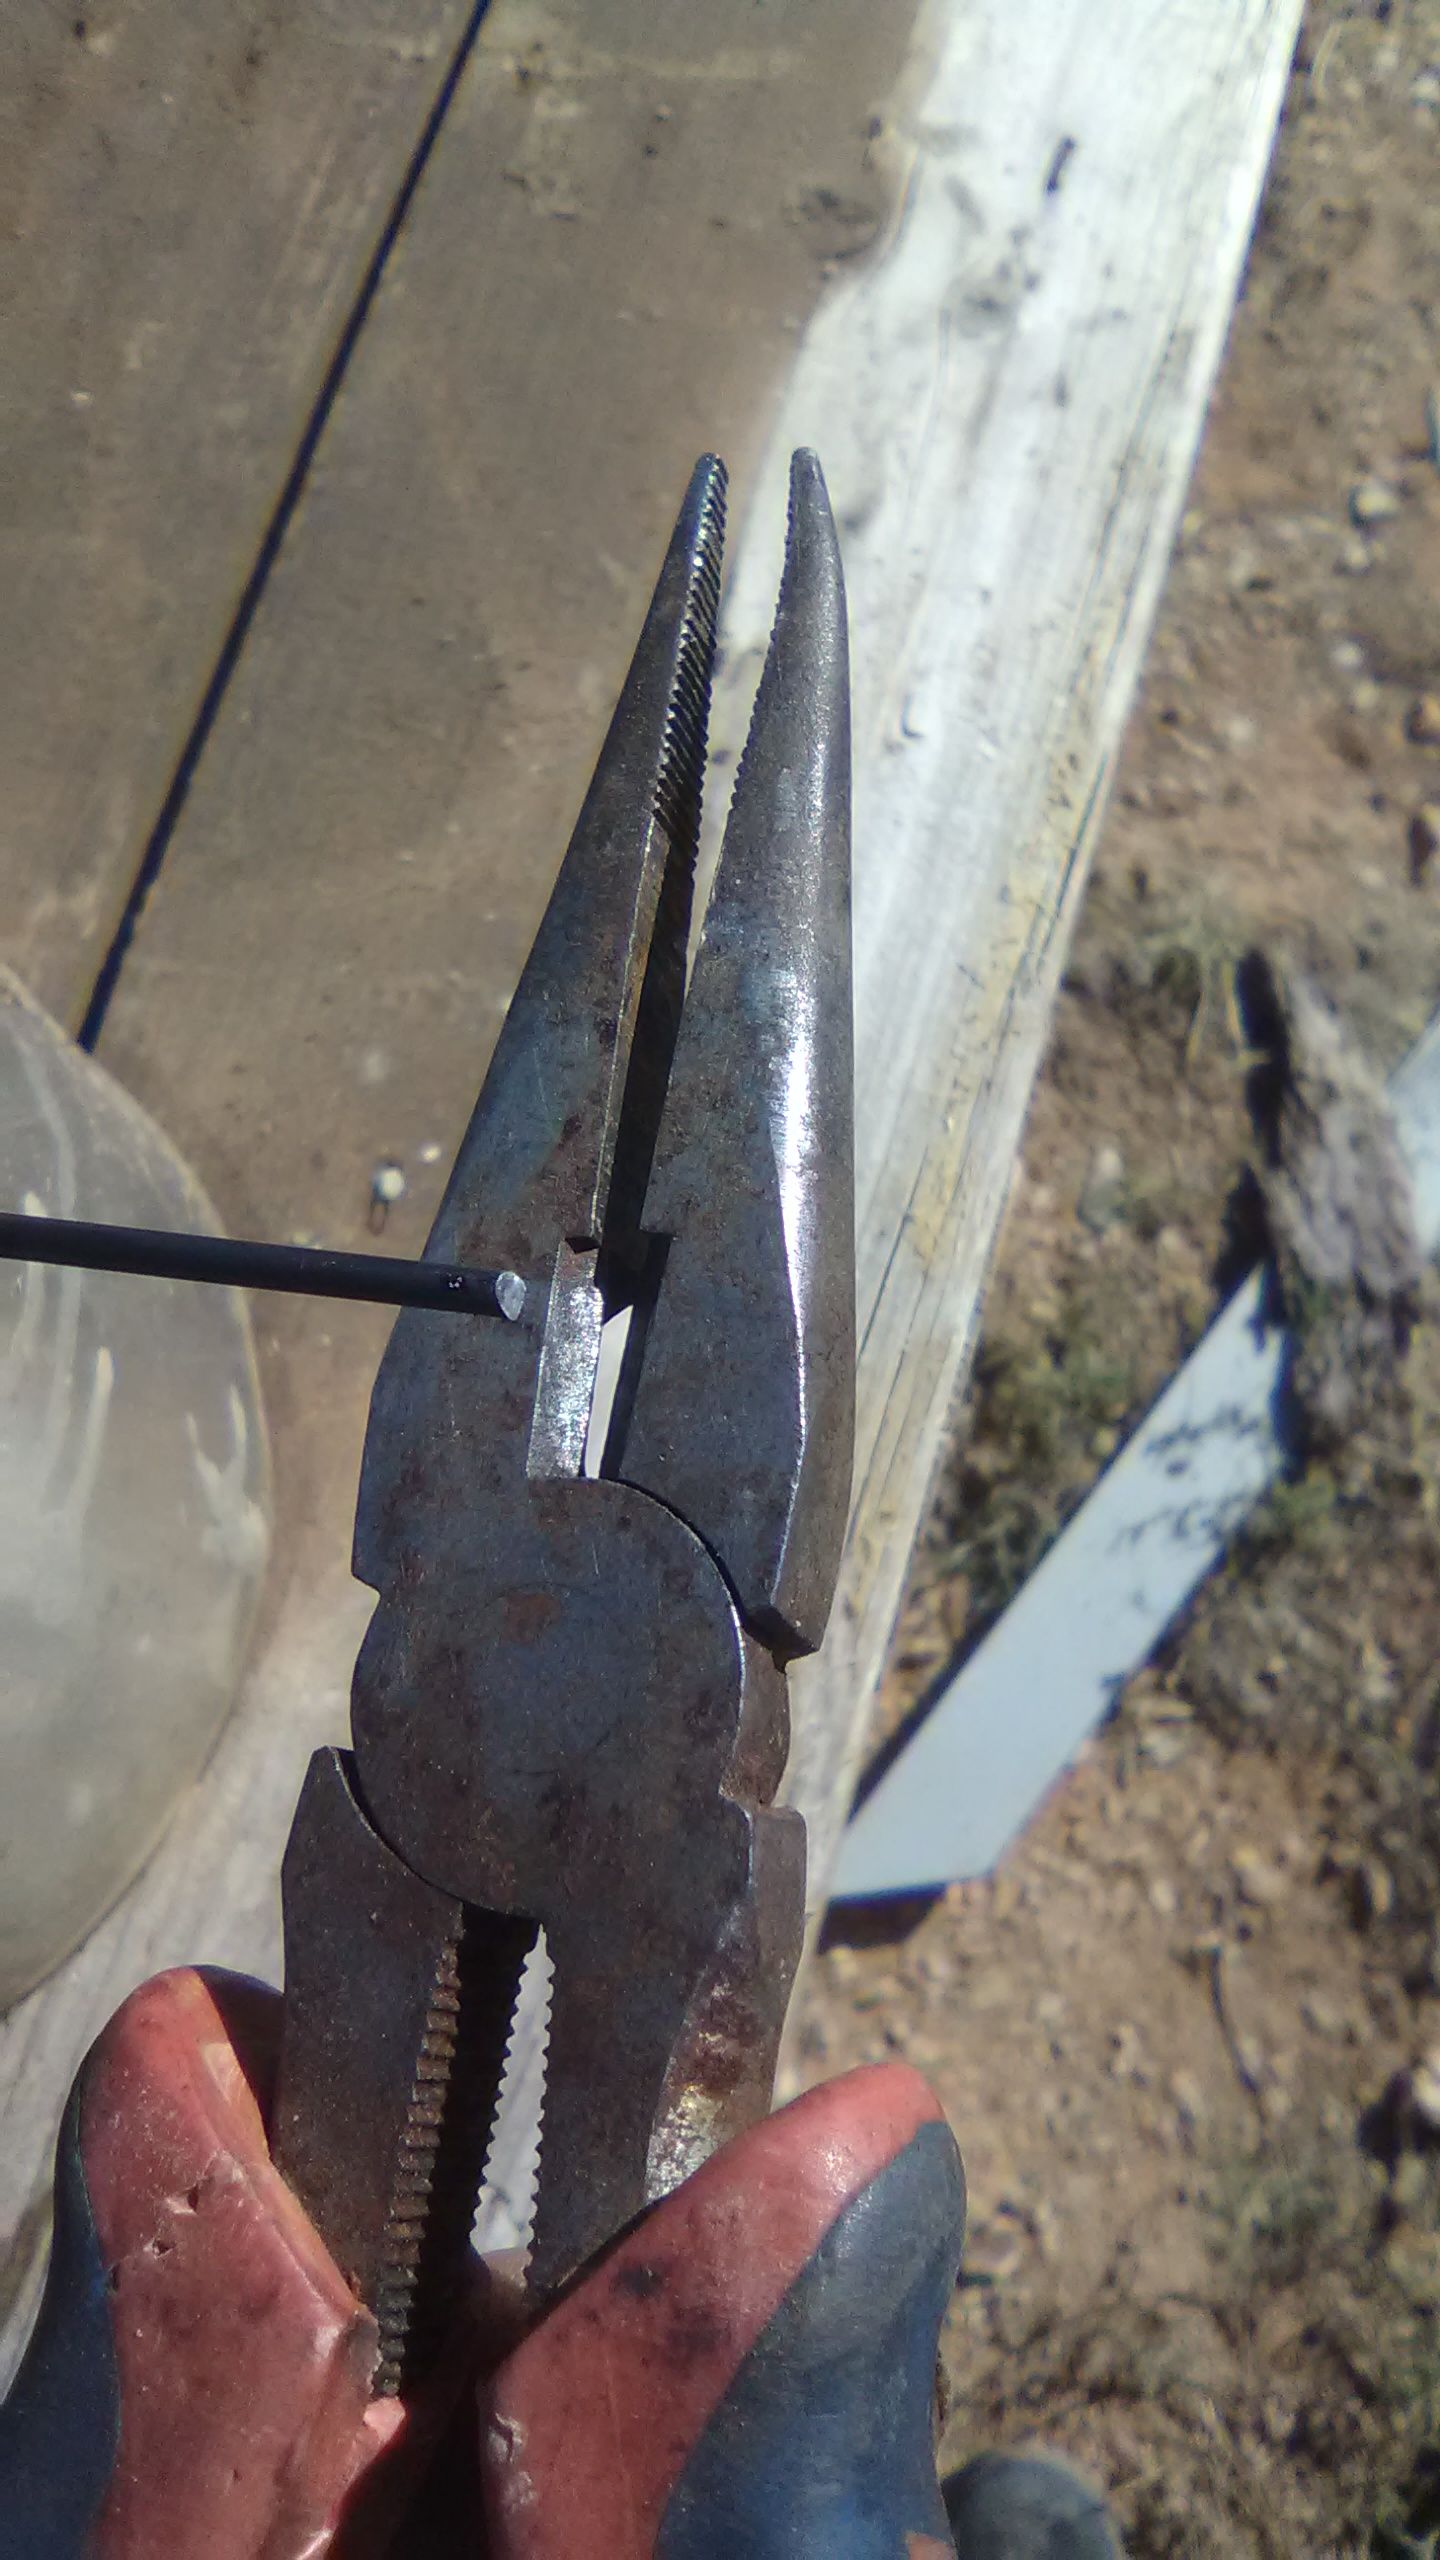
In this next image above I’m using my needle nose pliers to twist the nipple end of the spoke for my first socket Hammer which as I have already mentioned I have decided to use 12 mm deep socket
In this next image above I’m giving you a somewhat better perspective on how I’m twisting the nipple end of this bicycle spoke also take consideration of the width of the twist
In this image above you can see that the bicycle spoke is inserted into the open end of the 12 millimeter socket extending down through the shaft connection of the socket. The
plyers are in this picture only to hold the spoke in place for your viewing.. they’re not necessary for the actual thing to do
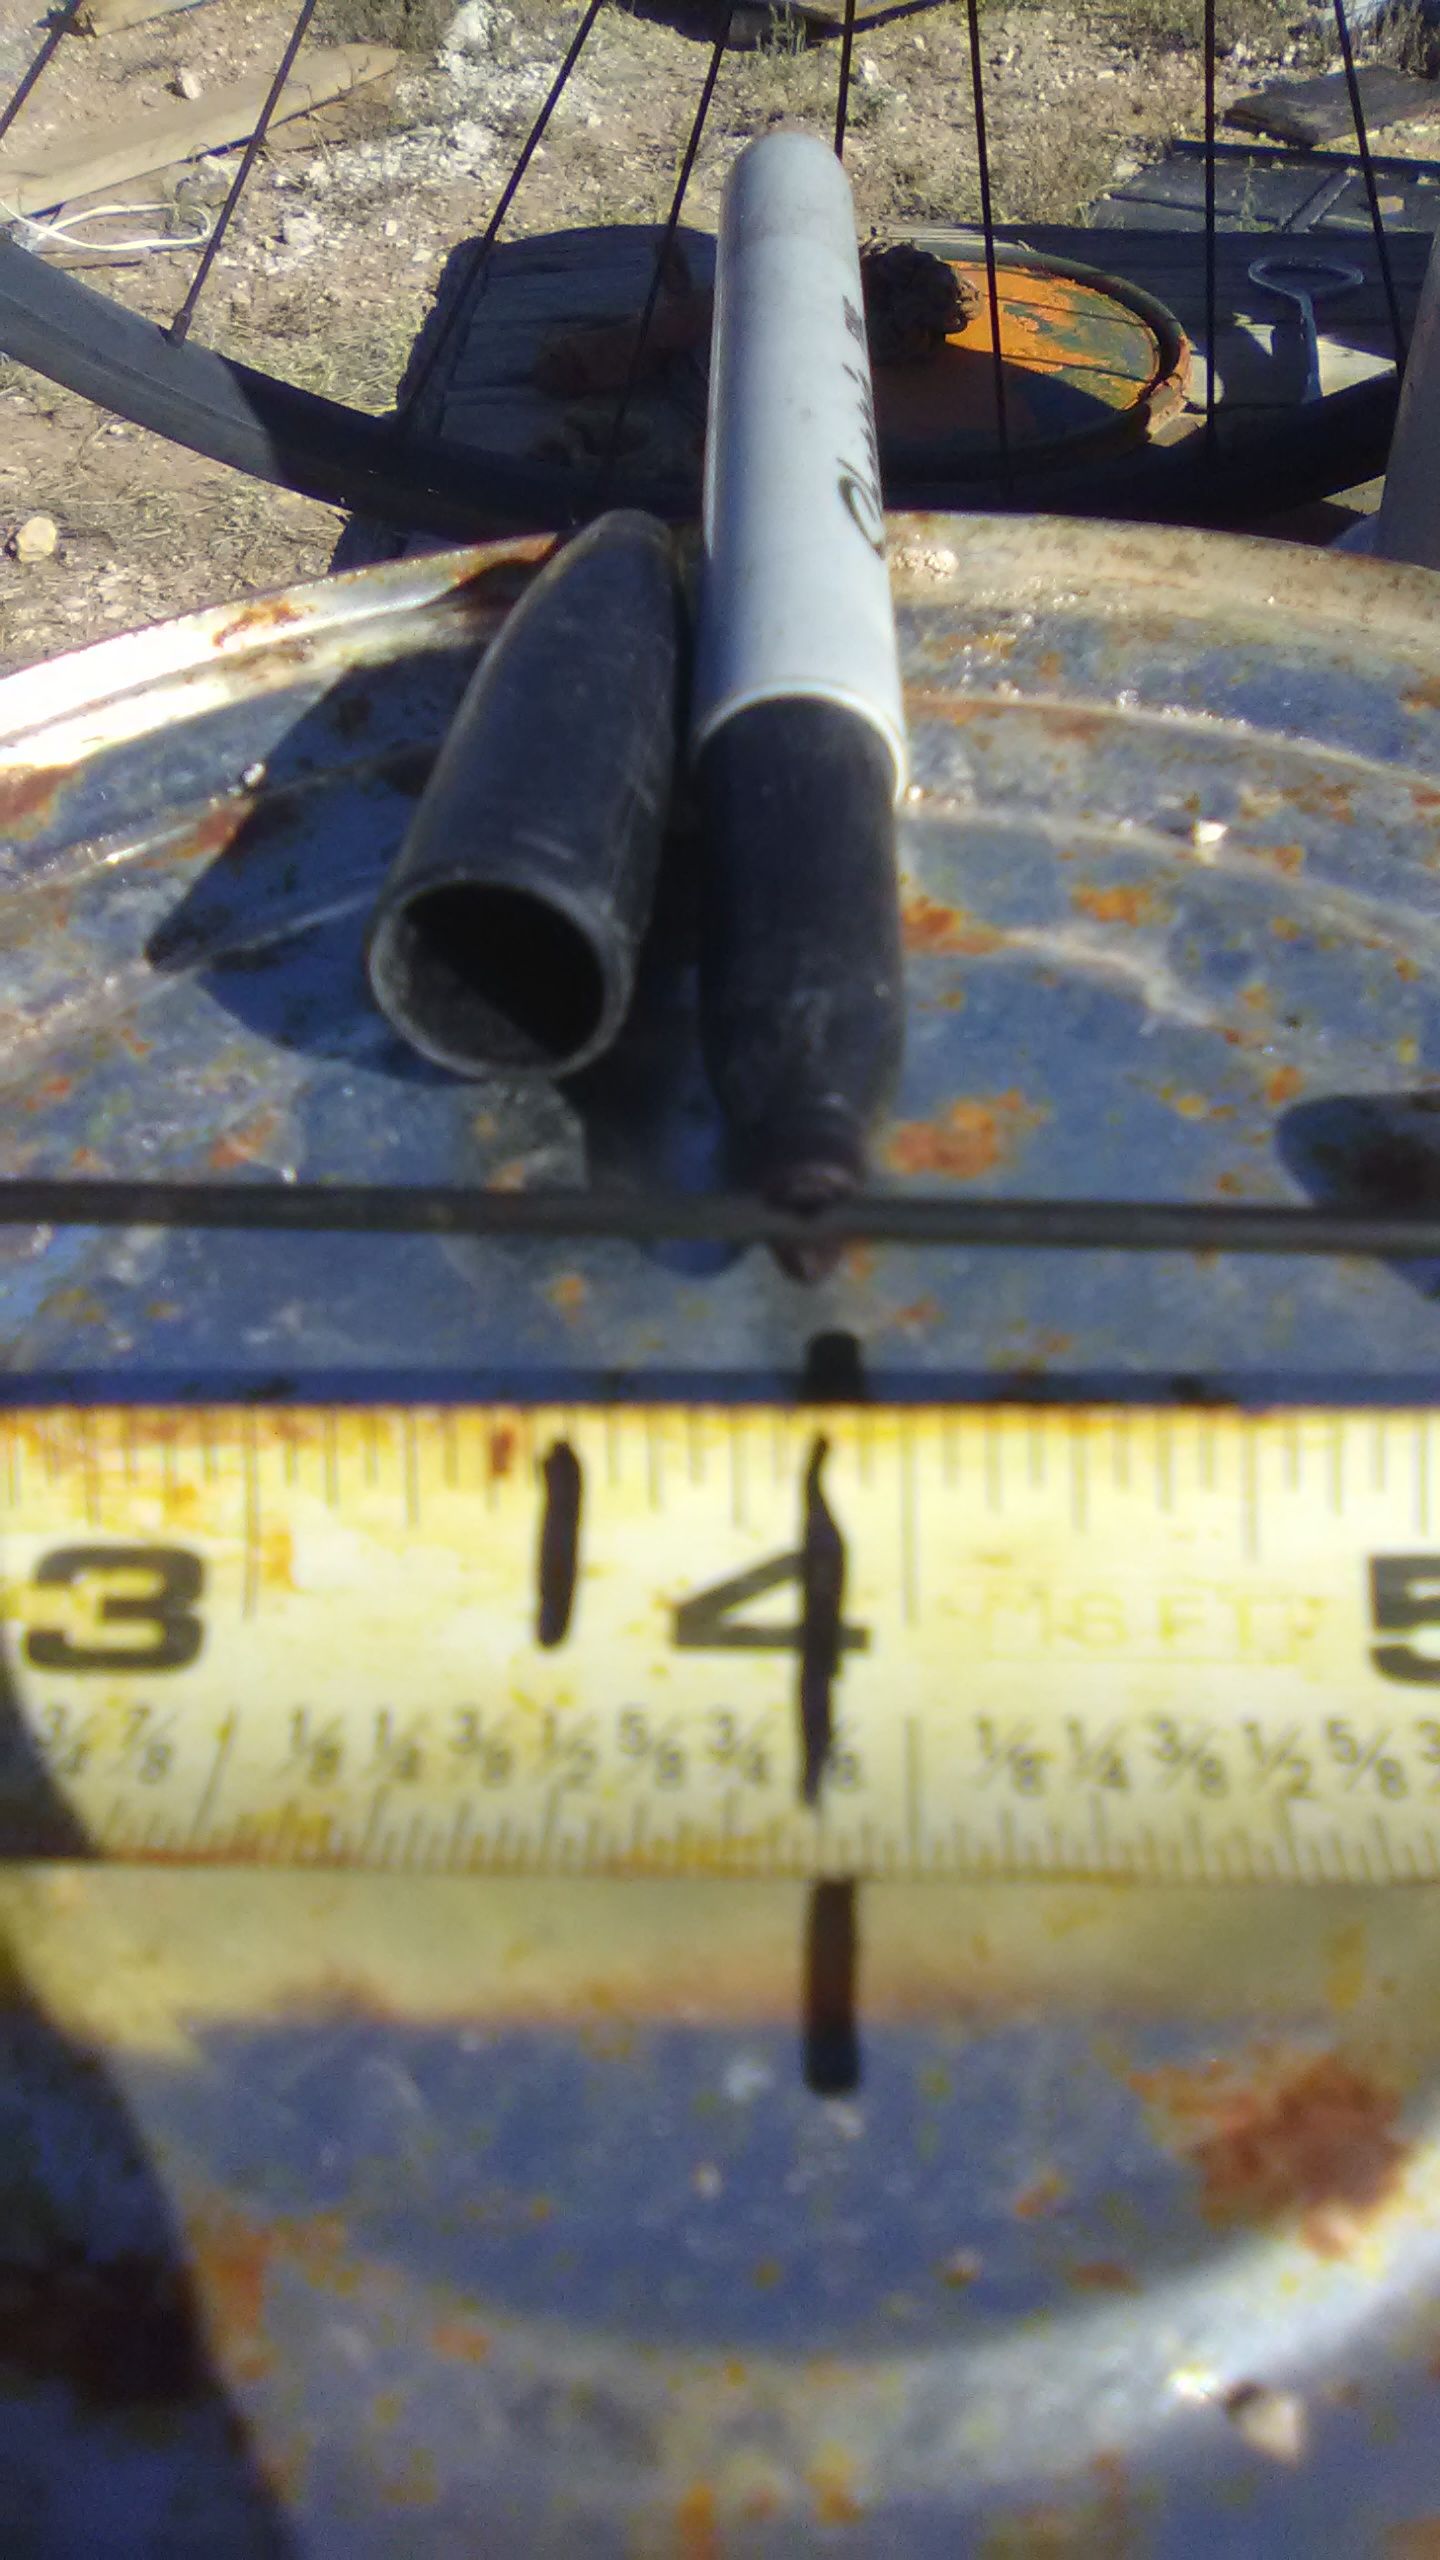
In this image above take note of where the tip of the pen is pointing toward the bicycle spoke… approximately an inch and a half to 2 inches away from the edge of the can, Make a Mark on the spoke here.
an proximation is good for your mark.it doesn’t have to be perfect
~but just make sure you have enough room two make adjustments ~
Cut the spoke at the Mark.

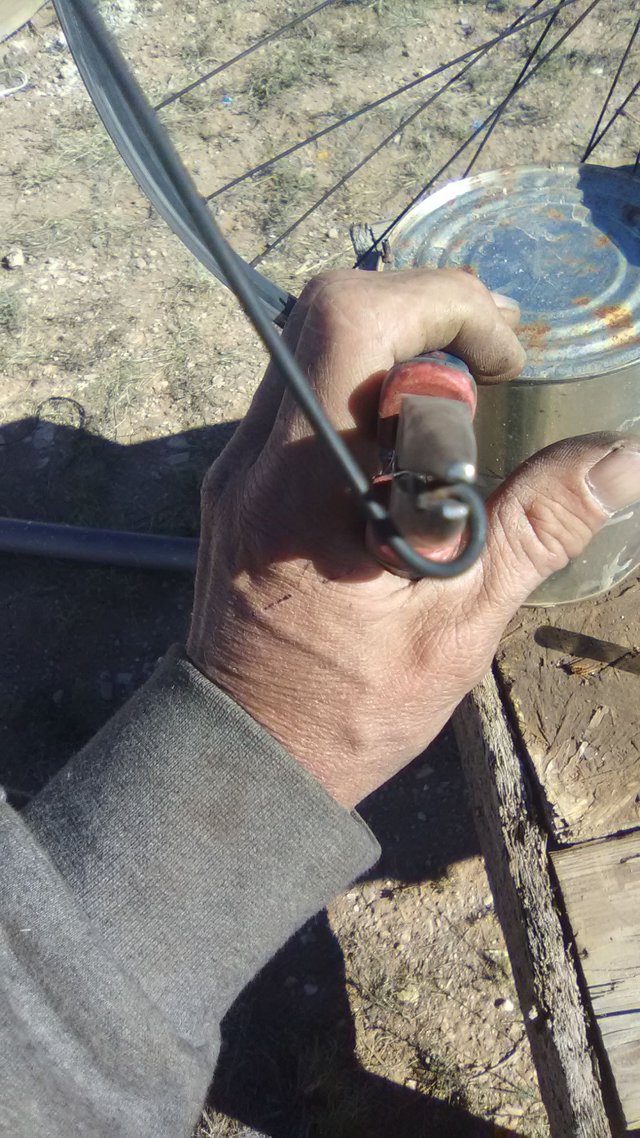
slide your second 12 mm socket on the spoke
Use your pliers to make a second Loop hook with both sockets on the spoke

. please note this Loop hook is bigger than the outlet of the socket there for the socket cannot come off of the spoke
When you make the hook first and then put a short crimp in the hook the hook arm.
be certain that the socket cannot come off of the bicycle spoke
Note the crimp in the hook arm
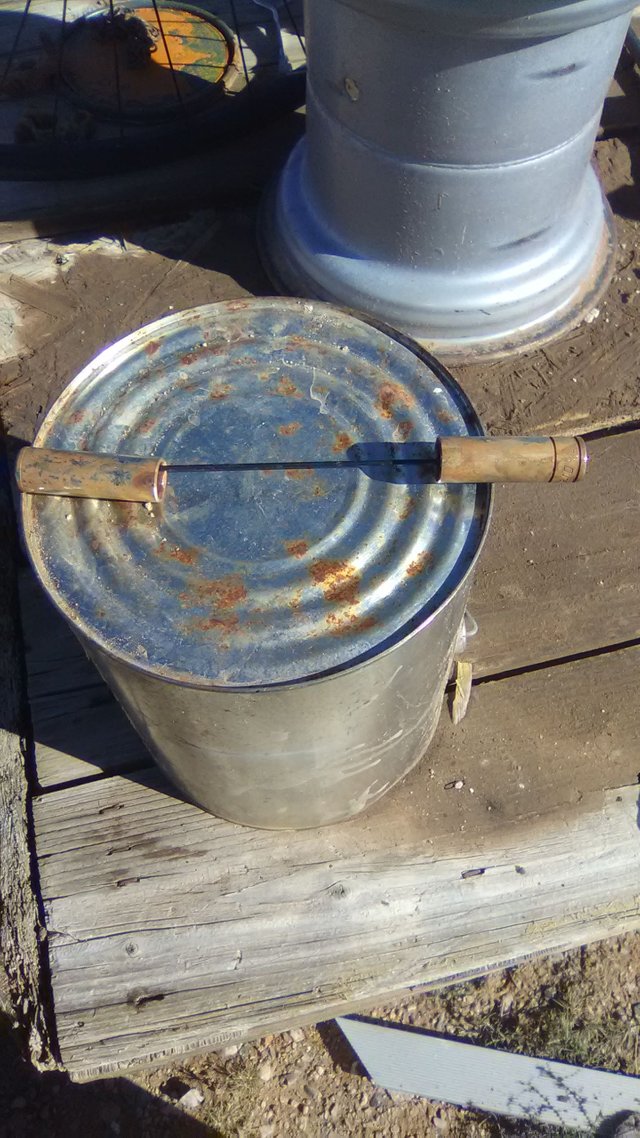
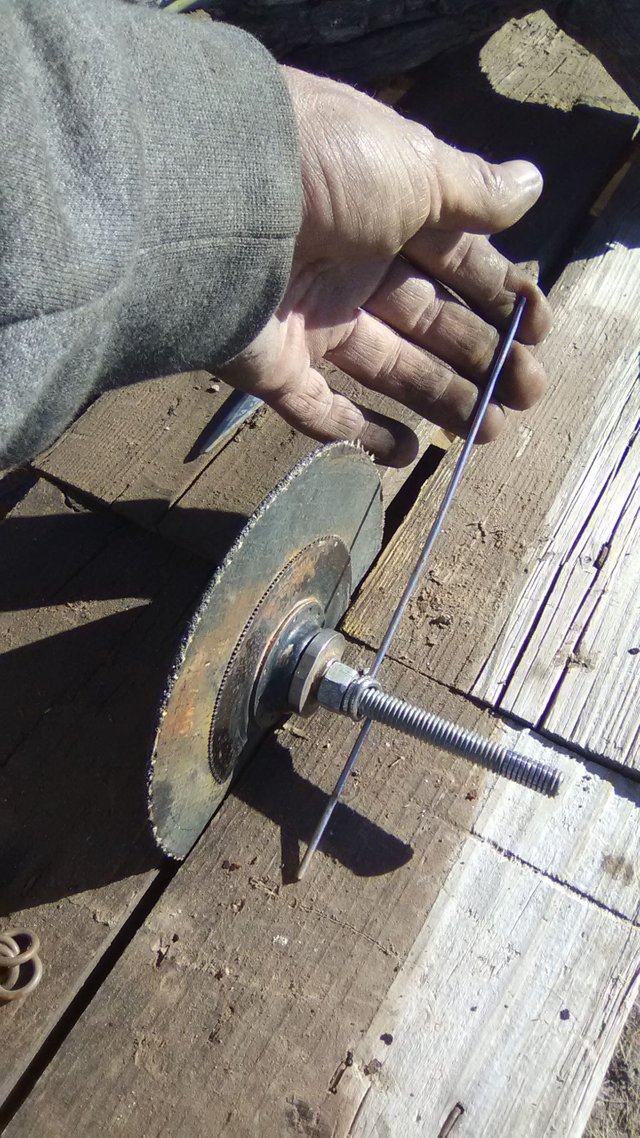
Take an eyeball measure of the total Hammer Pinn to the rim of the can
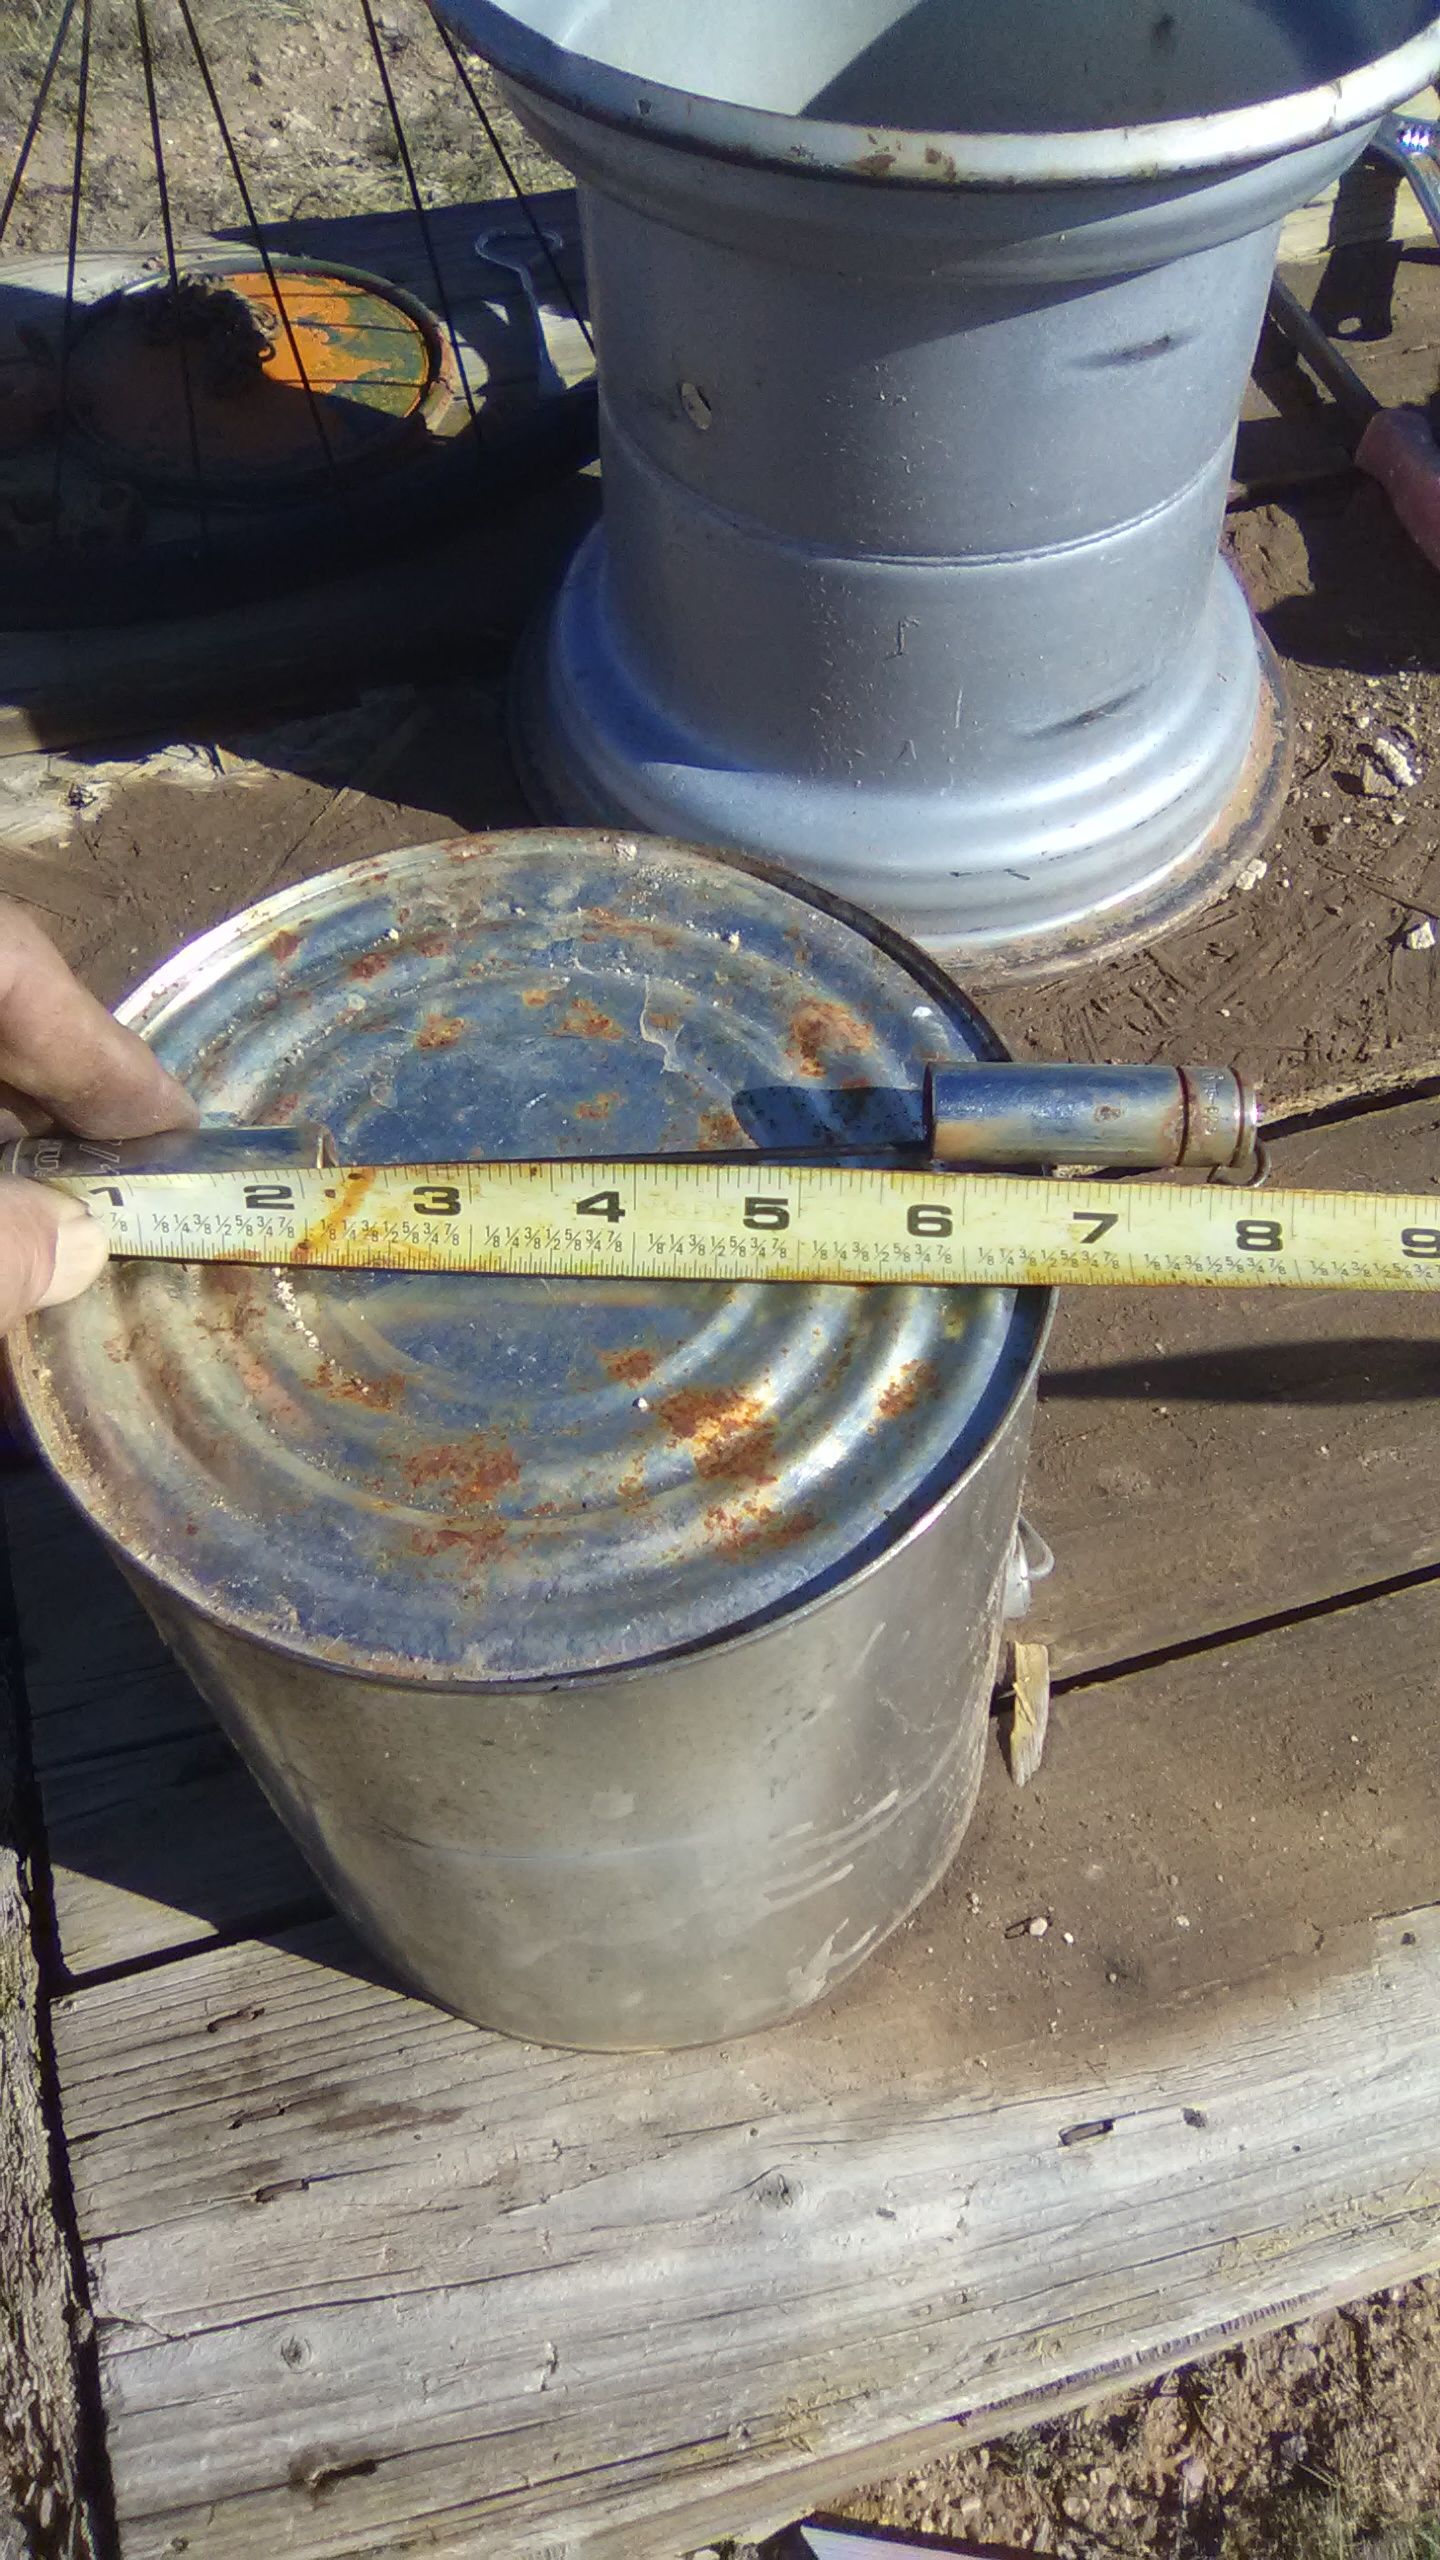
Measure the total length of the hammer Pinn
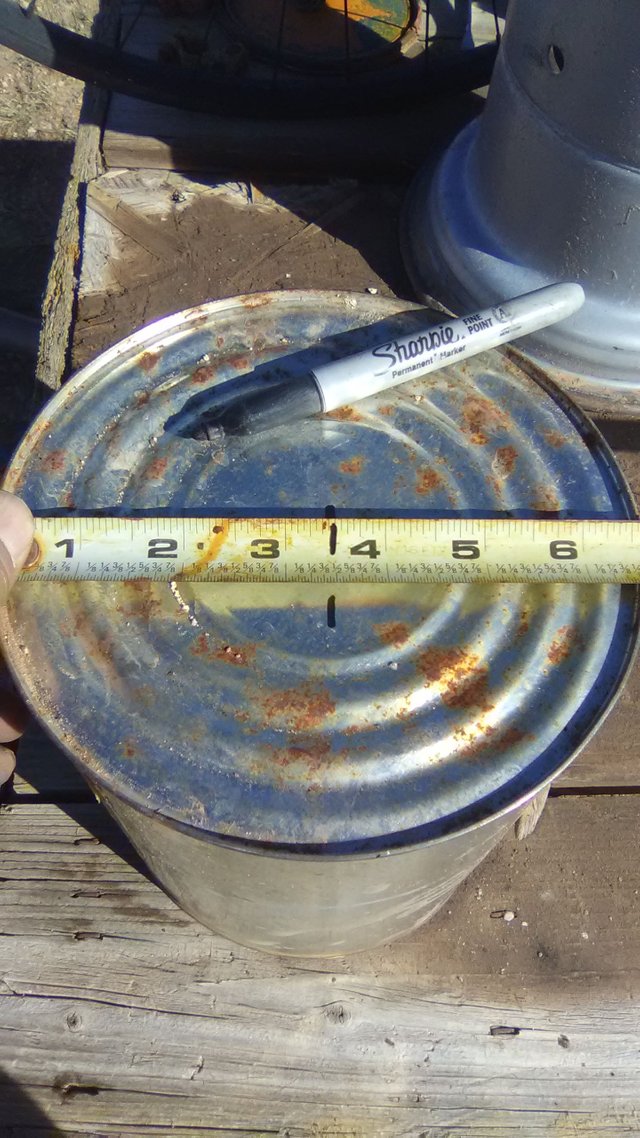
Measure out the center of the can
measure out the center of the hammer Pinn
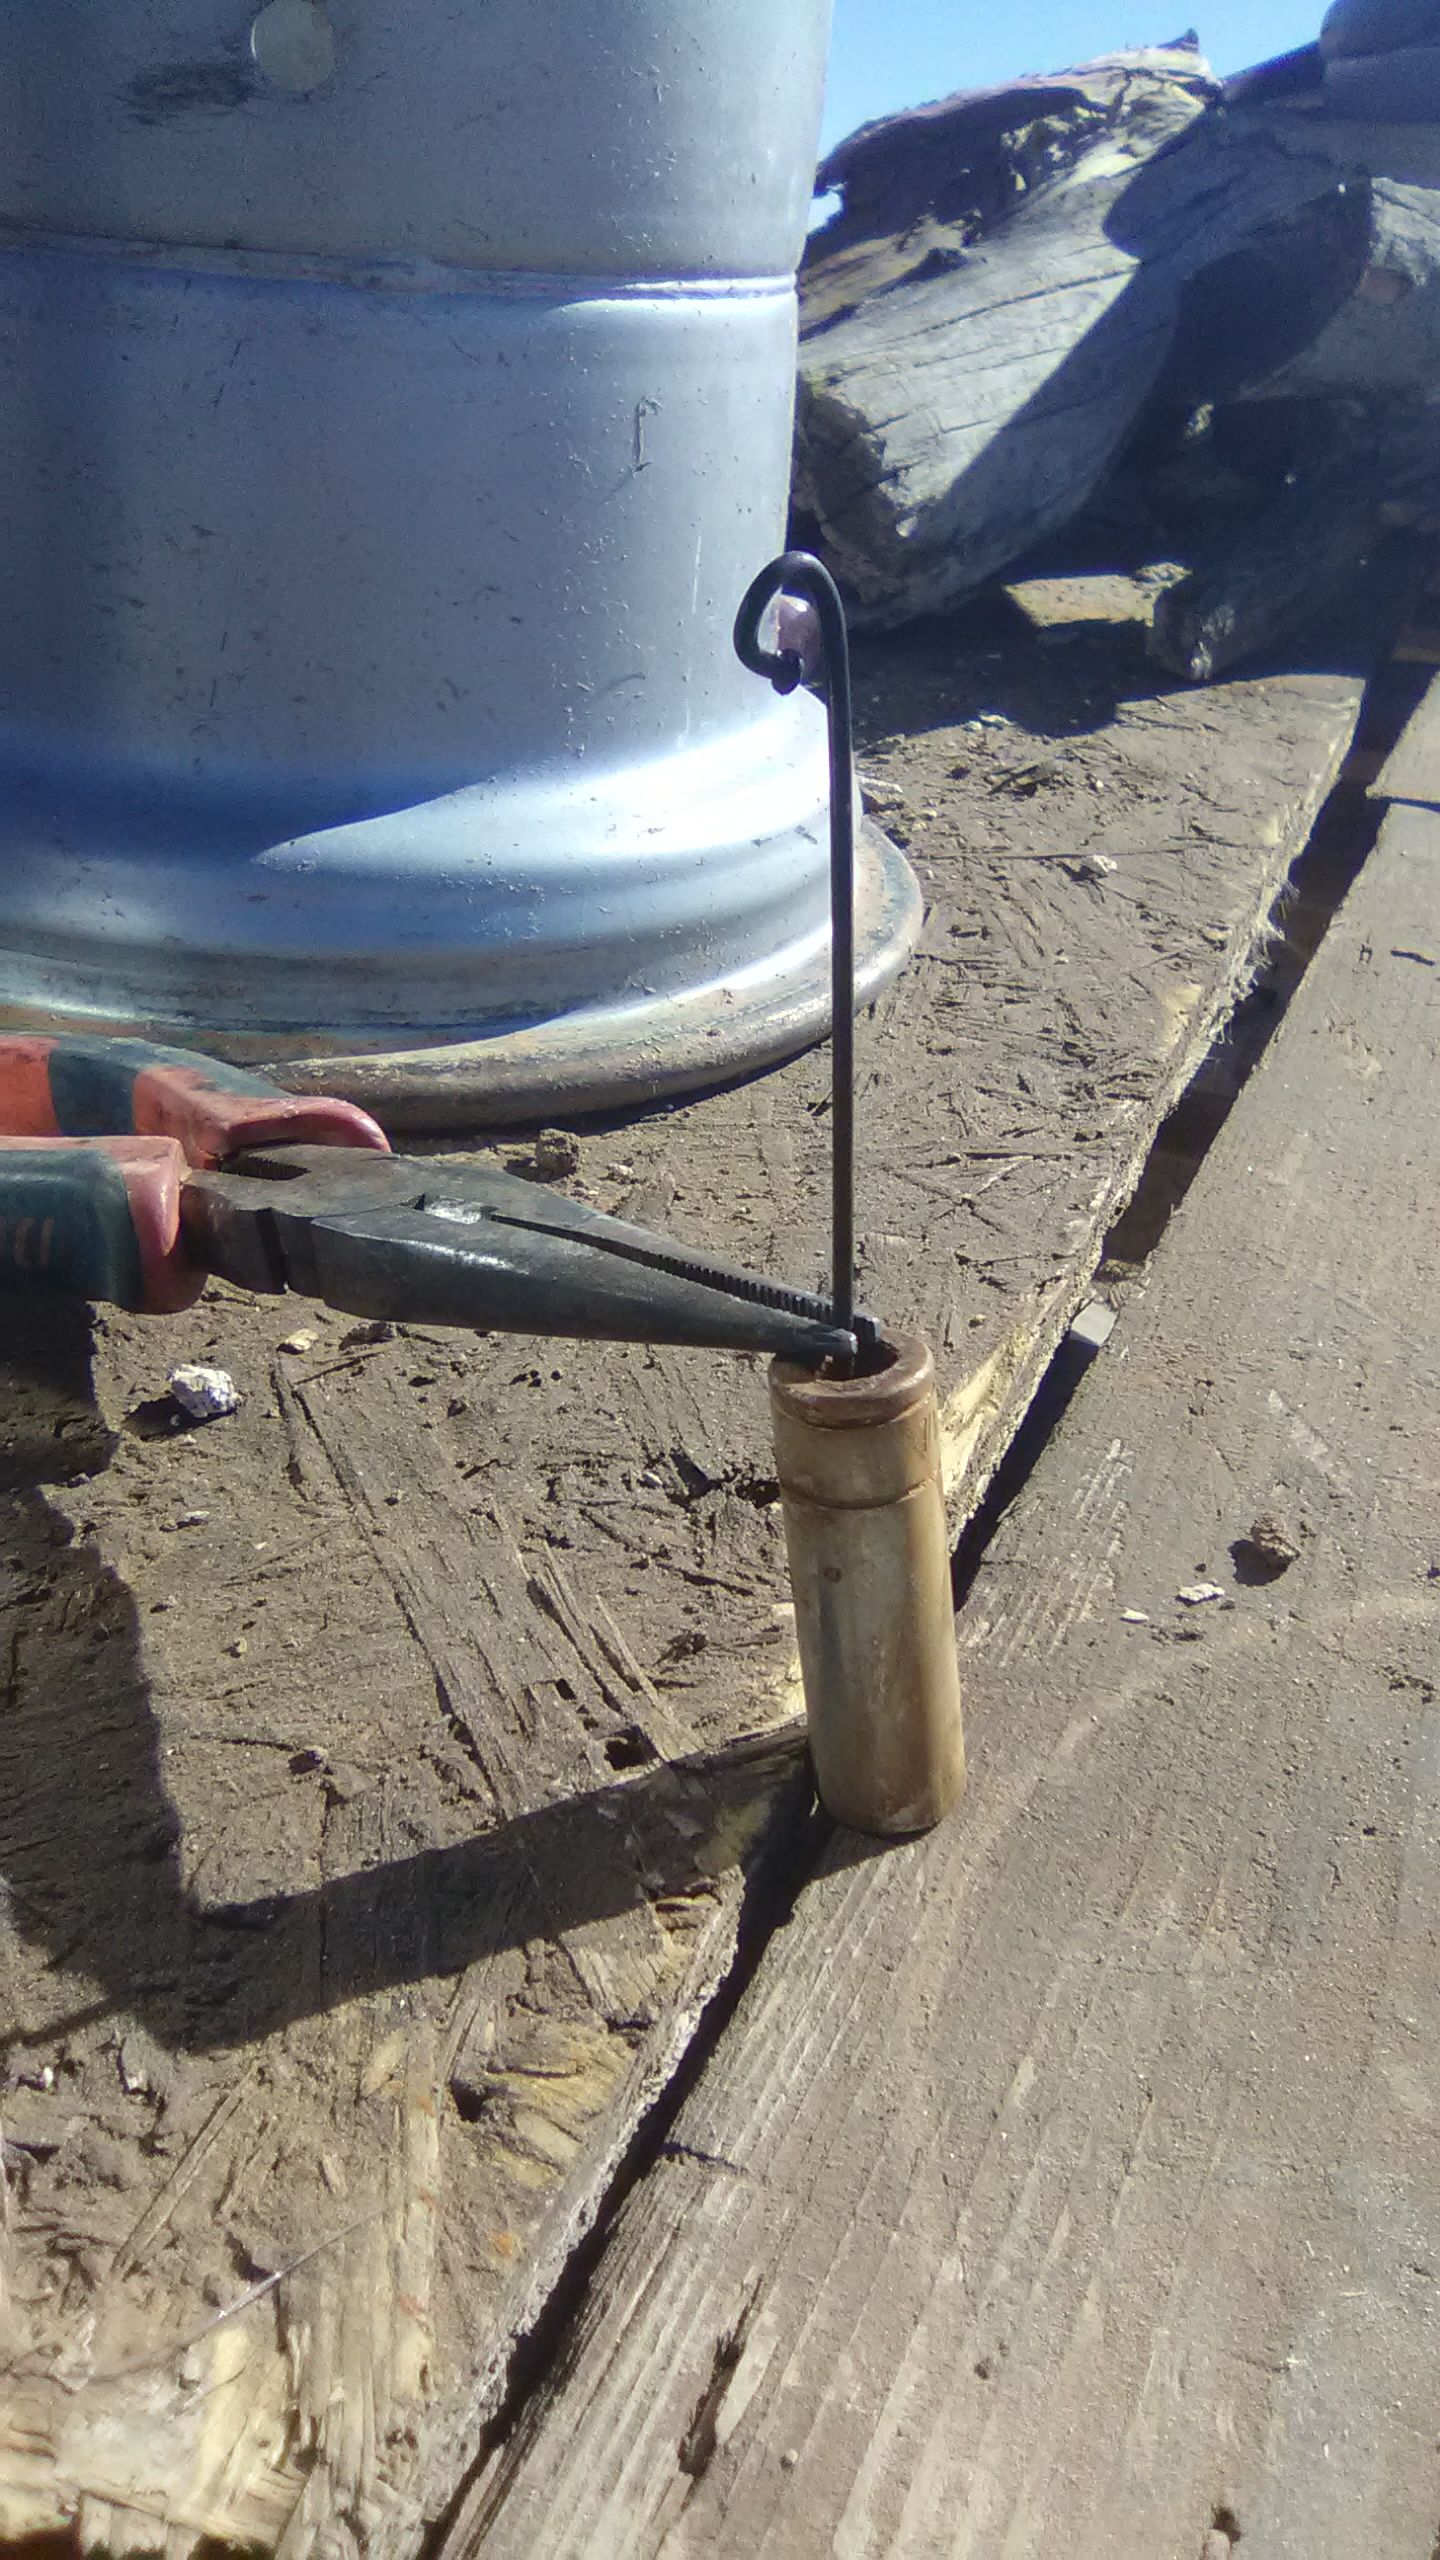
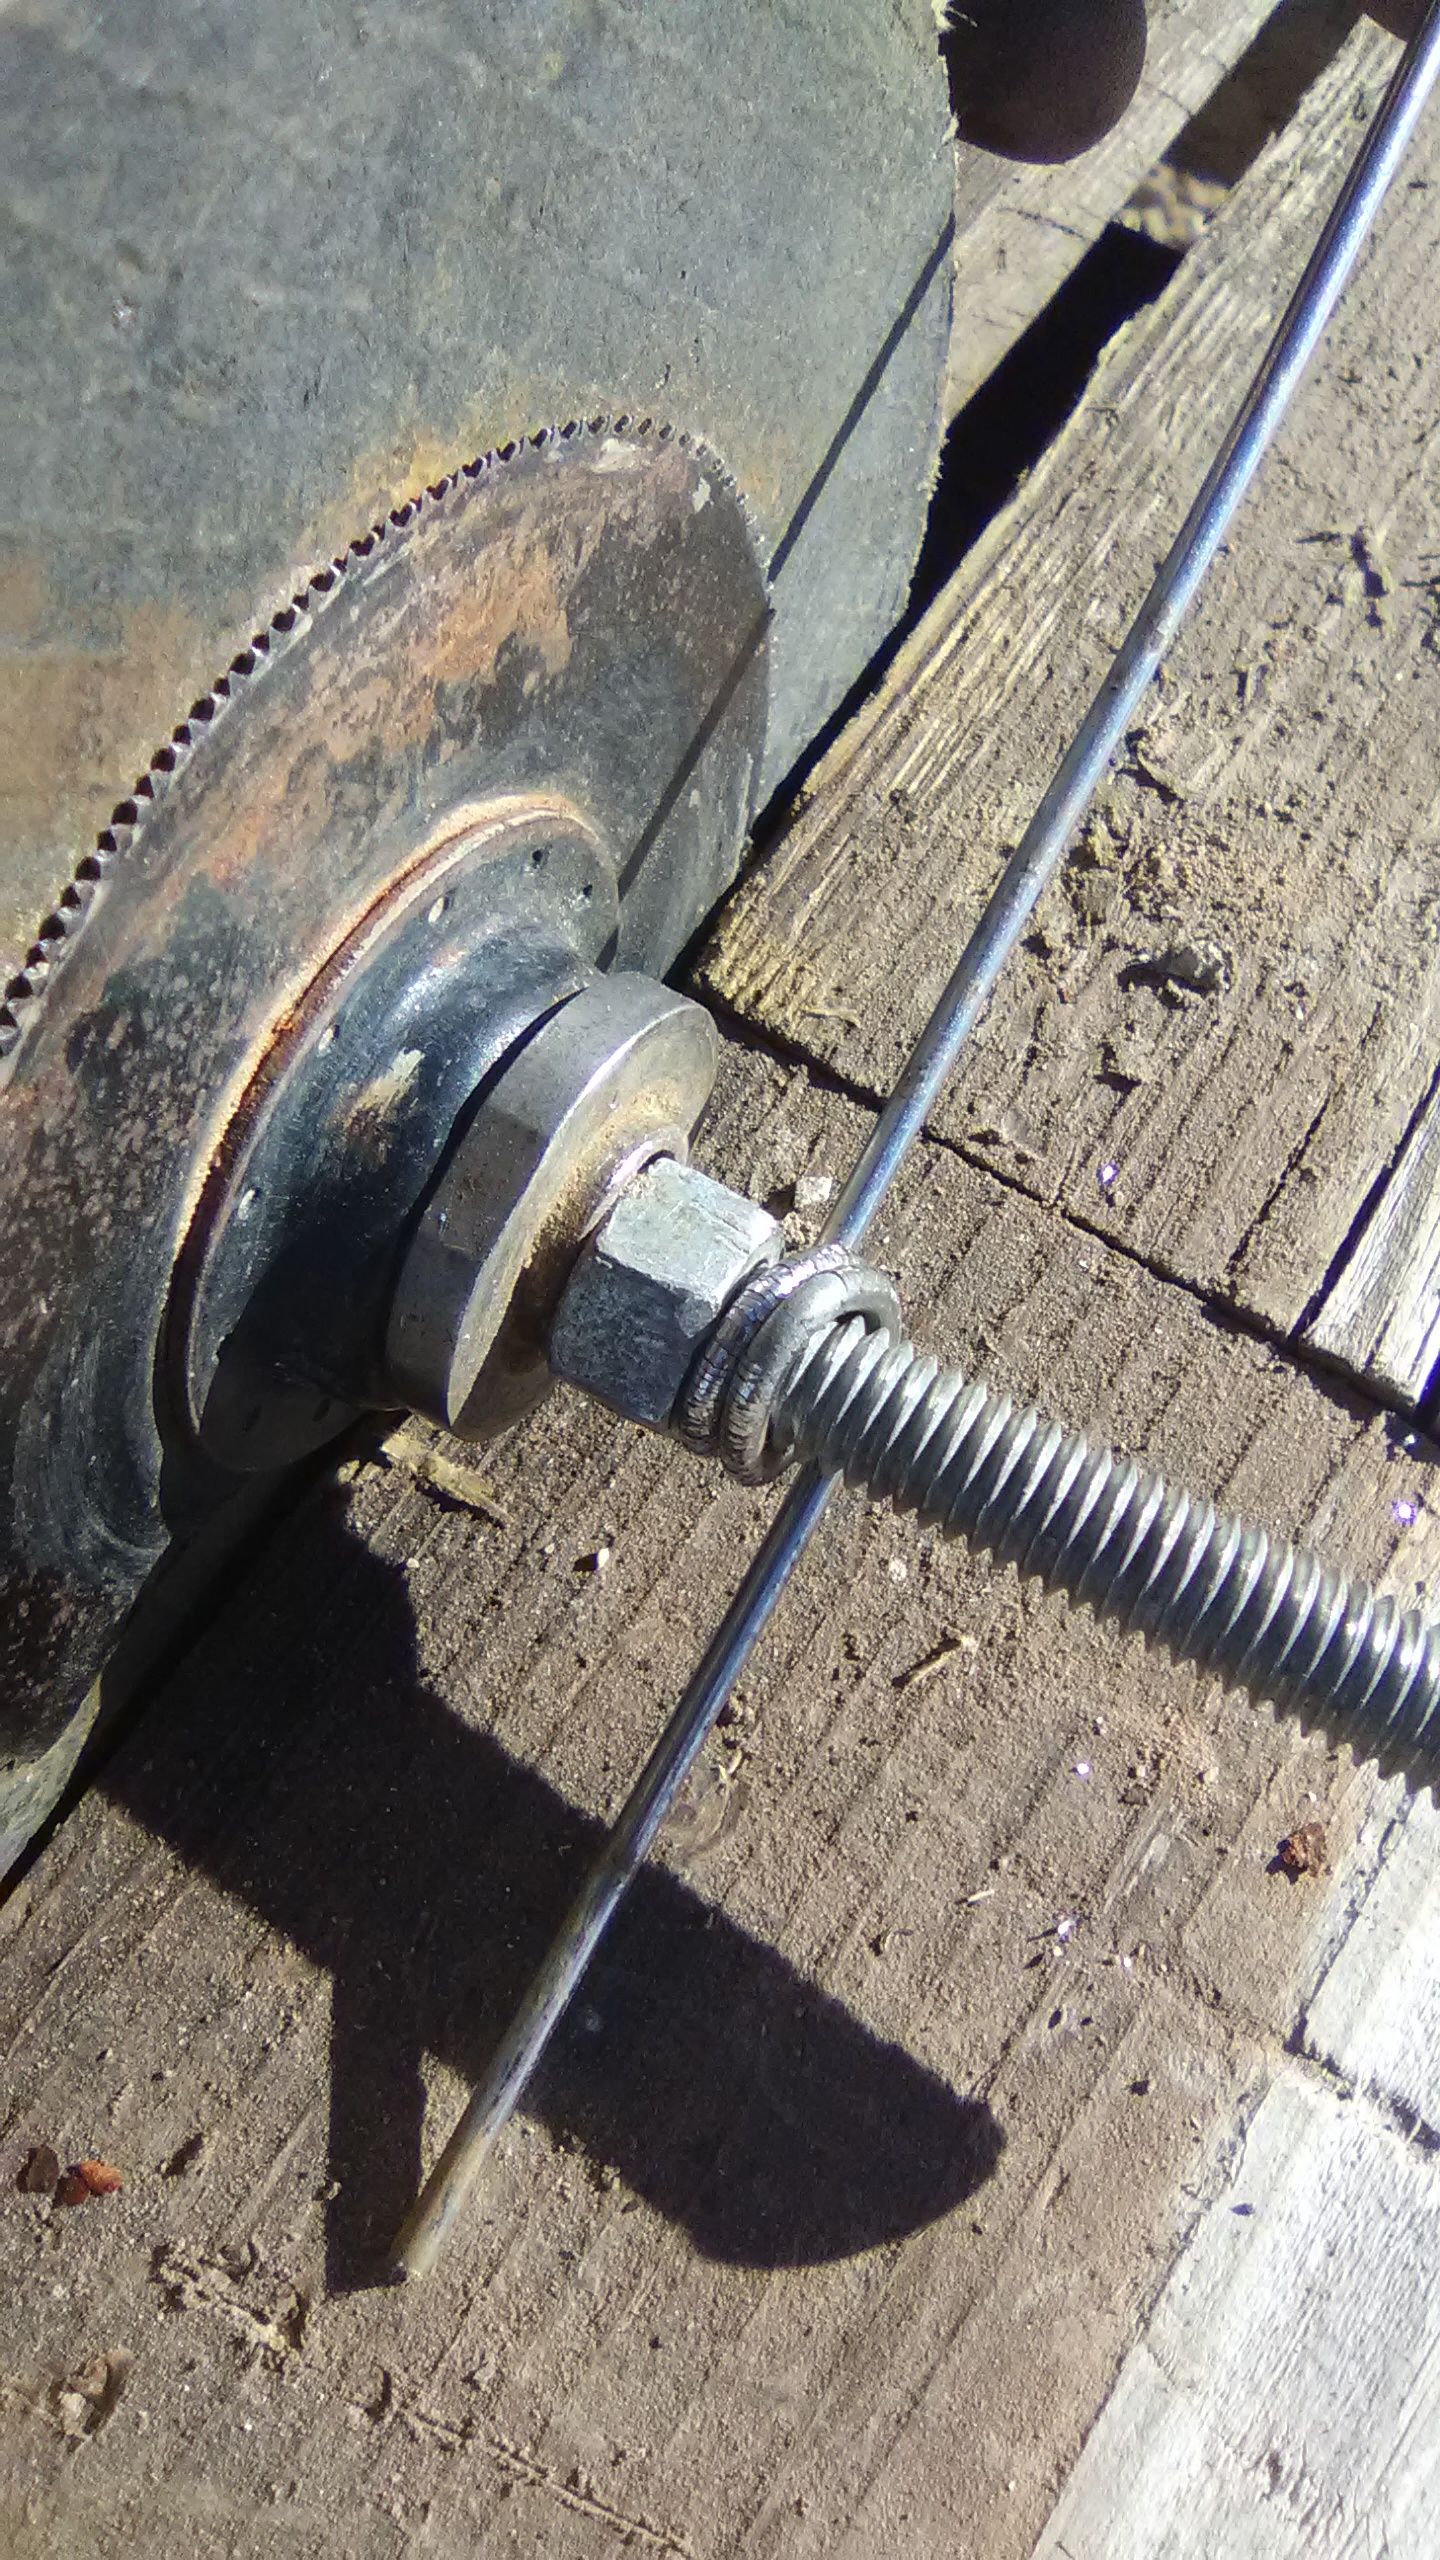
In this image above we’re going to begin to make the lock ring for the hammer Pinn…
in order to do this you’re going to need a second bicycle spoke.
First get yourself about half a length of bicycle spoke is easier to work with
next slide the length of bicycle spoke about 4 inches underneath of the spindle that you’re actually going to be using for your hammermill so that you can get the correct diameter on the lock ring.
With the short end of the length of spoke against the table top pull toward your palm Direction wrapping the bicycle spoke around the spindle you’ll be using for the hammer Mill
In the image above you can see I’ve made two turns for the lock ring which is not hard to do….

In this image above you can see the lock ring with the end still attached don’t cut them off yet
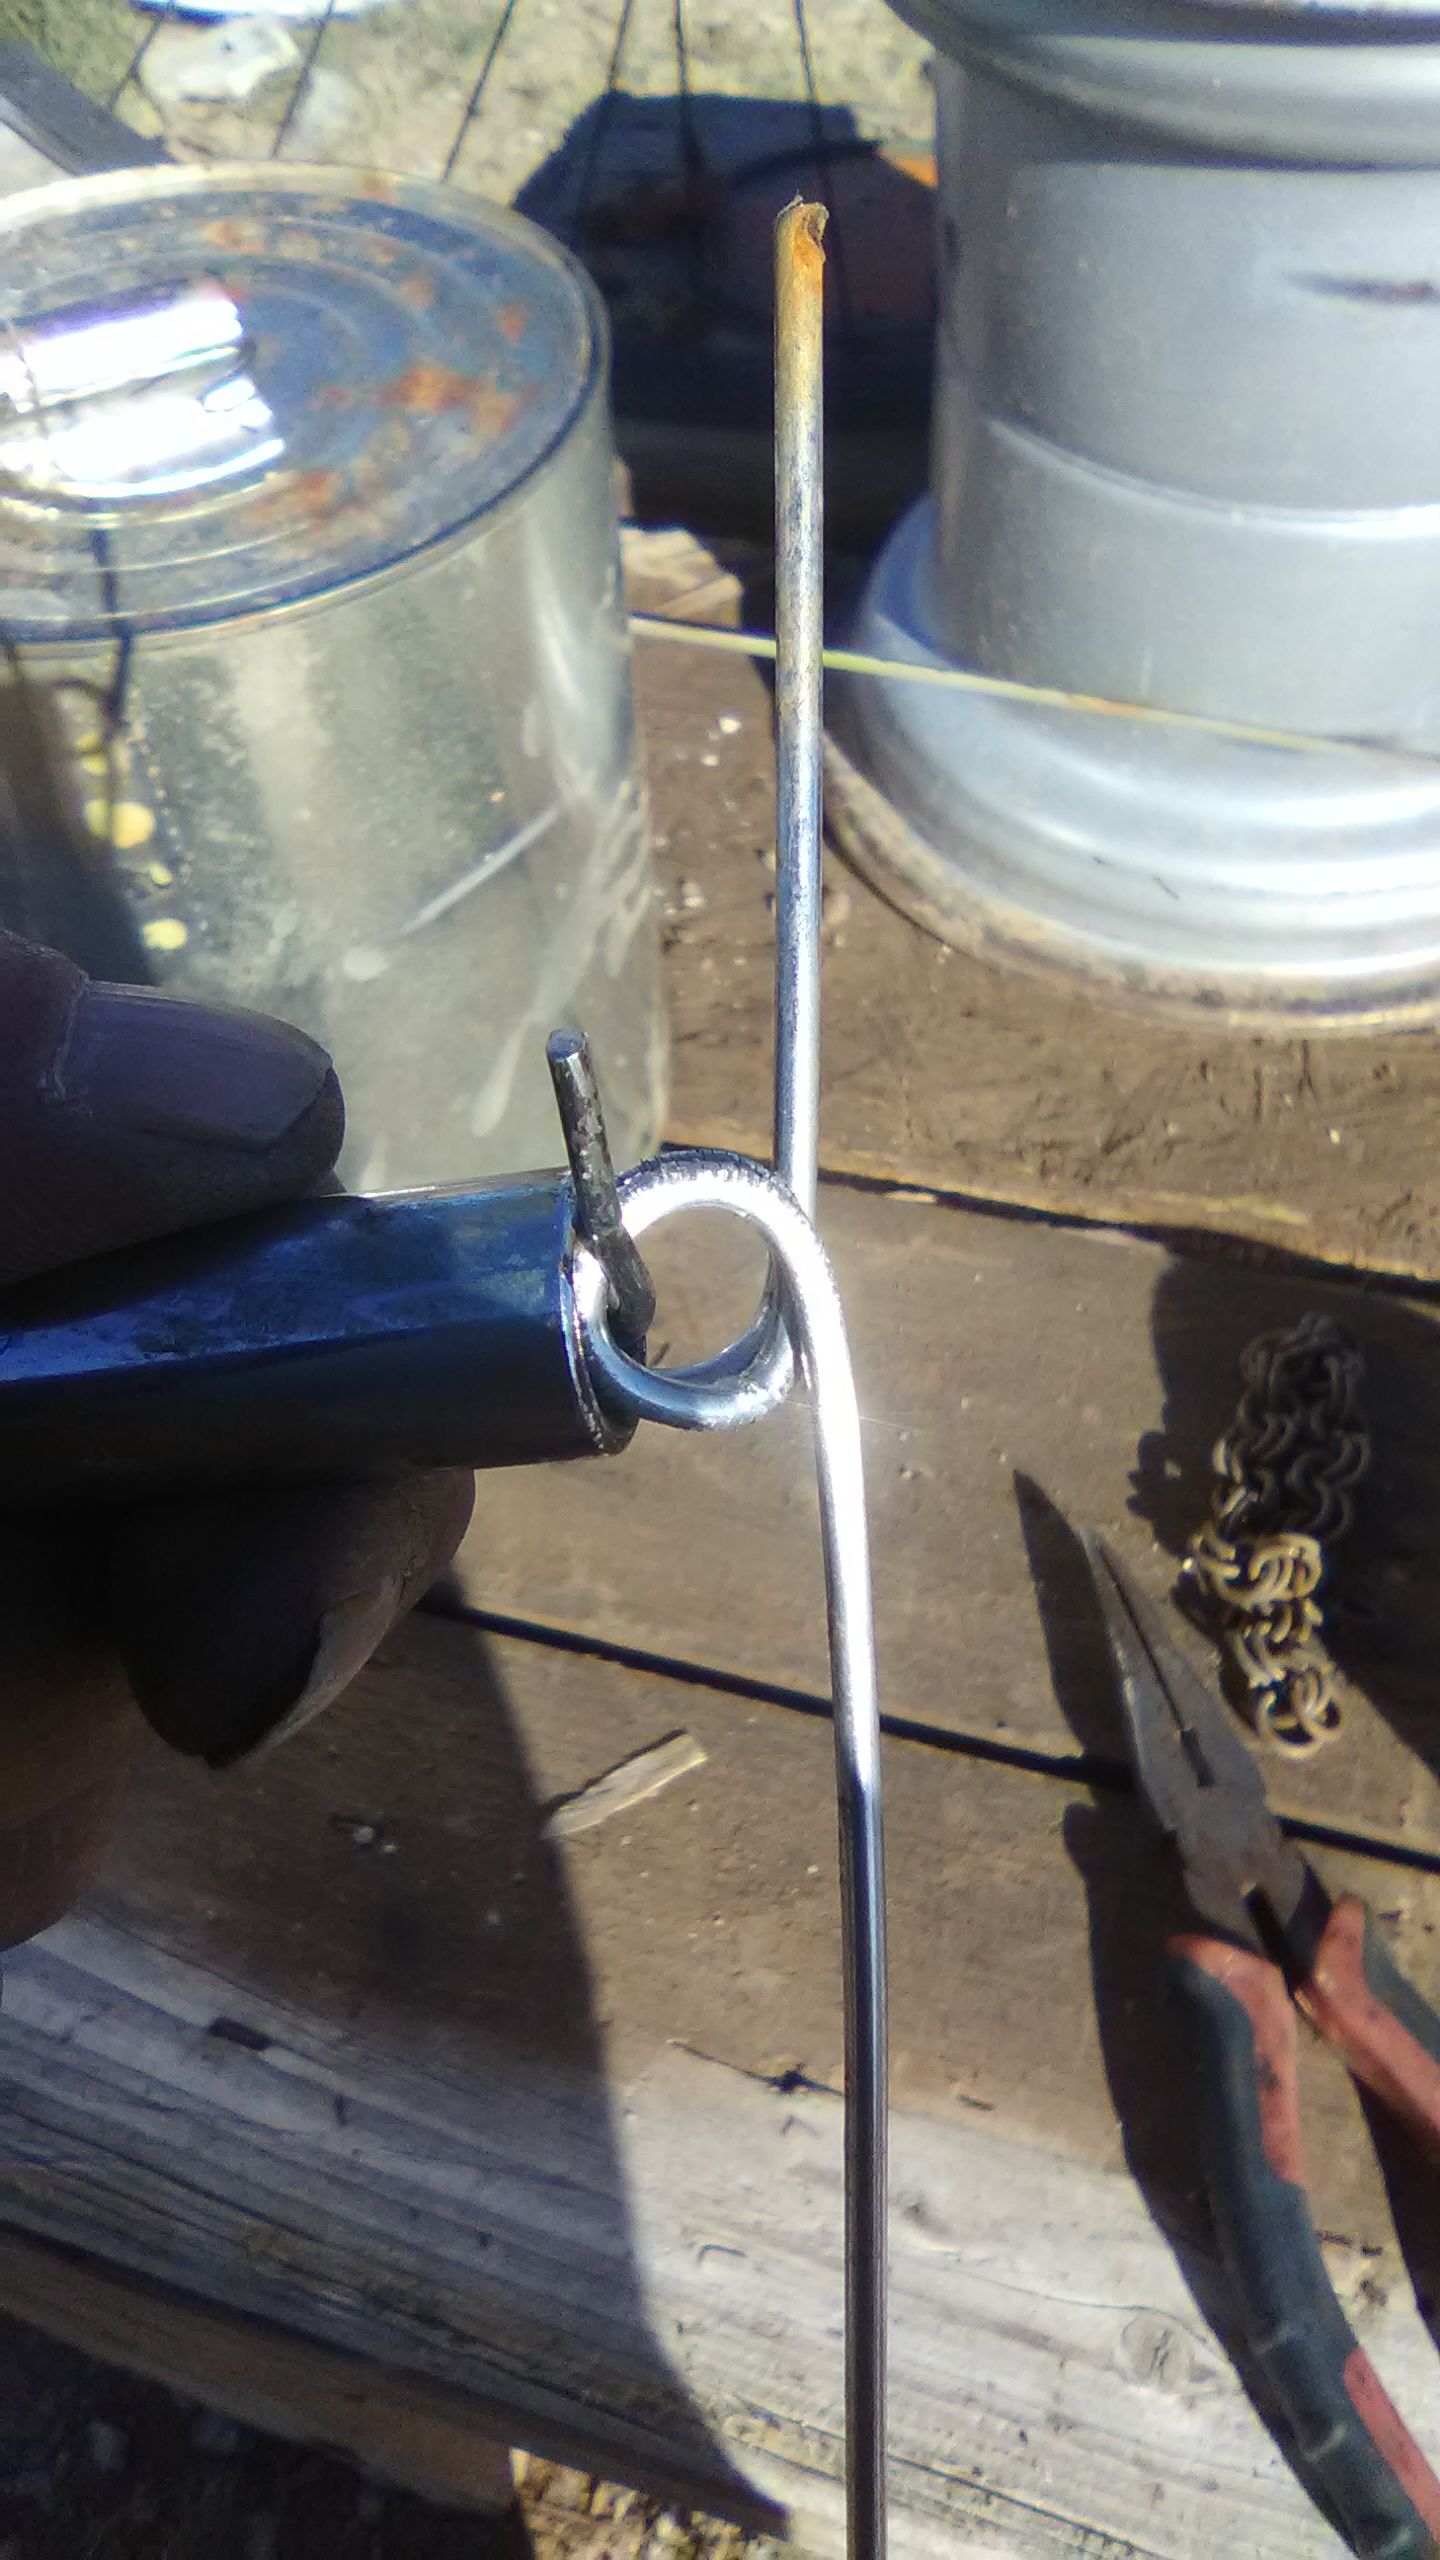
In this image you can see that I have cut the hammer pin at the center mark and the cut end of the hammer pin is passed through the center of the lock ring…. note I have not cut the ends of the lock ring yet
Using my needle nose pliers I created the U hook on the extended end of the hammer Pinn (where I cut it in the center) and wrapped it around the lock ring. Now with one hammer socket attached to the lock ring you then check the diameter of the Loch ring to the spindle that you’ll be using for your Hammer Mill to make sure that the lock ring fits over the spindle with the hammer socket attached to the lock ring…
if the lock ring is too tight to easily fit over the spindle then make adjustment by putting pressure on the ends of the bicycle spoke you are making a lock ring out of.. this was slightly open the diameter of the lock ring
Once you have the diameter of the lock ring wide enough to accommodate the hammer pin for both 12 mil socket hammers then cut the ends of the lock ring.
~ Make sure that the U hook is wide enough to allow the Hammers to rotate freely around the lock ring ~
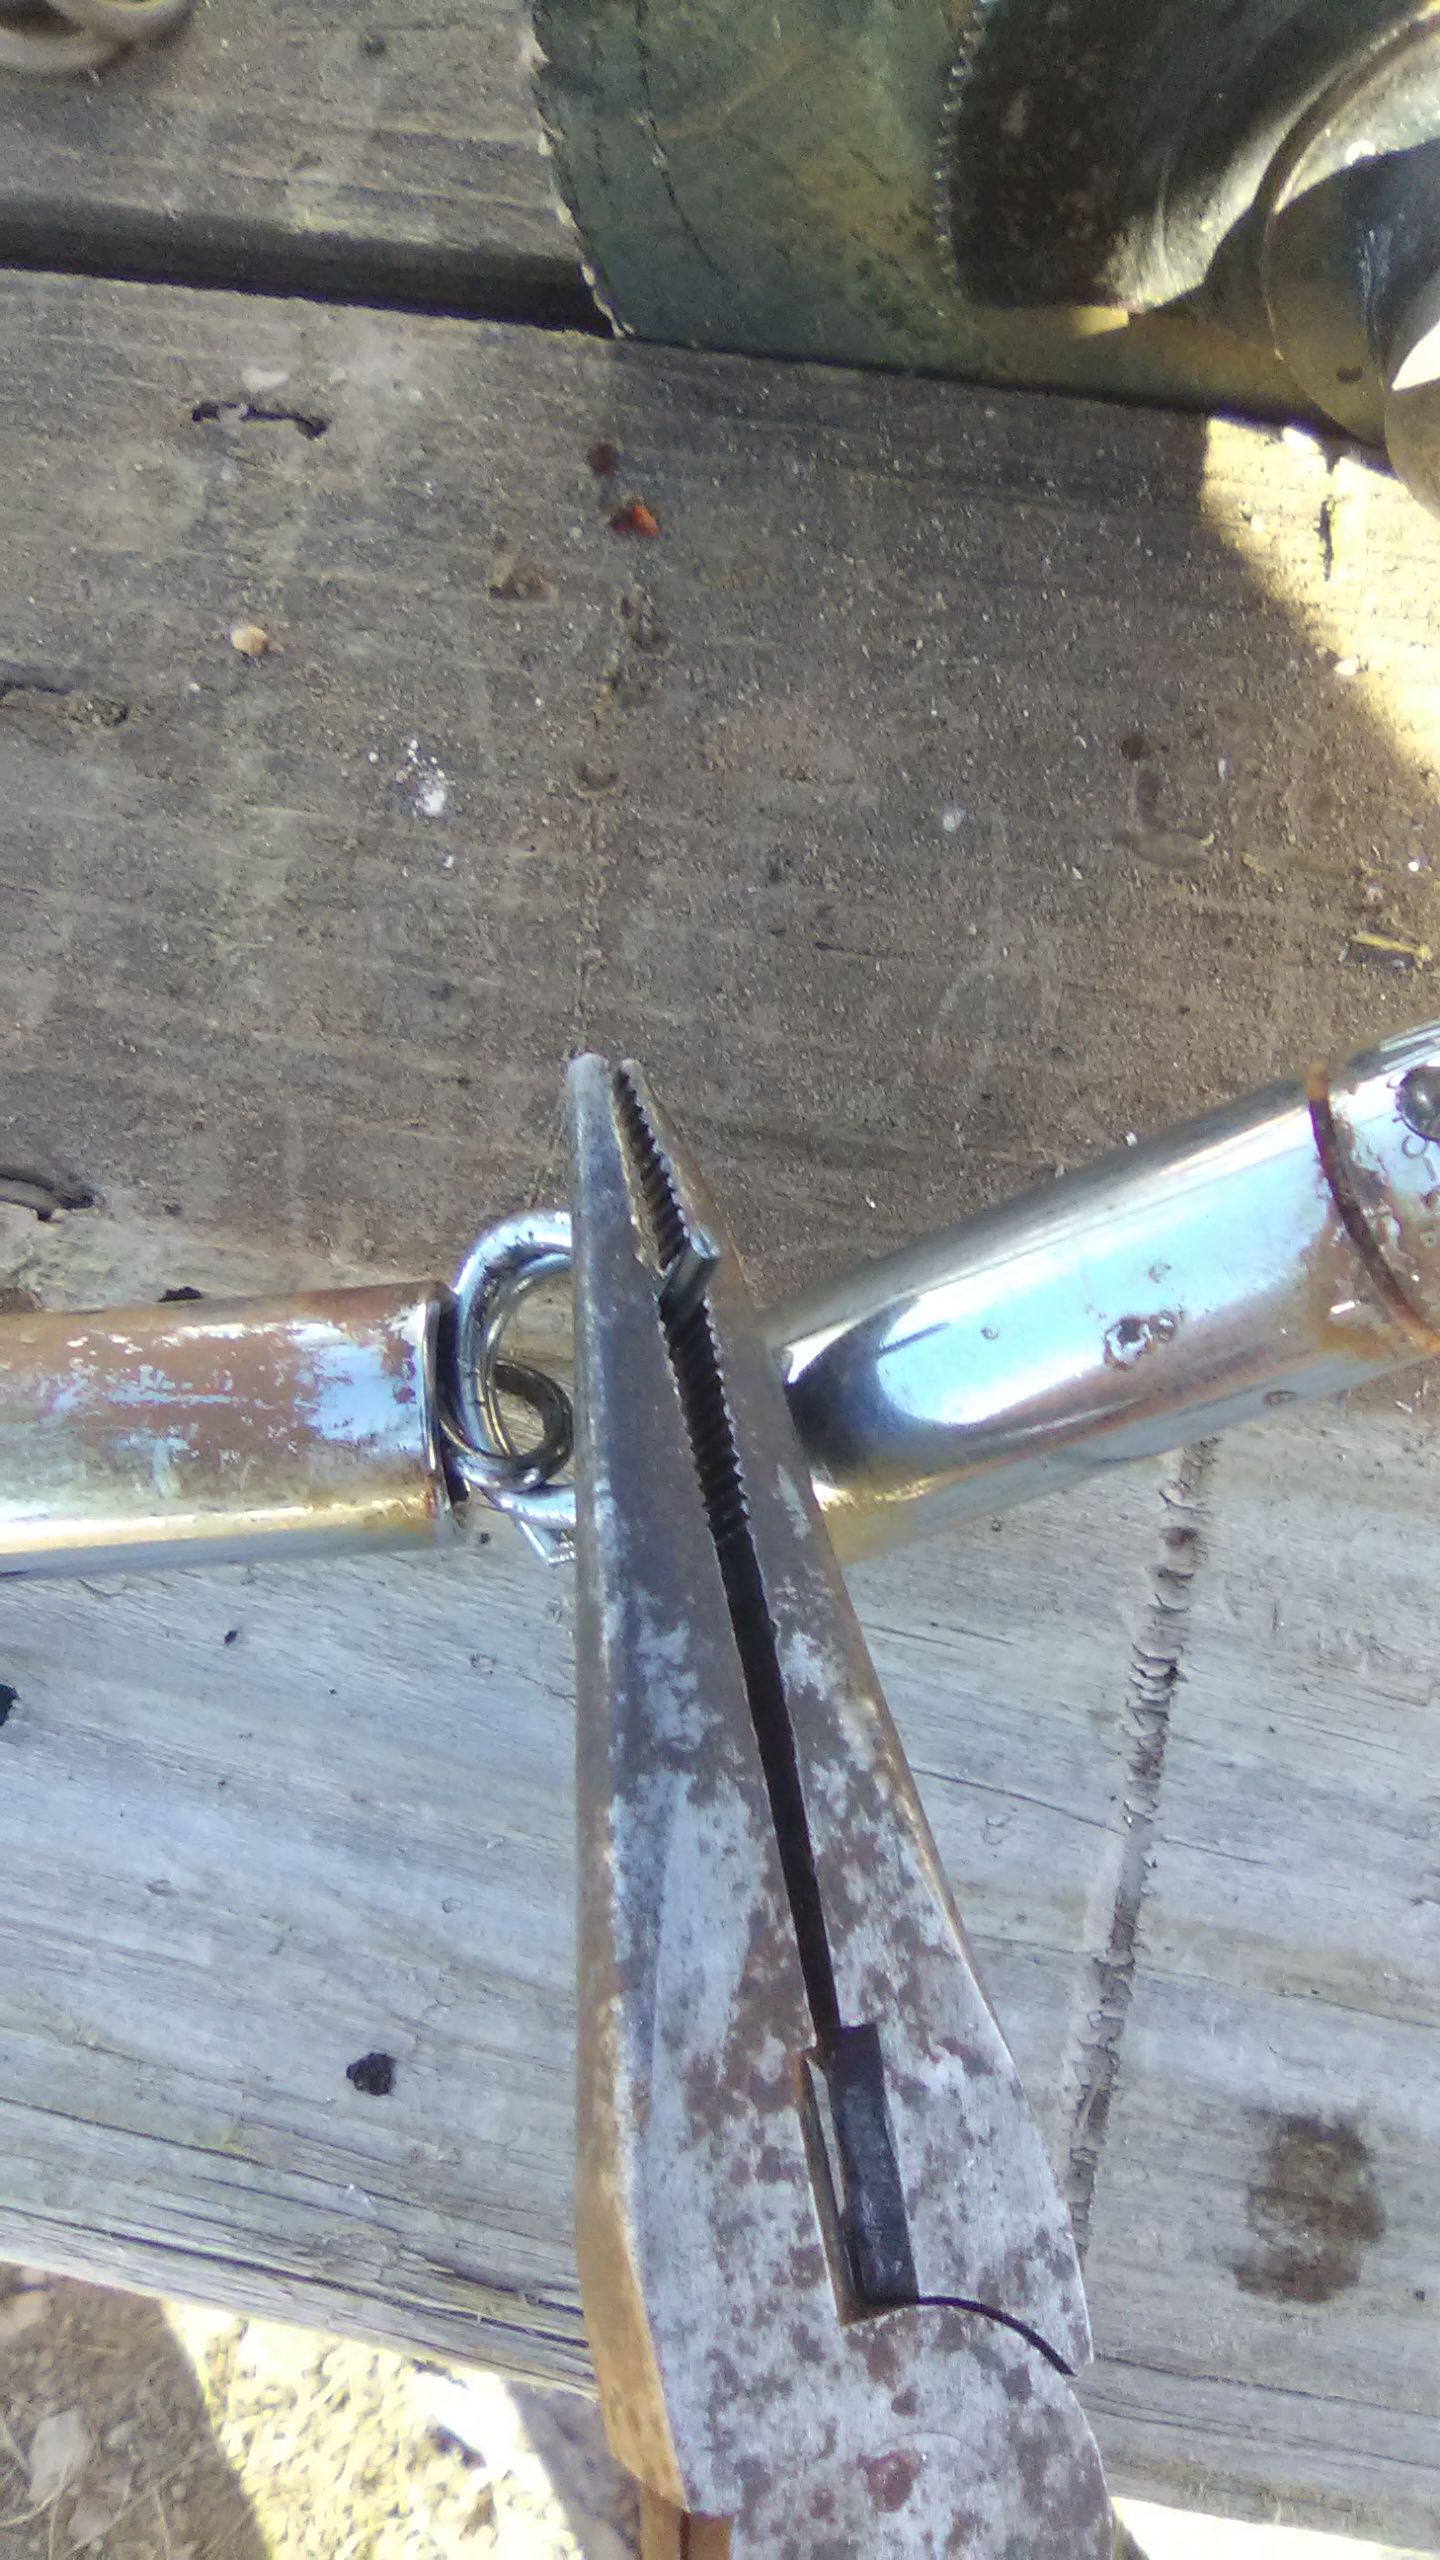
In the image above you see that I am compressing the cut ends of the lock ring so that there are no jagged ends and so that the socket hammers can rotate easily
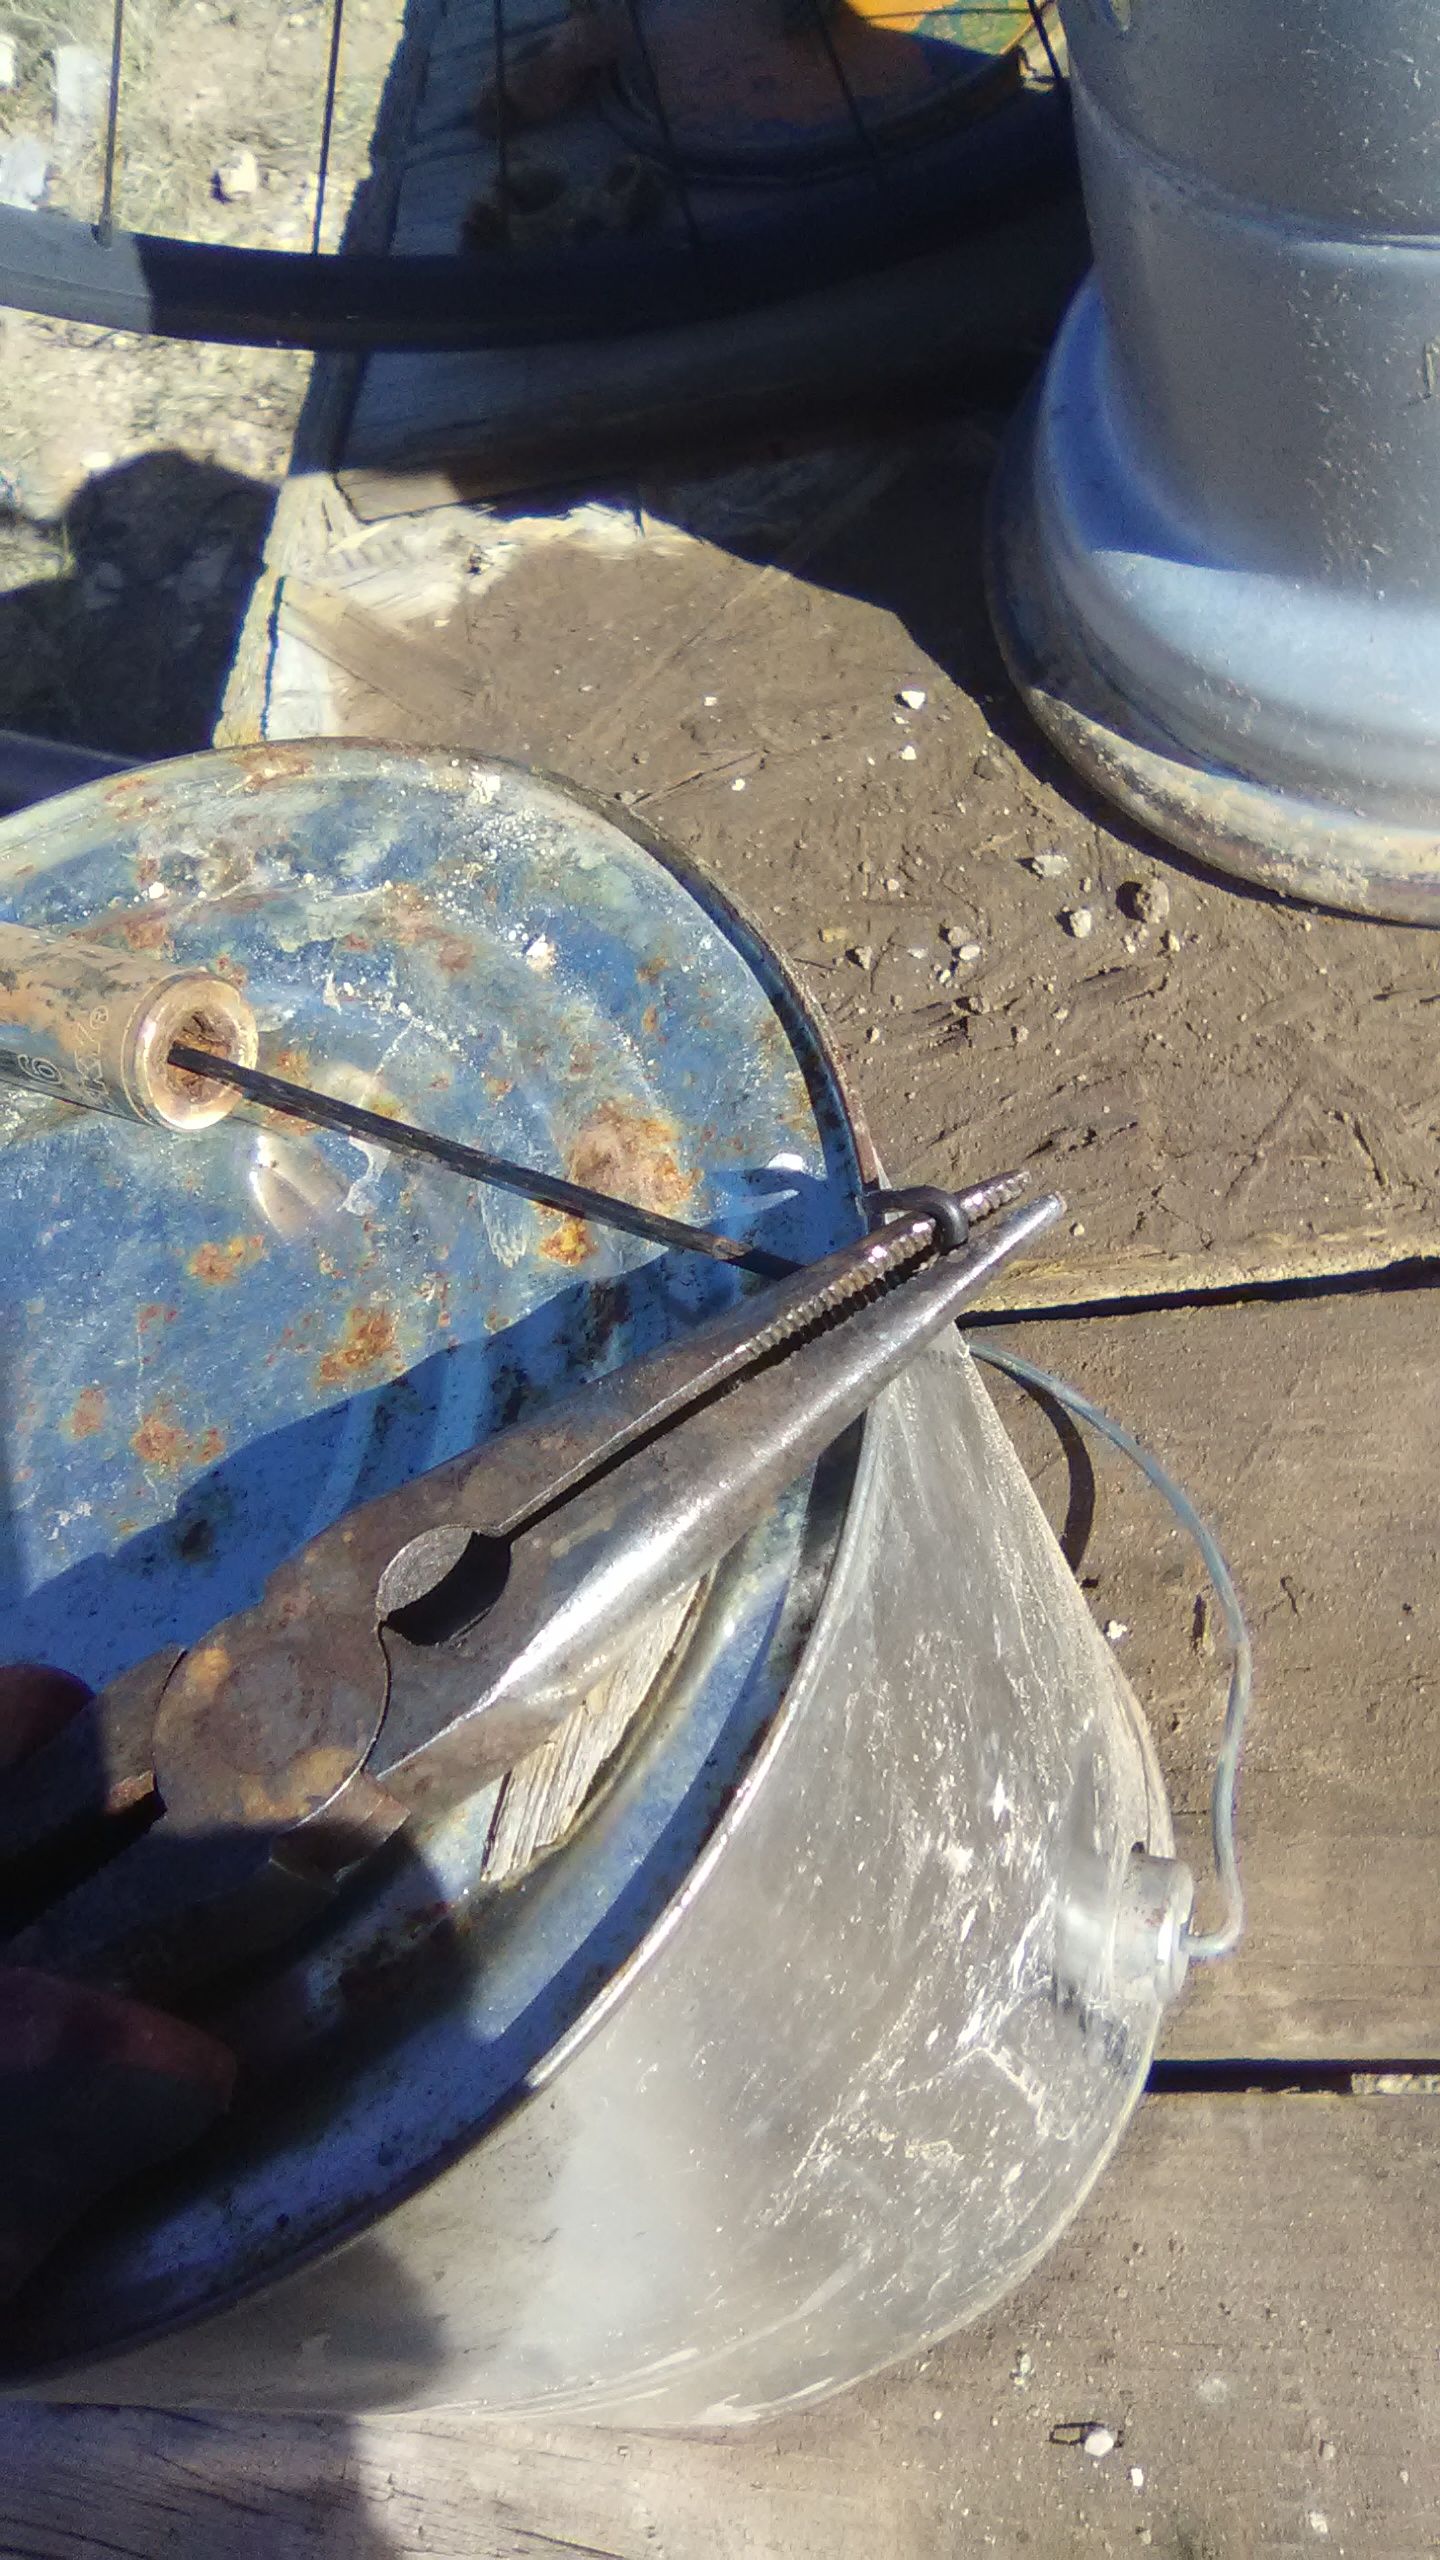
Detail picture of U hook that will be wrapped around lock ring for second socket hammer
Detailed image above of both socket hammers attached to lock ring
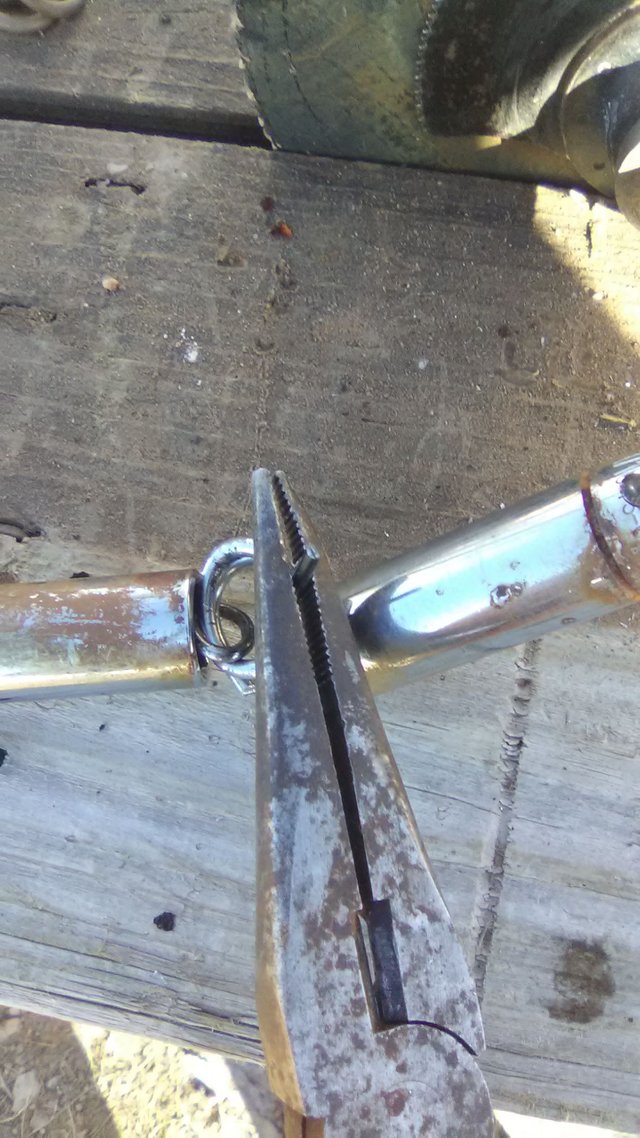
In this image above I’m using my needle nose pliers to compress the cut-ends of the lock ring which isn’t essential but it’s a good idea.
it’ll make the machine run smoother and it’ll prevent you from getting Nicks and cuts from the exposed Barb’s at the ends of the lock ring wire
...
In the image below you see my cutting wheel that I normally have on the spindle for cutting sheet metal... as I do not have a table vise the cracks in this wooden table are helping me out a little bit but of course if you have a table Vise use that
…
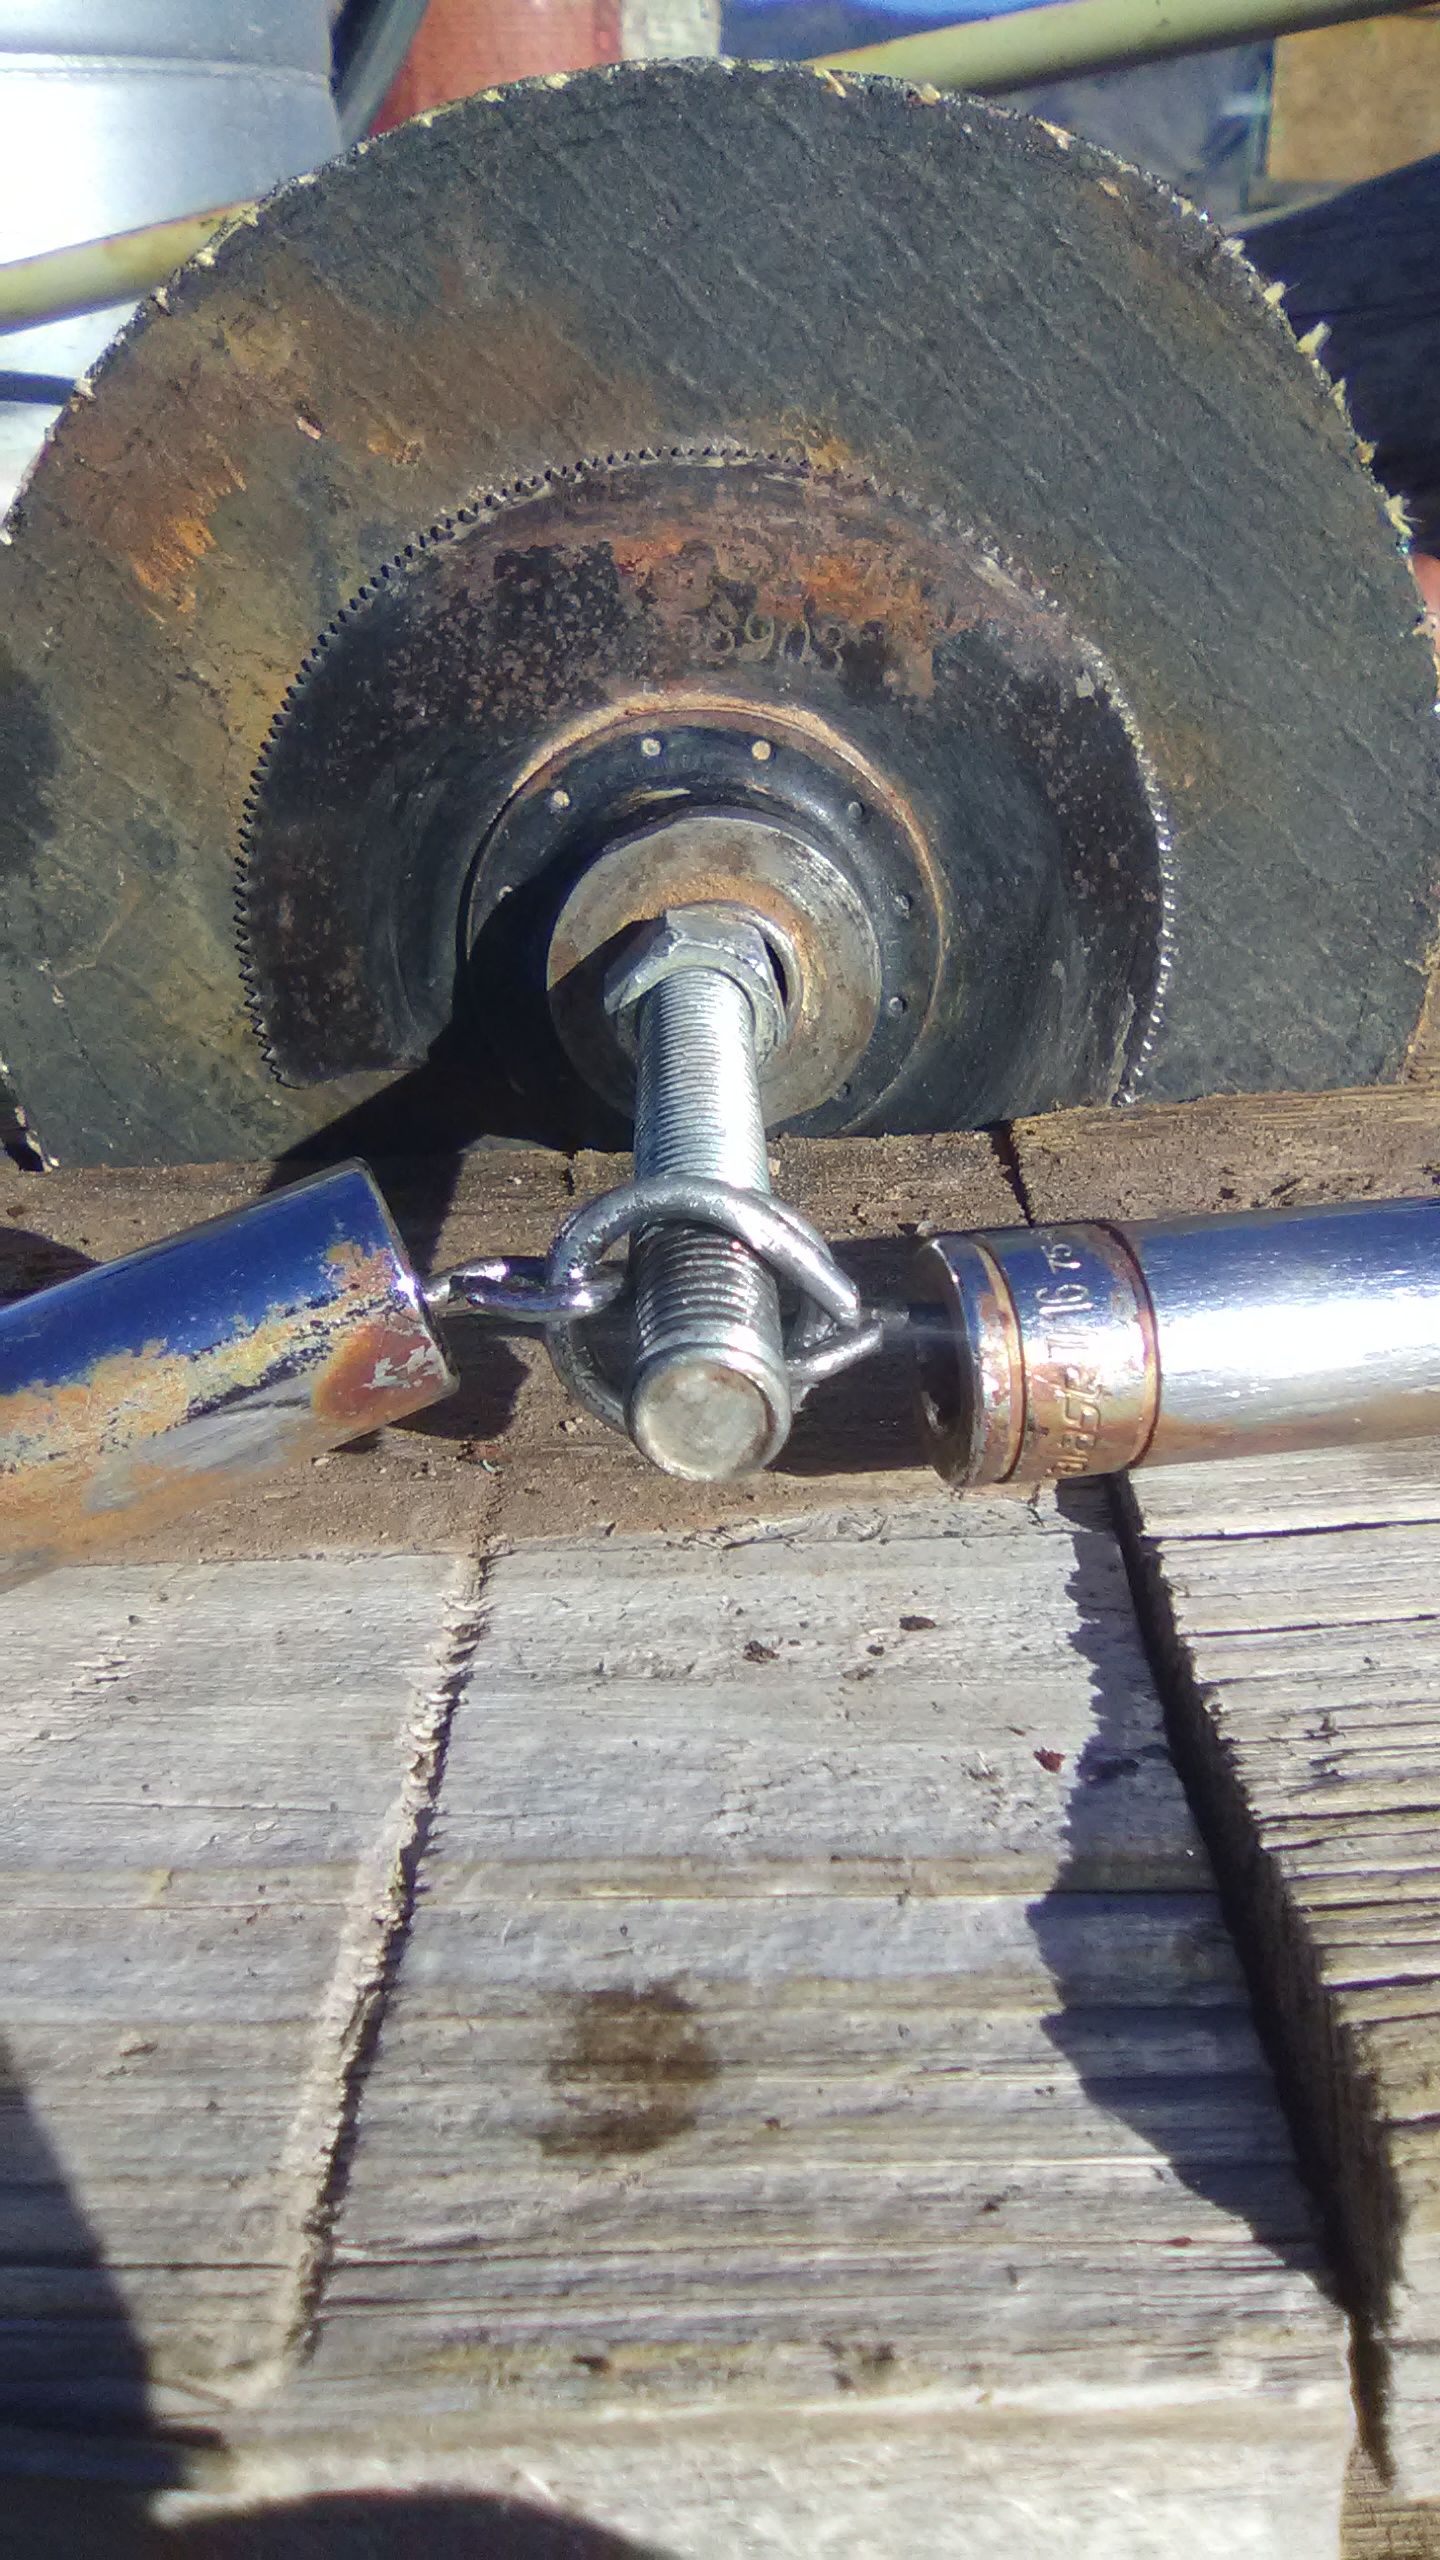
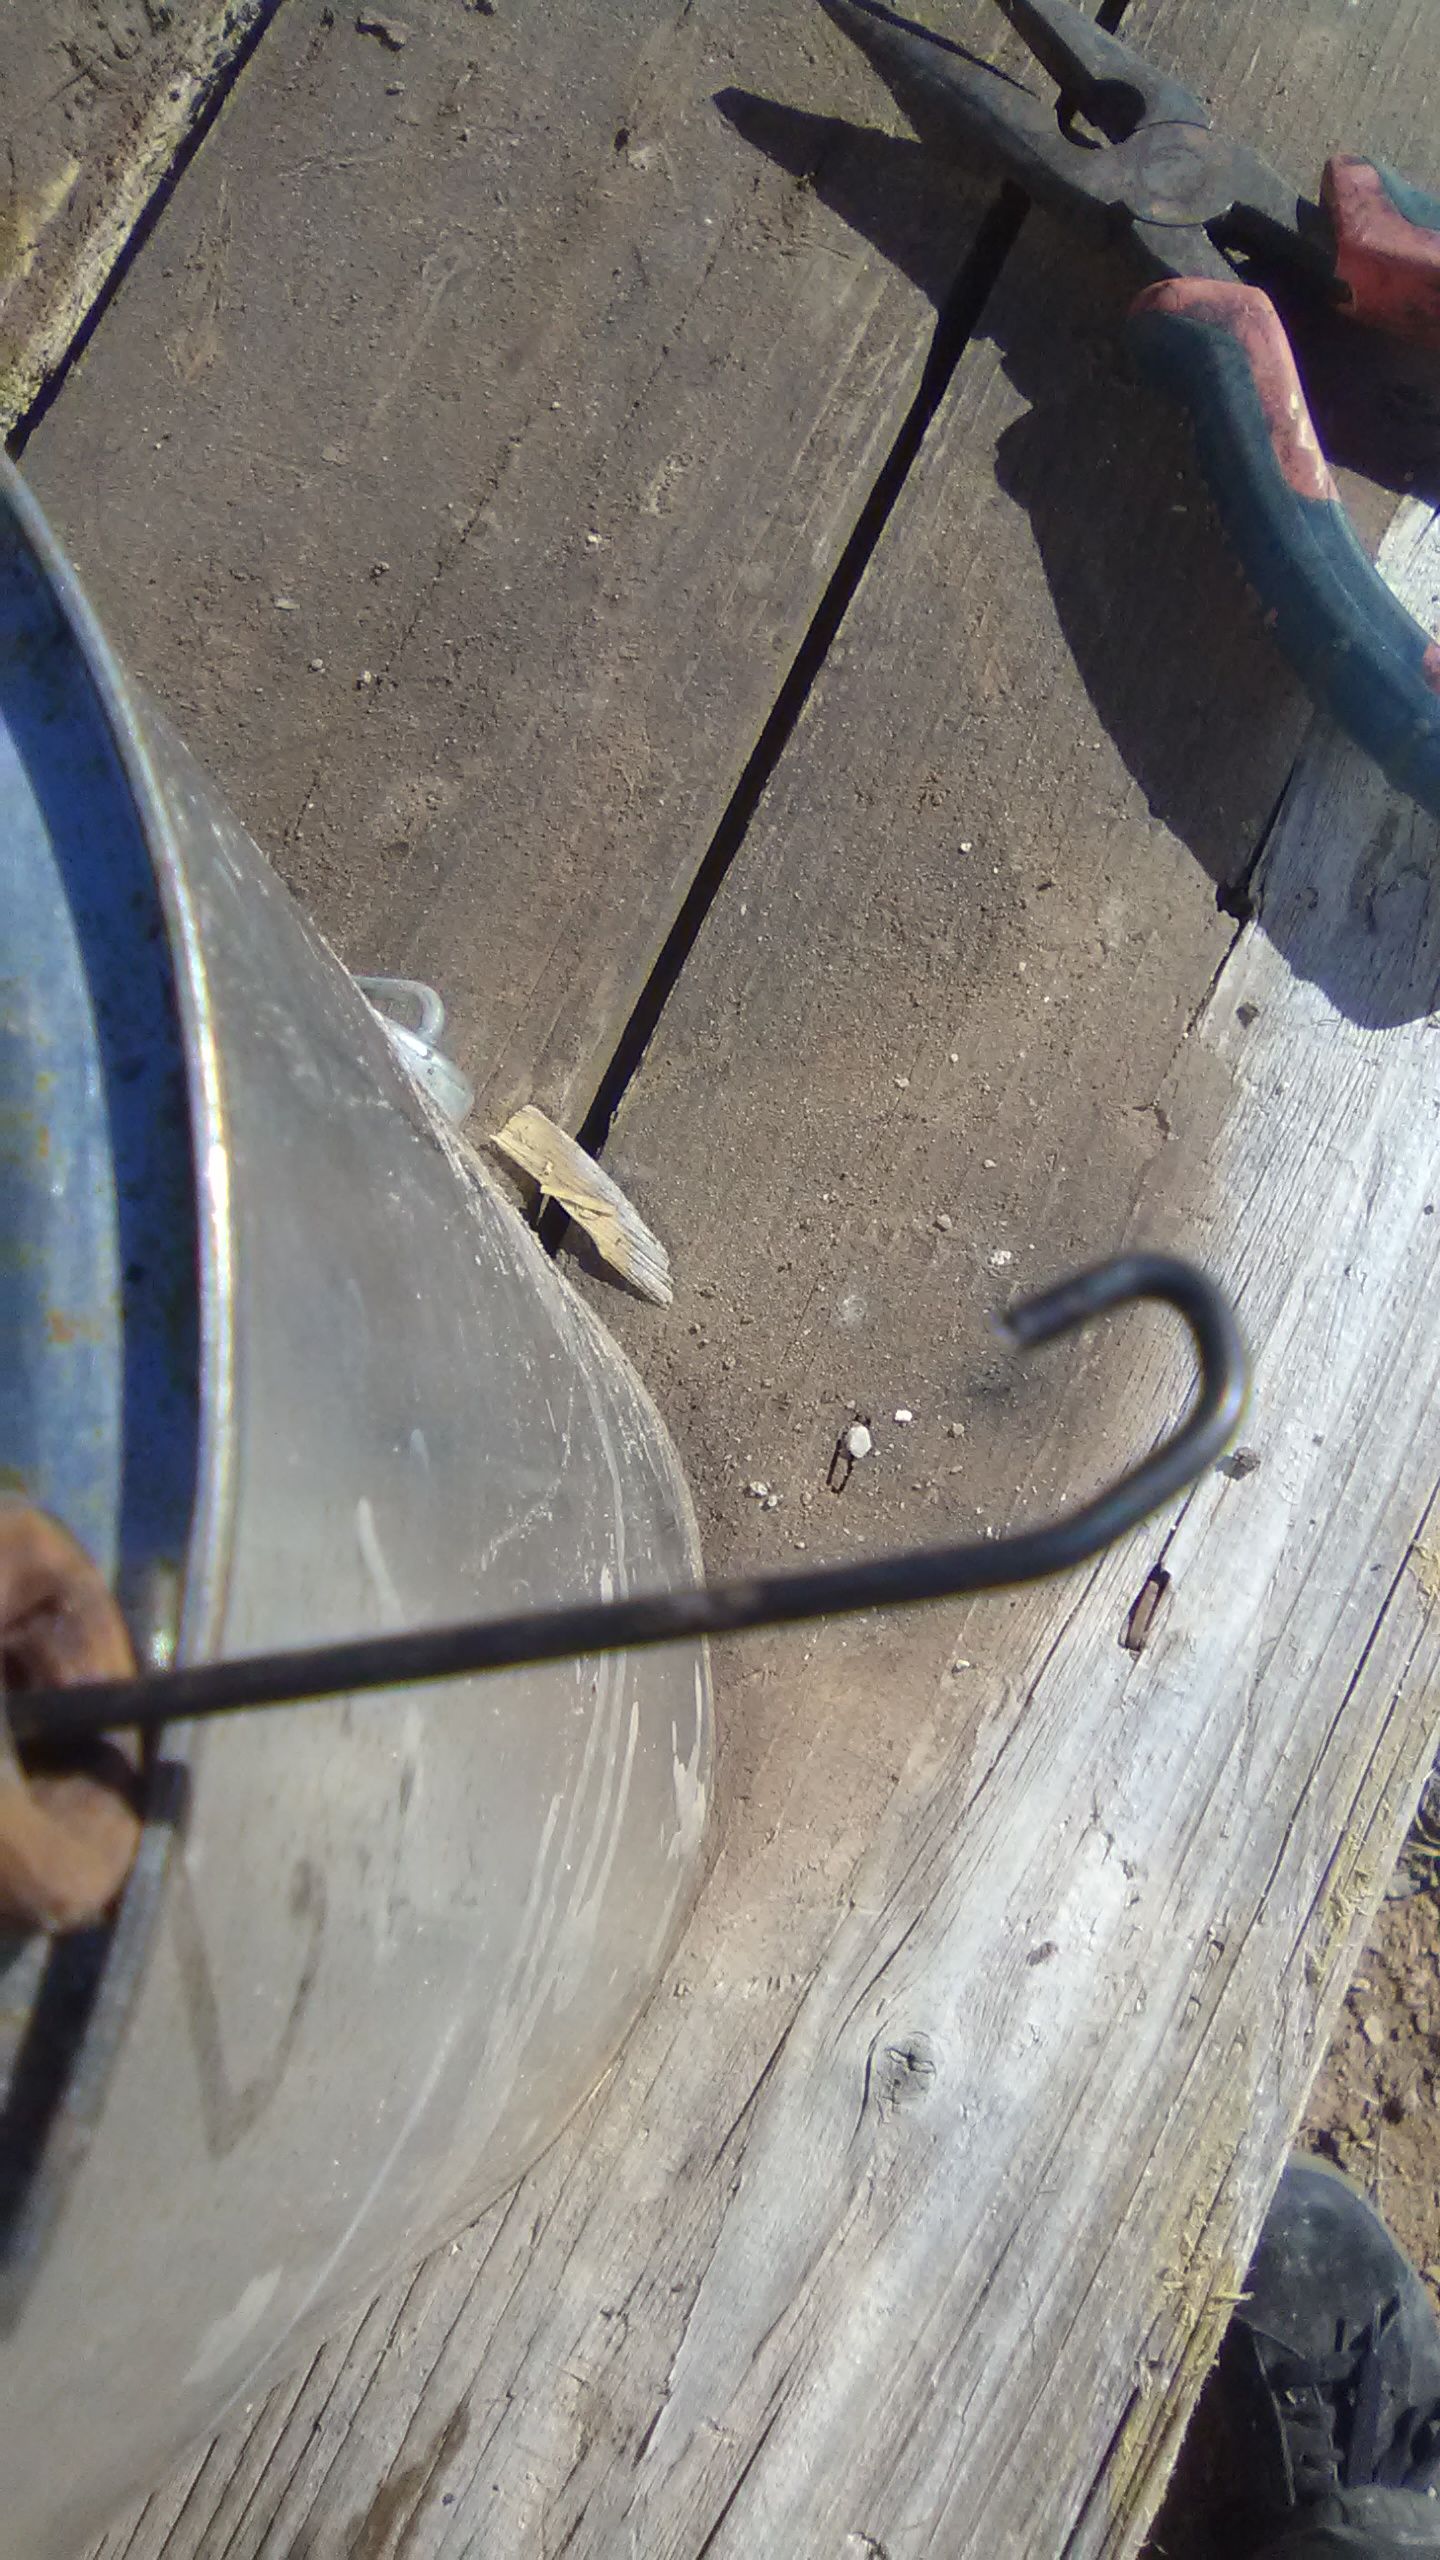
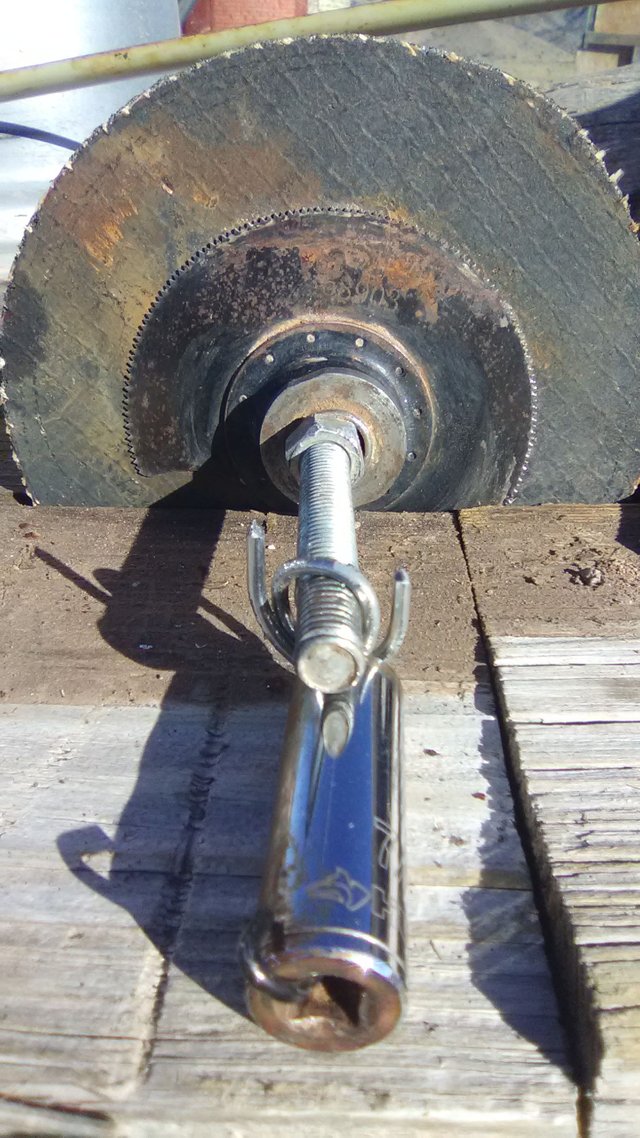
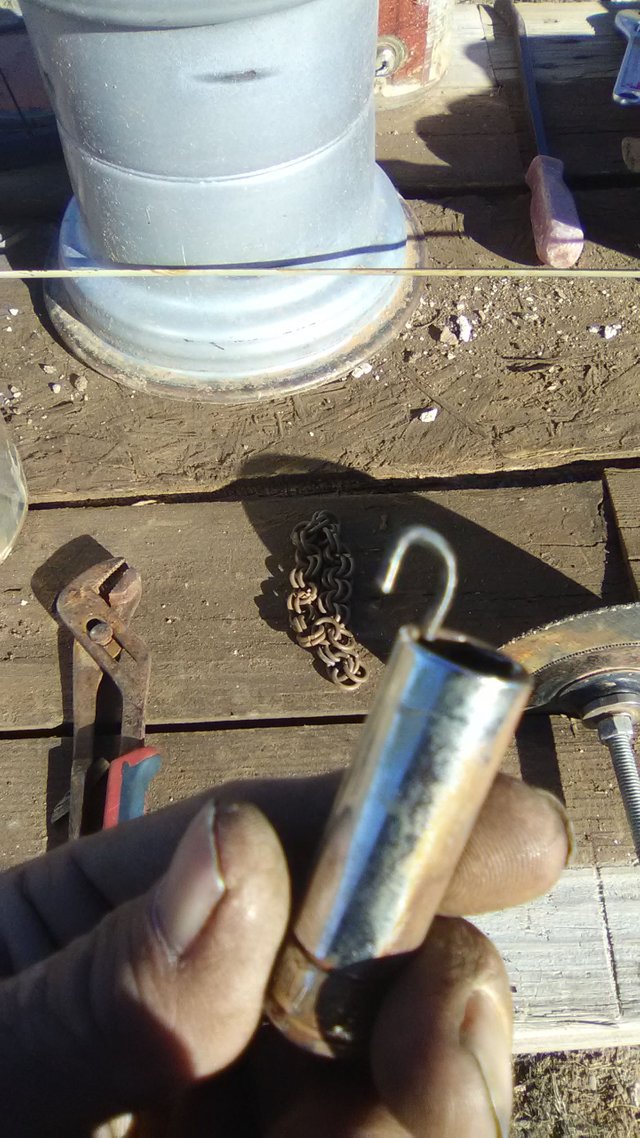
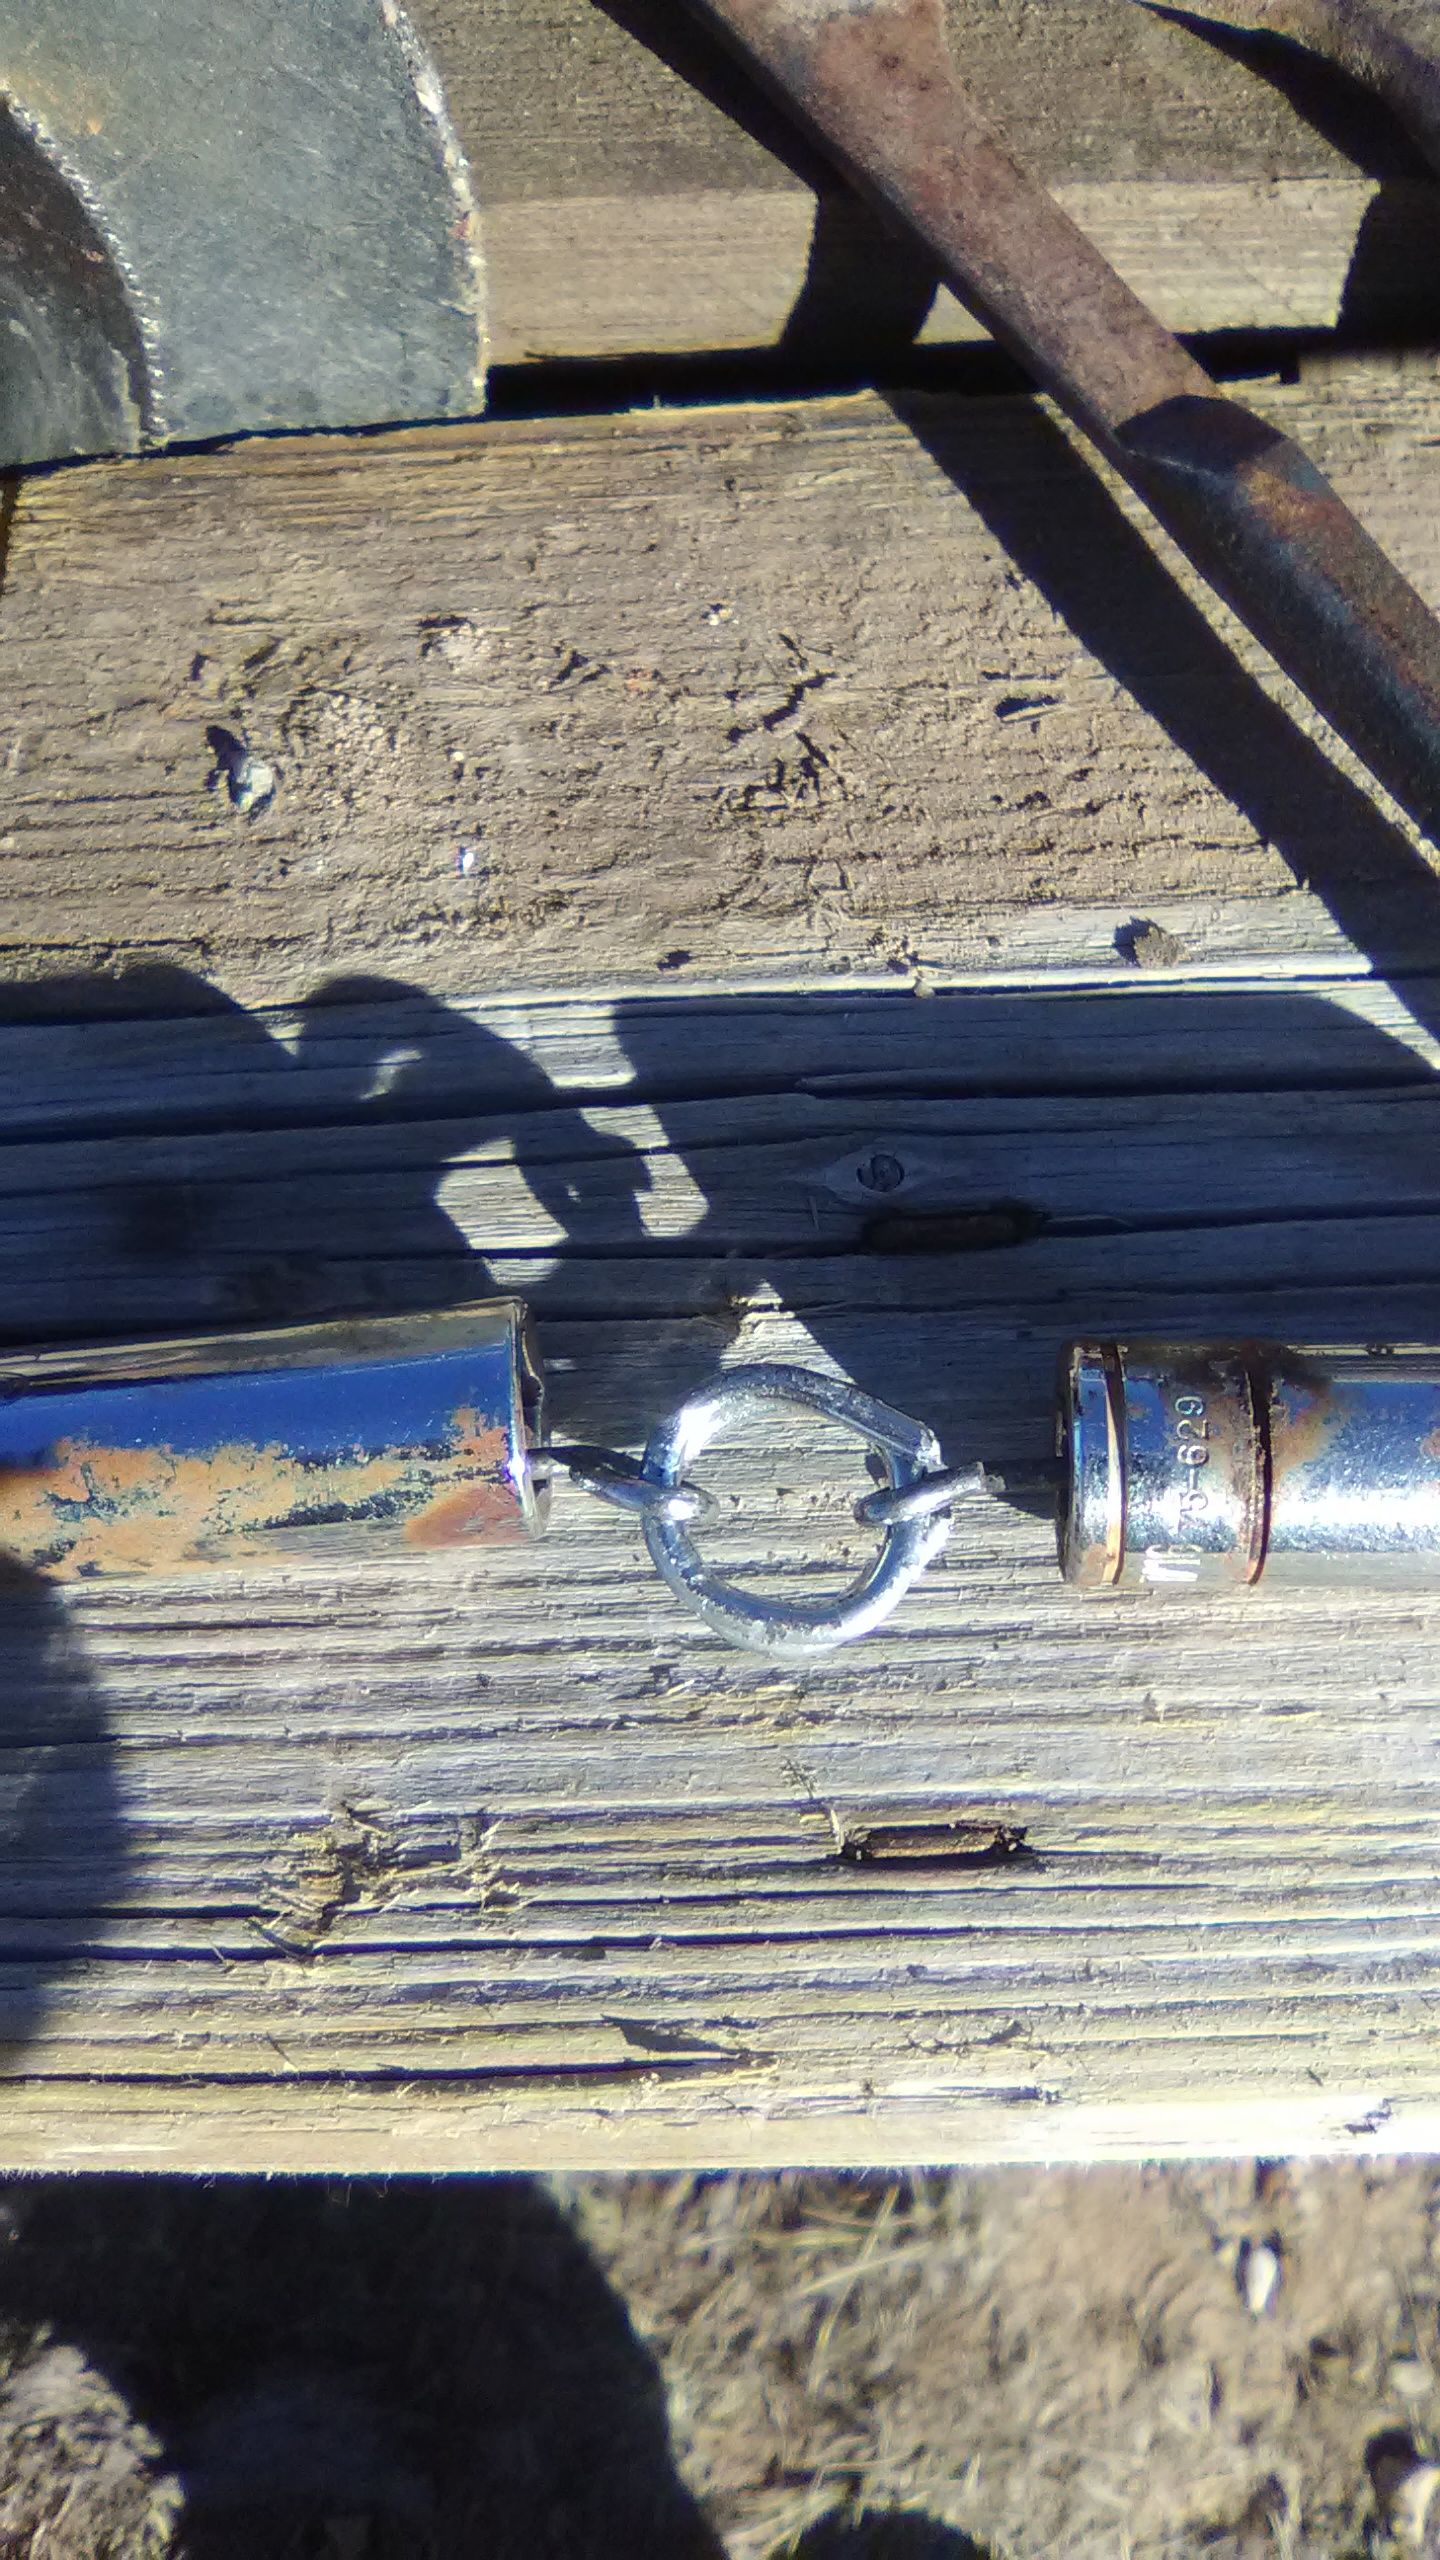
in this image I’m showing you detail that the lock ring does indeed fit over the spindle with both hammers attached by the U hooks…..
~ Note it is extremely important that you use whatever is necessary to completely close the U hooks around the lock ring you do not want them popping off in use. they could fly through the can and do Serious injury… Make sure that the U hooks are fully closed around the Loch ring and that all of the assembly is firmly connected together ~
………
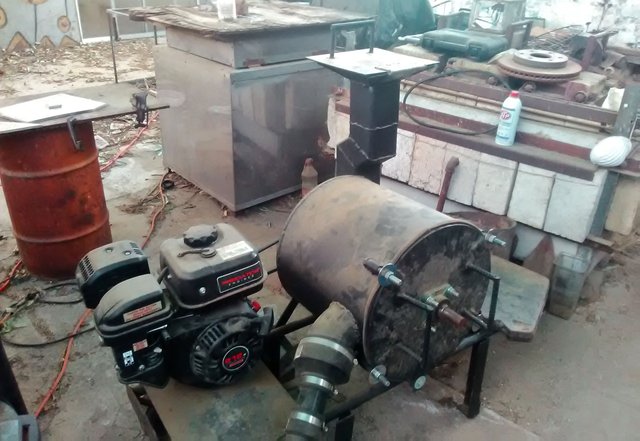
Hammer Mill DIY part 2
in hammermill DIY part 2 we would be building the debris Shield the dust then in the hammer chamber. following that I'll show you how to hook it all up and give it a test run following that few clues or suggestions on how to take care of your Hammer Mill for a long period of use
Please do Up~vote
........................Re~steam
.................................. follow
you follow me and I'll follow you.
and I give out a little bit of tokens for every comment
......so don't forget the comment
~ good looking out ~
all of the above is appreciated
As always peace and prosperity to one and all
peace love and soul
~ Get That Gold ~
cuz you deserve it...
.... don't think for one second that you don't
.............~One love~.............
Looks like a fun project! My roomate and I recently built me a badass chain mill for crushing gold ore. It turns rocks into powder in just seconds.
Jah Bless!! That's a sweet-looking contraption I like to build one myself that I saw on YouTube but I don't really have the tools in the set up for it at the moment working toward it though. Hey thanks for the comment I'm going to follow you since you're a rockhound like me and I'll tell you a little coin for the good comment . .. good looking out
We based this design from ones that we saw on youtube. Mainly the askJeffWilliams and DanHurd channels, but a few others too. I didn't have the tools for making it, but my buddy did and he was more than happy to get to use them. As soon as I asked him about this project he was all excited to get out his welder and all that stuff. I was hoping it was gonna be a little cheaper, but it wasn't to bad. Around $700 in parts and another $200 to my buddy for his labor... I had wanted to keep it in the $500-$600 range, but things just keep adding up... at least we kept in under a grand. Considering that buying a similar sized impact mill from a company online will usually run $3,000+ I don't think we did to bad.
I agree Jeff Williams got it going on for the gold prospecting vlog I'll watch him all the time
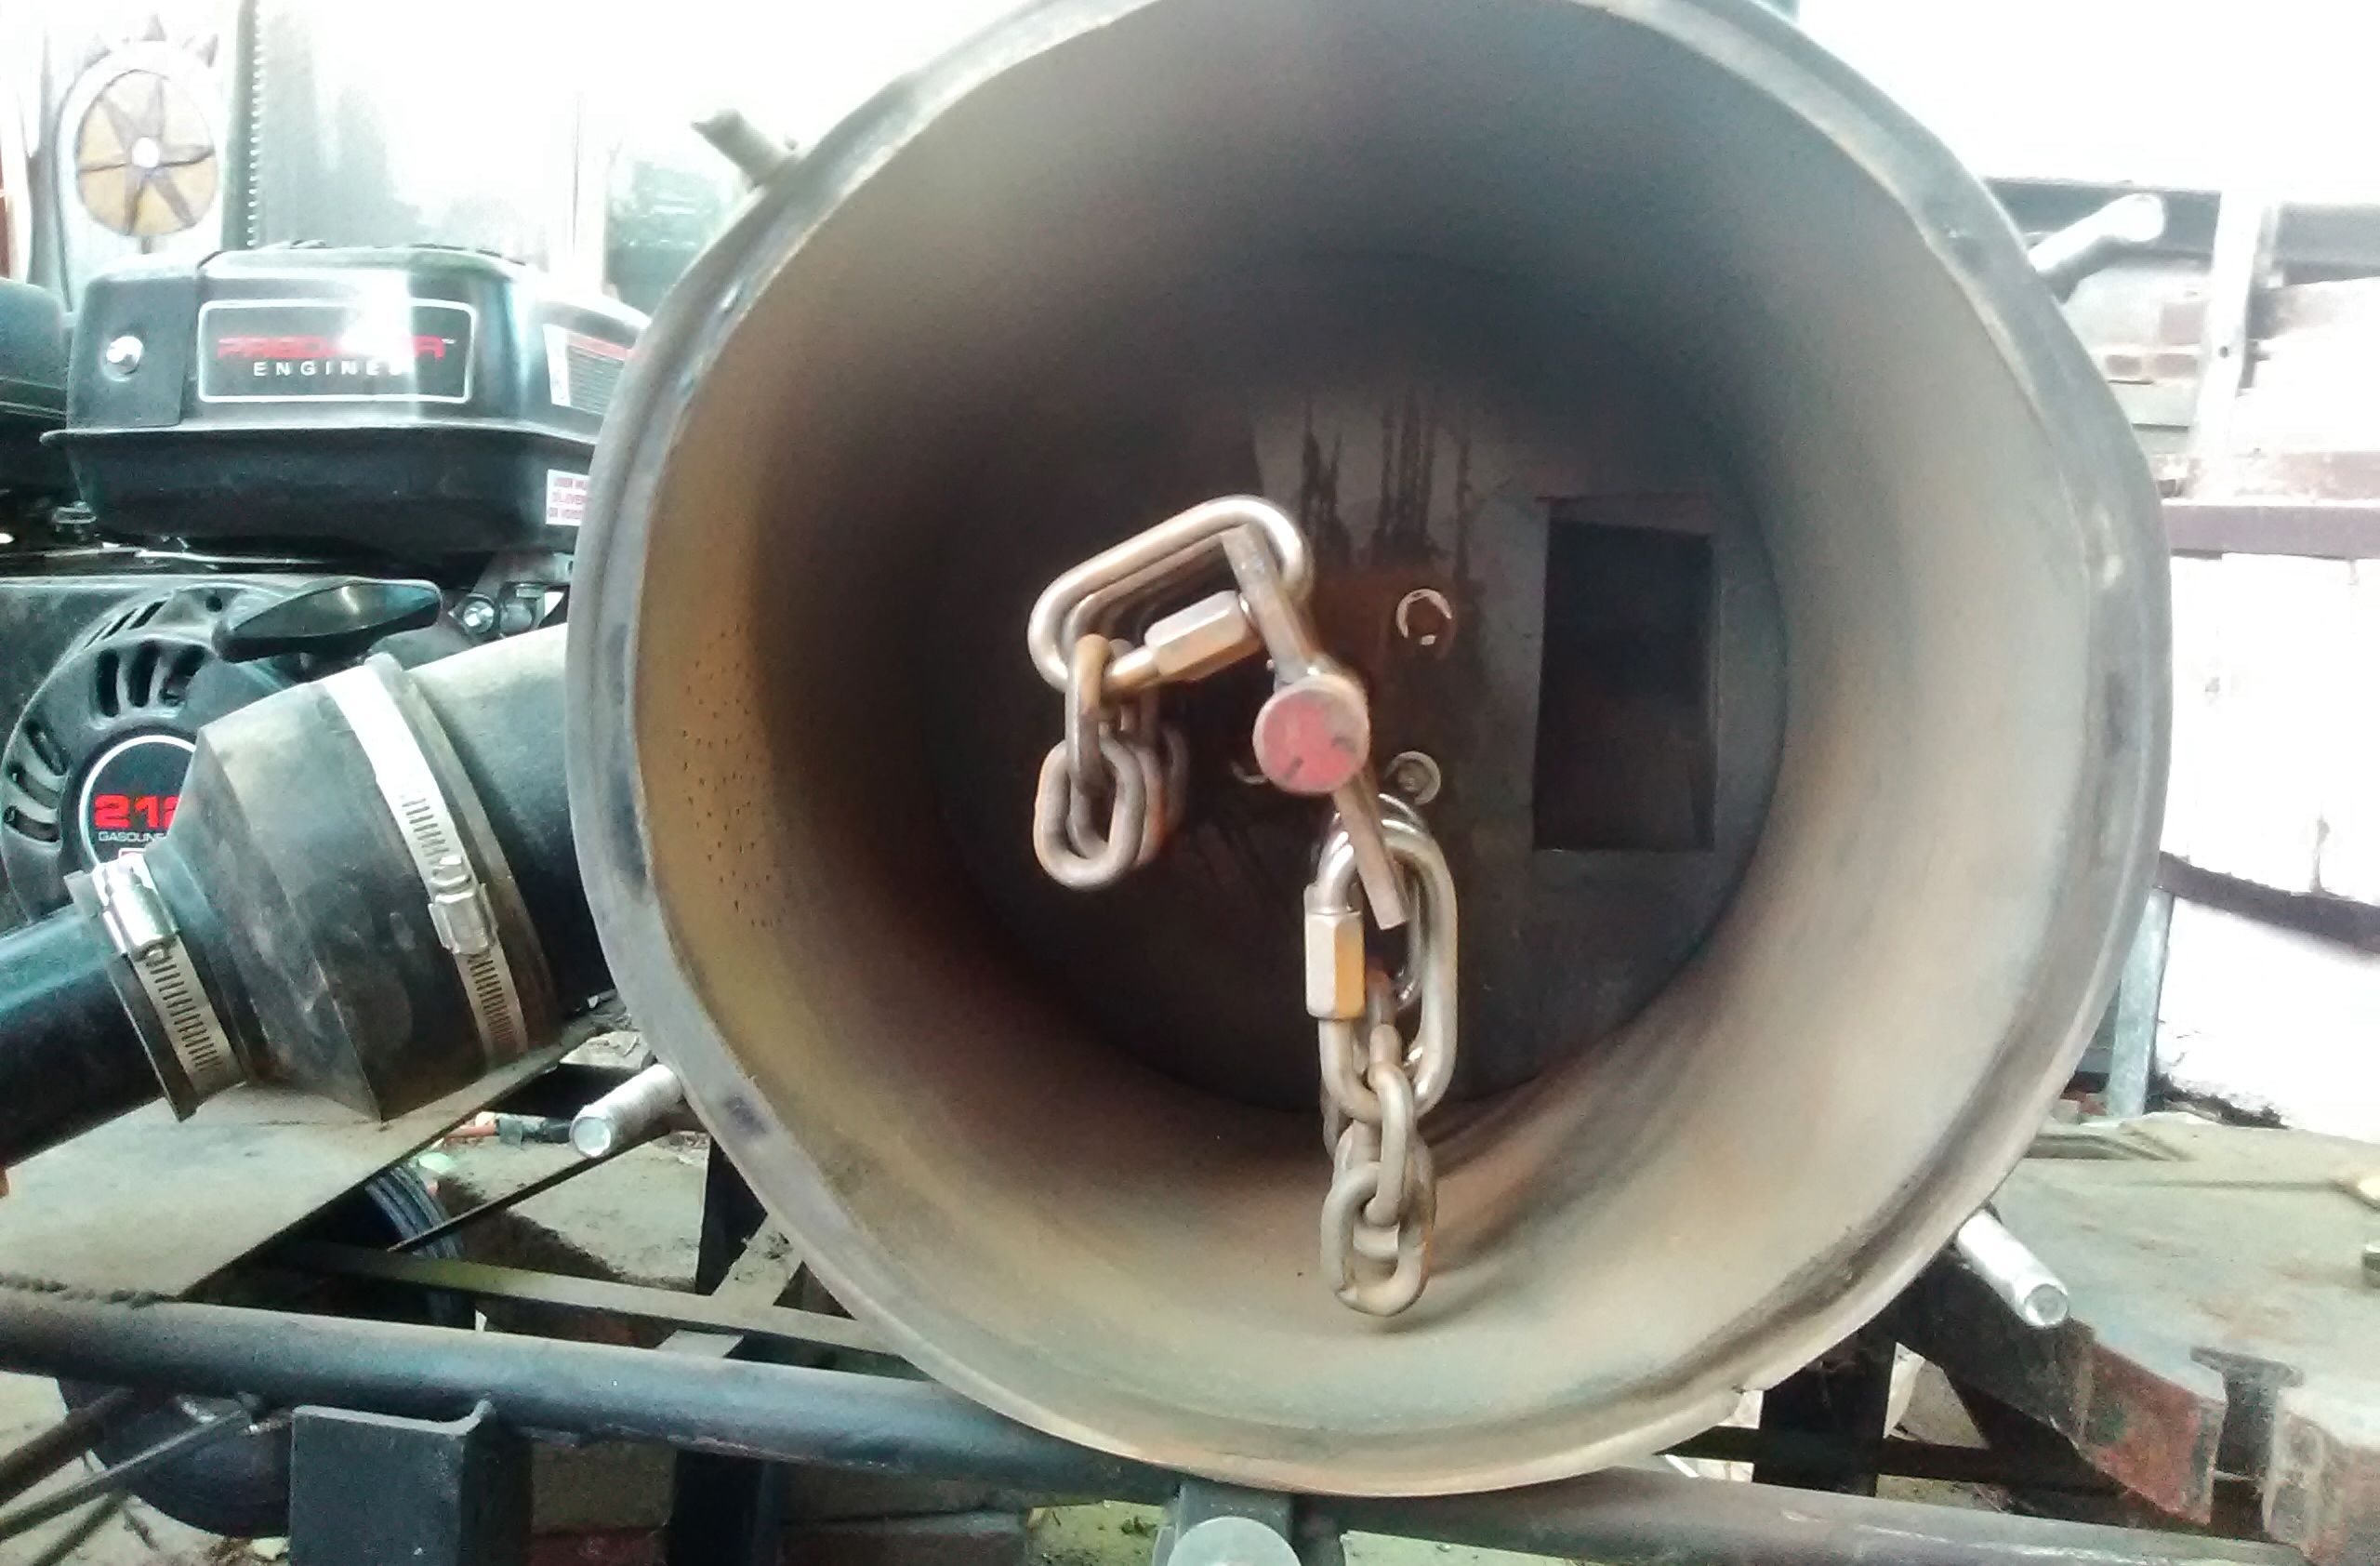
Here's a look at the inside -
like back
Resteemed your article. This article was resteemed because you are part of the New Steemians project. You can learn more about it here: https://steemit.com/introduceyourself/@gaman/new-steemians-project-launch
great my friend , I love DYI's greetings from germany