🎛️ Music Production Talk (Steem Monsters Voiceover Edition) - How to properly record voice for Steem Monsters!
With the Steem Monsters voice acting auditions currently in play, I thought it would be a great idea to talk about recording pristine vocals on a budget! Not that I'm encouraging or expecting all the auditioned voice actors to go out and blow a few hundred on microphone equipment, but it is what it is! If you auditioned at all, that means you show at least some interest in voice acting, or recording in general, so maybe this post will help you get started.

You can view the #steemmonsters Voice Acting Audition Post here.
Audio recording can be a pain in the butt, but it doesn't have to be if you get the correct setup. They market a lot of these microphones as plug and play, but inherently most are not, quite, that. All mics require a little bit of TLC and understanding how they work before you'll get the sound you want. But don't be discouraged, you get used to it - there's a whole bunch of mic configuration/troubleshooting at every stage of the game depending on what your setup looks like.
I'm going to write up a quick TL;DR at the bottom of this post, so if you're time crunched, you can scroll on down. But for the ones that want to know more about how they can get crisp, stoic, whimsical Steem Monsters vocals, read on.
Firstly, before we talk about anything in particular, I'm going to list some things that are typically going to affect your vocal recording (and some that will not).
| Things that can ruin your audio. | Things that don't have to. |
|---|---|
| Power Source (laptop, desktop, interface, etc.) | DAW (Digital Audio Workstation) |
| Mouth direction vs. mic placement | Low budget mic options |
| Broken or loose cables | |
| Room sound/ambient noise |
Now, let's chug on through these one at a time, starting with what typically will not hurt you.
What not to worry about.
Your DAW (digital audio workstation)
Typically, it really doesn't matter what software you use to record your audio. For Mac users, Garageband will work just great. For PC users, you can easily pick up a free workstation like Audacity, Cool Edit Pro, or Reaper. There is very little difference in the sound output from program to program, free or not.
Yes, some elitists will argue that some programs have a higher sample rate/quality output, which in a lot of cases is true, but so abysmally small that the human ear is barely even capable of telling the difference. In fact, in 99.9% of cases, your final product is compressed back down to an .mp3 for human listening anyway, so your ultra uber quality goes right out the window.
In short, don't worry about it. The free software you Googled will be fine.
Low Budget Mic Options
Is a Telefunken AR70 going to make you sound orgasmically good? Yes. Is it going to be $3,000 worth better than the $20 Amazon mic from a functional standpoint? No.
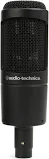
Let's face it, great mics are nice, but if we're talking about functionality and budget, then stay in the range that you can afford. A lot of people sleep on the $20 microphones that pop up on Amazon. You absolutely can get a great recording off of a budget microphone if it's set up correctly. Personally, I use an audio-technica AT2020 for my vocal recordings, and have been for probably 10 years. They go for about $80.
Cost isn't everything. It's actually better to have a proper, thought-out setup for a cheap microphone, than blowing the whole wad on an expensive mic that isn't being supported by an interface/outboard gear.
What to spend your energy and money on.
Power.
This is probably the most overlooked part of audio recording, so let's spend a minute or two on this.
There are two types of microphones - active and passive microphones.
 |  |
The big difference between active and passive microphones is that active mics require power to work correctly, where as passive ones do not. If you are going to use an active microphone, it's important to take a look at your source of power. They require something called 'phantom power' (48v) to work. If you go with an old-school non-USB active microphone, you'll need a phantom power unit, or an interface that provides it. Some of the newer USB versions of these mics no longer need it. Regardless, point being is that all mics are different and it's important to understand if you will need to power your mic or not. It's also important to know what is powering the thing that is powering your mic! For example, if your laptop (with power saver settings on) is powering your interface that is providing the phantom power, your laptop may not have a strong enough output of power for your mic to not buzz or hum. Dedicated power cables for your interface or phantom power unit (ie. a cable that plugs right into the wall, not pulls power from your laptop or desktop) is always going to yield more consistent, healthy results.
Active microphones are typically the ideal choice for studios because of their high sensitivity; they tend to pick up more of the detail and nuance of vocals and instruments in a studio setting. Passive mics are usually used for more live application. Because they are less sensitive, they are great for stages and live settings. The resilience of the passive mics will prevent feedback from occurring due to stage monitors, crowds, PA systems, and just loud environments in general. This isn't necessarily to say that you can't use a passive mic in a studio setting - it's all about what you're going for - but typically speaking, a passive mic will sound a bit more 'flat' in a studio setting.
It's always been a bit strange/silly to be that microphone brands are coming out with so many 'USB plug and play active microphones'. 95% of the time, these mics are being paired with laptops that are not meant to be used as a source of power. Right off the bat, you're potentially looking at damaged audio (buzzing, humming, distortion, artifacts, etc.), just because of the nature of how the mic is made. Not to say this happens all the time, but it has happened to me and I know of many others. If you have one of these, it's important that you look at how your mic is being powered to get a clean signal.
Some things you can do to mitigate these issues:
- Never try recording on battery (plug the laptop in).
- Make sure your computers 'power saver' settings are off.
- Purchase a powered USB hub option.
Additionally, if you're getting unwanted buzzing or humming you can also see if switching to a different power outlet helps (I know it sounds weird, but it happens way more often than you'd think).
At the end of the day, a USB condenser mic will always limit you a bit in the long run (the AT2020USB, Blue Snowball, etc.) and may give you annoying unwanted issues like humming and buzzing, but they're great for convenience and mobility. If you really want quality (but still a bit on a budget) I'd always go with a more standard set up with a microphone, XLR cables, and interface (and a phantom power brick if you're overly concerned like me).
How to speak into your mic.
Most people are pretty good with this, but it can make or break an audio recording. Especially when you're shooting for studio quality, one mic 'pop' can make an audio recording unusable for production.
First and foremost, use a pop filter where and whenever possible. This can eliminate the majority of the issues we're talking about below so this is top priority! You can purchase a pop filter online, or even make one out of a thin, stretchable material like pantyhose. The goal is to stop forceful air from hitting your mic in a way that will make it pop.
A lot of folks make the mistake of speaking directly into their microphone. This isn't ideal, as your mouth is constantly shooting air into the diaphragm of the mic. This can create distortion, popping, and can even break your microphone. You always want to speak a little bit past your microphone, keeping it slightly off center so the air coming out of your mouth blows past without actually entering. You want to make sure you get a healthy signal too - don't put it way off to the side of your head or anything - but having your mic at 2 o'clock in front of your face, as opposed to noon, can do wonders for your audio signal.
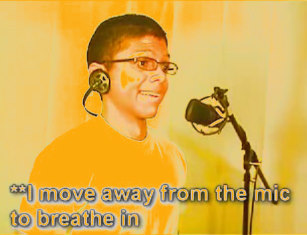
Take it from my dude, Tay Zonday.
Image Source
You can use a bit of your best judgement when considering distance. Typically, you want to be around 3-12 inches away, depending on your voice. If it's a dull whisper, you might move a bit closer, where as if you are screaming angrily at your mic (recording audio or setup-related from this post, either or) you might want to step away a bit.
Additionally, always make sure whatever is holding your mic is secure. A loose mic stand or mount can create unwanted noise if it's knocking and squeaking around. That's a silly way to ruin a high-quality take.
Bottom line (and this will eventually alleviate all issues) is make sure you understand how your mic behaves. Troubleshoot, troubleshoot, troubleshoot! Fool around with it. Run some test recordings before you go in for the big one. Analyze the way your voice sounds on the microphone and experiment with ways to fix issues. Voice not pronounced enough? Move a little closer. Popping in your audio take? Off-set your mic a tad from your face. Your mic will compliment you greatly if you take the time to understand it.
Don't use old/broken gear.
On a budget, I know this one is a huge pain in the ass. No one wants to keep dumping more money into maintaining/replacing equipment they already sprung for, but it's inevitably important. A buzzing/humming issue could just be as simple as a bad mic cable.
If you're getting audio problems and you have the option to switch out some cables, or try a different environment, do that first. It's annoying, but a simple fix like that is worth checking if it means not having to purchase a new mic or interface.
Room sound.
You'd be amazed at how much a clean room can have on an audio take. We may not be able to afford super fancy studio-quality audio treatment, but there are some fun DIY methods to replicating it.
First of all, it's important to analyze and understand what you're dealing with. Go into the room that you record in, and clap your hands. What do you hear? Is sound bouncing around? Where do you hear it, higher in the room or low? This is where you can utilize sound dampening to improve your recordings.
Essentially, any soft, plushy object can dampen sound. Crowding your room with objects and soft things can greatly help to minimize the amount of room sound in a recording.
Think of sound like a tennis ball. Sound bounces back and forth between parallel surfaces. Your goal is to keep it from bouncing off anything by deadening parallel walls and surfaces. Where as a bed sheet might not be very effective at stopping a throw because of being so thin, a heavy blanket would likely knock the ball down right where it hits. That's how you want to think when treating walls and parallel surfaces where sound may bounce.
Now, if your room is so far-gone that it's useless to try and think about treating your room, work on treating your own immediate surroundings. For example, I know this sounds silly, but hiding under a heavy blanket can create an awesome little sound-proofed space. You don't want the ruffling of the blanket to ruin your recording, so you'll have to be still and steady, but something like this can really help to eliminate unwanted room sound. Be creative with it. Harness your inner child and build a blanket fort studio.
Additionally, make sure you close windows, kick out roommates, maybe give your dog a treat to keep them occupied - you don't want background sources adding their own soundtrack.
To Conclude...
I know this is a lot of information coming in all at once, but really once you internalize some of these simple guidelines, it becomes super easy to get good takes. A little bit of practice and diligence goes a long way.
As promised, let's run a quick little summary for those who can't be bothered with this overly long rant.
TL;DR
If your audio doesn't sound great with your mic...
- Check your power source. No 'power saver' settings on laptops. Try different power strips/outlets to see if it eliminates the problem.
- Buy a phantom power block for active mics.
- Don't speak directly into your mic, can cause popping. Speak at 1-2 o'clock instead of noon. Use a pop filter (DIY pantyhose or not).
- Check your cables for buzzing/humming.
- Record your voice and study how it sounds. It's amazing how a little bit of attention and research can improve your sound. Experiment with distance, positioning, and environment.
- Record under a blanket or in a closet to reduce room sound. Or if you have the resources to treat the room itself with blankets, pillows, etc. that works too.
- Secure your microphone firmly to reduce bumps, booms, and unwanted ambiance.
Here's a few budget bundles for folks looking to invest in a starter set up:
Ultra-low Budget - $28
Fifine Usb Podcast Condenser Microphone - USB plug and play mic. No additional equipment needed to start. No pop filter and such will mean you may have to get DIY with some of the aforementioned issues in this post to get a clean take, but it has good reviews for what it is.
Blue Snowball USB Mic - $50
Blue Snowball - Very popular with podcasters and livestreamers, tried and true, great reviews. USB mics have been known to run into minor software/driver issues which may cause headaches, but nothing crazy. No pop filter or extra gear means you'll have to get creative in that regard. Active mic will be pleasantly more sensitive and responsive, but delicate.
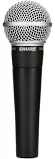
SM58 - $100 (mic cable and adapter not included, roughly about $15-30 bucks)
SM58 - Industry standard for passive microphones. Very tried and true, but typically used for live settings. May need to rely on post-production to liven up the sound a little bit. Still a solid choice and no power to hassle with. This is not a USB mic, so you will need an adapter/mic cable with this, or some form of connection to your PC. Make sure you look into how your computer accepts mic inputs before you purchase. Once you know, you will need to buy an XLR-to-[insert-jack-size-here] adapter. You will also need a mic cable.
AT2020 USB - $150
AT2020USB - Pretty much plug and play here, not much set up or need for additional equipment. USB mics have been known to run into minor software/driver issues which may cause headaches, but nothing crazy. No pop filter or extra gear means you'll have to get creative in that regard. Active mic will be pleasantly more sensitive and responsive, but delicate.
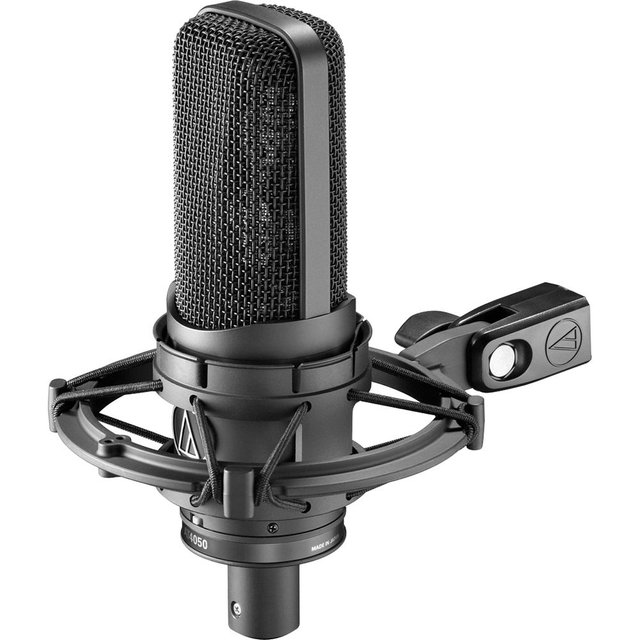
AT2020 Standard Gold Bundle - $190
AT2020 Gold Bundle - Comes with a microphone, cable, pop filter, and interface. Solid economy choice. Active mic will be pleasantly more sensitive and responsive, but delicate. Non-USB mics are typically more reliable and less issues with software compatibility. Interface has two inputs, which also allow for 1/4 inch instrument cables.
Thanks for reading, happy recording!

You can join the 'Steemit Local Music Society' here:
Click here to join on Discord.
Thanks for the article bro, Great tips, Im a fan of Audio Technica :D , those USB hubs are really useful.
Yeah dude, AT has great mics for so cheap. Solid stuff. Thanks for stopping in!
I also like AT 4050
and too I like Neuman mics which It starts with high prices , but all I know about it is that they have a great quality in recording
Nice dude, I've really been looking forward to checking out some of the other options around when I get my funds up. There's just always bills to pay before equipment spending, never seems to level out, you know 😂. What mic did you use for your Steem Monsters reading? Sounded great, had a nice crisp brightness to it.
you know bro, I have to say that we are just the same in this path :DD , I couldnt reach that point to buy all the stuffs that I need, but I used some stuffs to make my mic sounds pro, Its a plugin which make every instrument sound better, I used a Soundgoodizer on my mic (Mode : A) . I also used it for a Cello Plugin, it made it sound more realisitic.
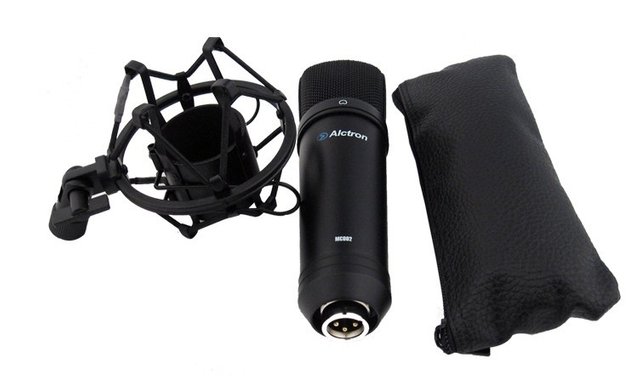
I have an Alctron MC 002 which is not bad, but not a pro mic, but I am using it for recording acoustic guitar and vocals.
here is my mic :
Nice dude, sounds great! Nothing wrong with making due with what you have. A lot of the time experience and a little patience will beat expensive equipment!
Thank you so much :D yes sure :))
This is an AWESOME article. Tons of great information for those looking to do voice work! I love that you mention some free or low cost options that can make a big difference.
I think I need to do a better job of moving away from the mic to breath. Haha that’s a great point!
Thanks so much @coruscate, glad you're diggin' it! Loved your SM audition too BTW!
Thank you so much you absolute life saver you! I wanted to join in on the fun, but I was really annoyed with my recording quality. I've never really tried to record my voice before and the low buzzing noise was driving me crazy but I just couldn't figure out how to make it go away. It was fun anyways, but now I'll have some idea of how to fix the problem next time lol.
Of course @blueteddy, really glad it helped! Mic issues can be a huge pain in the butt, I know lol. Don't hesitate to reach out if you ever need some help troubleshooting!
I have a snowball mic and have had a few of the issues you mention here. I will certainly try these mic- techniques too. Great post and very helpful, thanks.
Yeah I actually really like the Blue USB mics from a functional standpoint, they sound pretty great for the price points. But that whole family of USB microphones tend to run into compatibility issues that can be worked around, but it's kind of a pain. Especially for someone who may just be plugging in a mic for the first time, the last thing you want to do is run through a bunch of driver/software troubleshooting lol.
Thanks for stopping by @article61!
lol I found that out when first trying it on my fl8 software. Got some free-time tomorrow so will give your advice a try. see you around bud
Very useful article - I am still learning the ropes audio-wise for my radio shows on MSP Waves.
Host of The Alternative Lifestyle Show on MSP Waves Radio.
Editor of the Weekly Schedule of Steem Radio Shows.
Founder of the A Dollar A Day charitable giving project.
Great info here. I purchased a Blue Yeti a while back based on recommendations, but then realized that #1 I couldn't use it with my Sony or my goPro and it's really a pain trying to use it with my Android, so I usually use it with my laptop, which is bulky and not my first choice. I'm curious about the lapel mic that you referenced though. I am definitely going to look into that. Thanks! Really excited for this new advneture!
Happy to help! I'm a little bummed to say that the lapel mics I've tried so far seemed pretty under the bar. I'm torn too because it's almost too much so, to the point where I'm wondering if I got a defective one. Like the quality doesn't match the reviews lol. I don't know, for the $20 range it was still a good effort to try but I'd love to find a cheap lapel mic that I'm actually excited about.
So far, it makes the most sense to me to go with a Blue option (Yeti is sweet, I was going to recommend the Snowball Ice to the community for voice overs) and hook up to the PC I think.
@harrisonmir
Very inspirational. We are not a product of our circumstances. Rather, we are products of our decisions.