Cleaning the 'pot' on a Crybaby Wah (or anything for that matter)
All photos by veckinon
Preface
I recently read an article by @amberyooper about the work they had done on their bootleg bassman amp. This got me thinking, that I too could contribute to the pool of knowledge on electronics and instrument construction and repair here on steemit and maybe help encourage others to take an interest in the practice. So here is my first article on the subject. This article, though not completely void or technical terms, is written with the beginner in mind and offers a diy solution to noisy electronics that is simple and applicable to a wide range of electronics equipment. I hope you find it useful.
The Pedal
A very brief, very simple explanation of the wah pedal.
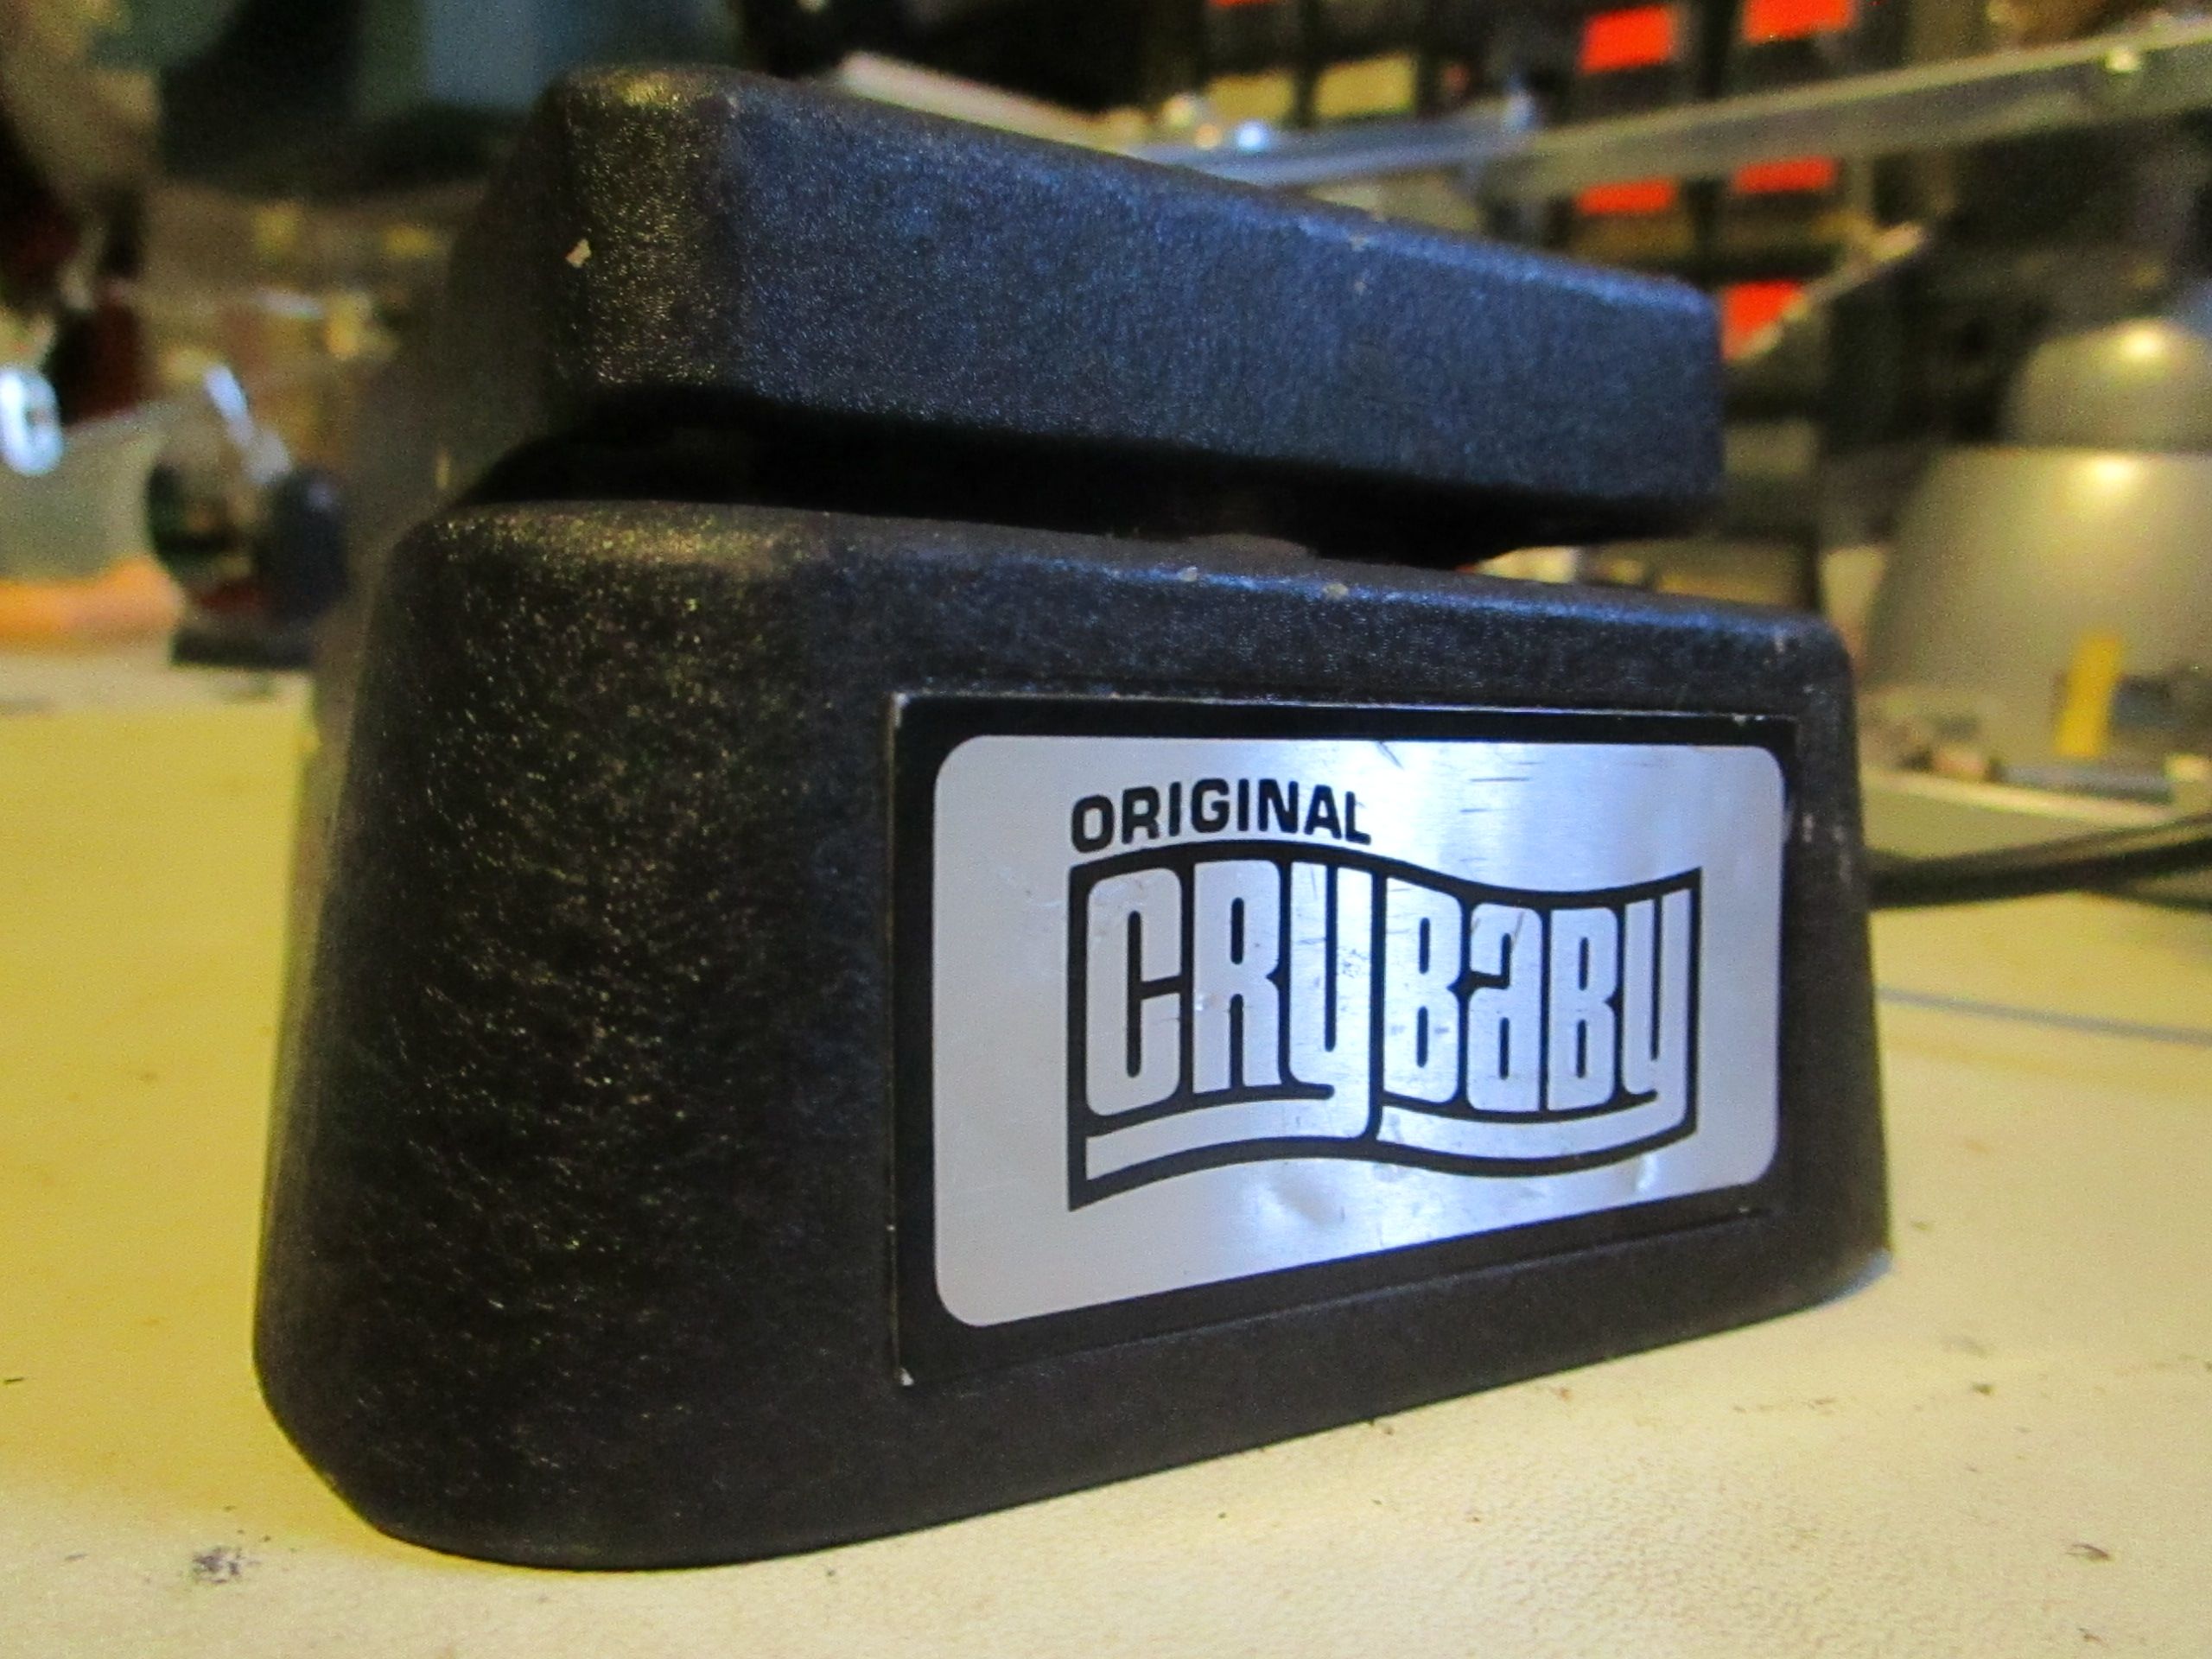
I have an early 1990’s Crybaby GCB-95, that I picked up used sometime around 96-97. The Crybaby wah, in essence, is a variable frequency filter controlled by a potentiometer or ‘pot’ (pots are the knobby things on your guitars and amps, they are resistors that can be adjusted by turning the knob). Another example of a potentiometer-controlled filter is the tone-knob on your guitar or bass. In fact, you can kind of think of a wah pedal as an active tone knob for your instrument that you just happen to turn with your foot. This is of course, an oversimplification. But it is essentially how it works. As you move the pedal up and down different frequencies are either amplified or attenuated giving the instrument a more vocal quality.
The Problem
Now that we know what a wah pedal is, I would like to redirect us to the task at hand. This pedal is over 25 years old and has seen both a lot of abuse and a lot of shelf time. Through the years it has become noisier and scratchier to the point that it isn’t really usable. The reason this happens is because of dirty pots. These are not the pots you have after making soup, but those knobby things I mentioned earlier. Dust and debris can build up inside of a pot and make it sound scratchy and harsh. In some cases, buildup can even create small dead spots on the resistive material in the pot.
The Solution
I am going to disassemble the pedal and the pot and clean the pot using contact cleaner and then reassemble it. This procedure can be replicated for any dirty pot on just about any instrument, amp, or piece of equipment, although the complexity of the removal may vary from project to project.
Removing the cover
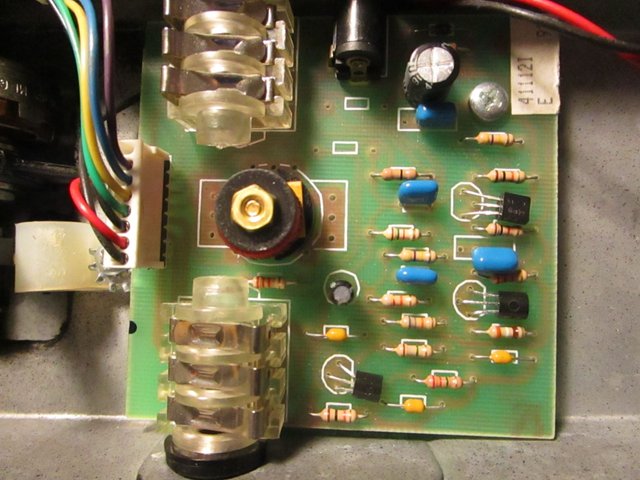
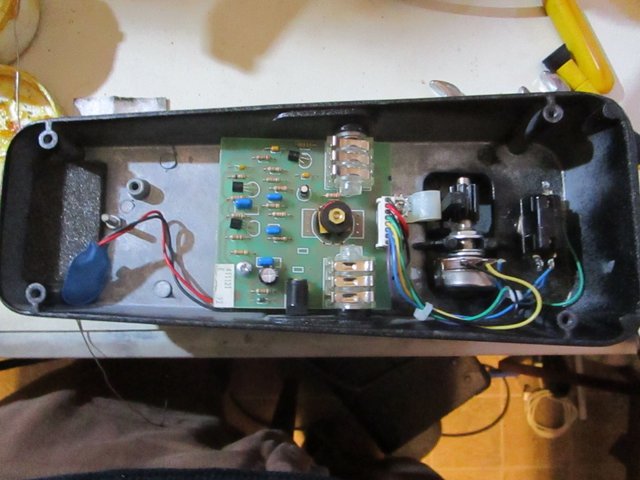
First, I am going to remove the rear panel off of the pedal. This is easy to accomplish on the crybaby; you simply unscrew the feet from the pedal and remove the aluminium cover. The inside of the pedal is pretty simple. There is a small circuit board, sparsely populated with resistors, capacitors, transistors, and an inductor, suggesting the active RLC circuitry (RLC stands for ‘Resistance’ ‘Inductance’ and ‘Capacitance’. Why is there and L and why isn’t it 'RIC' you ask? Because 'I' is reserved for current. The L actually is in honor of physicist Heinrich Lenz). The way crybabies are usually dated is by identifying period specific revisions. For example the pcb (printed circuit board) mounted input and output jacks, the brass knot on top of the inductor all point to this pedal likely being produced between 1990 and 1992. You can also see from the tag on the board that it is a revision E pedal.
the board
Removing the pot
the pot
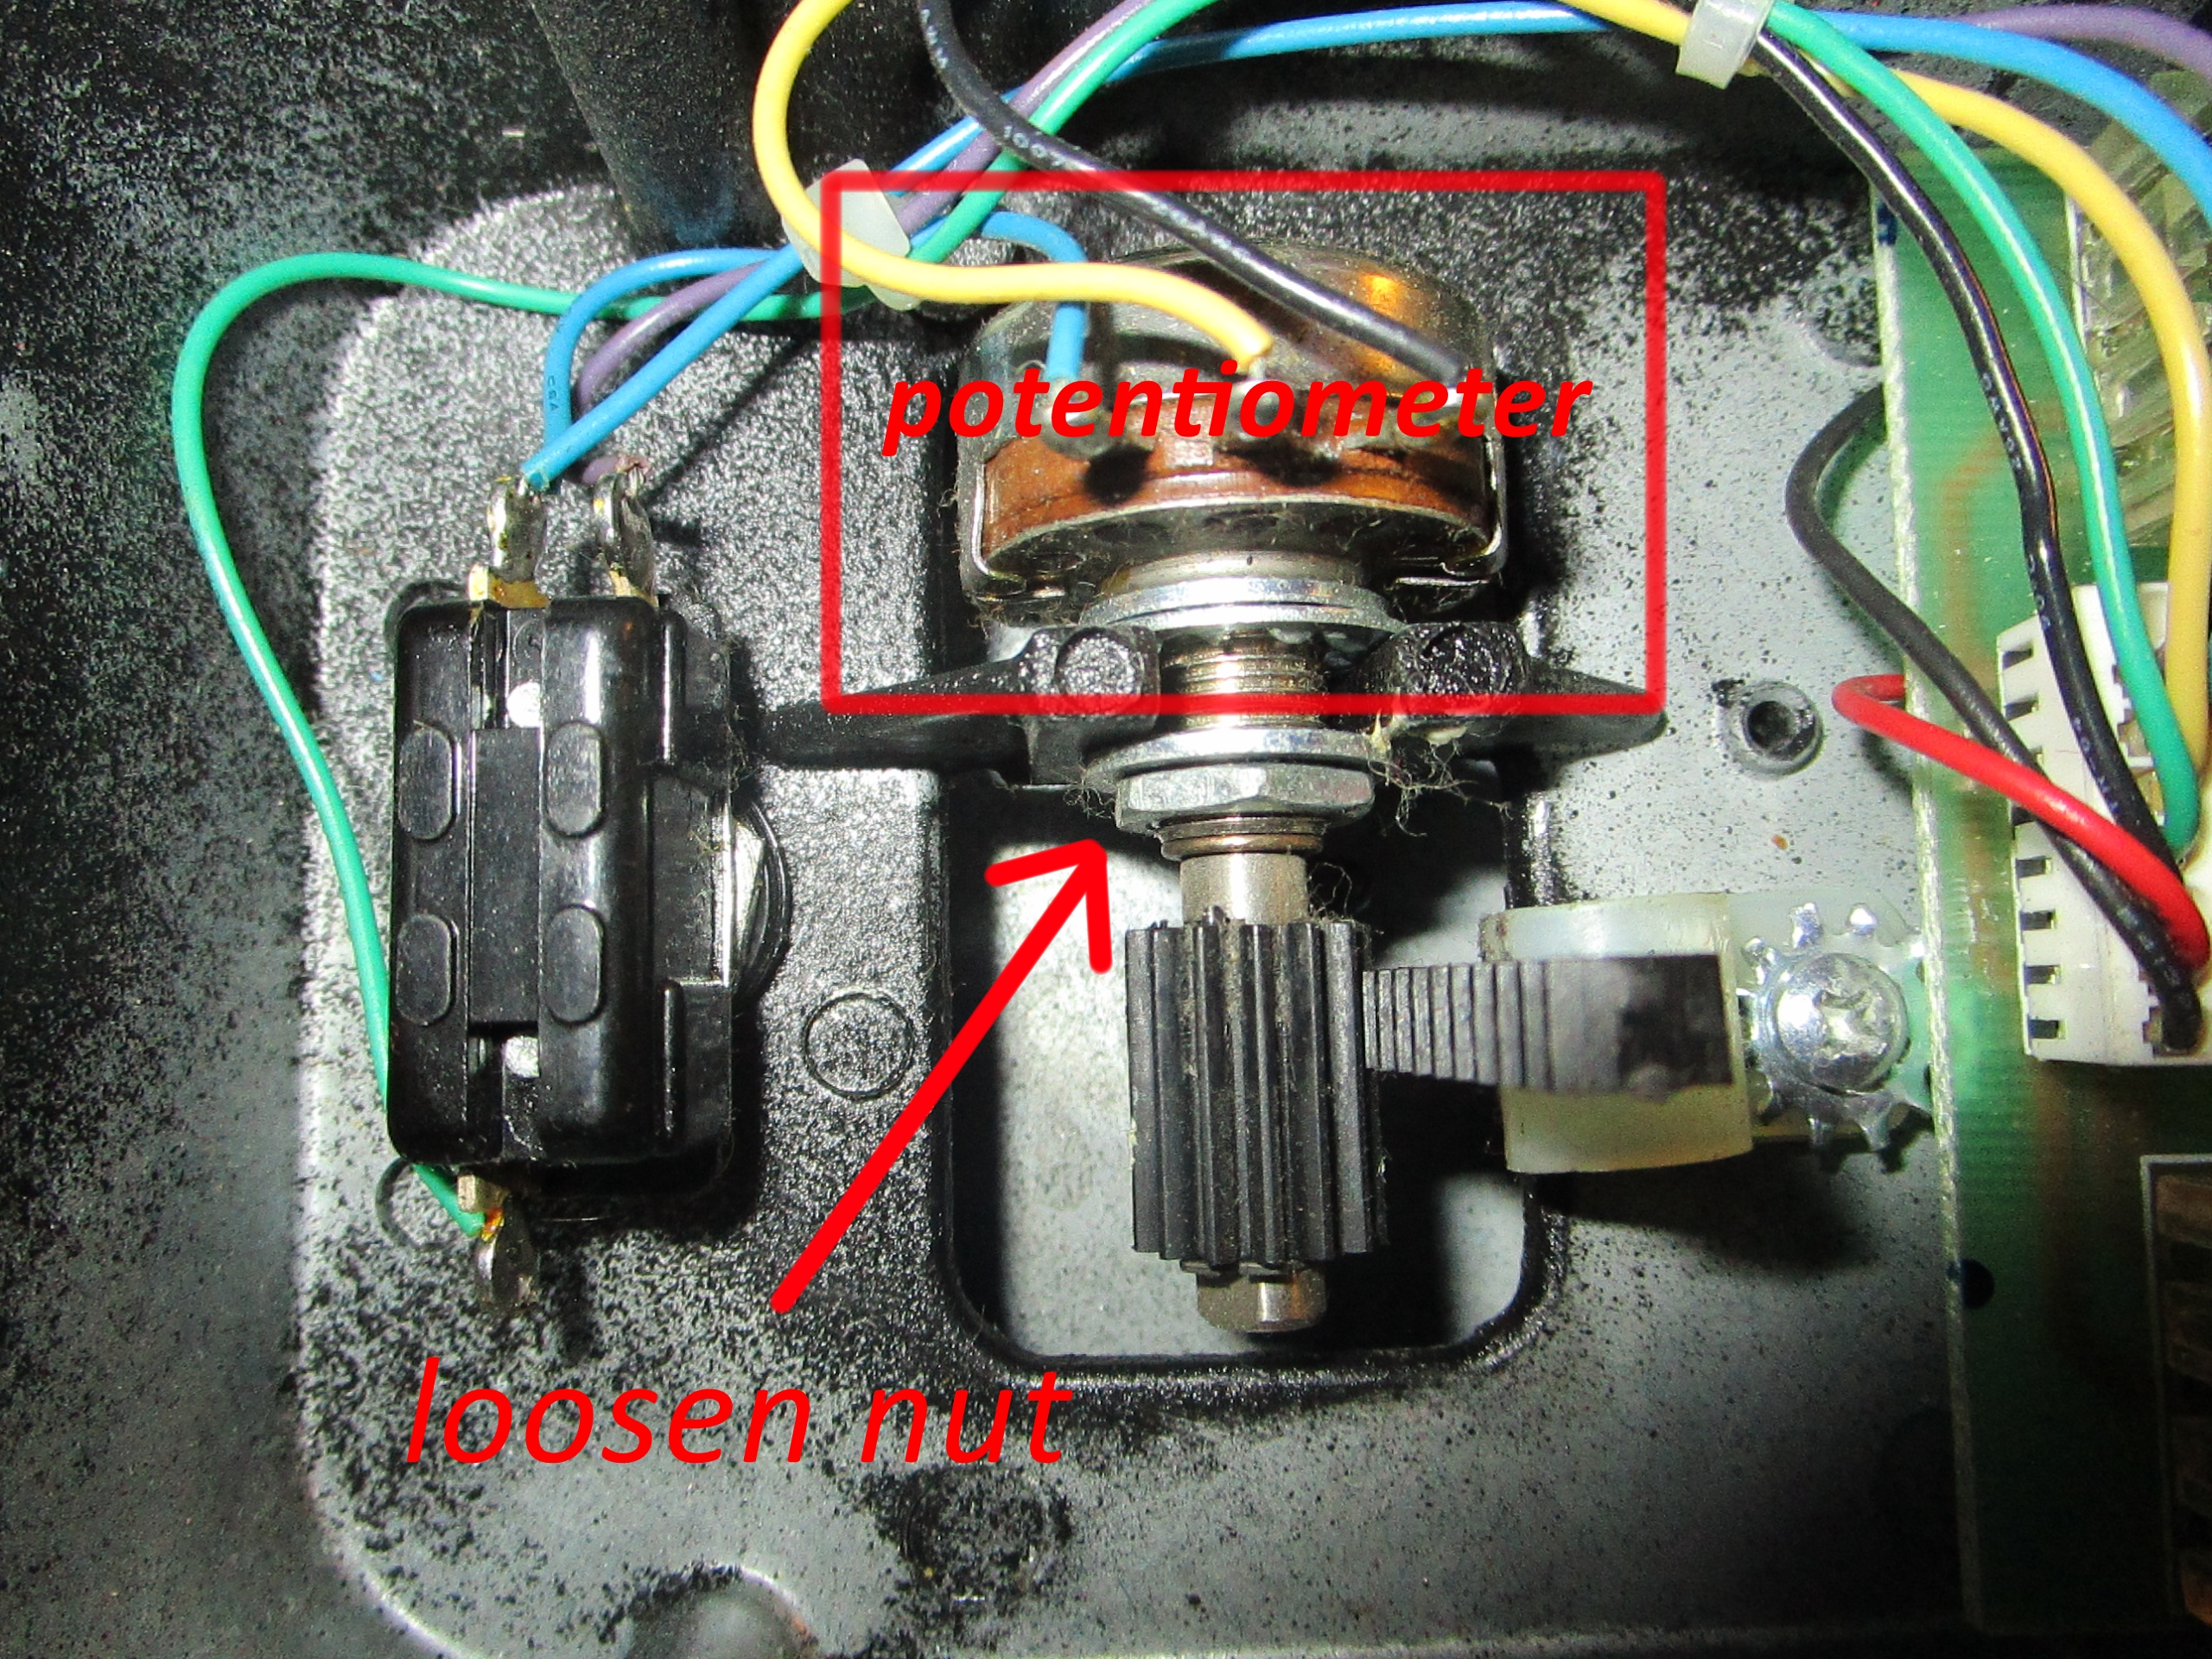
Slightly above the circuit board, you find the pot which is driven/turned by a rack and pinion type gear system connecting the pot to the pedal. There is a nut that helps hold the pot in place. I used a 13 mm wrench to loosen the nut (a ½ inch may have also worked) and pulled the pot out, leaving the wires attached. It is best to loosen the nut while keeping the pedal in the closed position so that the pot doesn’t turn while you turn the nut. Most pots have little metal tabs that you can pry back to deconstruct the pot and get inside.
pry tabs
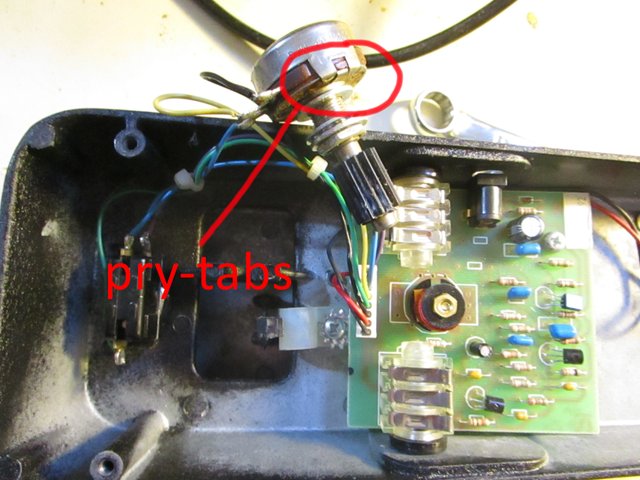
On this wah pedal potentiometer, there were four and two of them had been glued with some very strong adhesive and could not be pried open. Not to be deterred, I decided “who needs four tabs anyways” and cut them off with my Dremel tool. I have taken apart a lot of things and very rarely have I seen pots that were intentionally made inaccessible. Part of me can’t help but wonder if the glued tabs were to encourage people to just buy another pedal instead of fixing their old one.
Cleaning the pot
Once I got the pot open there were large ammounts of residue in that were already evident in the cover. This pot works by using a pad of conductive material (called the ‘wiper’) that travels along a conductive path while you turn it. The longer or shorter you make the path, by turning the knob, the more or less resistance there is, respectively. The wiper in this pot is somewhat similar to a carbon brush in an old sewing machine motor and with frequent use it can begin to degrade. In a pot sealed like this everything that is worn off of the conductor stays inside the pot and eventually creates noise and dead spots. I used CRC Quick Dry Electronics Cleaner and sprayed the pot thoroughly and then used a small cloth to wipe down all the surface that the wiper came in contact with. I then rotated the pot a few times and repeated the process. I then reassemble the put and pushed the two remaining tabs back into place to hold everything together
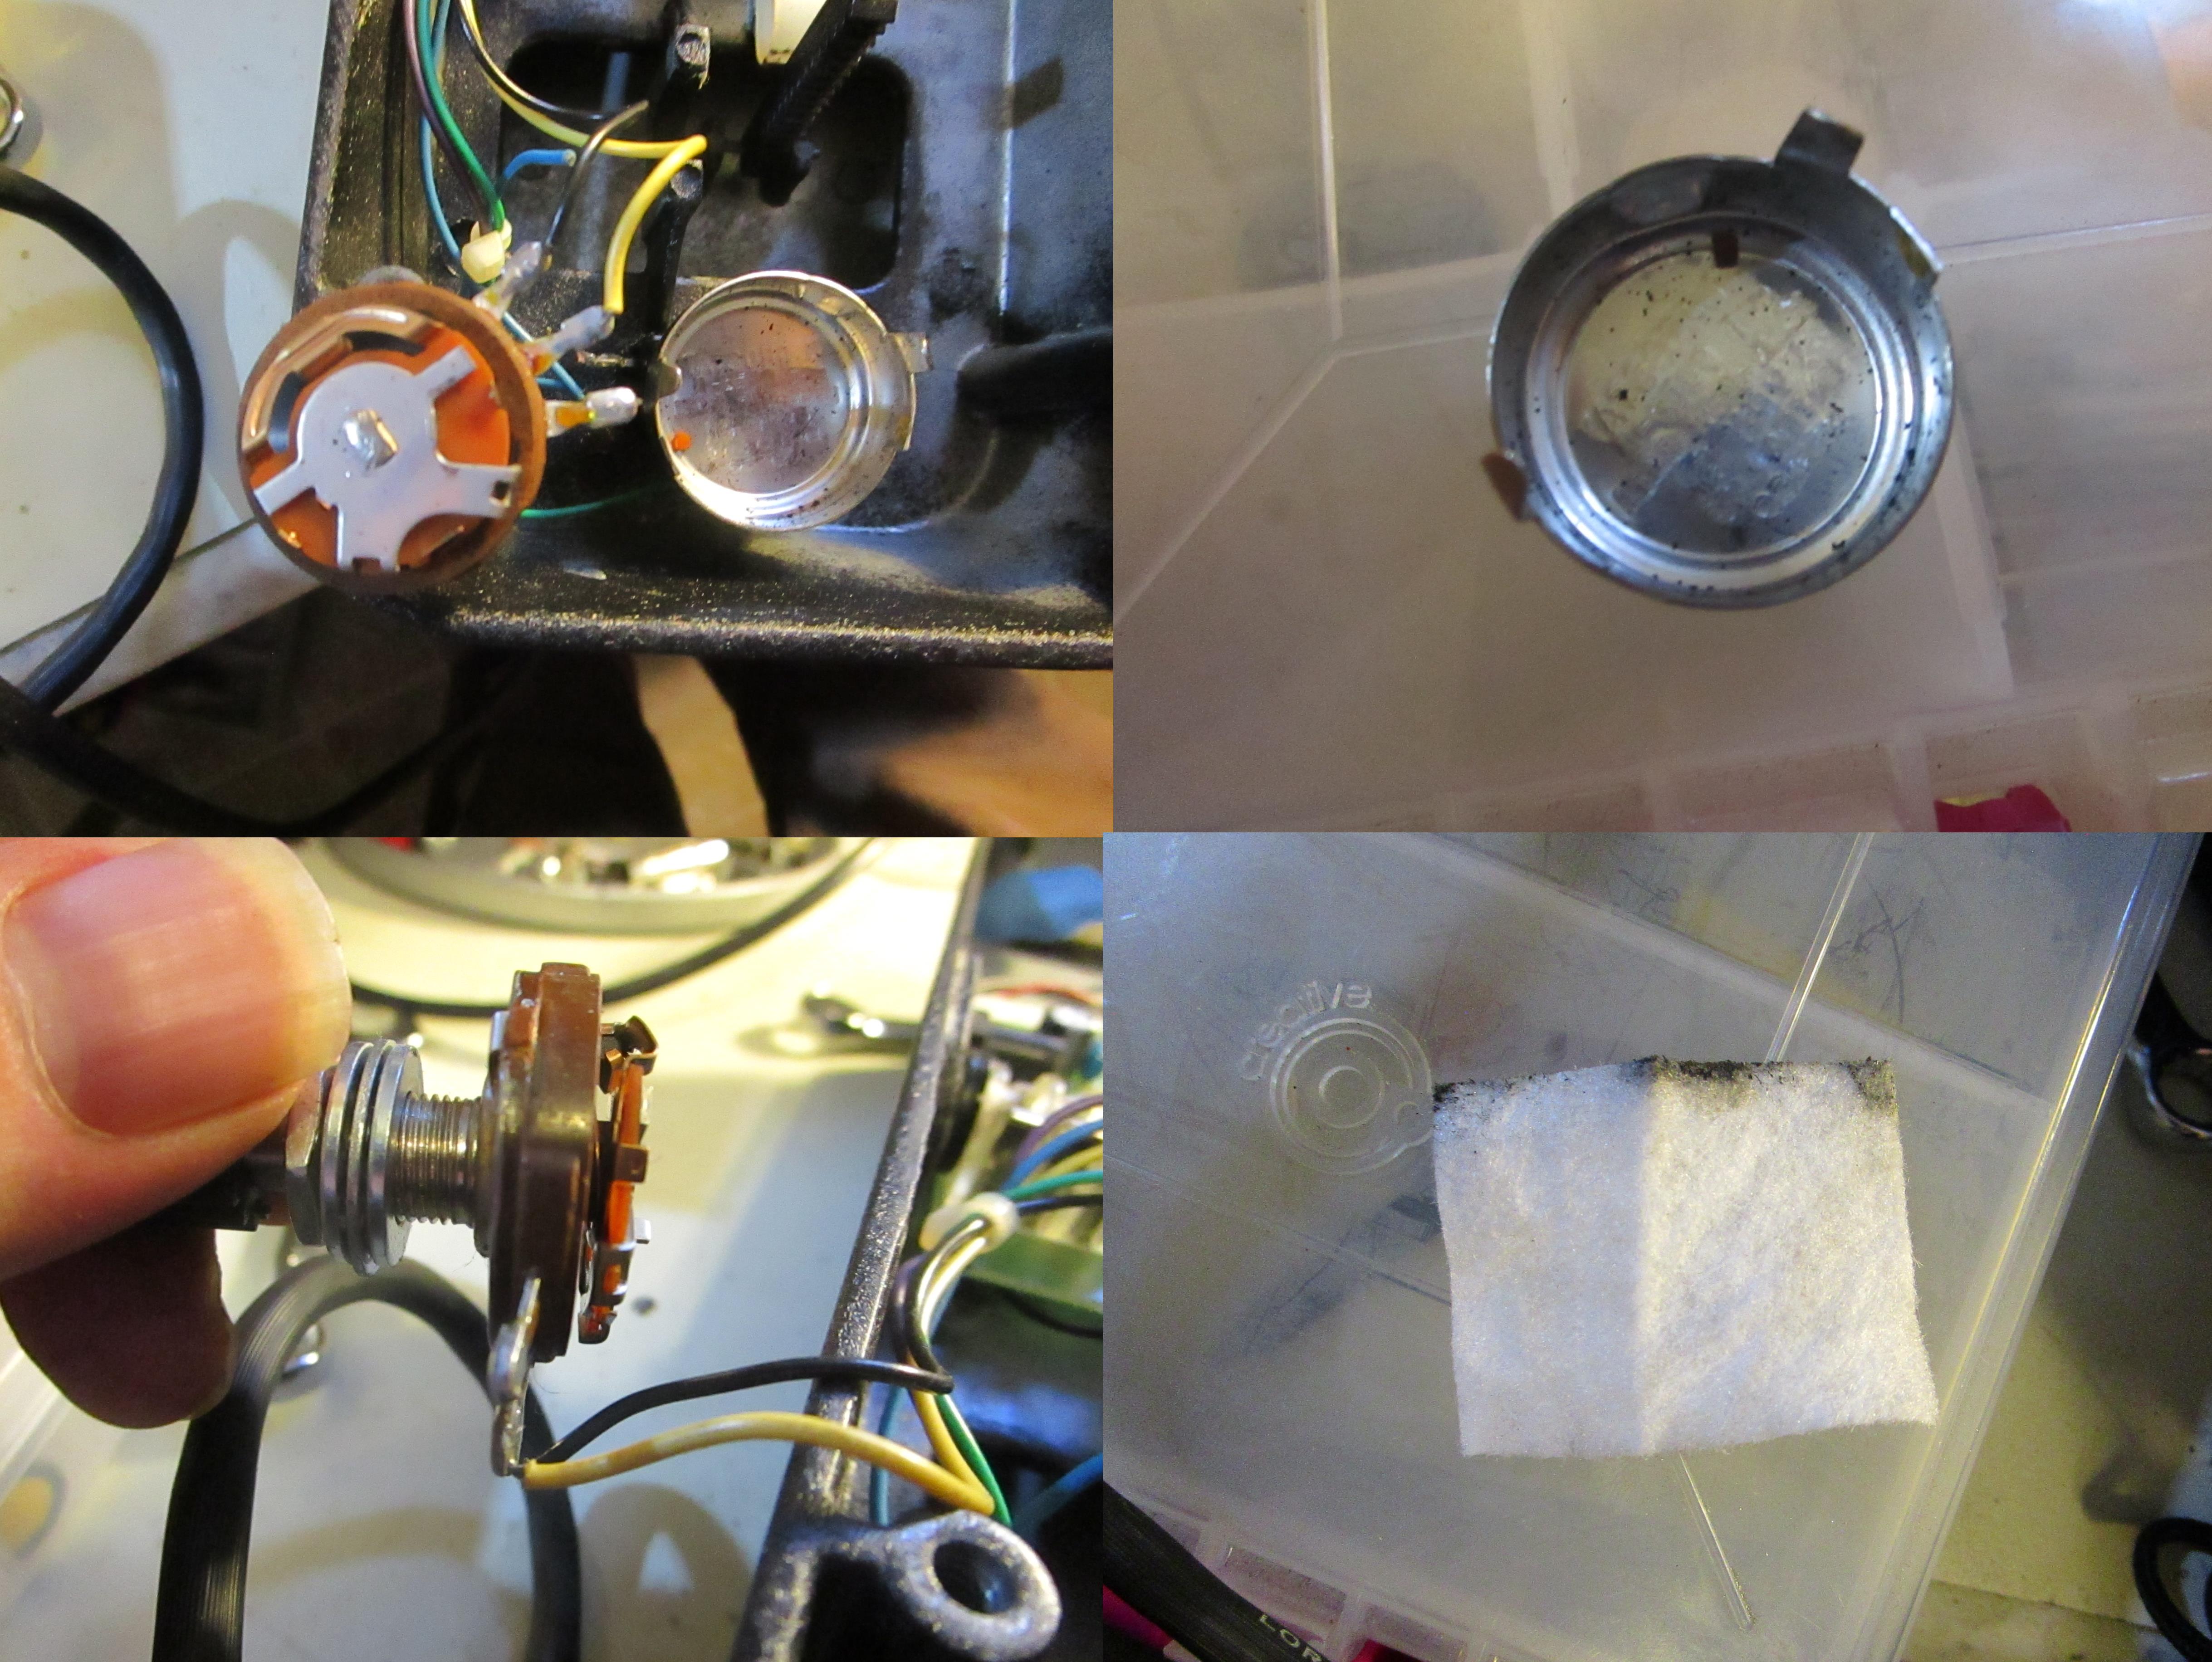
the gunky gunk
Whoopsies
I noticed at some point that I had broken one of the wires where it reconnected to the pot. Probably sometime during the Dremel tool thing. As tempted as I was to just heat up the old solder blob and jam the wire back in there and call it good, I decided I should do the right thing and suck off the old solder and resolder the wire with fresh solder. So I heated up the soldering iron and fixed the wire. It only added another minute or two to the process.
Puttin' it all back together
Afterwards, I put the pot back inside the pedal and retightened the 13mm nut. When putting the pot back, you need to make sure that it is turned all the way in the appropriate direction to work with your pedals orientation. If you still have the pedal closed (with the button depressed), I believe that means you should turn the knob all the way counter-clockwise before replacing it.
all done
Afterwards just replace the cover and you are good to go. The scratchiness should be all gone. The whole process took me about fifteen minutes and that included fixing the wire I fucked up. As I mentioned earlier, this can be done to just about any noisy pot and even many mechanical switches. Just look for the little metal pry-tabs. And be careful when you open them. Some pots or switches may have parts that could fall out.
I hope you found this article helpful. If so, feel free to upvote, follow or resteem. As always, thanks for looking!!
Best wishes,
@veckinon
Awesome stuff brother, I have a volume pedal laying around with some issues as well.. i think its the pot, but i need to get around to dissembling it... maybe i'll do it over the weekend.. volume has to be even simpler, im sure.
Good stuff, and good pics brother!
The pot cleaning process is essentially the same. Getting the pot out could be easier or even harder depending on the setup. For example, I have an Ernie Ball volume pedal that uses a cable pulley system to turn the pot as opposed to a rack and pinion gear. This can make it just a touch more tricky to remove and replace the pot, but as long as you are vigilant about reassembling it correctly it is still a very doable project. It just might take you a couple of extra minutes.
Awesome! I have a lot of gear that has dusty pots, and I've been meaning to take them apart and clean them out. The most annoying one is the volume knob on my Telecaster. I've been putting it off too long lol
It is a pretty fast job on a guitar. Some pots aren't completely sealed and you can even find gaps to spray cleaner inside and then turn them a few times and let them dry. This isn't as thorough, but can be enough in some cases.
That's what I'm hoping. I've watched a friend do it before and it worked last time. I just need to get one of those computer air duster cans.
If the compressed air doesn't completely fix it, be sure to try quick dry electronics cleaner. You can actually get it at auto parts stores. I think I got my last can at O'Reilly auto parts. Just look for the red can like the one in the picture above.
Sweet I will for sure! Thanks for the info :)
Congratulations! This post has been upvoted from the communal account, @minnowsupport, by veckinon from the Minnow Support Project. It's a witness project run by aggroed, ausbitbank, teamsteem, theprophet0, someguy123, neoxian, followbtcnews, and netuoso. The goal is to help Steemit grow by supporting Minnows. Please find us at the Peace, Abundance, and Liberty Network (PALnet) Discord Channel. It's a completely public and open space to all members of the Steemit community who voluntarily choose to be there.
If you would like to delegate to the Minnow Support Project you can do so by clicking on the following links: 50SP, 100SP, 250SP, 500SP, 1000SP, 5000SP.
Be sure to leave at least 50SP undelegated on your account.