How to create a meme using GIMP
 |
Create your first meme |
Ongoing Meme Contest
There is an ongoing meme contest hosted by @fibra59, the above image is from the #69 contest. He will supply an image every week, all you have to do is add some funny text, create a post with what you created, and comment on the active contest, sharing the link to your post. It is best to also put your image in the comment. It will double your chances for upvoting.
Different Memes
When you look at the entries, they are very different. Different fonts, different text placement, different text color. I am not sure whether people do that to standout, or just because they don't know how it is done.
Step 1 - Download the Image
Download the supplied image to your computer or use copy/paste to load the image into GIMP right away. I assume you already know what text you want to add. If the there is enough room for the text already then you can skip Step 2
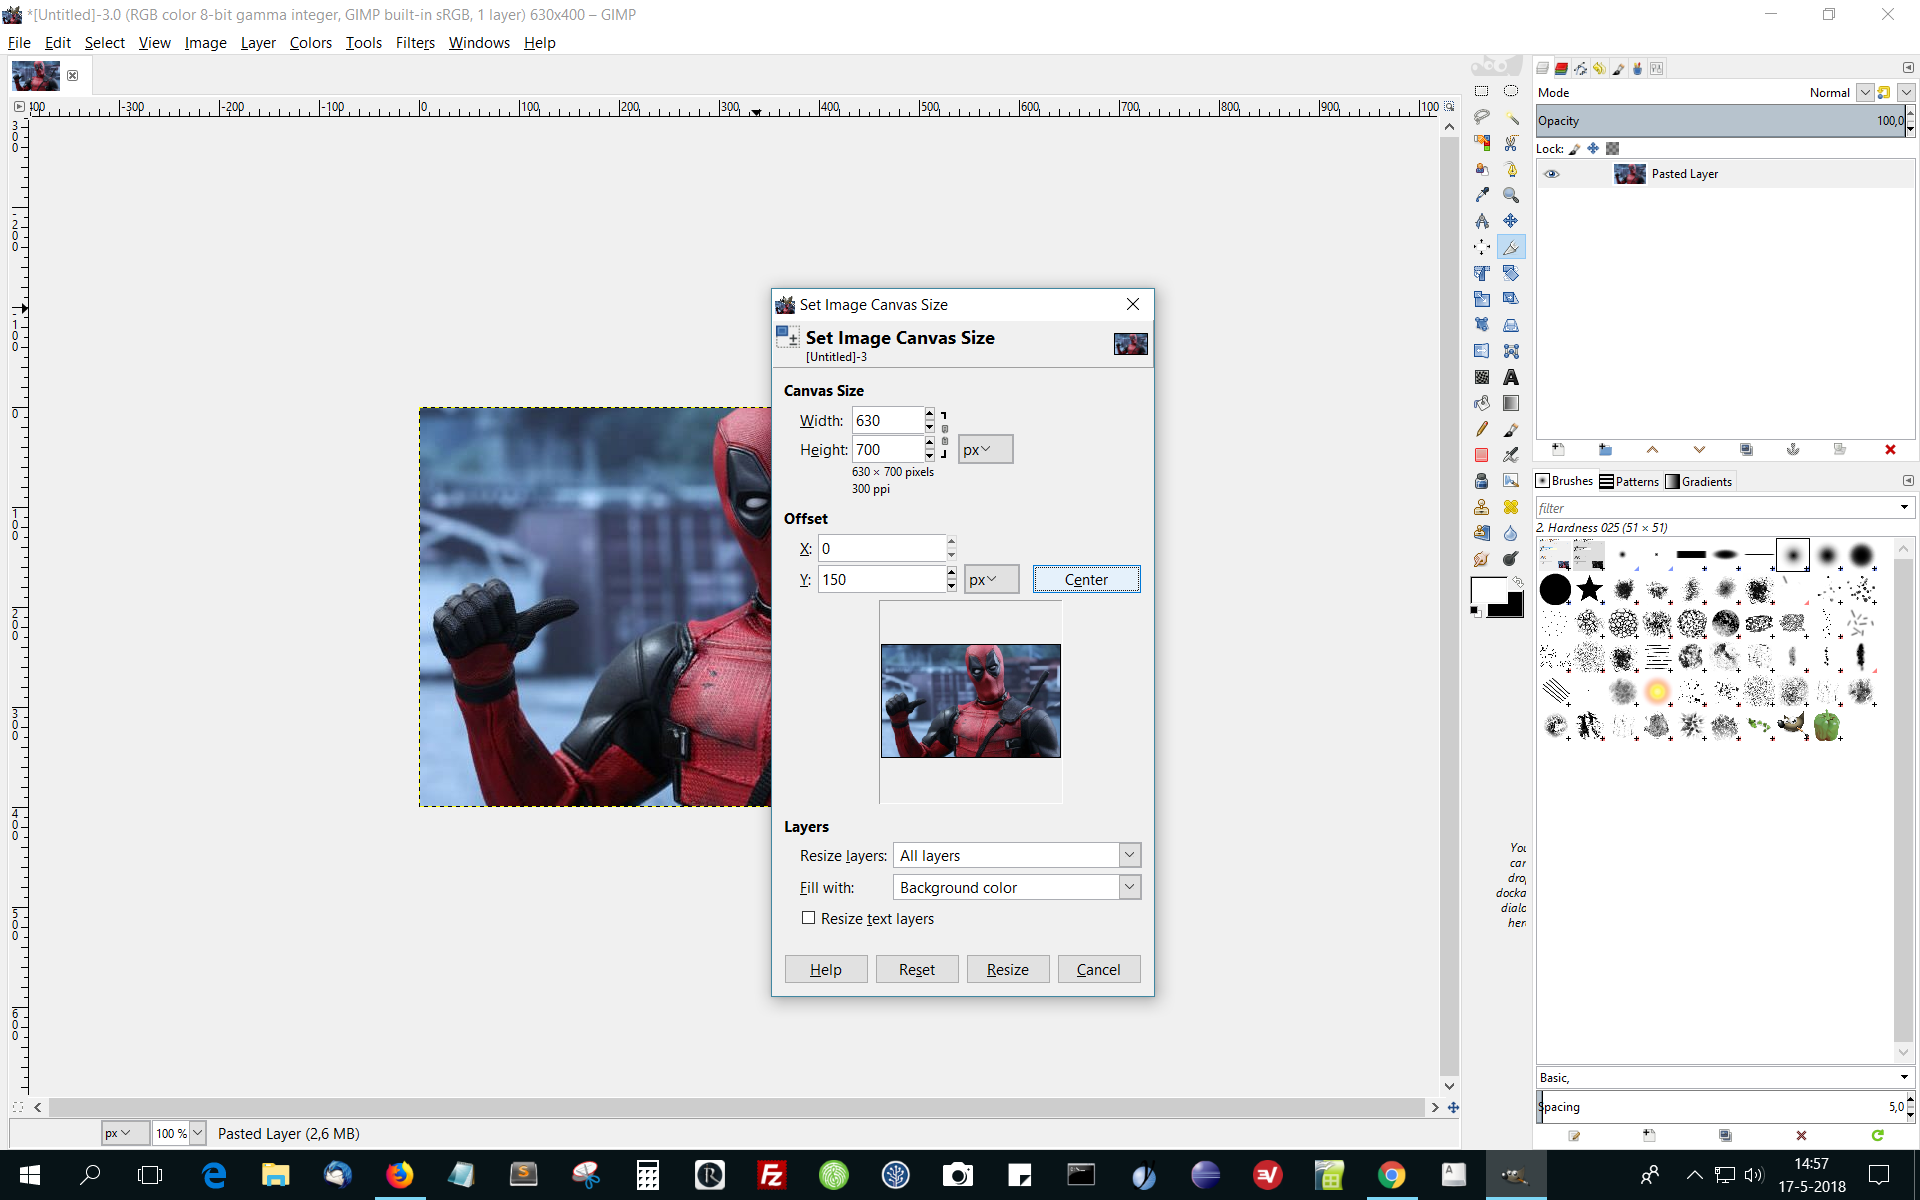
Step 2 - Adjusting Canvas Size
If there is not enough room for your text you can add extra space at the top and the bottom of the image.
Click Image -> Canvas Size

Add 300px to the height setting of the image
then click 'Center'
Set 'Resize Layers' to 'All Layers'
Set 'Fill in' to 'Background Color' (assuming your background color is set to black)
Click 'Resize'
Step 3 - Adding Text
Your image should look like this
The font that is commonly used for memes is Imperial. It is present on most computers but if it isn't you can download the font for free from wfonts.com
Double click the Text tool (the big A in the toolbox)
Set 'Justify' to 'centered'
Set 'Font' to 'Impact'
Set 'Size' to '38' (you can always change this later)
Set 'Color' to 'White'
Now click in the upper black border you added. Typ your text, all in capitals.
Click the lower black border and add some text there too
Step 4 - Text placement
You can move the text around using the Move-tool, it looks like an arrowed cross. Make sure you are on the correct layer. The layer should be blue in the layer menu at the top right of the screen.
To select text, always click on a character.
Step 5 - Save and Plublish
You can save your image as a Gimp file, this is useful in case you want to adjust something later on.
You can also export the image as a png, jpg or any of the other available formats. This exported file can be used for uploading to a steemit.com post. But there is a quicker way.
Click 'Image' in the main menu, click 'Flatten image'. Now the image has changed to a one layer image. The text layers have been merged with the image layer.
Press Ctrl+A to select the whole image
Press Ctrl+C to copy the image to the clipboard
Go to your Steemit post and press Ctrl+V. The image will be inserted in your post.
Text in image
When text is printed over the image itself, people often use black outlined text. The text is created the same way as we did but an additional function is performed.
The way outlined text is created is not by outlining the text. It is created by adding a layer below the white text layer, with the same text, a little bigger, in black. So it is not a white character with a black outline. It is two sets of characters one white one black, the black one a bit larger than the white one.
Creating Outlined Text
Add text to the image.
Duplicate the text layer
Click the lower on of those layers to make it the active layer
Right click the text and select 'Layer' -> 'Text to Path'
Right click the text and select 'Select'-> 'From Path'
Right click the text and select 'Select'-> 'Grow'
Set size to 3px
Click 'Edit' in the main menu, select 'Fill with FG/BG Color' (which one is black)
Now your image should look like this
Leave a comment when you get stuck or want to share your meme.
Don't forget to check out the meme contest @fibra59
Meme Image by @fibra59
Screencaptures by me