Focus Stacking Tutorial - Part 1 - Why Focus Stack.
Focus Stacking Tutorial - Part 1.
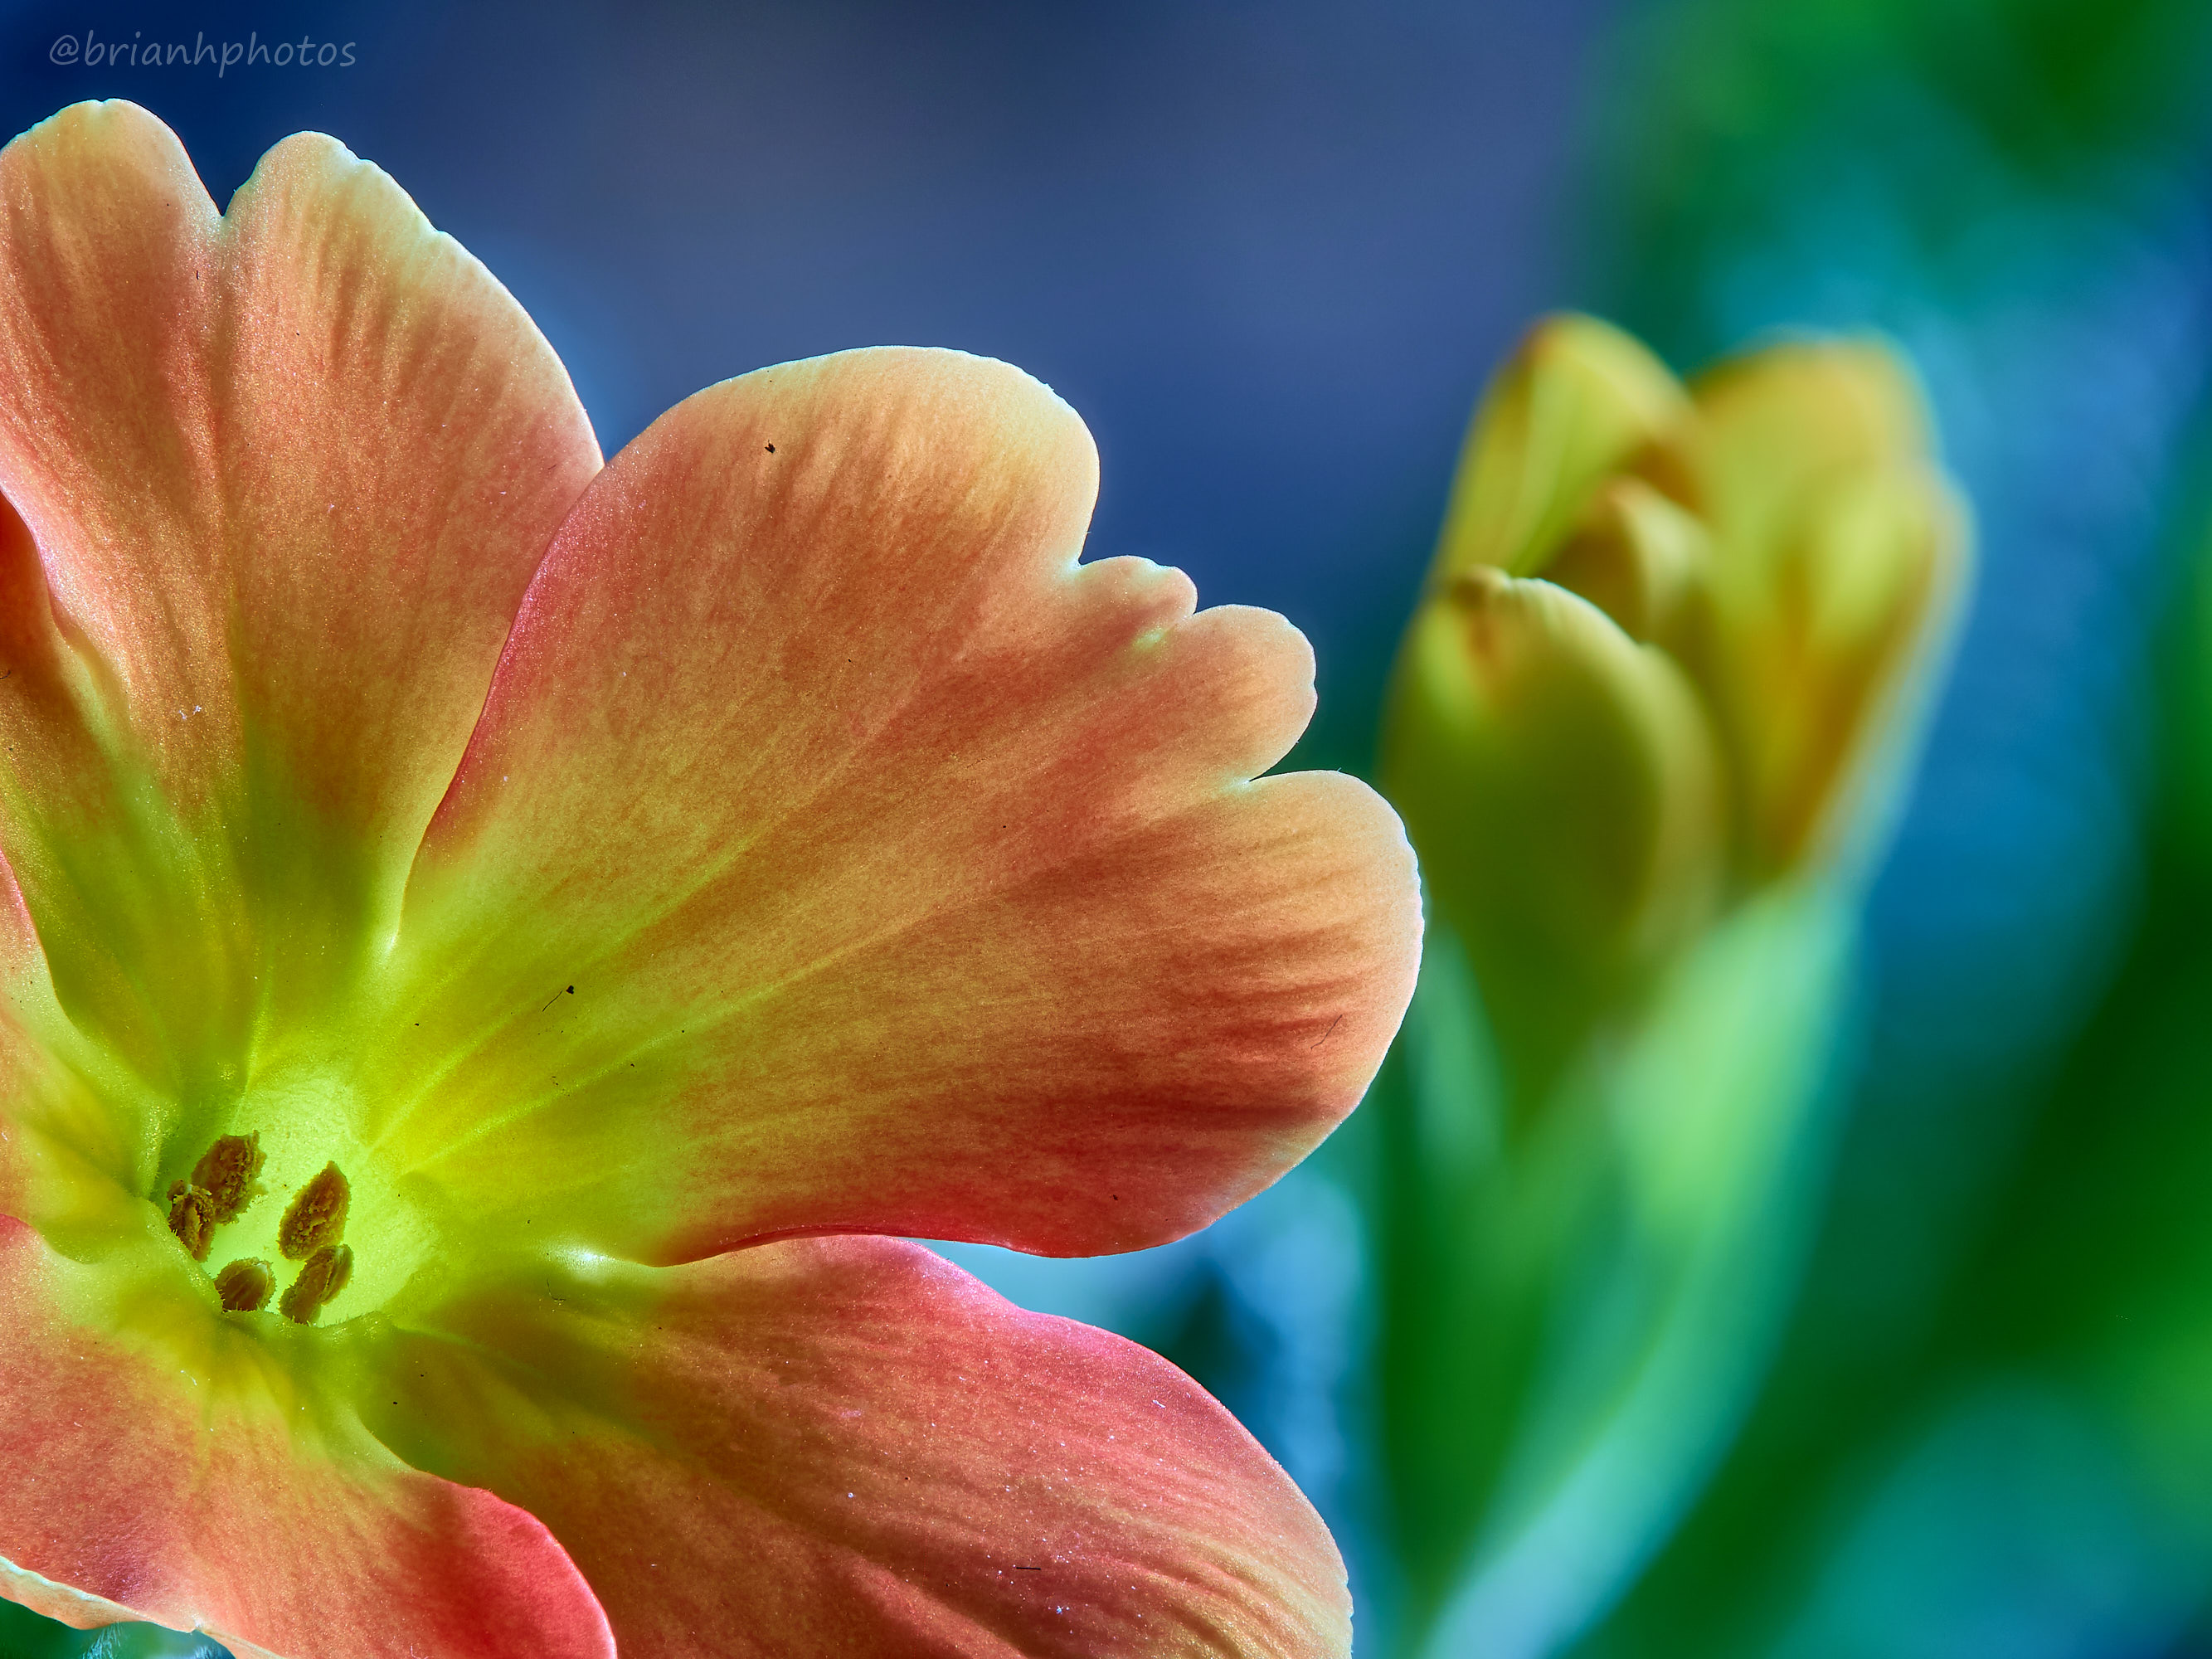
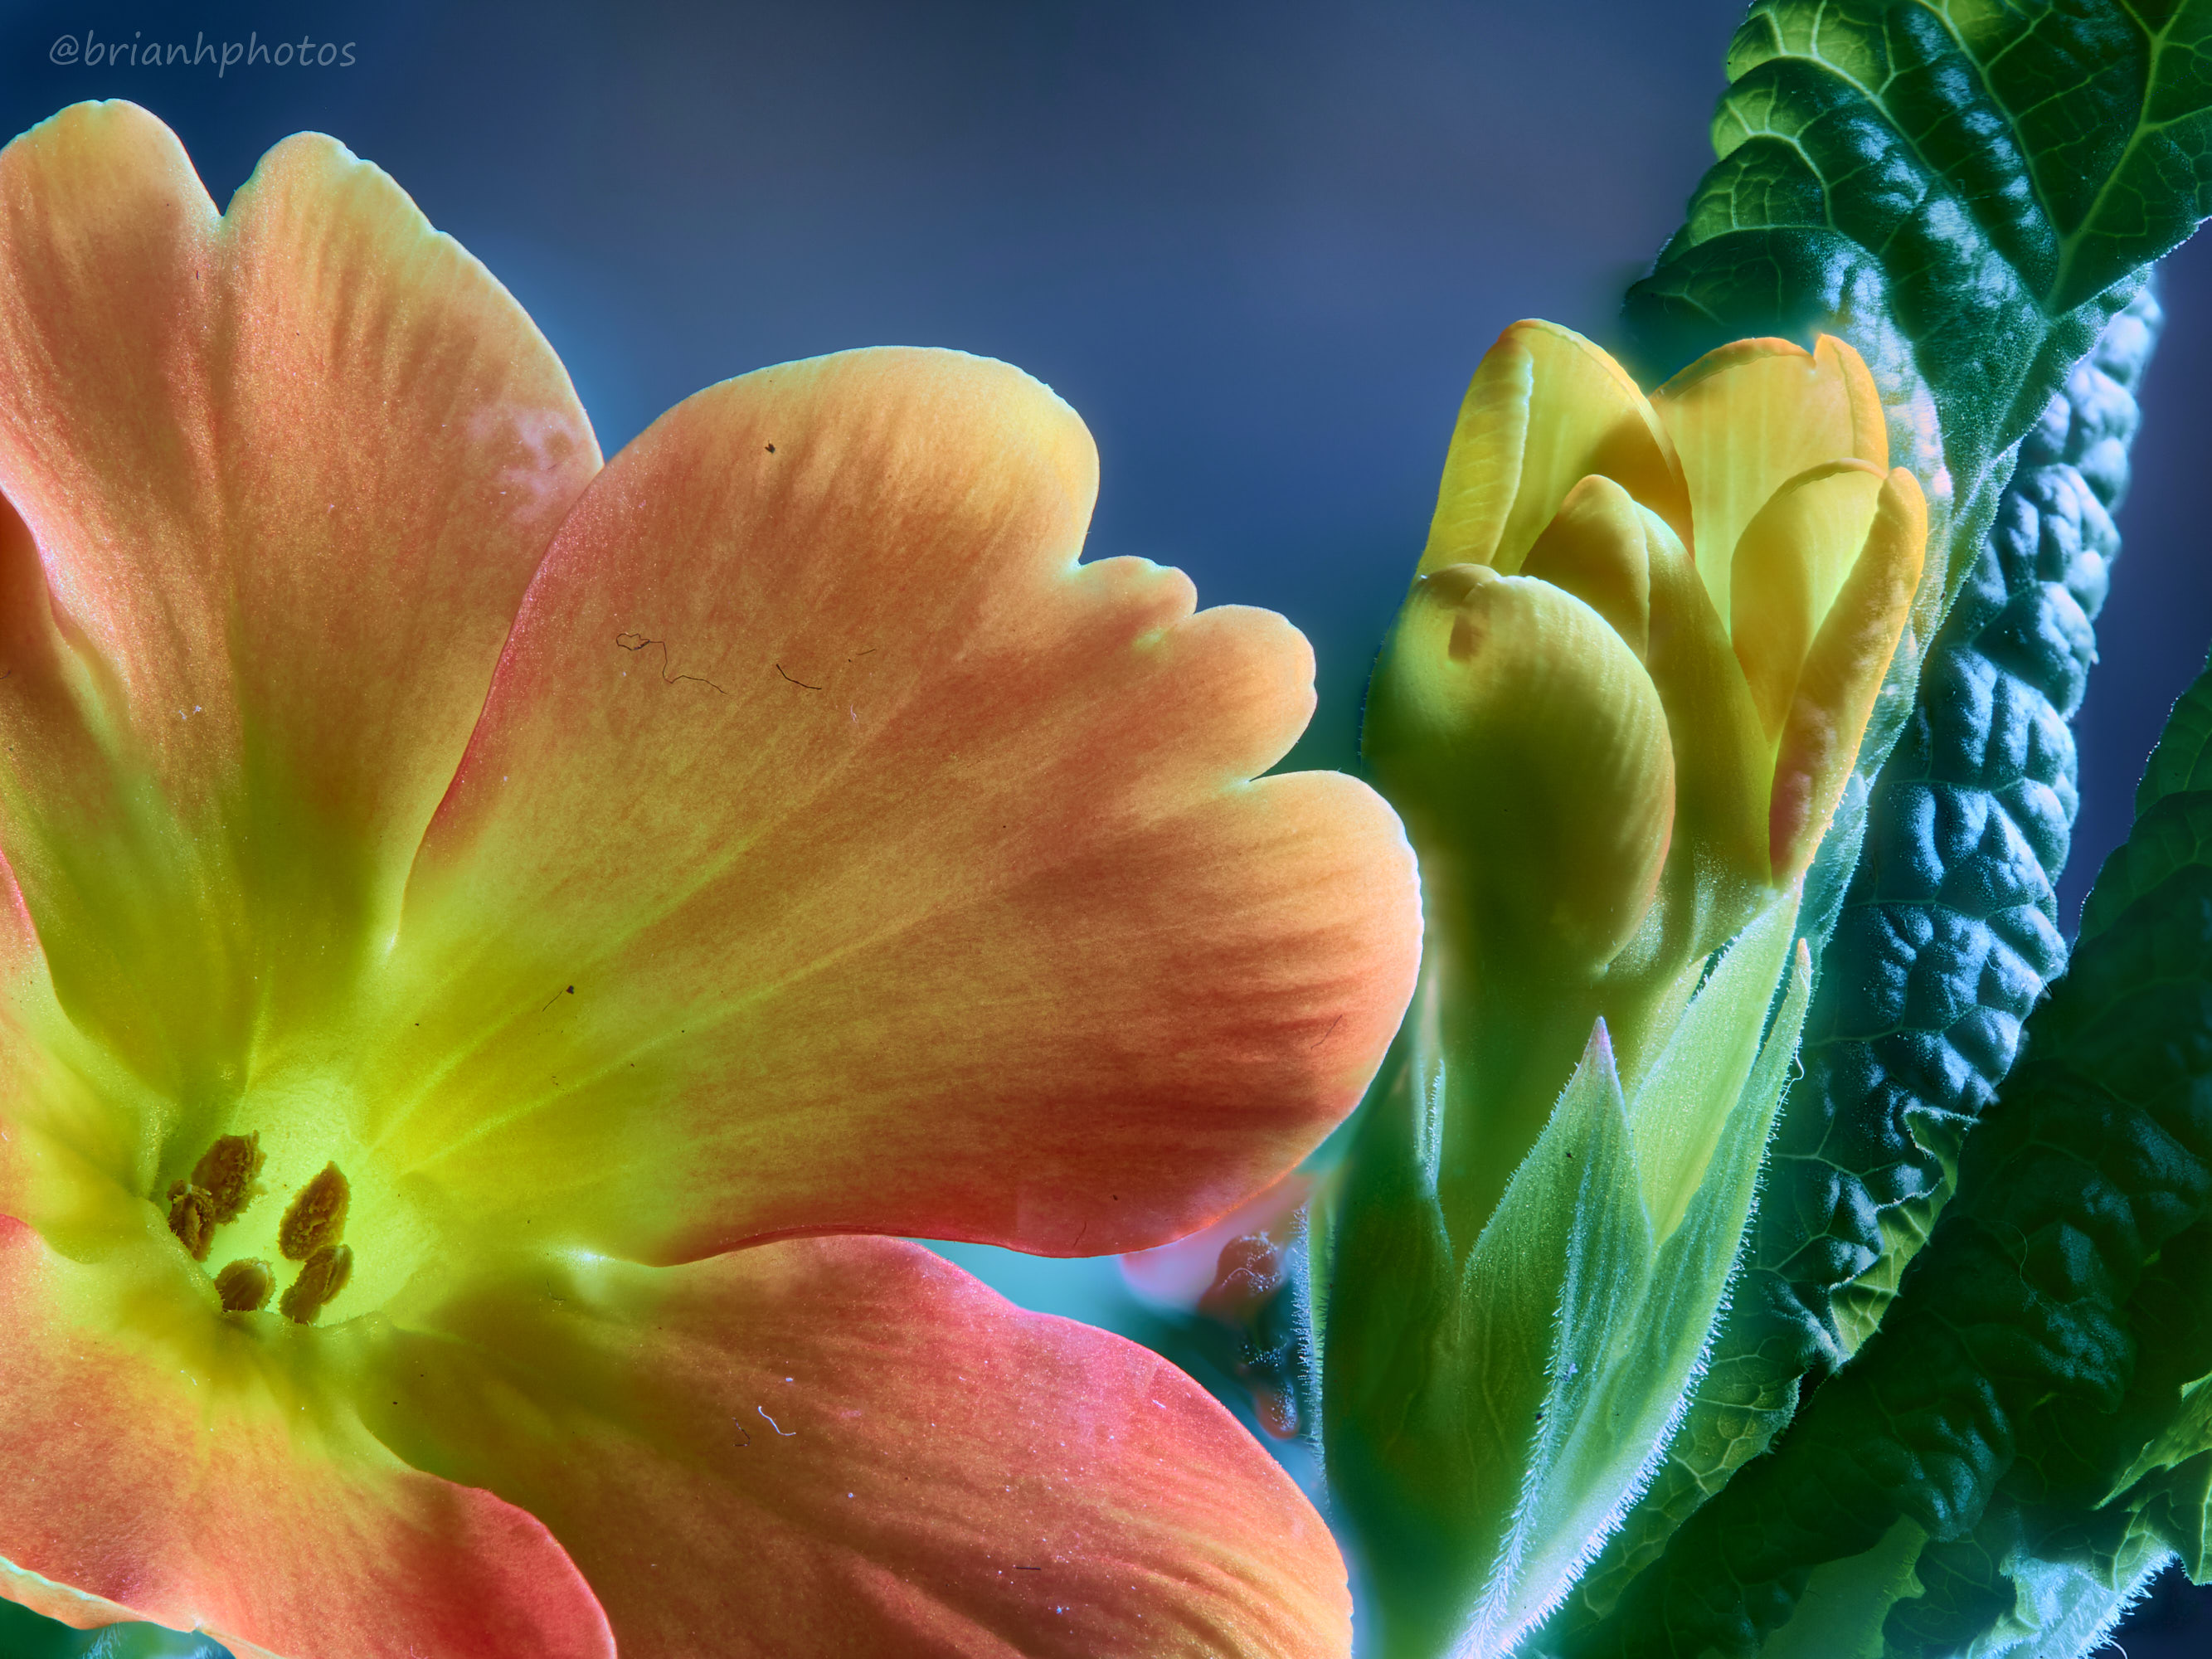
Click/tap any of the images to view at 100% - This is the focus stacked image
This is how I wanted the image look, created from 55 of the full 150 individual shots taken.
Introduction
A few days ago I made a post summarizing the technical processes involved in creating a focus stacked macro image. Enough people seemed interested for me to think it would be worth while posting a series of tutorials going into more detail. I don't consider myself an expert but I really enjoy focus stacking my macro shots and hope the knowledge I have can be helpful to anyone who wants to get started and try it.
In this first part I am going to attempt to discuss and show you why you may want to learn how to focus stack. It is a time consuming process and some of the stages are a little technical but it opens up some unexpected artistic control for the photographer who is willing to learn this technique.
I am assuming that my audience understands the photography terms I will be using such as "aperture", "depth of field", "diffraction" etc. If anyone is not sure what these terms mean, please let me know and I will try and explain in the comments or via a separate post.
What is focus stacking?
It's the process of taking two or more shots of a subject with different focal points. These separate shots are then merged together using computer software, picking the most sharp parts from each individual shot, to create one image with many more areas of the image sharp and in focus.
Why Focus Stack?
Have you ever taken a single shot macro and wished you had more areas of the image in focus? Well, to try and maximize this area of sharpness, you may have reduced your aperture to maybe f22 or or even smaller. When you do this something called diffraction becomes more noticeably/problematic and degrades your image quality. YOU DO NOT WANT THIS. Also when you take very close up macro shots, 1 to 1 or closer, aperture does not make that much difference to increase depth of field.
You should be shooting at your lenses sharpest aperture, which is normally somewhere between f4 to f11.
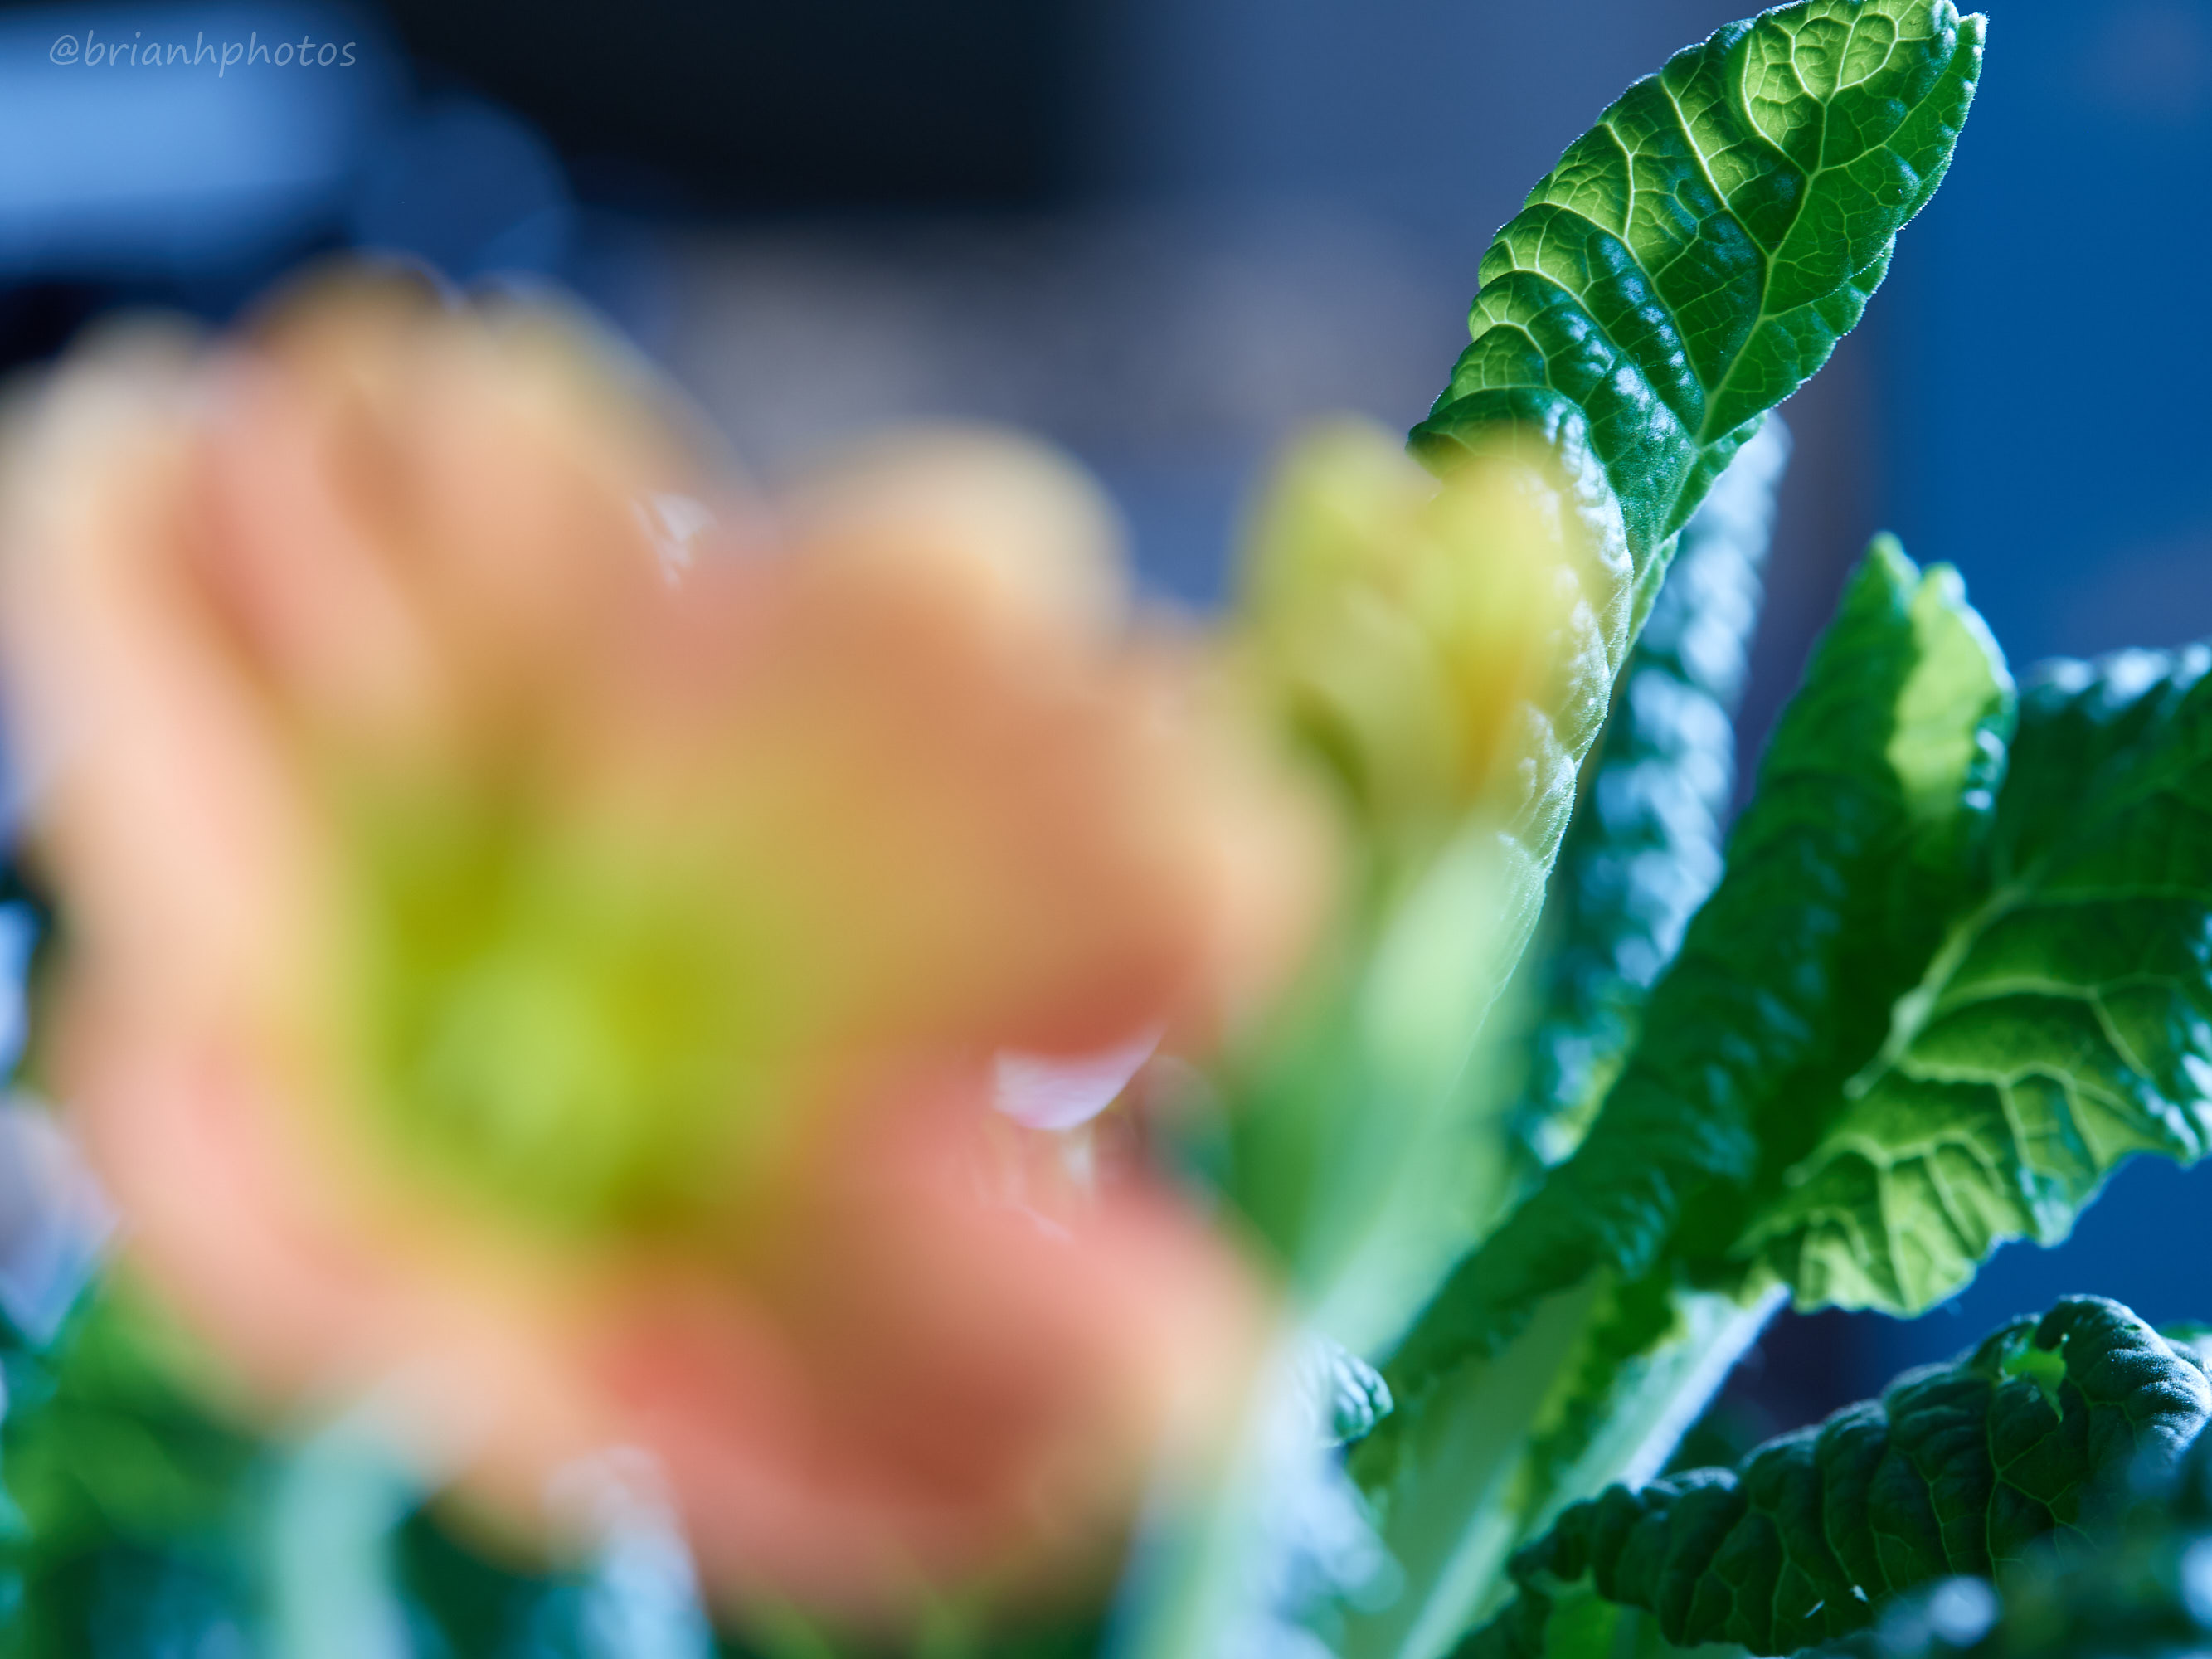
Here is a single shot picked from the stack of images that produced the main focus stacked post image above.
This is the single shot image
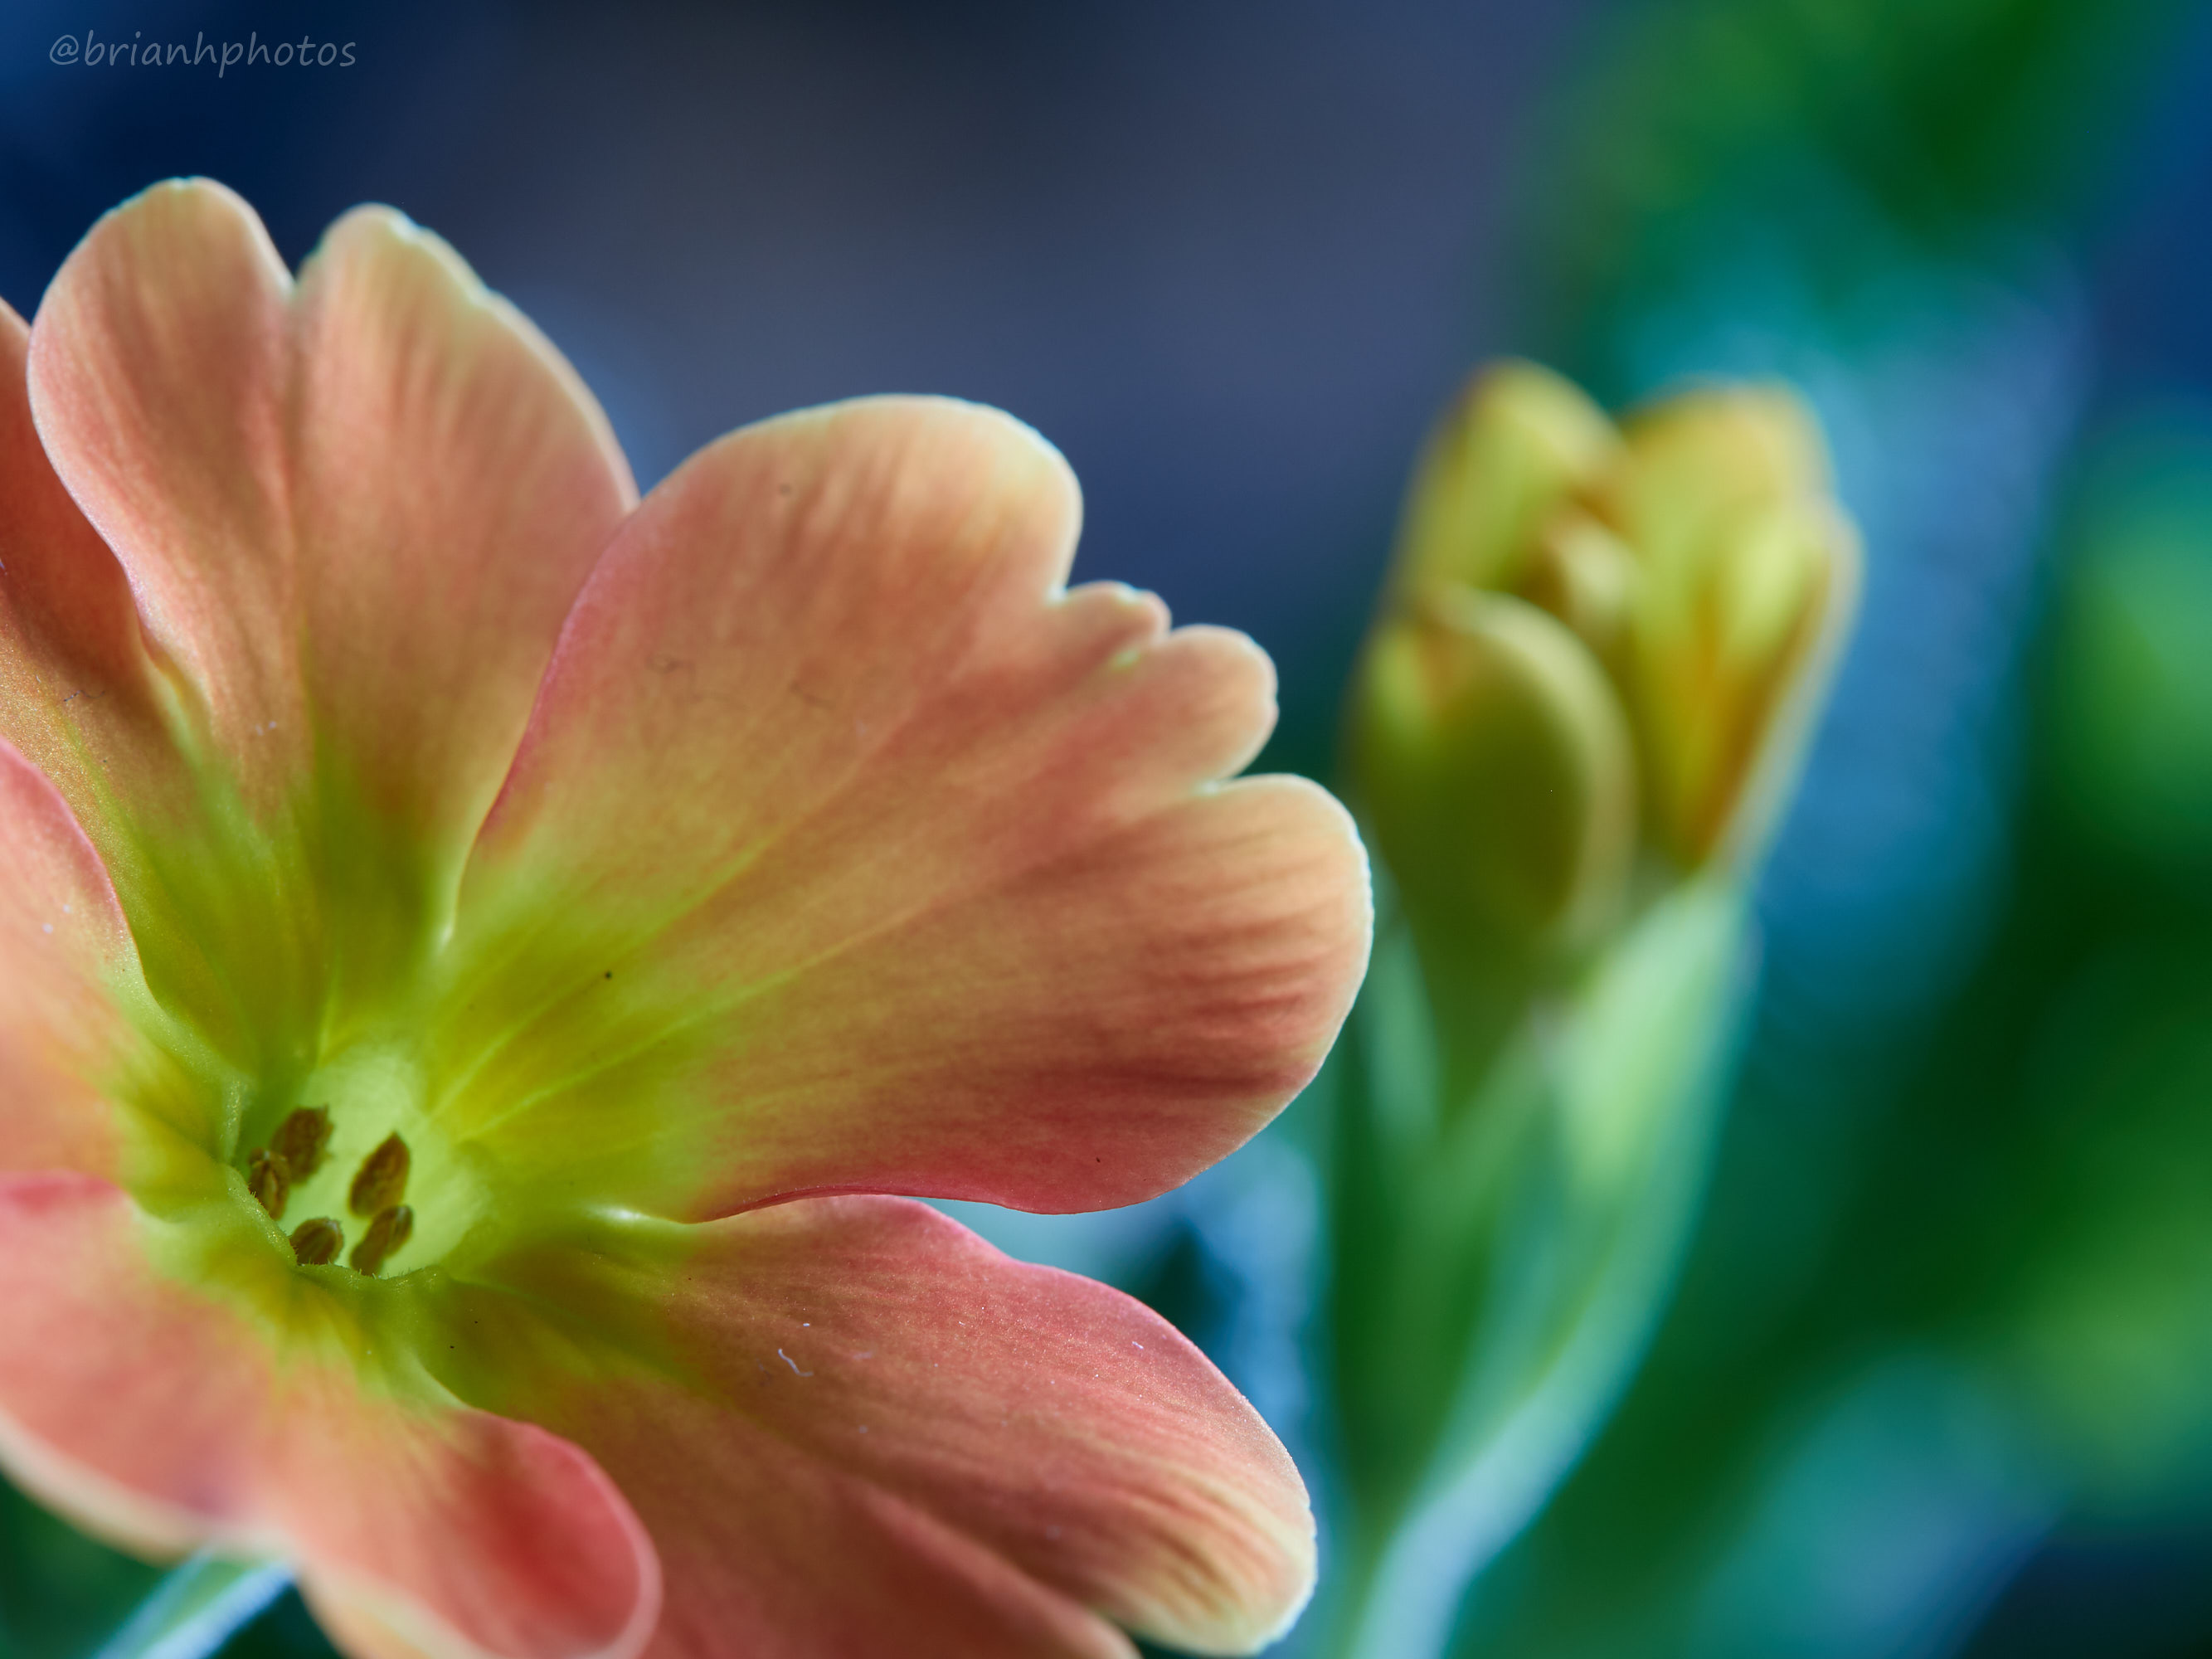
I think this image looks great but when you look close, YOU HAVE TO LOOK CLOSE AND ZOOM IN, and notice how only the area just before the center of the orange flower is in focus. The out of focus areas (bokeh) do look beautiful but I personally want to see the whole of the orange flower in absolute total sharp focus. To achieve this you need to focus stack!!!
Compare to two images zoomed in, by clicking(PC) or tapping(phone/tablet) on the images.
I hope you will agree with me that the focus stacked image looks the best of the two. If you can't tell the difference then maybe focus stacking is not for you , otherwise please follow this series that I will be posting over the coming weeks.
Future Posts
I would love to be able to do a post each day but unfortunately I have to go to work and look after my three lads. I will post at least one a week of this series. I hope you stay with me and discover the delights of focus stacking.
Next post will cover the equipment required to achieve decent focus stacked macro shots.
Here is a link to my Focus Stacking Summary post: https://steemit.com/macro/@brianhphotos/focus-stacked-macro-25-basic-steps-tutorial
Other useful stuff
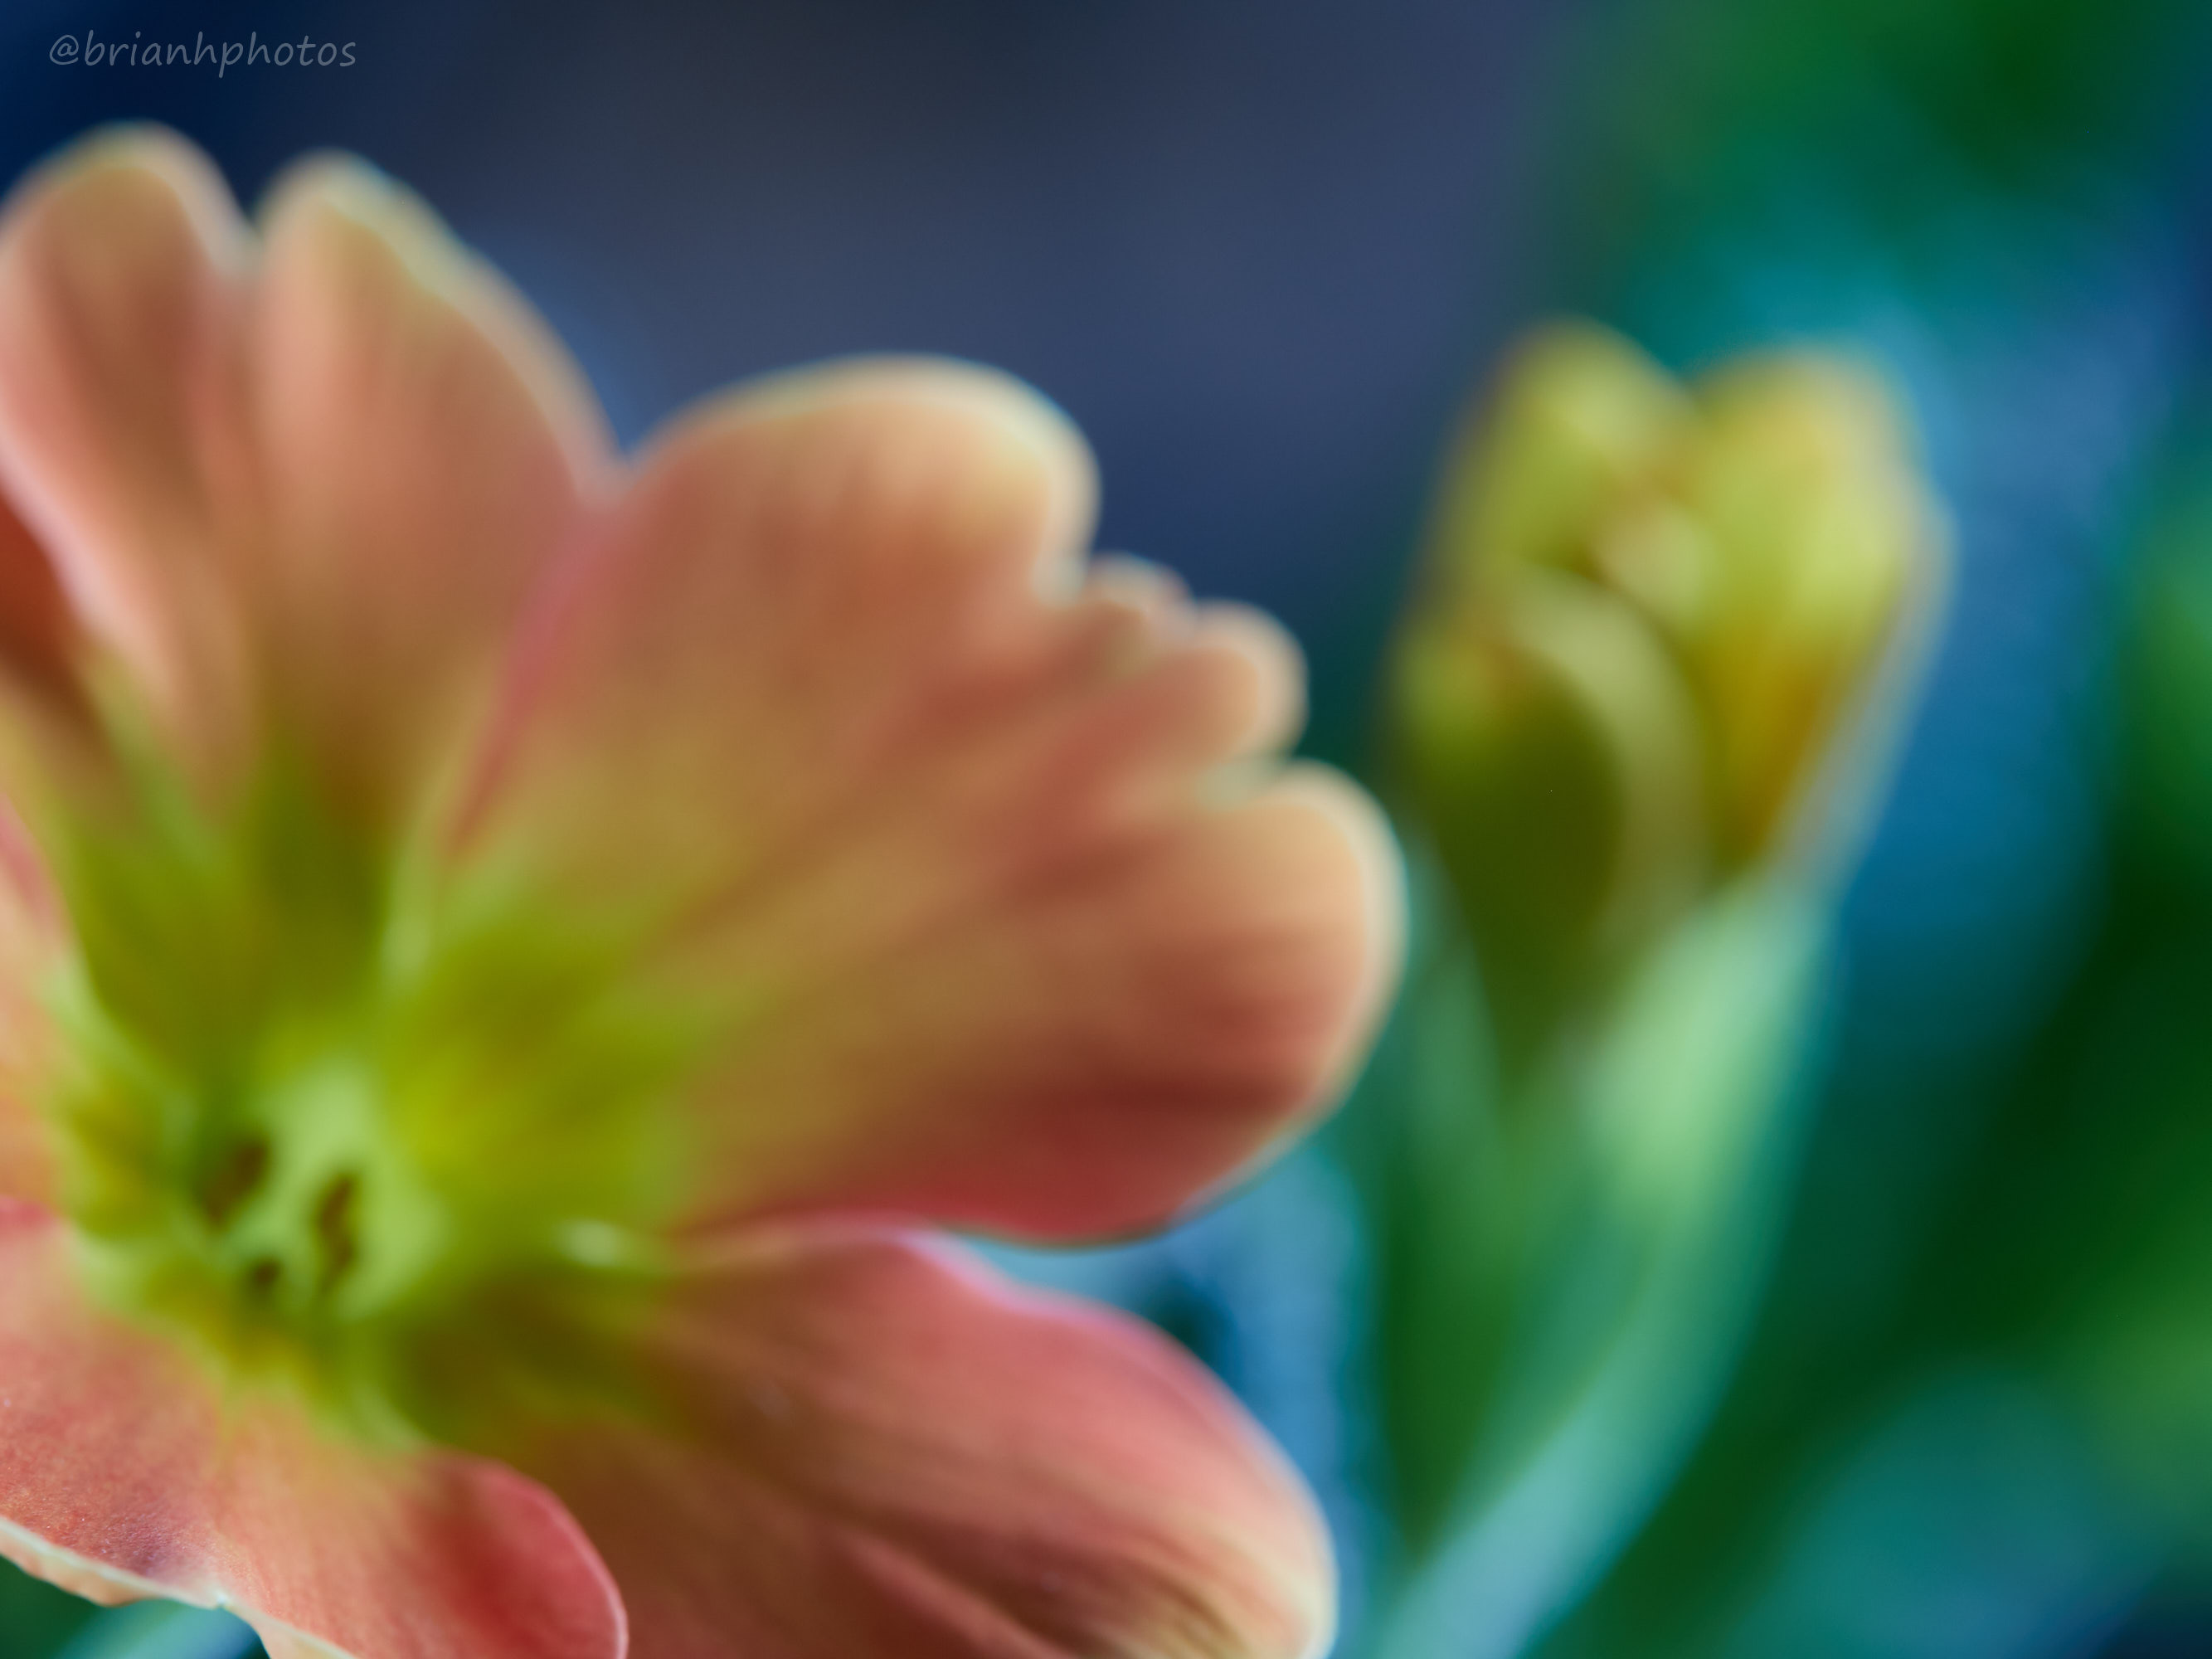
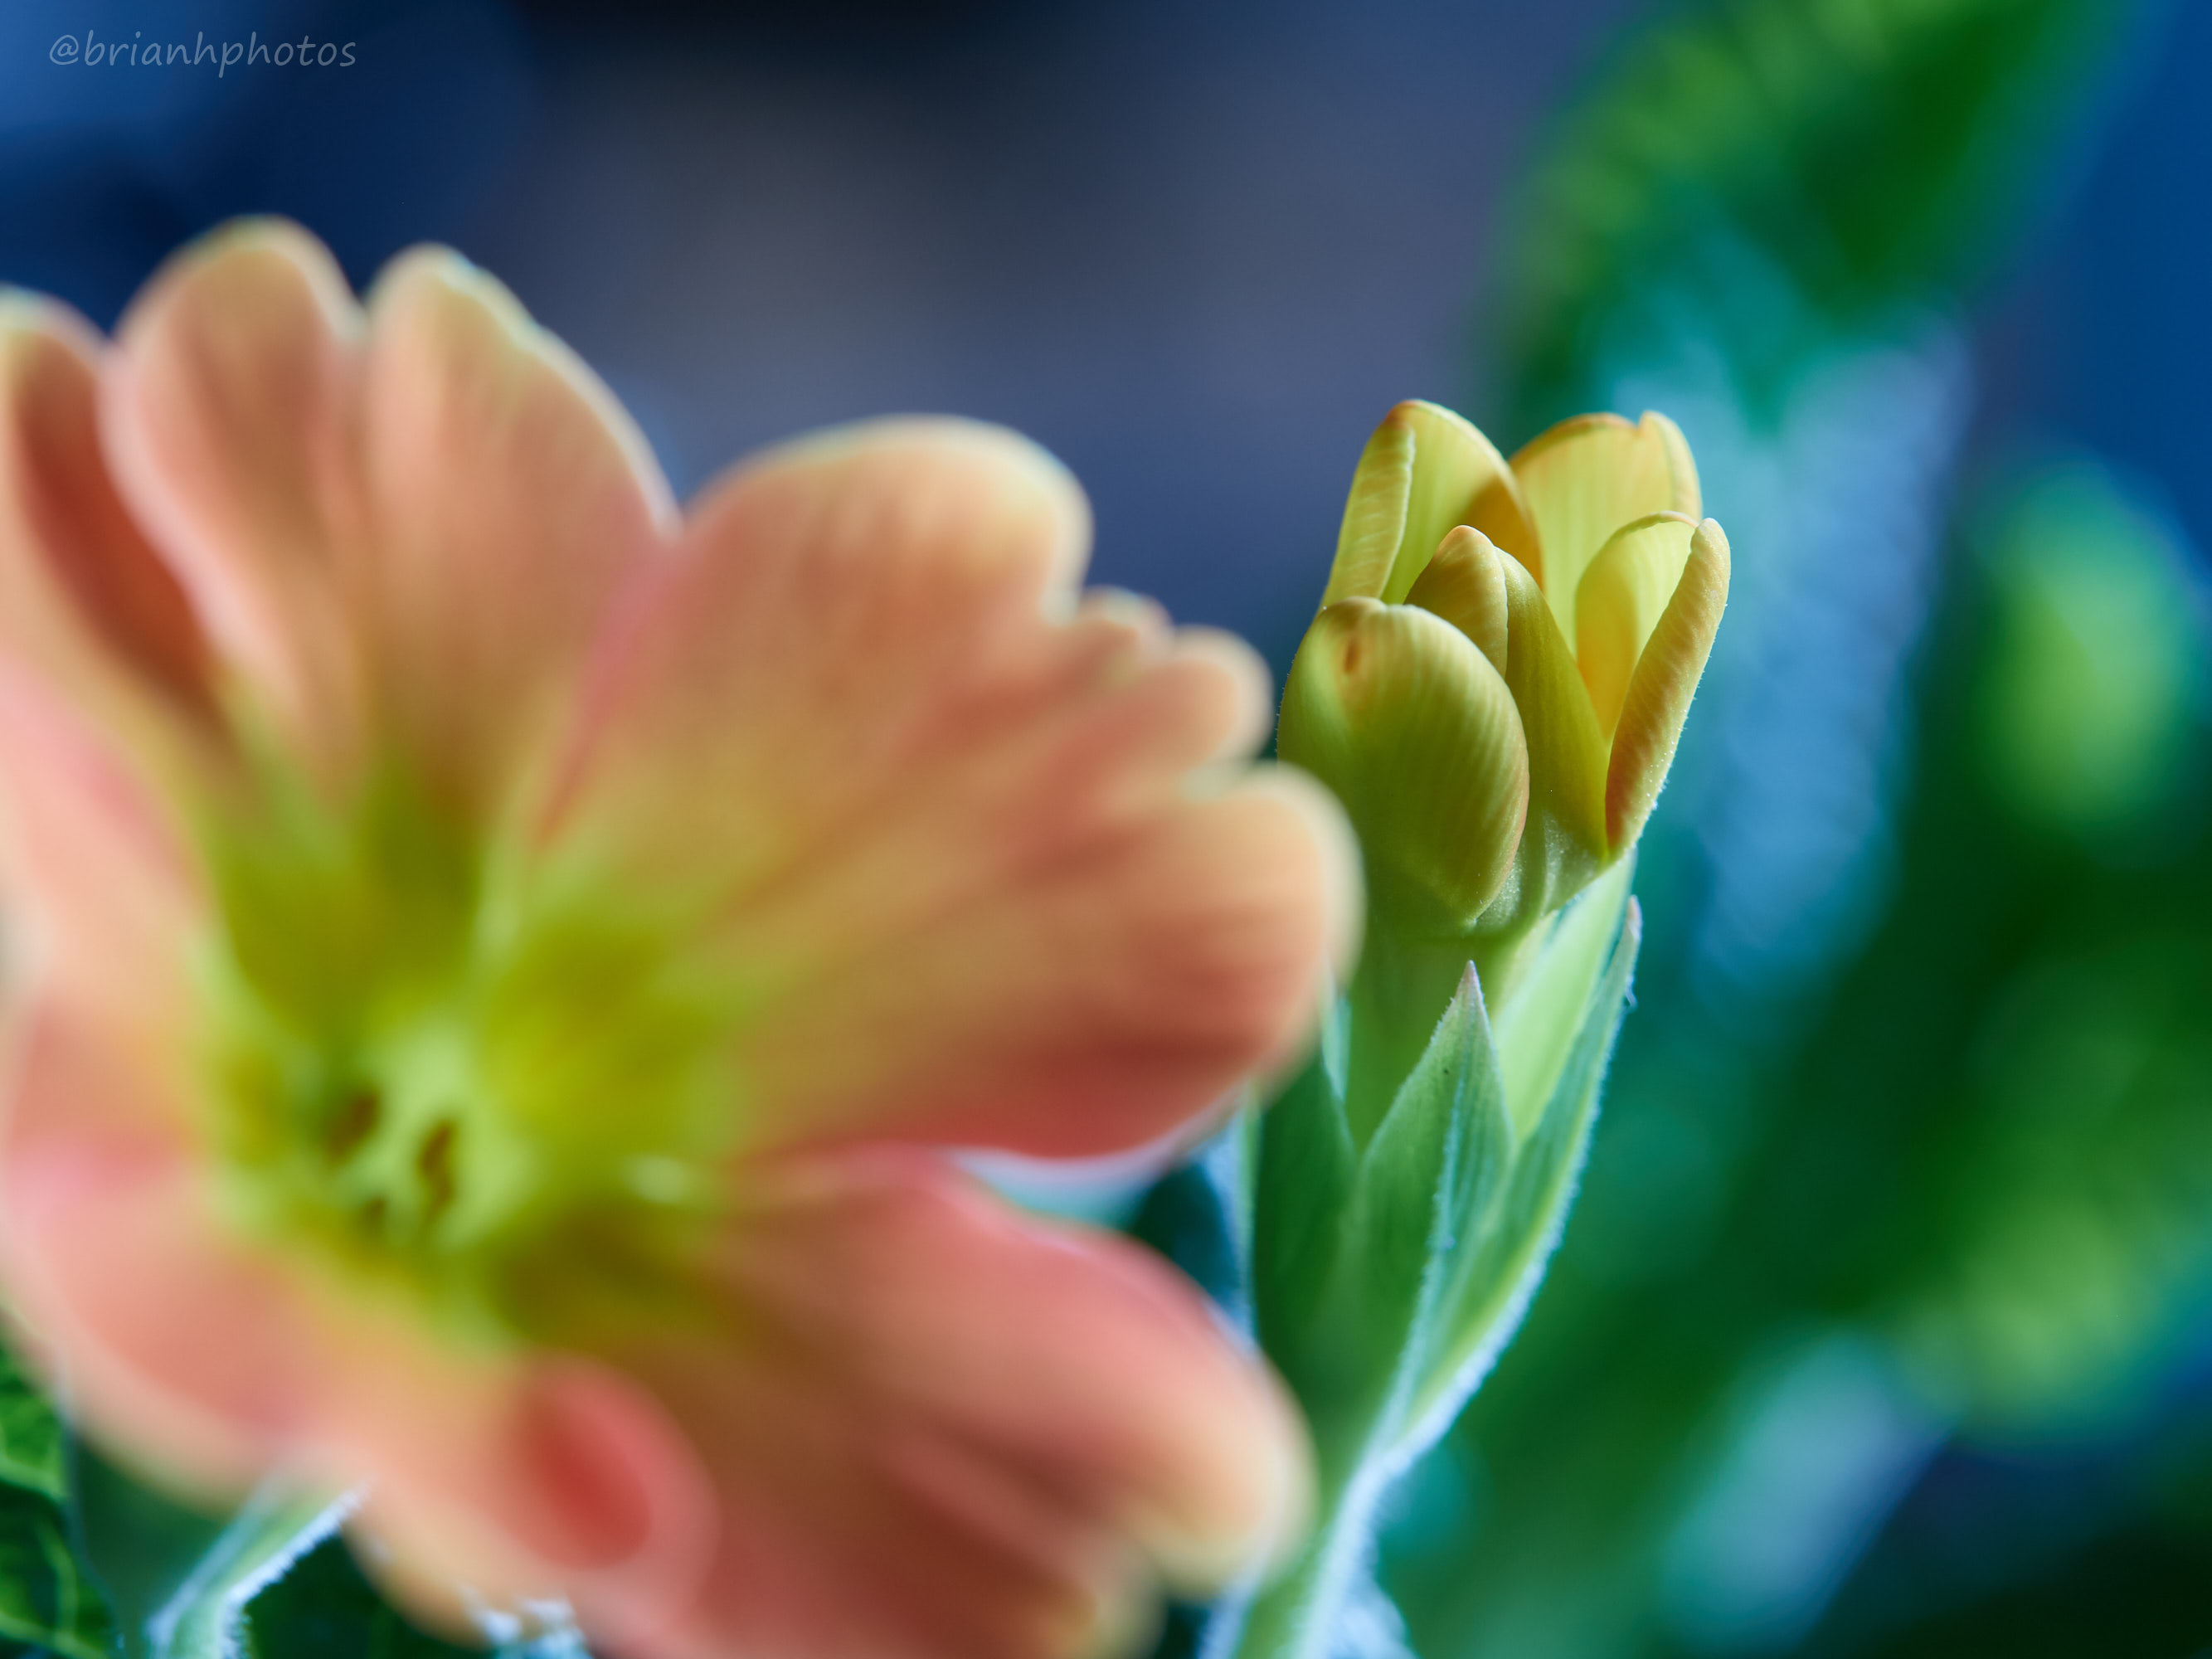
For completeness, here are some of the individual shots I took to create the final focus stacked image. First is one from the front of the stack (where only part of the most near petal of the orange flower is in focus) , followed by somewhere in the middle (Yellow flower bud is in focus) and at the end of the stack (green leaves are in focus). The distance between the first and last image was about two inches and I took 150 shots to cover this range at f5.6 using my Olympus E-M5II and Olympus 60mm macro lens
And finally here is an image created from the complete stack of 150 images, with everything in focus, which I think you will agree is not the best. I think his demonstrates how the photographer can influence how they want their final version of the image to look.
Feel the Love
@brianhphotos
I love this thank you for explaining it so well! I will be getting a DSLR this year so I need to learn how to do this
Glad you found it useful. Look out for part two where I'll discuss equipment required to stack, which I should be posting in the next few days.
It's always exciting looking forward to getting a new camera. If you want to try some focus staking make sure new camera has a built-in "focus bracketing" feature. Also check out the mirrorless cameras from either Sony, Panasonic or Olympus.
brilliant, thank you!
That is a really cool tip / trick. I will see if my wife @deadgrlsuppastar knows how to do that! Thanks. Upvoted and resteemed!
Cheers buddy.
That is very educating, it looks like it is a hard job to come to one perfect result. Otherwise I thought you are just lucky man who got very good camera and lucky shots. As everything in this life, to create such result it is not enough just walk around and shot the pictures :)
Thanks for reading my post and pleased that you found it educational. I suppose its similar to the hard work and skill you put into your beautiful drawings and paintings.