Running A Linux Live Session From A Thumb Drive - A No-Fear Tutorial For Absolute Beginners
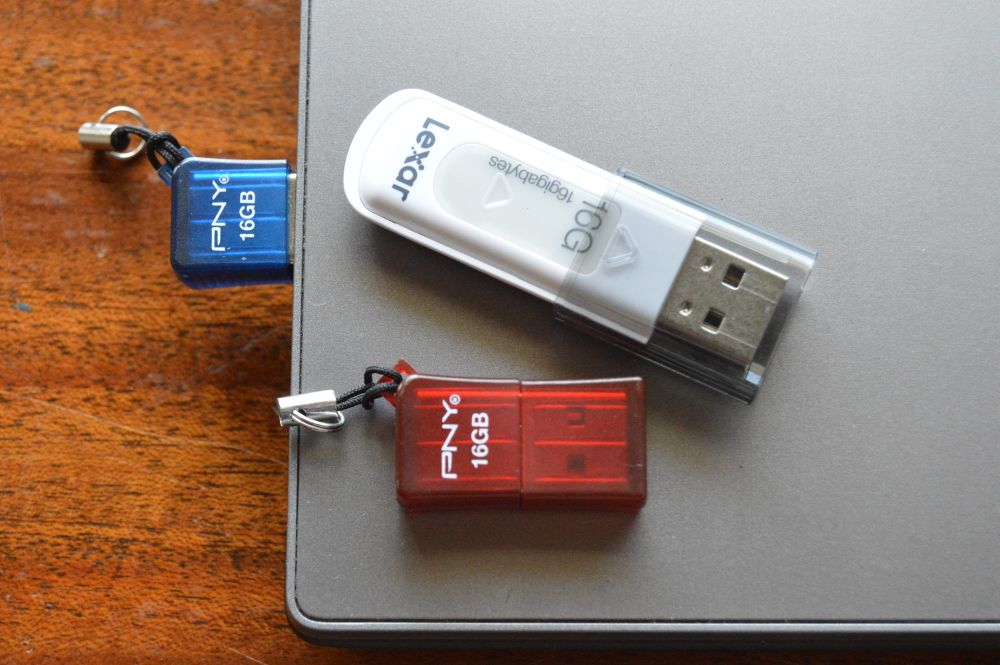
Cool! You followed along with the yesterday's tutorial and installed the latest version of Linux Mint on a USB thumb drive!
Take a moment and consider how amazing this is. You now hold in your hand a device which can boot and manage any modern computer on the planet. It's got a full office suite, image editing software to rival Photoshop, web browsers, email clients, and a software center capable of installing free, open-source programs capable of doing or building or playing just about anything you can imagine.
What a world! I bet you didn't know it came packed with so many goodies!
Now we've just got to figure out how to get your computer to boot up from this thumb drive instead of the usual hard drive. I'm not going to say that this part is hard or tricky, because it's not, really. It's just that there are a lot of different computers out there and they all react a little differently, and we've got to figure out what will work for you and yours.
There's a lot of words in this tutorial, but chances are you won't have to read them all. Don't be afraid to try out things and experiment. Nothing you do here is going to permanently affect your system without warning you, and all the changes I describe here are reversible.
Just Try Turning It On
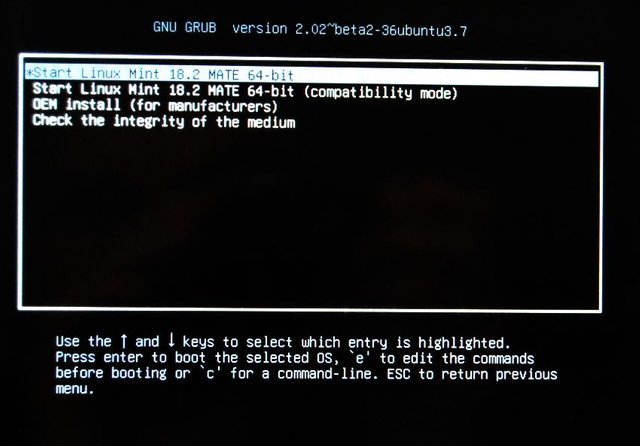
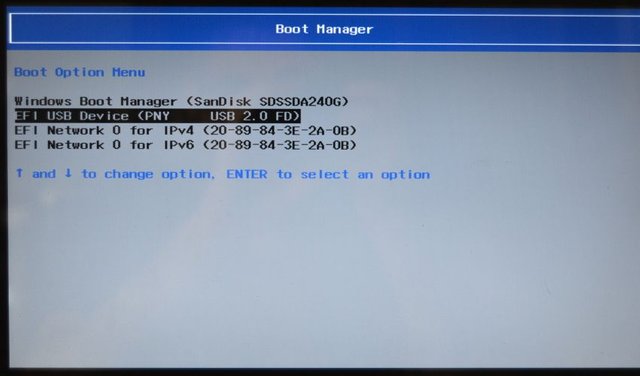
The first thing to try is shutting down your computer, plugging in the thumb drive, and then turning it on again. It might boot right into Linux Mint. It might bring up a menu that looks like this, in which case you can just press the ENTER key and start Linux Mint.
But most likely it'll just boot straight into Windows, like it always does.
Select a Different Boot Device With A Button
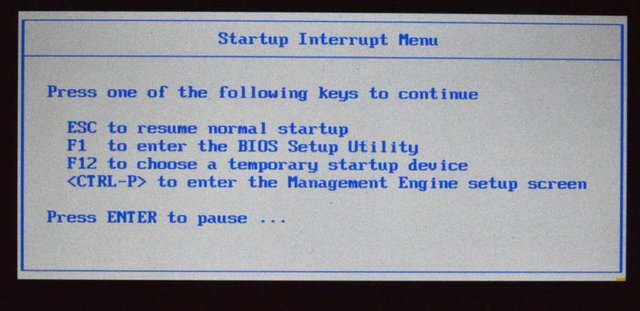
Many laptops have a button that will boot the computer into some sort of options menu. My Thinkpad X220 has a bright blue "ThinkVantage" button right along the top row.
This button doesn't do anything on its own, but if I press it just as the computer is starting up and displaying its first splash screen, it'll bring up a "Startup Interrupt Menu" that allows me to choose a temporary startup device by pressing F12. This is what I want to do. (The computer told me about this option every time I turned it on.)
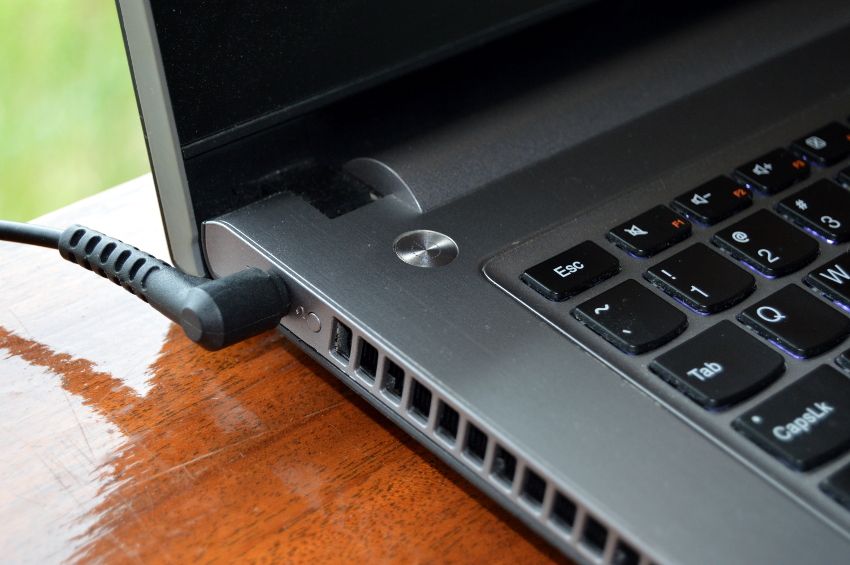
My other laptop, a Lenovo P400, also has a different button that gives access to some startup options. It's so tiny that I didn't even know it was tehre until I googled "How to access the BIOS on the Lenovo P400." It's on the side, right in front of the power cord.
This one powers the computer on from a turned-off state, unlike the "ThinkVantage" button above. It's so small that I need to poke it with a pen. Instead of going into Windows, though, it brings up a menu of options, one of which is "Boot Manager".
Selecting this starts the Linux Mint installation right up.
Changing The Boot Order In The Bios
If you haven't found any special buttons on your laptop (or if you're using a desktop), chances are you've got to get into the computer's BIOS and change the order in which your computer looks for a boot-able drive.
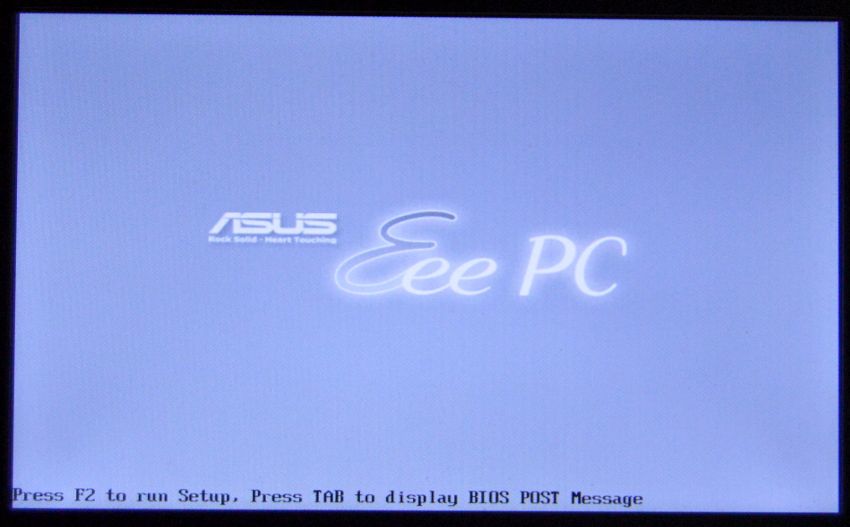
BIOS stands for "Basic Input-Output System," and it's a fairly simple program that's semi-permanently saved on the motherboard of your computer. Your computer always checks the BIOS first thing after it wakes up to learn where it's supposed to look for an operating system to load. You might have seen some instructions on accessing your computer's BIOS when you turned it on. My Asus Eee netbook tells me this when it starts.
Newer computers aren't as helpful in sharing how to get at the BIOS. But it's almost always accessed by pressing F2 or DEL as soon as the computer turns on. For the most part, laptops favor F2 and desktops go with DEL. Don't know why. You might have to try both. I've also heard some manufacturers go with F8.
In any case, there's a bit of voodoo involved with the process of pressing this key. The timing has to be right. Holding the key down as you turn the computer on doesn't usually work, and pressing it once is hit or miss. What I usually do is press the power key and then start hammering F2 like I'm knocking on a door. tap-tap-tap-tap-tap-tap-tap-tap Once the screen starts beeping at you or showing something you don't recognize, you can stop. You're probably on the way to the BIOS.
Keep in mind that a lot of keyboards now require you to press a "FN" key along the bottom row simultaneous with the F key at the top to actually access the proper function. (Long rant about this some other day - but since when do volume and media controls take precedence over the damn functions of the function keys? We've been using F1-F12 for decades! Don't mess with them!) So if the BIOS isn't loading you might need to try pressing F2 while holding down that other FN key.
Still no dice? Sorry then. You might have to head over to Google and ask "How do I access the BIOS on [my computer model]?"
A Quick Note About UEFI
Over the past few years, some computer manufacturers have been abandoning the tried-and-true (and primitive looking) BIOS for something they're calling UEFI, for Unified Extensible Firmware Interface. What a mouthful! I'm afraid I don't have any experience with the latest UEFI since my computers are all over four years old, but essentially you'll be looking through menus for the same sorts of functions as I show in the pictures below.
Back to BIOS
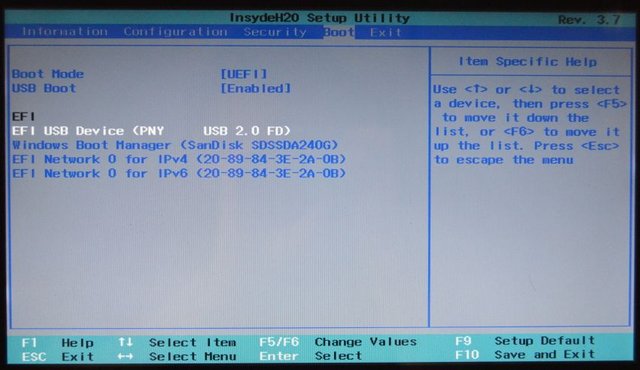
OK, You've found a way into your computer's BIOS. You're probably looking at an old-school screen something like this:
There's usually no mouse support in the BIOS, so you'll have to use the arrow keys to navigate to the appropriate menu. Again, every manufacturer will use a different BIOS system, but you want to find something that says "Boot" and arrow over to that. Then you want to move your removable thumb drive to the top of the list, so the computer will check for that first, before booting from the usual Windows installation. The instructions on the right of the BIOS screen will tell you which keys to use to move your selections up or down.
As you can see in the picture above, I've put my PNY USB device at the top of the list. I've also set USB Boot to "Enabled." Above that, you'll see "Boot Mod"e set to "UEFI" - that damn UEFI again! If I wasn't able to boot into Linux after this I would come back here and changed it to the other option which was "Legacy Support."
Notice that we're not removing the Windows selection (here referred to as "Windows Boot Manager.") We're just pushing it down a notch. Now the computer will boot from the USB drive when it's plugged in, and from the Windows drive when it's not. Neat!
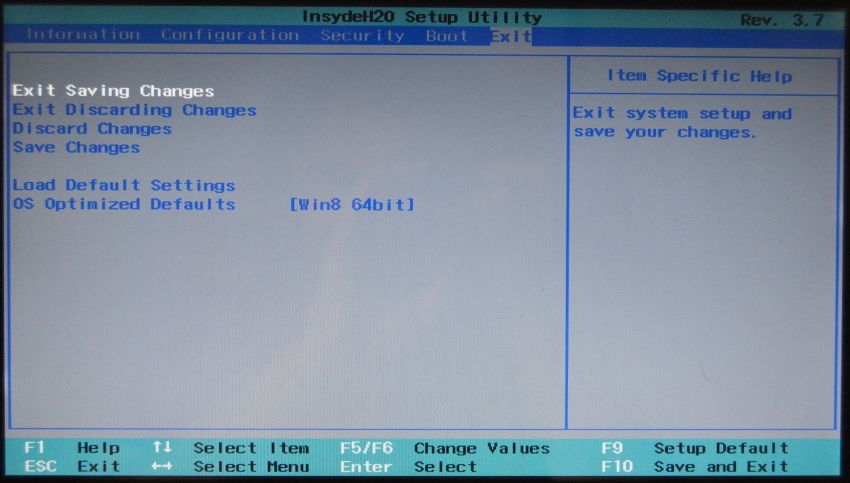
We need to save these changes. Arrow over to a tab that says EXIT and check this out:
I want to mention a couple things about this menu, because tinkering with the BIOS makes some people nervous.
If you're ever uncomfortable about something you've done in the BIOS, you can always click "Discard Changes." You can also "Exit Discarding Changes" and pretend you never came here. Also - check it out - there's a selection to "Load Default Settings." This is comforting! If you ever do screw up your BIOS enough to turn your computer into a brick (a process affectionately known as "bricking") you can come back here and select that to put things back the way you found them. Aren't you glad you know how to get into your BIOS now?
Now that you're feeling comfortable, arrow down to "Exit Saving Changes" and press ENTER.
Cross your fingers and count to 10. I'm reasonably confident the next thing you see will be the GNU GRUB menu from the second photo above, on which just press ENTER, and wait for the Linux Mint desktop to load.
Fast, right?
If it doesn't work, try one more re-boot, then shoot me a comment below.
The Linux Mint Desktop
You're in!
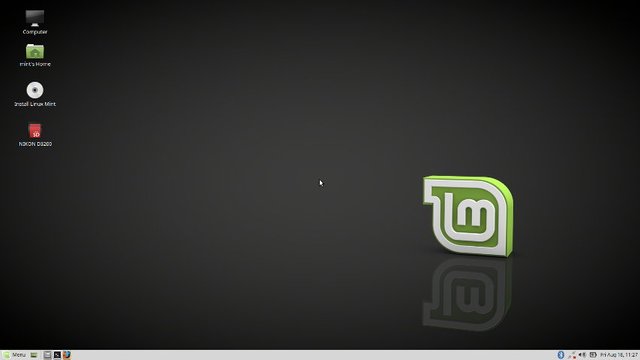
This is the Linux Mint desktop. It's set up very much like Windows in terms of basic layout. You've got desktop icons for "Computer" and "mint's Home" as well as a link to install Mint permanently to the hard drive if you decide you like it. You can also see my camera's SD card on this screen.
If you're using a WiFi connection, go ahead and click on the the connection icon on the bottom right (the one with the red x next to two ethernet plugs) to select your router and put in the password. You don't have to do this if you're plugged directly in to a router.
Click the Menu on the bottom left to explore all the applications at your disposal. When the menu pops up it shows some "favorites," but there's a button on the upper right to bring up "All Applications." Do that.
The applications menu is one of the things I adore about Linux. Applications are grouped into this menu by purpose, not by the software company that made them. Take a look at all the Office applications you've got, and all the internet tools. The full-featured graphics editor GIMP is on here already- it's the program I use to process all my photographs and screenshots. And there's lots more.
What it Means To Run a Linux Live Session
What you're running right now is a "Live Session" of Linux Mint. You can do all the work you like on here, but it's important to take a moment and think about what a Live Session means.
When you boot into a Linux Live session like this, everything that makes the operating system work is loaded directly into your computer's memory. It creates a "virtual disk" in RAM to carry out it's functions. This means that any changes you make to the operating system will not be saved when you turn off the computer.
"But Winston? What's the point if I can't save my work?"
You absolutely can save your work! You just need to be conscious of where you're saving it.
Let's click on the file browser. In the screenshot above, it's the little gray file cabinet drawer two icons to the right of the Menu.
If you're used to navigating around Windows, you shouldn't have any trouble with the Linux Mint file browser.
Take a look at the shortcuts on the left of the window. Everything under "Computer" is currently saved to a virtual hard drive. This exists only in RAM, and will not be preserved when you shut off the computer. Anything you save to these folders, including to your desktop, will not survive a re-boot. Notice that at the bottom, it says my free space is 4.1 GB. This is actually the RAM of my computer!
However, you can save all you like to the "Devices" that show up as shortcuts further down. If you have an SD card plugged in, or a second thumb drive, you can save stuff to those and work on it again after a re-boot, or eject them and take them to another computer.
Just be careful in whatever program you're using. When you click "Save As," you need to navigate to one of these "external" devices. If you have secondary hard drives installed, or partitions other than your Windows partition, you can save there, too. (My computer has a few extra hard drives installed, which you can see them the screenshot. So I could save to "SPINNEY" OR "LRS_ESP" if I wanted to. I'm locked out of the Windows drive, though, for my own protection. Clicking on that produces an error message.)
Again, the best bet for saving work is a second thumb drive, SD card, or external hard drive.
And this all changes if you decide to run a full installation someday.
The Benefits of the Linux Live Session
Most Linux users will go ahead and run a full install, so they're not stuck configuring their system from scratch every time they turn it on. But there are good reasons for keeping a Linux thumb drive like this around too, and you might find yourself using it more than you think, now that you know how to navigate the boot process.
- You can explore the operating system, make changes, and install programs, knowing it'll all go back to normal when you're done. You've got the freedom to screw things up!
- None of the changes made to the operating system will be recorded when you shut down. Sure, this means you have to re-enter your wi-fi password next time you boot. But it also means that you're computer doesn't store any passwords at all. You can log in to your email account, or Steemit, or your bank, confident that your computer isn't accumulating files that will help it identify you.
- The same goes for internet history! It's all wiped out with a shut-down!
- So it's great for internet shopping. All those tracking cookies on your PC that determine who you are and therefor what you're able to pay can't survive when the OS is reset with each re-boot.
- Overall, running a live session puts you in control of what information you're sharing, and forces you to be conscious of when you're doing it, and why.
- It's magically fast. If you're used to running Windows from a mechanical, spinning hard drive, you'll probably notice how quick and responsibe a Linux Live Session is. That's because the entire operating system and all of it's applications are loaded directly into your computer memory. And for the most part, these applications are much more efficiently coded and "lightweight" than their Windows coutnerparts.
- It's a handy tool for getting in to a "dead" computer. If your hard drive dies, you can still boot from a thumb drive and get some work done. And then you know you just need a new hard drive instead of a whole new computer.
Next Steps
Go ahead and explore Linux Mint for a while. Write a letter in LibreOffice or take a tutorial on the GIMP. You can even have a browse through the Software Manager (under "administration" in the menu) to see just how much stuff is available under this platform, absolutely free. (Install what you like, as long as you understand anything you install will have to be re-installed next time you boot up.)
I'll be back soon with another tutorial on running a full installation of Linux, and then delve into some of the wonderful applications available.
My goal is to show you how easy Linux has become to use today, without losing any of the customizability and power that made it great from the start.
My first Linux tutorial: Try Linux For Free By Creating A Bootable Thumb Drive - A No Commitment Tutorial For Absolute Beginners


Congratulations @winstonalden! You have completed some achievement on Steemit and have been rewarded with new badge(s) :
Click on any badge to view your own Board of Honor on SteemitBoard.
For more information about SteemitBoard, click here
If you no longer want to receive notifications, reply to this comment with the word
STOP