Fit for Life #9 - Making a Custom Wedding Ring Box (Part 1)
Hello Steemit!
In this week's Fit for Life post I want to do something a little different. For me, being fit for life is about being fit for all aspects of your life. That's not just about being physically fit but also being fit for everything that life throws at you. My fiance and I recently bought a house so I've been improving all of my DIY skills. Becoming good with your hands is a skill that most people are losing nowadays.
In a world of desk jobs, the internet and iphones, we no longer need to learn practical skills. However, I think it's really important to learn practical skills to be fully rounded as a person. It teaches you to think differently and approach problems in ways that you might not have thought of. Being fit for life is about being the best and most well rounded version of yourself.
Making a Custom Wedding Ring Box
Today I'm going to show you the start of a project I am working on. I wanted to make a box for our wedding rings for our wedding, and I wanted to make it out of a New Zealand hardwood because New Zealand is very special to us. I managed to get hold of some Rimu, which is a beautiful hard wood from NZ and it smells amazing. Here's how I built the start of the box!
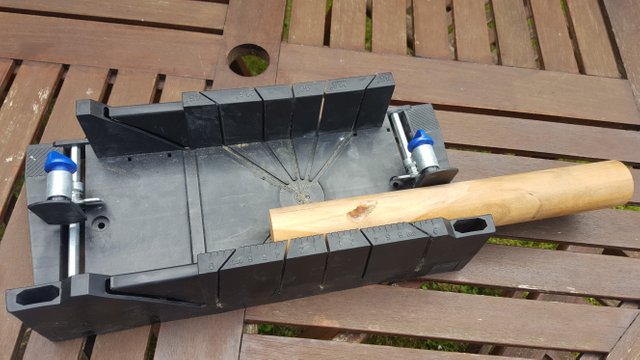
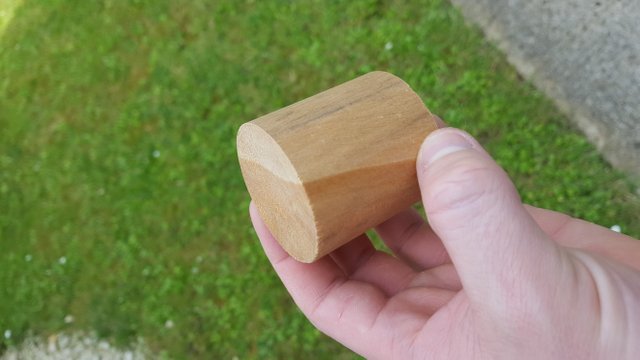
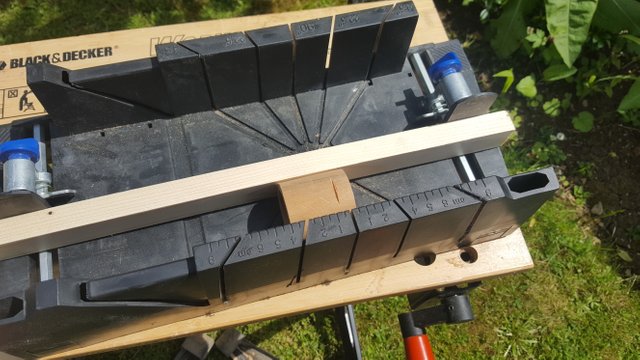
First I cut a small length from the pole that I would use to make the box. Fortunately I've got a lot of spare wood if this goes wrong. I used this mitre box to make sure I was going to cut perfectly straight. I just used a basic hand saw but took it very slowly to make sure it was as smooth as possible on the cut.
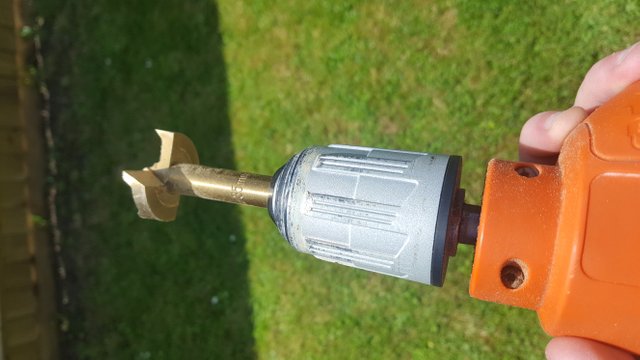
Next I went and bought a forstener bit for my drill, which was 3.5cm in diameter. This would allow me to bore a hole in the middle of the pole and leave a 0.5cm edge around it for the walls of the box. It's important to use a forstener bit for this type of job because it gives a flat bottom to the hole. Many wide drills like this have a long pilot drill spike which would come through the bottom of my box - not ideal! I couldn't have a larger drill bit because it would make the walls of the box too thin and they would break. Any smaller and there wouldn't be enough space for the rings.
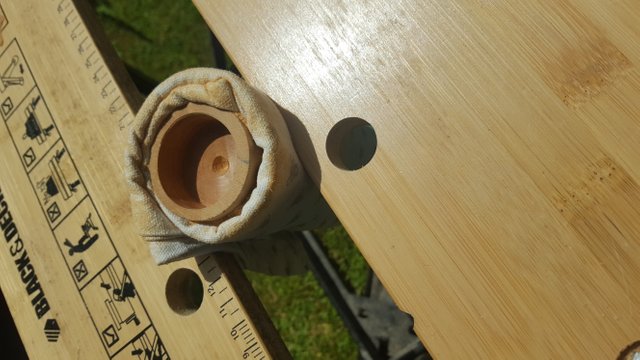
What I did next was wrap the pole in a tea towel and clamped it. If I had clamped it without a tea towel then I would have dented and ruined the wood. Once the pole was clamped I started to drill straight down in to the pole, right in the centre. As you can see, this started to create a recess where the rings would go.
What I did was leave about 2cm of wood that I didn't hollow out at the bottom of the pole - that gave me something to clamp on to without caving the sides in with the strength of the clamp. Once I was happy with the depth of the box, I then cut this additional 2cm of wood off, as you can see here.
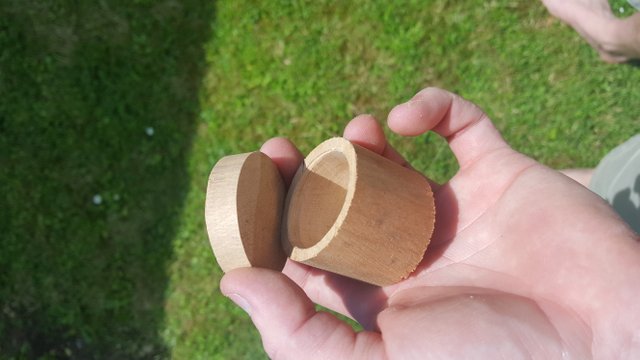
Taking the piece I just cut from the bottom of the box, it now became the lid of the box! I will attach this to the top of the box soon, either with a hinge or some kind of pivot. What do you think so far?
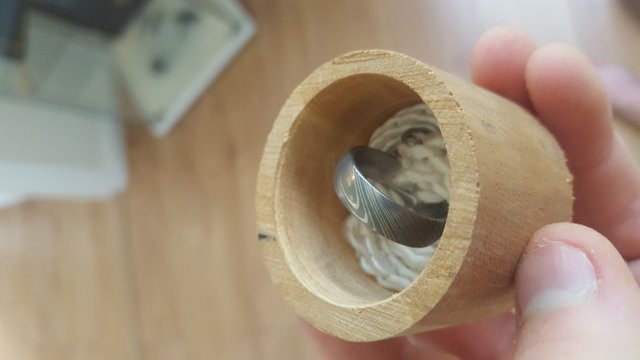
As a final test of the box, I curled up some rope in the bottom of it to create a cushion to stand my wedding ring in. You can see here, that it fits perfectly. This is my Damascus Steel wedding ring which has a beautiful grain to it.
This is just the first part of this project. It took around 2 hours of drilling and cutting and measuring. In the next part I will be spending a lot of time sanding, polishing and waxing with a high quality bees wax. The final touch will be to add the hinge to the lid of the box and to create a cushion for the rings. What do you guys think so far?
Can't wait to read your comments, what hobbies do you guys have to keep you active, mentally and physically? Looking forwards to chatting soon! If you found this interesting, please like and follow for more and to see the finished box!
Yours in health,
Ben
God bless you. @biblegateway
I wish you much success and hope you find Steemit to be as rewarding and informative as I have.
Here are some links you might find useful.
Your stats on SteemNow
Your stats on SteemWorld
Your stats on SteemD
How does Steemit actually work?
Oh yea, I have upvoted you and followed you. Many blessings!
Thanks for the comment @sidjaggal :)
I wish you all the best for your craft making part which you have started. And i liked your work.
Thank you @ankita14 :) I hope that it will look really good once the sanding and polishing is finished! I'll show you this weekend I hope x
you posted are really different and interesting I really love you
Thank you @khirud, as different as life is different :D
Welcome and if you get some time please visit my profile it will really help me I am new in this community please support me thank you so much