[Vue.js] 스팀잇(Steemit)기반 앱 만들기 #4 - 상세화면 구현하기
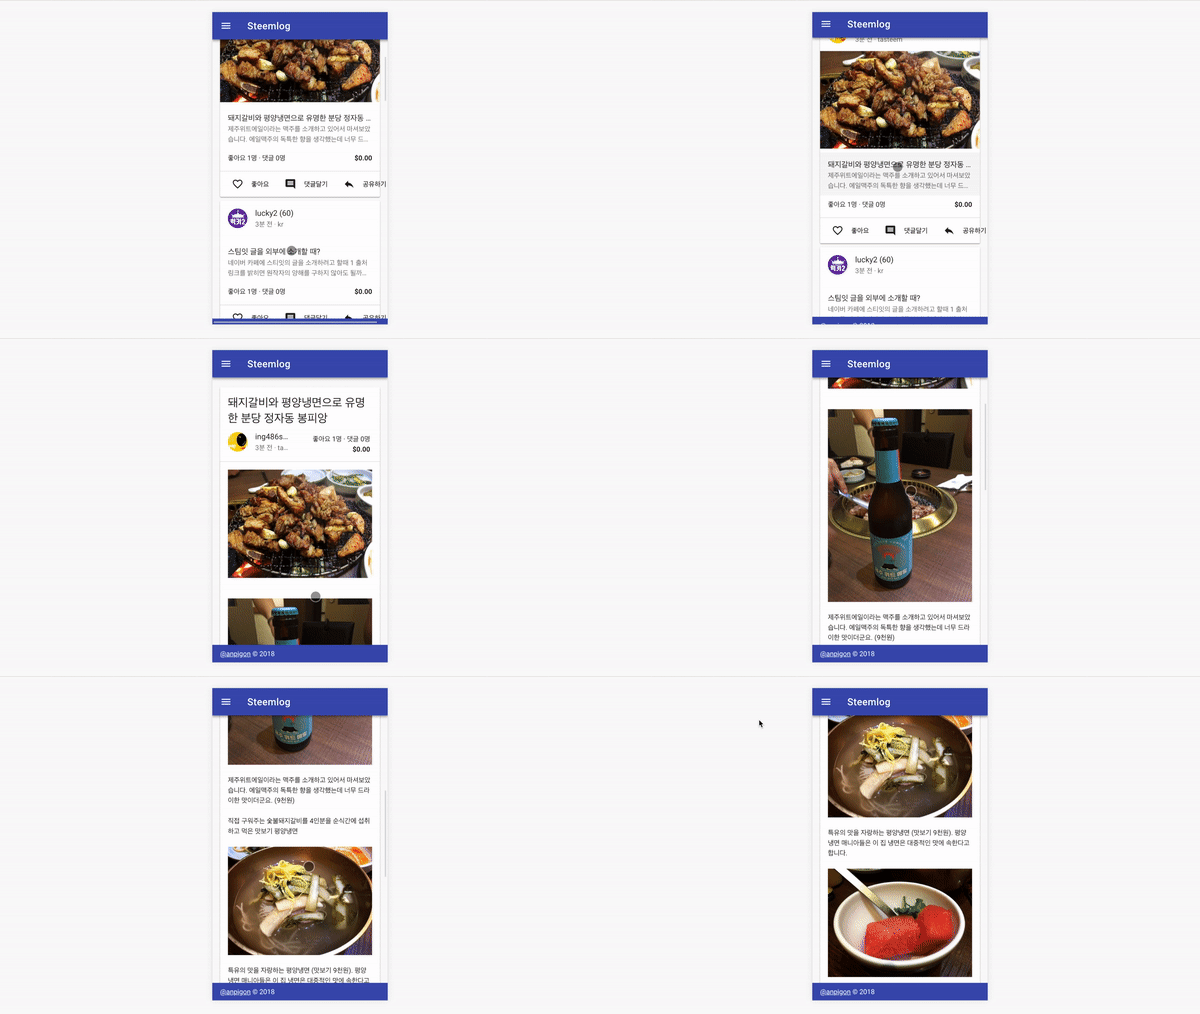
이번 시간에는 아래 화면과 같이 글 상세 내용을 볼 수 있는 화면을 구현해보도록 하겠습니다.
그리고 구현하고 있는 앱 이름을 Steemit 과 Blog를 합쳐서 Steemlog 라고 지었습니다.^^
"Steemit + Blog = Steemlog"

이전글
시작하기전
글 상세화면을 구현하기 전에 무한 스크롤과 관련하여 오류가 있어서 Main.vue를 수정하였습니다. 오류를 설명하자면 상세화면 컴포넌트에서 페이지를 스크롤하는 경우에도 Main.vue에 구현되어 있는 무한 스크롤 기능이 동작하여 글을 계속 가져오는 문제가 있습니다. 해당 오류는 아래와 같은 방법으로 해결하였습니다.
Main.vue 컴포넌트가 비활성화가 되는 경우에는 무한 스크롤 기능이 동작하지 않도록 합니다. Main.vue 컴포넌트의 deactivated 함수에서 busy 플래그를 true로 변경합니다. 그리고 Main.vue 컴포넌트가 활성화 되면 무한 스크롤 기능이 다시 동작하도록 activated 함수에서 busy 플래그를 false로 변경합니다.
deactivated () {
    this.busy = true
},
activated () {
    this.busy = false
}
위의 설명이 잘 이해가 되지 않으면 Main.vue 파일의 전체 내용을 여기에서 확인하시기 바랍니다.
라우터에 PostView.vue 컴포넌트 추가하기
이번에 구현할 상세화면 컴포넌트 정보를 라우터(Router)에 추가하도록 하겠습니다.
router/index.js 파일에 PostView 컴포넌트를 임포트합니다. 참고로 우리는 아직 PostView 컴포넌트를 구현하지 않았기 때문에 오류가 발생할 수 있습니다. 그리고 아래와 같이 Router 오브젝트에 PostView 컴포넌트의 path와 component 정보를 추가합니다. path에는 PostView 컴포넌트에서 사용할 author와 permlink값을 파라미터로 받을 수 있도록 /detail/@:author/:permlink 와 같은 형태로 입력합니다. 구현된 소스 내용은 여기 참고하세요.
... 생략 ...
import PostView from '@/components/PostView' // PostView 컴포넌트 임포트

... 생략 ...

export default new Router({
  routes: [
    {
      name: 'PostView',
      component: PostView,
      path: '/@:author/:permlink'
    }
    ... 생략 ...
그러고 나서 Main.vue 컴포넌트에서 글목록을 클릭하면 PostView 컴포넌트으로 이동할 수 있도록 components/Main.vue 파일을 아래와 같이 수정합니다. 글제목과 내용을 표시하는 <v-list-tile> 태그에 to 옵션을 추가합니다. to 옵션은 우리가 라우터에 추가한 path정보와 맵핑되어 해당 컴포넌트가 렌더링됩니다. 아래 소스 내용에서 "'/@' + d.author + '/' + d.permlink" 코드에 실제 값이 매핑되면 "/@anpigon/steemit-3" 와 같은 형태가 됩니다.
... 생략 ...
<v-list three-line>
  <v-list-tile :to="'/@' + d.author + '/' + d.permlink">
    <v-list-tile-content>
      <v-list-tile-title>{{ d.title }}</v-list-tile-title>
      <v-list-tile-sub-title class='ellipsis'>{{ d.body }}</v-list-tile-sub-title>
    </v-list-tile-content>
  </v-list-tile>
</v-list>
... 생략 ...
상세화면(PostView) 컴포넌트 생성
이제 components/PostView.vue 파일을 생성합니다. 파일 내용은 아래와 같습니다.
<template>
<v-container fill-height fluid grid-list-md>
  <v-layout v-if="loading" align-center justify-center>
    <v-progress-circular size="50" color="primary" indeterminate></v-progress-circular>
  </v-layout>
  <v-layout v-if="!loading">
    <v-flex xs12 md8 offset-md2>
      <v-card>
        <v-card-title class="headline pb-0">
          {{ title }}
        </v-card-title>
        <v-layout>
          <v-flex xs6>
            <v-list class='pt-0'>
              <v-list-tile avatar>
                <v-list-tile-avatar>
                <img :src="'https://steemitimages.com/u/' + author + '/avatar'" alt="avatar">
                </v-list-tile-avatar>
                <v-list-tile-content>
                  <v-list-tile-title>{{ author }} ({{author_reputation}})</v-list-tile-title>
                  <v-list-tile-sub-title>{{created}} · {{category}}</v-list-tile-sub-title>
                </v-list-tile-content>
              </v-list-tile>
            </v-list>
          </v-flex>
          <v-flex text-xs-right class='pr-4 pt-3'>
            <div>좋아요 {{ net_votes }}명 · 댓글 {{ children }}명</div>
            <strong>${{ payout_value }}</strong>
          </v-flex>
        </v-layout>
        <v-divider></v-divider>
        <v-card-text>
          <article v-html="body"></article>
        </v-card-text>
      </v-card>
    </v-flex>
  </v-layout>
</v-container>
</template>
<script>
import steem from 'steem'

export default {
  data () {
    return {
      loading: true,
      title: '',
      body: '',
      author: '',
      author_reputation: 0,
      category: '',
      children: 0,
      net_votes: 0,
      created: '',
      payout_value: 0
    }
  },
  deactivated () {
    // 해당 컴포넌트가 비활성화 되었을때, 컴포넌트를 메모리에서 제거한다.
    this.$destroy()
  },
  beforeCreate () {
    const author = this.$route.params.author // path에서 author값
    const permlink = this.$route.params.permlink // path에서 permlink값

    // 스팀 네트워크에서 글을 가져온다.
    steem.api.getContentAsync(author, permlink)
      .then(r => {
        this.title = r.title
        this.body = r.body
        this.category = r.category
        this.children = r.children
        this.net_votes = r.net_votes
        this.author = r.author
        this.created = r.created
        this.author_reputation = r.author_reputation
      })
      .catch(e => console.log(e)) // 에러가 발생하는 경우 콘솔에 출력
      .finally(() => (this.loading = false)) // 로딩 이미지 비활성화
  }
}
</script>
위 소스 내용에 대한 설명은 일부 주석으로 대신하였습니다. PostView.vue 컴포넌트에서는 beforeCreate 함수를 사용하여, 컴포넌트가 생성되기 전에 글 내용을 가져오도록 구현하겠습니다. beforeCreate 함수에서 스팀잇 글 내용을 가져오는 steem.api.getContentAsync 함수를 호출합니다. 참고로 data에서 loading 플래그는 글을 가져오기 전에 로딩 이미지 <v-progress-circular>를 보여주거나 또는 숨겨주는 용도입니다.
참고로
steem.api.getContentAsync와steem.api.getContent는 동일한 기능의 함수입니다. 두 함수의 차이점을 설명하자면 Async가 붙은 함수는 ES6 표준 Promise를 사용하고, 그렇지 않은 함수는 콜백을 사용하여 구현합니다. 그리고 Async함수는 ES7부터 지원하는 Async / Await 문법을 사용하여 더 간결하게 코딩할 수 있습니다. 이 부분은 기회가 되면 나중에 보여주도록 하겠습니다.
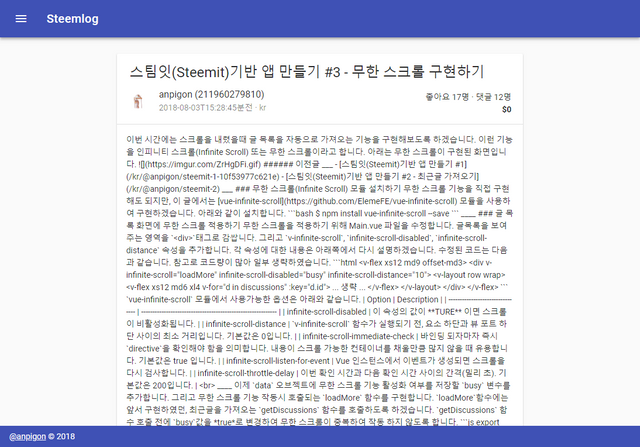
여기까지 구현한 다음 목록에서 글을 클릭하면 아래와 같은 화면이 보입니다.

이쁘게 출력되진 않네요. 수정해야 할 부분들이 보입니다.
위 화면을 보시면 글 등록시간이 2018-08-03T15:28:45와 같이 표시되고 있습니다. Main.vue 컴포넌트에서 구현했던 방식을 사용하여 시간을 표시하도록 하겠습니다. 하지만 Main.vue 컴포넌트와 PostView.vue 컴포넌트에서 시간을 변환하는 동일한 코드가 있으면, 소스 내용도 길어지고 보기에 좋지 않습니다. 그래서 이번에는 vue가 제공하는 옵션 중 필터(filter)를 사용하여 모든 컴포넌트에서 사용할 수 있도록 구현해보겠습니다.
main.js 에 아래와 같이 등록시간을 변환해주는 필터(filter)를 구현합니다.
Vue.filter('filterCreated', function (value) {
  if (!value) return ''
  const now = new Date()
  const created = new Date(value.toString() + 'Z')
  const elapsedSeconds = (now - created) / 1000 // 경과 시간(초)
  if (elapsedSeconds < 60) {
    return Math.round(elapsedSeconds) + '초 전'
  } else if (elapsedSeconds < 360) {
    return Math.round(elapsedSeconds / 60) + '분 전'
  } else if (elapsedSeconds < 8640) {
    return Math.round(elapsedSeconds / 60) + '시간 전'
  } else if (elapsedSeconds < 207360) {
    return '어제'
  } else {
    return (now.getFullYear() !== created.getFullYear() ? created.getFullYear() + '년 ' : '') +
                            (created.getMonth() + 1) + '월 ' +
                            created.getDate() + '일'
  }
})
이제 PostView.vue 컴포넌트에서 등록시간 바인딩 해주는 부분에 필터를 적용하겠습니다. {{}} 형태의 데이터 바인딩 방법을 중괄호 보간법(mustache interpolations)이라고 합니다. 필터 적용방법은 보간자 내에 파이프 심볼과 함께 필터를 추가 해주면 됩니다. {{ created }} 를 {{ created | filterCreated }}로 수정합니다.
같은 방법으로 명성(reputation)을 계산하는 것도 필터로 만들어봅니다.
// 명성 계산
Vue.filter('filterReputation', function (t) {
  if (!t) return t
  t = parseInt(t)
  let e = String(t)
  let r = e.charAt(0) === '-'
  e = r ? e.substring(1) : e
  let n = e
  let i = parseInt(n.substring(0, 4))
  let o = Math.log(i) / Math.log(10)
  let s = n.length - 1
  let a = s + (o - parseInt(o))
  if (isNaN(a)) a = 0
  else {
    a = Math.max(a - 9, 0)
    a *= r ? -1 : 1
    a = 9 * a + 25
    a = parseInt(a)
  }
  return a
})
작성자 명성을 표시하는 부분에 필터를 {{author_reputation | filterReputation}} 와 같이 적용합니다.
이번에는 computed 함수를 사용하여 보상금액(payout_value)을 계산해보도록 하겠습니다. vue에서는 이것을 계산된 속성(computed property)이라고 부릅니다.
... 생략 ...

data () {

  ... 생략 ...

  // data에 payout_value 관련 값들을 저장
  total_payout_value: 0,
  curator_payout_value: 0,
  pending_payout_value: 0
},

// computed 기능 구현
computed: {
  // payout_value 금액 계산
  payout_value () {
    return (this.total_payout_value + this.curator_payout_value + this.pending_payout_value).toFixed(2)
  }
},

beforeCreate () {

  ... 생략 ...

  steem.api.getContentAsync(author, permlink)
    .then(r => {

        ... 생략 ...

        this.total_payout_value = parseFloat(r.total_payout_value.split(' ')[0])
        this.curator_payout_value = parseFloat(r.curator_payout_value.split(' ')[0])
        this.pending_payout_value = parseFloat(r.pending_payout_value.split(' ')[0])
    })

  ... 생략 ...
}
소스 내용에서 생략된 부분이 많아 보기 힘드실 수 있습니다. 소스 전체 내용은 여기를 참고하세요.
이제 마크다운으로 표시되고 있는 글내용을 html로 변환하여 보여주도록 해보겠습니다. 아래와 같이 Remarkable 객체를 생성합니다.
import Remarkable from 'remarkable'

const md = new Remarkable({ html: true, linkify: true })
그리고 글을 가져오는 함수에서 마크다운 형태로 된 글내용을 html로 변환합니다. this.body = r.body를 this.body = md.render(r.body)로 수정합니다.
여기까지 구현하면 아직 스타일이 적용되지 않아 글내용을 보여주는 페이지의 디자인이 너무 투박하게 보일 것입니다. 우리는 스팀잇과 비슷한 디자인으로 보여주기 위해 아래와 같이 스타일을 추가합니다.
<style>
article img {
    width: auto;
    max-width: 100%;
    height: auto;
    max-height: none;
    display: inline-block;
    vertical-align: middle;
    border-style: none;
}

... 생략...

</style>
스타일은 내용이 너무 길어 생략하였습니다. 전체 내용은 여기를 참고하세요.
코드 하이라이트 적용하기
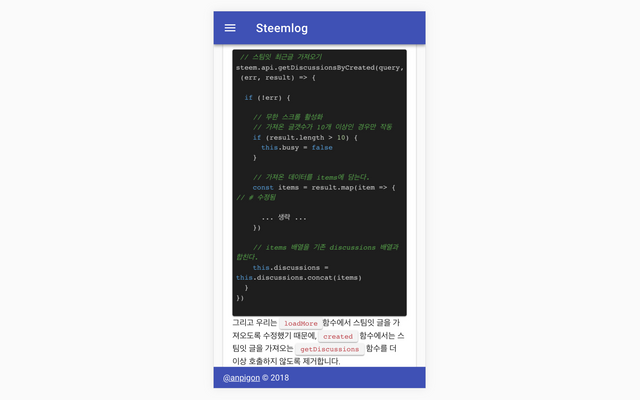
저는 스팀잇에 글을 작성할 때 주로 소스코드가 포함된 글을 올리기 때문에 코드 하이라이트 기능을 추가로 구현하였습니다.
아래와 같이 highlight.js 모듈을 설치합니다.
$ npm install highlight.js --save
그리고 아래와 같이 index.html 파일의 헤더 부분에 css를 추가합니다.
<link href='//cdnjs.cloudflare.com/ajax/libs/highlight.js/9.12.0/styles/default.min.css' rel="stylesheet">
highlight.js에서 제공하는 테마는 종류가 많습니다. 제공하는 테마는 종류가 궁금하신 분들은 여기에서 찾아 볼 수 있습니다. 테마 적용방법은 css경로에서 default.min.css을 해당 테마의 파일명으로 변경하면 됩니다. 저는 vs2015 테마를 적용하였습니다. 저와 같은 테마를 적용하려면 vs2015.min.css를 사용하면 됩니다.
마지막으로 글내용중에 코드블럭을 찾아 highlight를 적용합니다. PostView.vue 컴포넌트가 업데이트(updated)되었을때 코드블럭을 찾아 highlight를 적용합니다. 코드 내용은 아래와 같습니다.
import hljs from 'highlight.js'

export default {

  ... 생략 ...

    updated () {
    Array.prototype.forEach.call(document.querySelectorAll('article pre code'),
      function (block) {
        hljs.highlightBlock(block)
      })
  }

  ... 생략 ...
참고로 Remarkable 모듈에서도 highlight 옵션을 제공하고 있습니다. 하지만 highlight 테마의 배경색상이 나오지 않아서 저는 위와 같은 방법으로 적용하였습니다. Remarkable 모듈에서 제공하는 옵션이 궁금하신 분은 여기를 참고하세요.
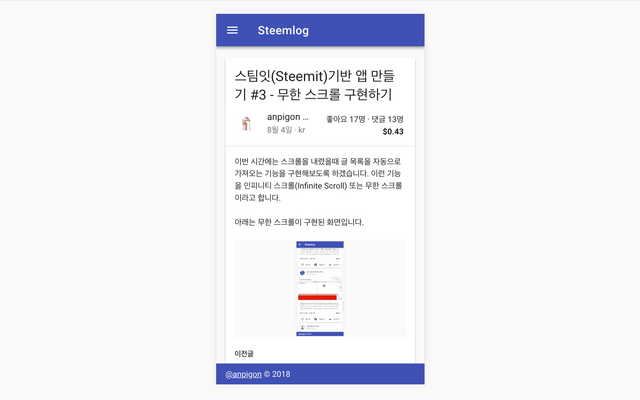
아래는 지금까지 구현한 화면입니다.


여기까지 읽어주셔서 감사합니다.
전체 소스 내용은 github에서 볼 수 있습니다.
날이 너무 덥습니다......덥다 ㅠ
날씨가 너무 더워서 큰일이네요~ 빨리 여름이 지나갔으면 좋겠어요
우왓~! 멋져용~!
수고 많으셨어용~ ^^
'스파'시바(Спасибо스빠씨-바)~!
블루엔젤님 감사합니다~ ^^
Congratulations @anpigon! You have completed the following achievement on Steemit and have been rewarded with new badge(s) :
Click on the badge to view your Board of Honor.
If you no longer want to receive notifications, reply to this comment with the word
STOPTo support your work, I also upvoted your post!
오 괜찮은데요? 🌿
감사합니다~🍒