Making a Rattlesnake Wallet: How To: Weekly Contest by Armadilloman
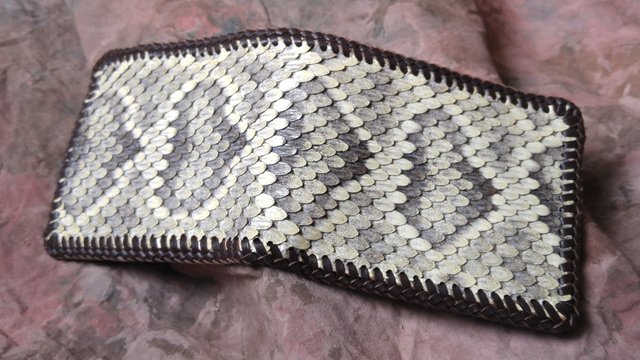
Today I am going to show you how to do what everyone just dreams of doing….scratch building a rattlesnake wallet. When I say scratch build I am meaning without a kit or any manufactured parts such as a wallet interior. We are going to start with just a piece of leather that we are going to color, finish, cut and assemble the parts into a functioning billfold wallet.
Warning…Making this as I have done requires a greater then beginner leathercrafting skill set. You should have made a few wallets from kits before you charge into scratch building one. Also this How To presumes the craftsman knows how to make a double loop lacing stitch, to splice lacing and finish the braid around the outside of the wallet and how to draw up their own project paterns.
Diamond Back Rattlesnake is an expensive leather, usually costing between $3-5 per linear inch for a skin big enough to cut a 3 ½” wide billfold back. This same wallet I am making here could be made with any number of exotic (and less expensive) leathers such as ostrich, python or even good old cowhide, which might be a better choice if this is your first scratch built wallet. Wrecking a $5 piece of cowhide does not sting quite as bad as screwing up a $50 piece of snakeskin.
Materials needed:
- 2 square feet of 2 oz “Soft tanned” unfinished cowhide
-Fiebings leather dye in Tan, Walnut and Dark Brown.
-Tandy Eco Flow Dark Brown water stain
-A clear, semi gloss acrylic finish such as Fiebings Resoline. (or Tandy Super Sheen or Sprinfield Leather Pro Clear)
-A 10” long piece of Rattlesnake wide enough to cut a 3 ½” wide wallet back from
-1/8” calfskin lacing and lacing needles
-Tandy Eco Flow contact cement and applicators (Qtips) ...I like this stuff because of its water clean up which is important for messy people like me
-Waxed hand stitching thread and 2 blunt needles
Tools needed:
-Knife and or leather shears.
-Round or chisel lacing hole punch
-Mallet and cutting/punching board
-Small wood block
-Old t-shirt or soft cloth for staining
-Small sponges
-Wool dye applicators
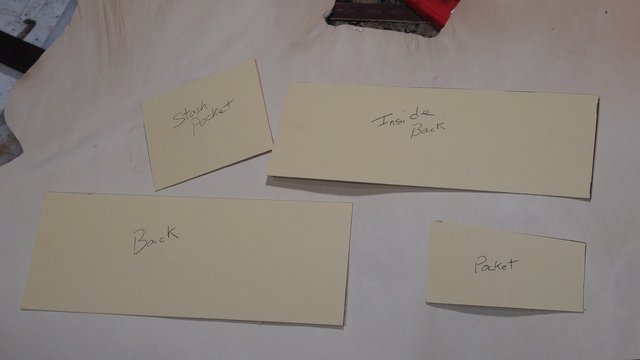
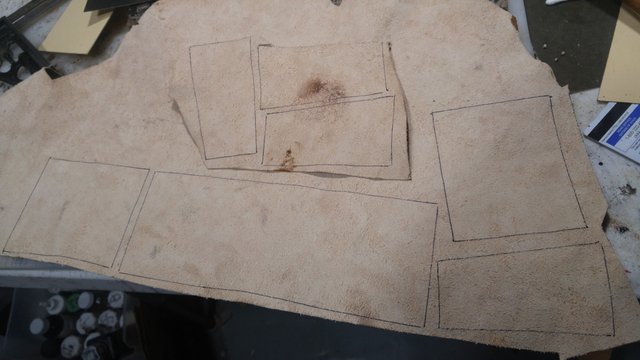
1) Here is where we start: Our pattern and a 2 sq ft unfinished piece of 2 oz thick vegetable tanned cowhide. This leather is “Soft Tanned” which means it was slightly milled to break down the stiffness. This will be important as we get to distressing the leather.
The interior I am making here is a simple one, not a leather swiss army knife like some tend to be. The pieces are 1) card pockets (cut 4 -- flip the pattern for left and right) 2) larger stash pockets (cut 2) that we will attach the card pocket to. 3) the inside back (which is 3/8”-1/2” smaller in width then the billfold back so that it can naturally fold without wadding up) and 4) the billfold back lining. We will also need to cut a small piece of our soon to be hand colored leather to line the inside back between the pocket assemblies. These pieces will all vary in size depending on how big of a wallet you are making. Generally speaking a wallet back is 9 1/2" x 3 1/2"
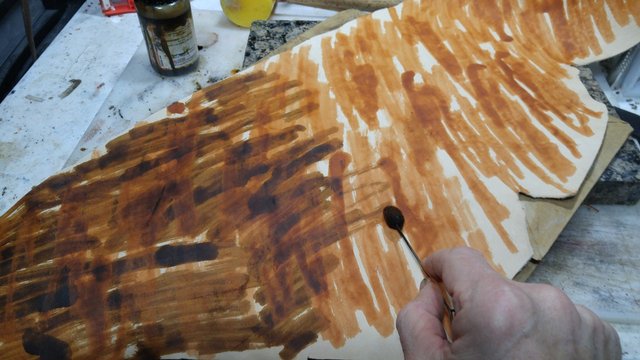
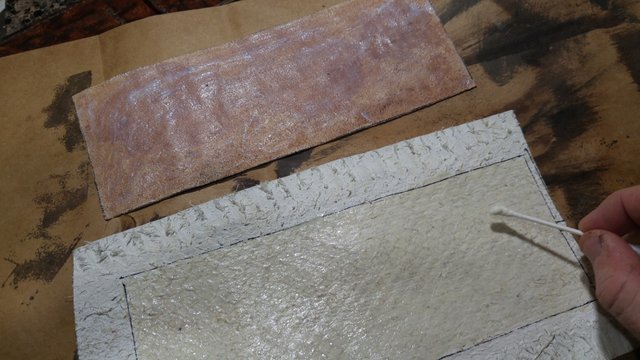
2) Take a piece of leather and with a wool dye applicator, lay in the tan color all going one direction. You don’t want a solid application.
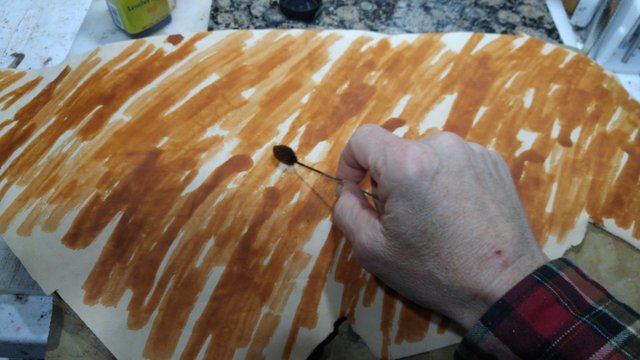
3) Now do the same going the other direction with the Wallnut Brown stain. I know this looks awful. Trust me, it gets better.
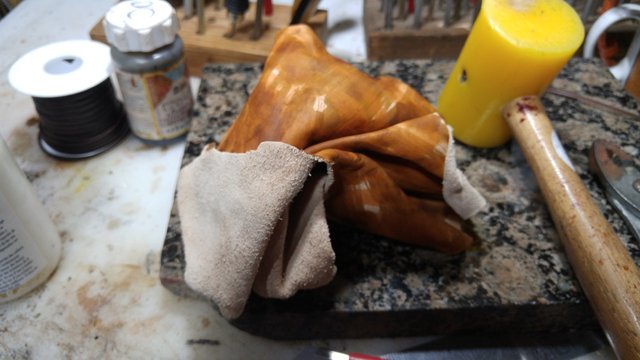
4) Next you get to take your aggression out on this piece of leather by wadding it up in a knot. I then stomp on the knot, hit it with a mallet, untwist it and re-twist a different way and carry it around in my back pocket, sitting on it. The point is, the leather needs to be “broken in” and no longer flat.
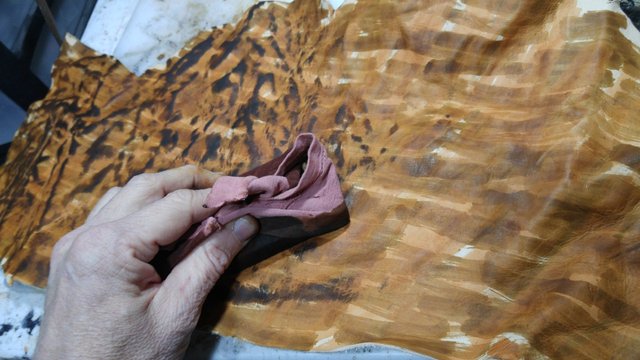
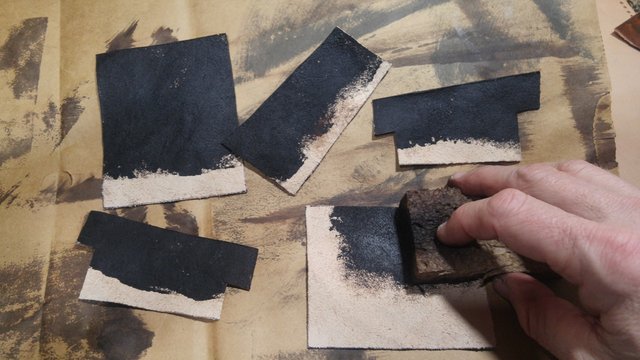
5) Uncurl the colored leather piece and take a small block of wood and wrap it with a piece of soft cloth. Take the block with cloth and tightly press it to the open mouth of dark brown dye bottle and flip it over once to soak the cloth with the dye. Take the block covered with the now dye soaked cloth and lightly rub the bumps and ridges of the wrinkled leather. Press harder as the dye is exhausted from the cloth. Repeat this until you have covered the leather piece.
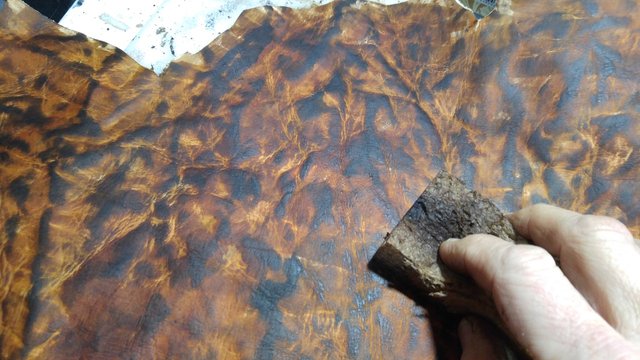
6) Add some Dark Brown water stain to a damp sponge, smoosh the sponge to spread the dye within. Blot lightly and sponge paint texture onto the leather. As the dye exhausts from the sponge, press harder, using this to balance the contrast between the dark and light tones.
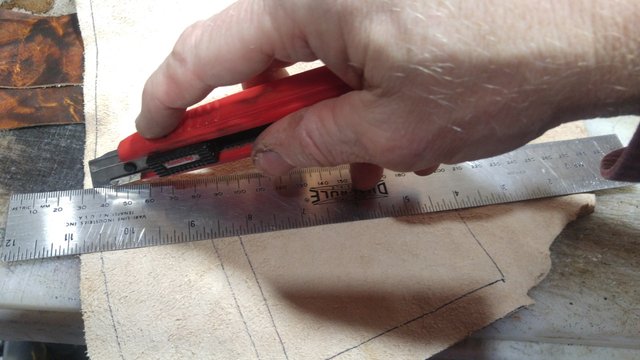
7) When the dye is completely dry put a coat of acrylic finish on the leather piece. When the acrylic is dry, flip the piece over and trace around your pattern pieces with fine point sharpie.
8) Cut the pieces out with sharp knife and or leather sheers.
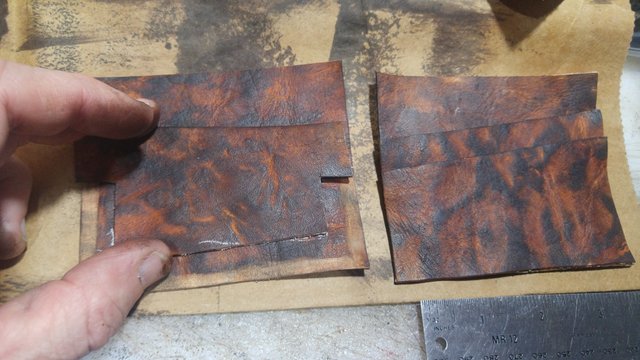
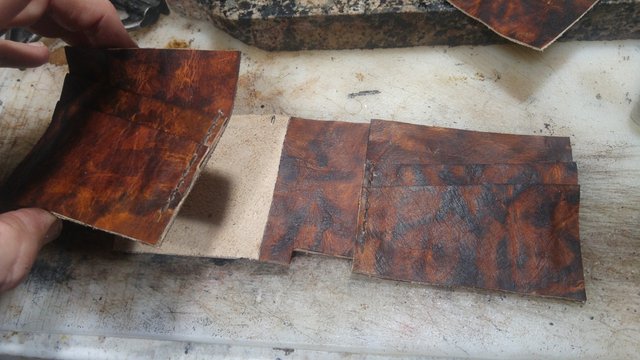
9) The backs of the pieces are colored with the dark brown water stain, leaving the bottom edge un colored where you are going to apply glue. Notice that the two inside pocket pieces have a half inch notch cut out the sides of each of them. This makes the edge thinner with one less piece of leather to lace through.
10) The inside card pockets are glued down ½” from the bottom of the stash pocket on the left and right side pieces. The front card pocket is glued down along the edges.
11) Stitching holes are punched on the inside opening, 3/16” from edge of the glued pocket assemblies and then…
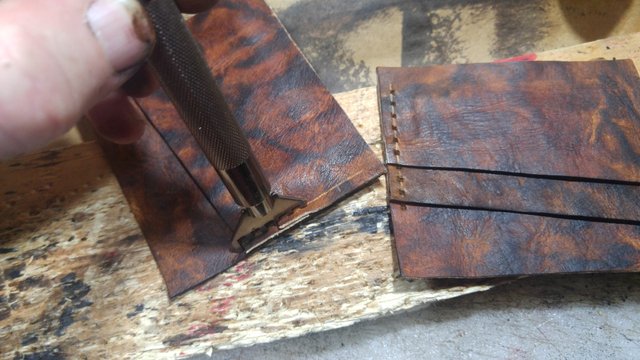
12) …the pocket assemblies are stitched up using waxed thread and double needles. The inside back lining piece is glued in the center back of of the inside back and a fold relief notch is cut in the center bottom. This notch makes it possible for the smaller billfold insides to be laced to a larger back. The insides need to be 3/8 – a ½” smaller in order for the billfold to naturally fold up. The pocket assemblies are glued along the edges to the inside back.
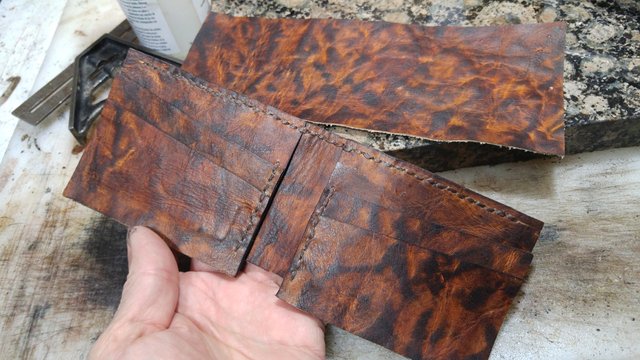
13) Stitching holes are punched 3/16” from the top edge, and…
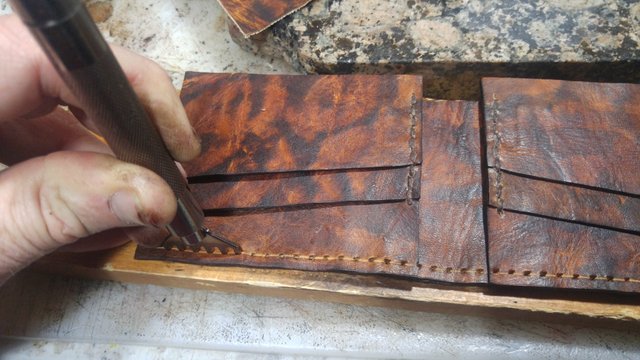
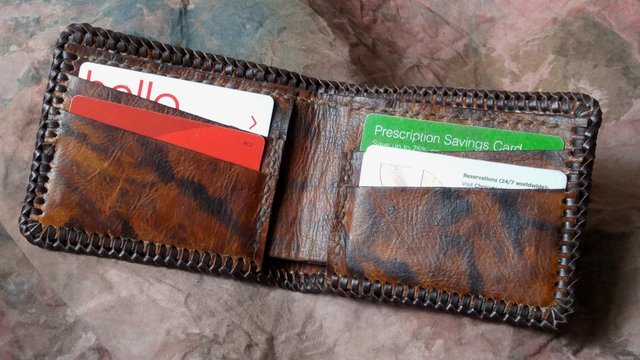
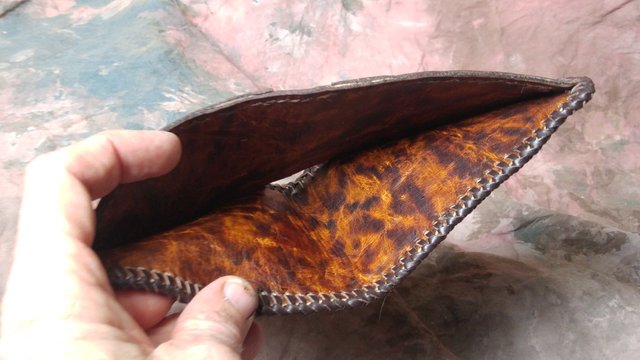
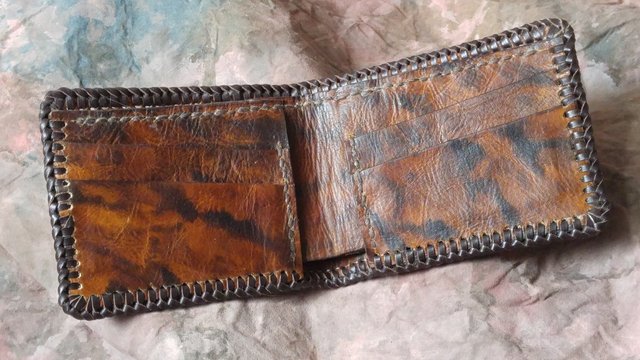
14) …the top is stitched up and there we have our finished insides with the billfold back lining.
15) I have cut out a 10” piece of Eastern Diamond Back Rattlesnake Skin out of the part of the hide wide enough to cut the billfold back without having to use the belly scales on the edges (which are not as nice or easy to work with.)
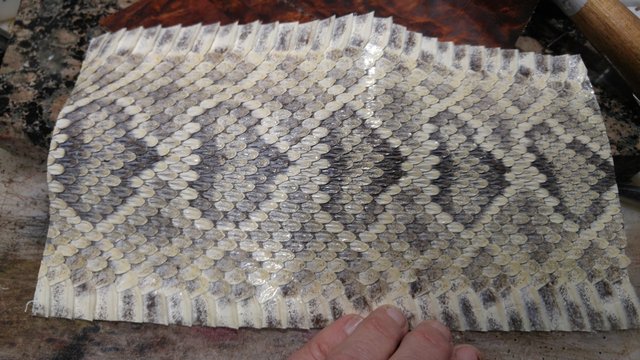
16) Draw around the previously cut out lining piece on the back of the snakeskin, centering the diamonds down the middle of the piece as much as possible. Spread contact cement on both sides and when it is partially dried, press the pieces together. Cut around the edge using a leather shears, rather then knife as it is tough to cut through the snake scales evenly with a knife.
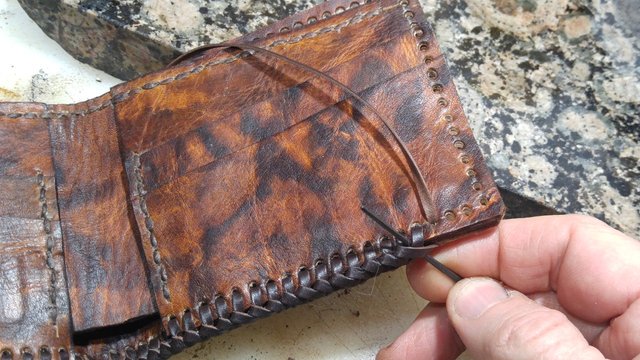
18) Flip the now glued up snakeskin billfold back over and mark a line 3/16 – 1/8” from the edge to guide punching the lacing holes.

19) Do the same on the wallet insides.
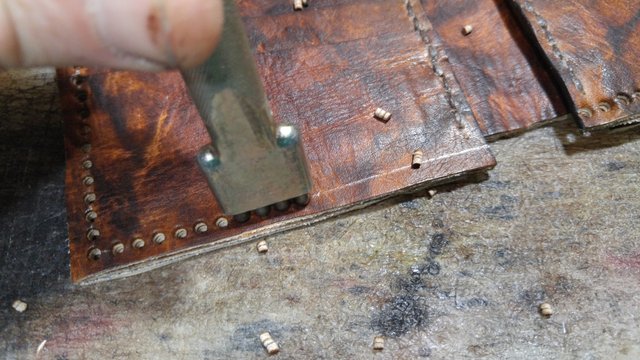
20) Scrape off the finish on the edge of the back and glue the left side of the insides to the wallet back. I just glue the one side first then stitch that side before gluing the other side down just because it seems easier to hold and lace with out the wallet spine bend in it.
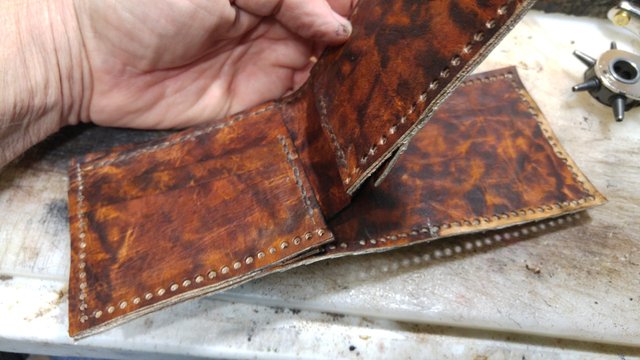
22) Using a double loop stitch, from the front of the wallet, lace up the glued on left side around to the bottom spine center.
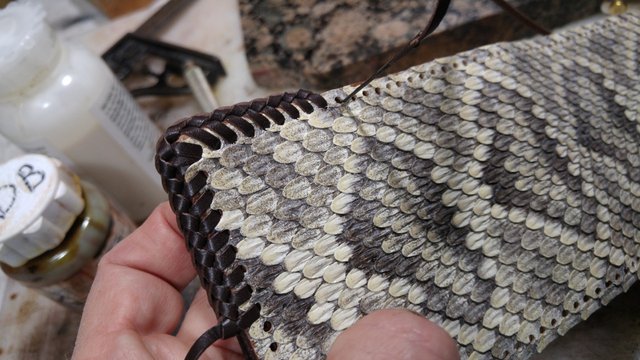
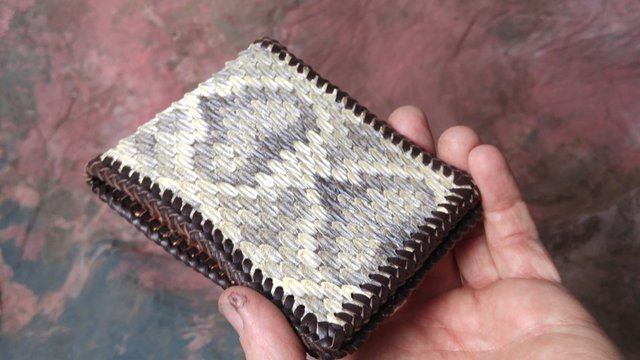
23) When you are laced to the spine notch on the wallet inside, spread glue around the right hand side edge of the wallet inside and glue aligning the edges. Double loop lace around and finish where the lacing reaches the place started. and then…
You are done.
Some of this is kind of complicated, so if any does not make sense to you, please ask me questions and I will clarify. I do lots of "How I Did That" photo blogs of leather projects, so please give me a follow if you want to see more.
Very talented @armadilloman! Certainly looks like a fine product
Thanks @jeffjagoe!
This is awesome... You really gave a detailed post of how you did it. Great job
Thank you for the kind words, @sammynathaniels!
Beep bop, this is @pushbot.
I just received a signal from the Mother Ship that you may require a push.
You just got a 9.54% upvote courtesy of @howtoweekly!
Message from the Mother Ship:
You can earn daily profit by delegating SP to make @pushbot stronger. Delegators receive a share in 95% of the earnings.
10 SP • 20 SP • 50 SP
100 SP • 200 SP • 500 SP
1000 SP • 2000 SP • 5000 SP
Any Other Amount
impressive the result product looks amazing!!! well done
Thank you @drawmeaship. Eastern Diamondback is really showy beautiful stuff.
Your Post Has Been Featured on @Resteemable!
Feature any Steemit post using resteemit.com!
How It Works:
1. Take Any Steemit URL
2. Erase
https://3. Type
reGet Featured Instantly & Featured Posts are voted every 2.4hrs
Join the Curation Team Here | Vote Resteemable for Witness
Join our Discord Channel to connect with us and nominate your own or somebody else's posts in our review channel.
Help us to reward you for making it ! Join our voting trail or delegate steem power to the community account.
Your post is also presented on the community website www.steemmakers.com where you can find other selected content.
If you like our work, please consider upvoting this comment to support the growth of our community. Thank you.
oo not sure how i missed this post of yours, probably my favourite item so far! Are you doing any plain unsteem stamped wallets? i could do with one, a bit like this but just with cheap leather as currently rather broke. what sort of price am i looking at?
Hey @robali123! Hows life in the van? Here is the wallet I have in the etsy shop at the moment. I do others but thats the one (for various reasons) I have in the shop at the moment. But lets barter. Show steemit how its done! I will drop you a note on discord.
https://www.etsy.com/listing/499112741/hand-tooled-billfold-leather-billfold