#RecyclingWithCraft :: Weaving a Basket with Magazines
Hi there!
A lovely Sunday to you!
Do you have magazines you no longer read and are just lying around, waiting to be recycled?
How about using them to weave a basket which you can then use to store and organize your things?
If you search the internet, there are many weaving styles. For this post, to start off, I will share with you a simple weaving method which you can try.
This tutorial makes a basket that is about 19cm x 19cm in size and uses a 27.5cm x 21cm magazine with thin and glossy pages. The basket is quite sturdy in structure and uses about 25 x 2 pages (centerfold) of the magazine. A nice way to recycle, repurpose and reuse 😎🌳.
Step 1
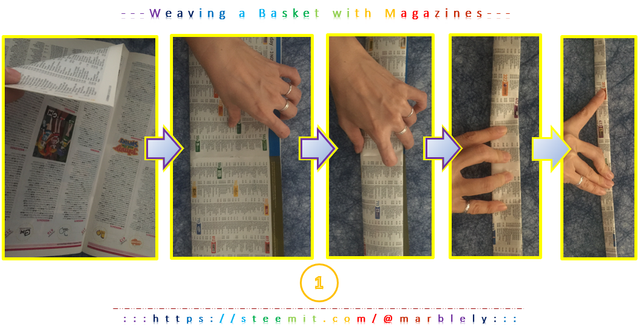
- Take any magazine you no longer read. Tear out the center pages. This will give you 42cm in length for the basket weaving.
- Fold the center pages to half and keep folding half until you get a 2cm x 42cm strips.
Step 2
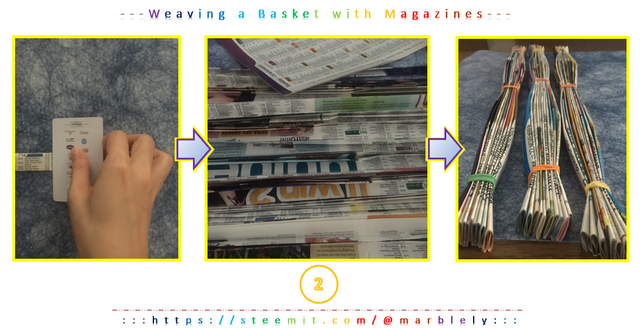
- If the magazine is hard to flatten, use an old credit card or any hard card you have, press it down and scrape onto the strip to flatten it.
- Keep repeating Steps 1 and 2 to create about 25 strips.
- I bundled the strips together with rubber bands to keep it flattened.
You can customize the size of your strips to either wider, thinner, depending on your paper texture. The idea is to create a sturdy enough strip to weave a sturdy basket.
Step 3
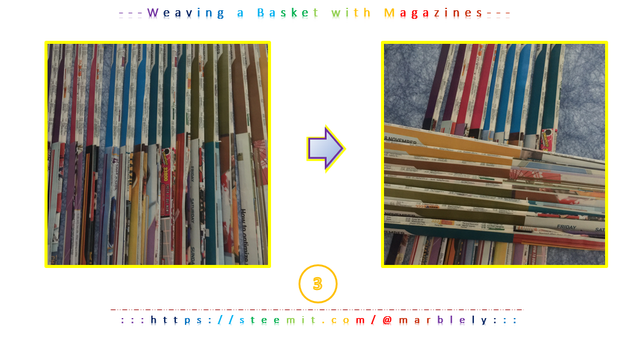
- You can arrange the strips according to colour and decide which strip goes where.
Step 4
- Lay 9 strips side by side vertically.
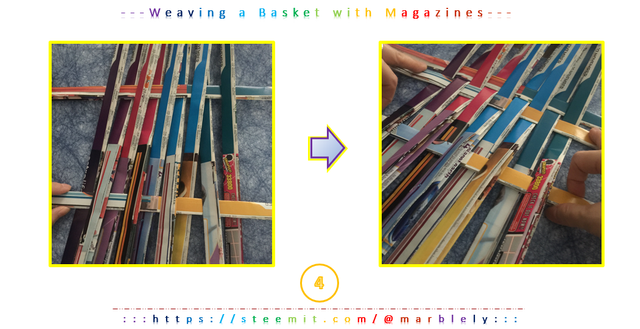
- Begin weaving by inserting the first loose strip horizontally, placing it under and over the vertical strips until you reach the end of the 9 strips.
- Take the second loose strip and repeat the weaving but this time, place it over and under the vertical strips in a different order as the first strip.
- With the third loose strip, repeat the weaving by following the order of the first strip.
- Use both hands to tighten the weave.
You can customize the size of your basket by laying less strips vertically before you weave and weaving with less horizontal strips.
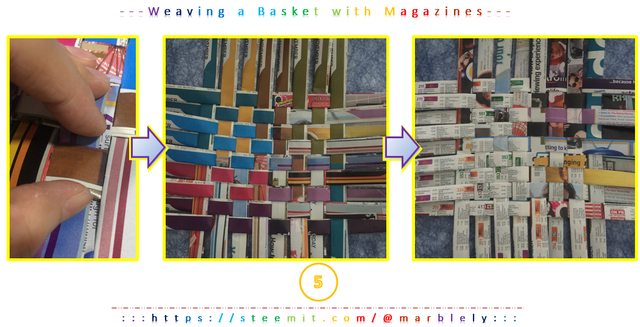
Step 5
- Continue weaving until you reach the desired basket base size. I used 8 horizontal strips.
- Use your finger to push the weaves tight.
- Compare the weave pattern front and back to decide which side will be the inner side of your basket, and which side will be the outer side of the basket.
- I chose the colourful weaves as the outer side of the basket.
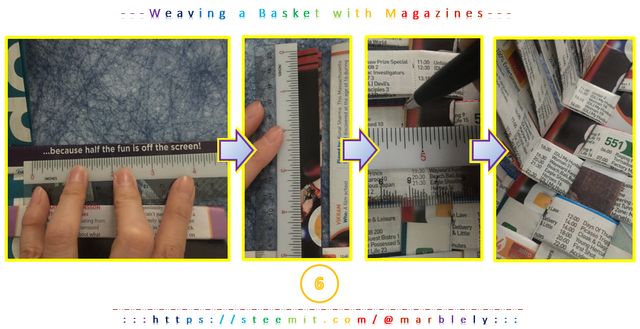
Step 6
- Roughly measure the loose ends to make sure that the weave basket base is in the center. If it is not at the center, slowly move the weaves accordingly to position it at the center.
- Bend the edges of the weave to a 90 degree angle to begin weaving upwards.
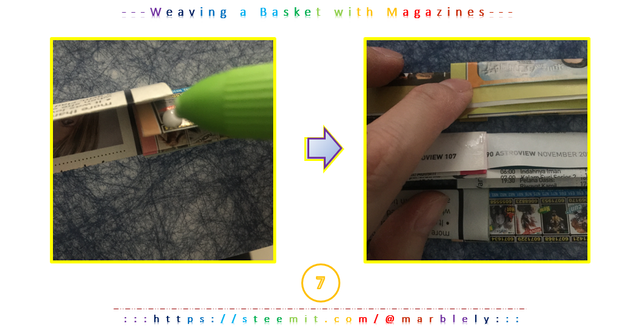
Step 7
- Prepare the strips to weave upwards by joining and gluing 2 strips ends together. Wait for it to dry.
- I prepared 4 strips of 2s (84cm x 2cm)
You can also do this step before you start weaving. I forgot to do this earlier 😁.
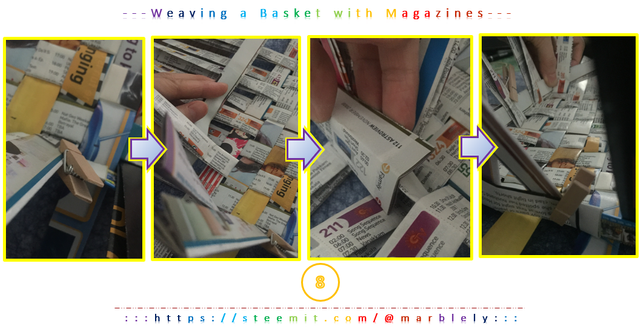
Step 8
- When you start weaving the first row upwards, using one of the loose 84cm strips, make sure the weave order is in the opposite order from the edge strips to ensure the strips are locked in the weave.
- To join the strip, place one end over the other end.
You may use clothes peg to help secure the strips as you weave upwards the sides.
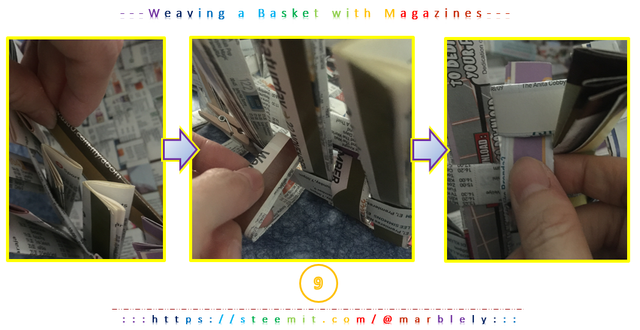
Step 9
- Take a new loose 84cm strip and place it at the center of the basket.
- Begin weaving the second row by inserting the 90 degree bent vertical strips through the horizontal strip in the opposite order from the first row.
- Continue Steps 8 and 9 for the four 84cm strips.
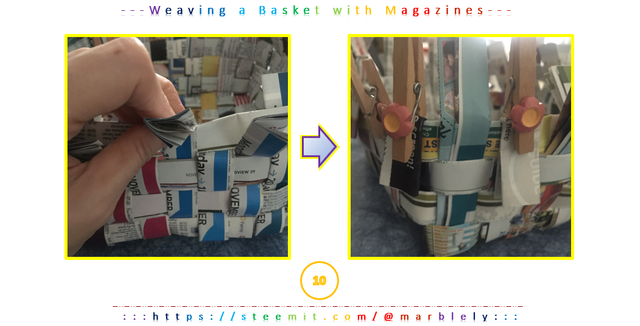
Step 10
- Tighten the weave by pulling, pushing and adjusting each strip.
- Finish the edges by folding each strip downwards and secure it with clothes pegs.
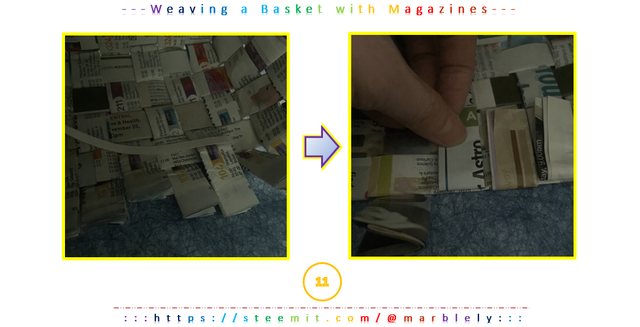
Step 11
- Use double sided tapes to secure the edges, all around the basket.
- You are done! Yay!
There are several ways to end the weaves. You can tuck the edges into the weave (if the weave is thin enough) or staple it all around.
For this tutorial, I stick the edges inward using double sided tapes. Tomorrow I will share with you on how to finish off the basket with a simple fabric lining 🙃.
Hope you will try this. You will get to make many baskets out of magazines you no longer read and have fun doing it with friends and family 😊.



Congratulations, your post has been selected to be included in my weekly Sustainability Curation Digest for the Minnow Support Project.
Host of The Alternative Lifestyle Show on MSP Waves Radio.
Founder of the A Dollar A Day charitable giving project.
Thank you so much @pennsif! Thank you for your support!
You are welcome.
Awesome, @marblely. Very clear instructions and use of recycled material !
Thank you so much @cryptocariad :) We can make so many baskets from magazines!! It was my first attempt and I am pumped to make more. I used a whole book for this!
OMG marblely, I just love your post! You always come up with the most amazing things to create with recycled material.
I have to say, the best part in the post, aside from what you have created is the part with the ruler where is says "...because half the fun is off the screen" That was awesome. You are awesome!
Thank you so much @foxyspirit! 😘😘😘 It was really fun doing this. Oh, you are right, I did not realise the quote and how true it is! Half the fun is indeed off the screen! Hehe.
You didn't spot that? I thought it was on purpose :P Even better! Haha that's cool.
Haha yah... I read it when I was measuring but did not think much into it until you pointed it out. Thank you!
@resteemator is a new bot casting votes for its followers. Follow @resteemator and vote this comment to increase your chance to be voted in the future!
This is amazing idea of recycled papers. Thank you for sharing this idealistic materials @marblely!
Thank you @sharatots!
wow! great happened! it's really a great job. we have a lot of magazines come in the form of free advertising and we throw them away. we will need to collect them and make such a basket :)
Thank you @tali72! Yes yes! Do try! I am going to make more for sure. It is such a nice way to repurpose magazines instead of throwing them away.
Wow... very good tutorial! I will share this to my friebds
. Thanks for sharing
Posted using Partiko Android
Thank you so much @mers!
I might give it a try one of these days when time already allows.
Posted using Partiko Android
Wow!! Very creative and eco-friendly craft!. I used to know this way way back in highschool and i kinda forgot how it was done.. thank you for your step by step tutorial. This is very helpful and timely. We need to recycle things and put them unto something useful..
This comment was made from https://ulogs.org
Thank you @maquemali! Yah.. I am reliving my childhood here on Steemit. I used to do these crafts in school too :)
yeah same here.. but at this time, i find it hard to recreate crafty stuff. but i do want to try it out with the kids. maybe soon..
Yes, yes do try! You are pretty (looking at your profile pic) :)
Thank you. I take that as a compliment.. 😊
Posted using Partiko Android
It is! :)
I love it. Thanks for sharing.
Thank you for reading @vassana955! :)
This post was shared in the Curation Collective Discord community for curators, and upvoted and resteemed by the @c-squared community account after manual review.
Thank you so much @c-squared!