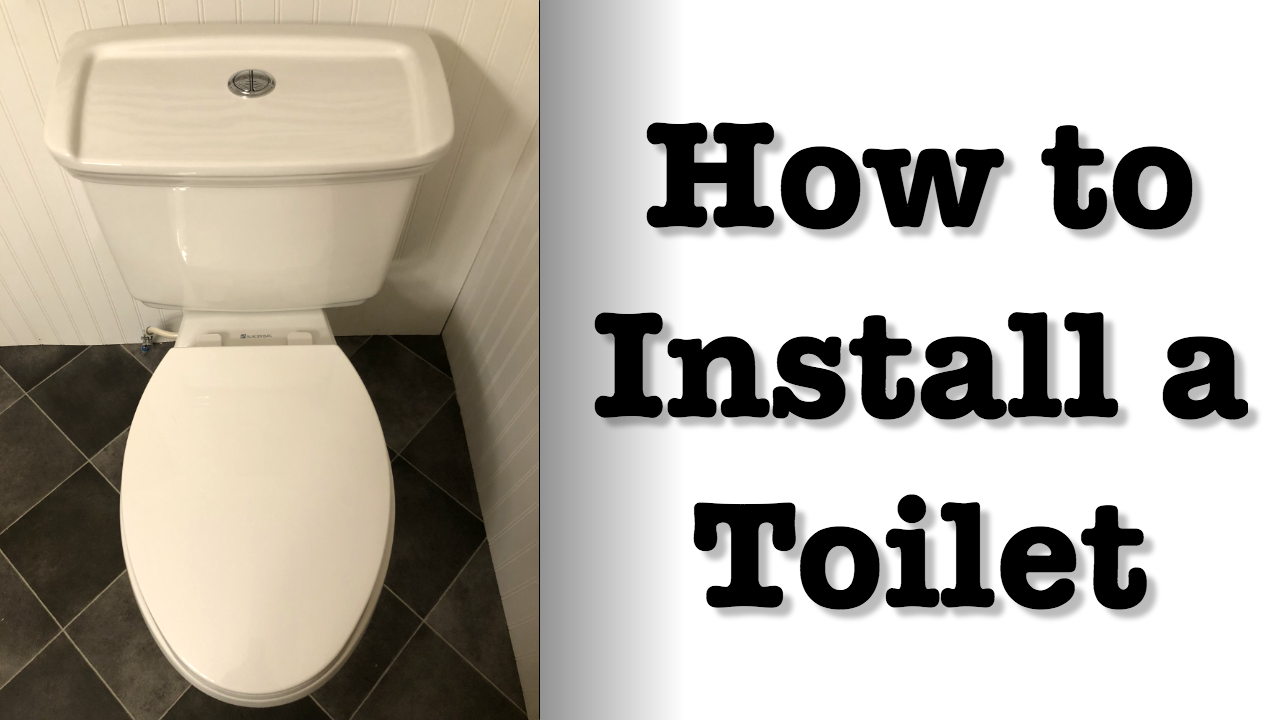
This photographic how-to will walk you through the steps of installing a new toilet. As a bonus feature, you'll also get to see how to make a custom toilet riser in the event your plumbing flange is too high to allow the toilet to sit flush to the floor like ours was. I hope you find this educational and helpful so you can tackle this project if it ever presents itself to you.
Note: This Step-by-Step How-To begins at the stage of the new toilet installation. If you need help removing your existing toilet, try reading this article from the bottom to the top. Alternatively, a big hammer works well too.
Step 1 - Wax Ring
Install the new wax ring and toilet bolts. Most modern toilets come with wax rings in the box. However, I would recommend purchasing a better quality ring separately. We purchased the best quality ring at our hardware store to the tune of $9 USD -- not too bad for a sense of comfort to guard against leaks and to get the best.
Step 2 - Set the Toilet Base
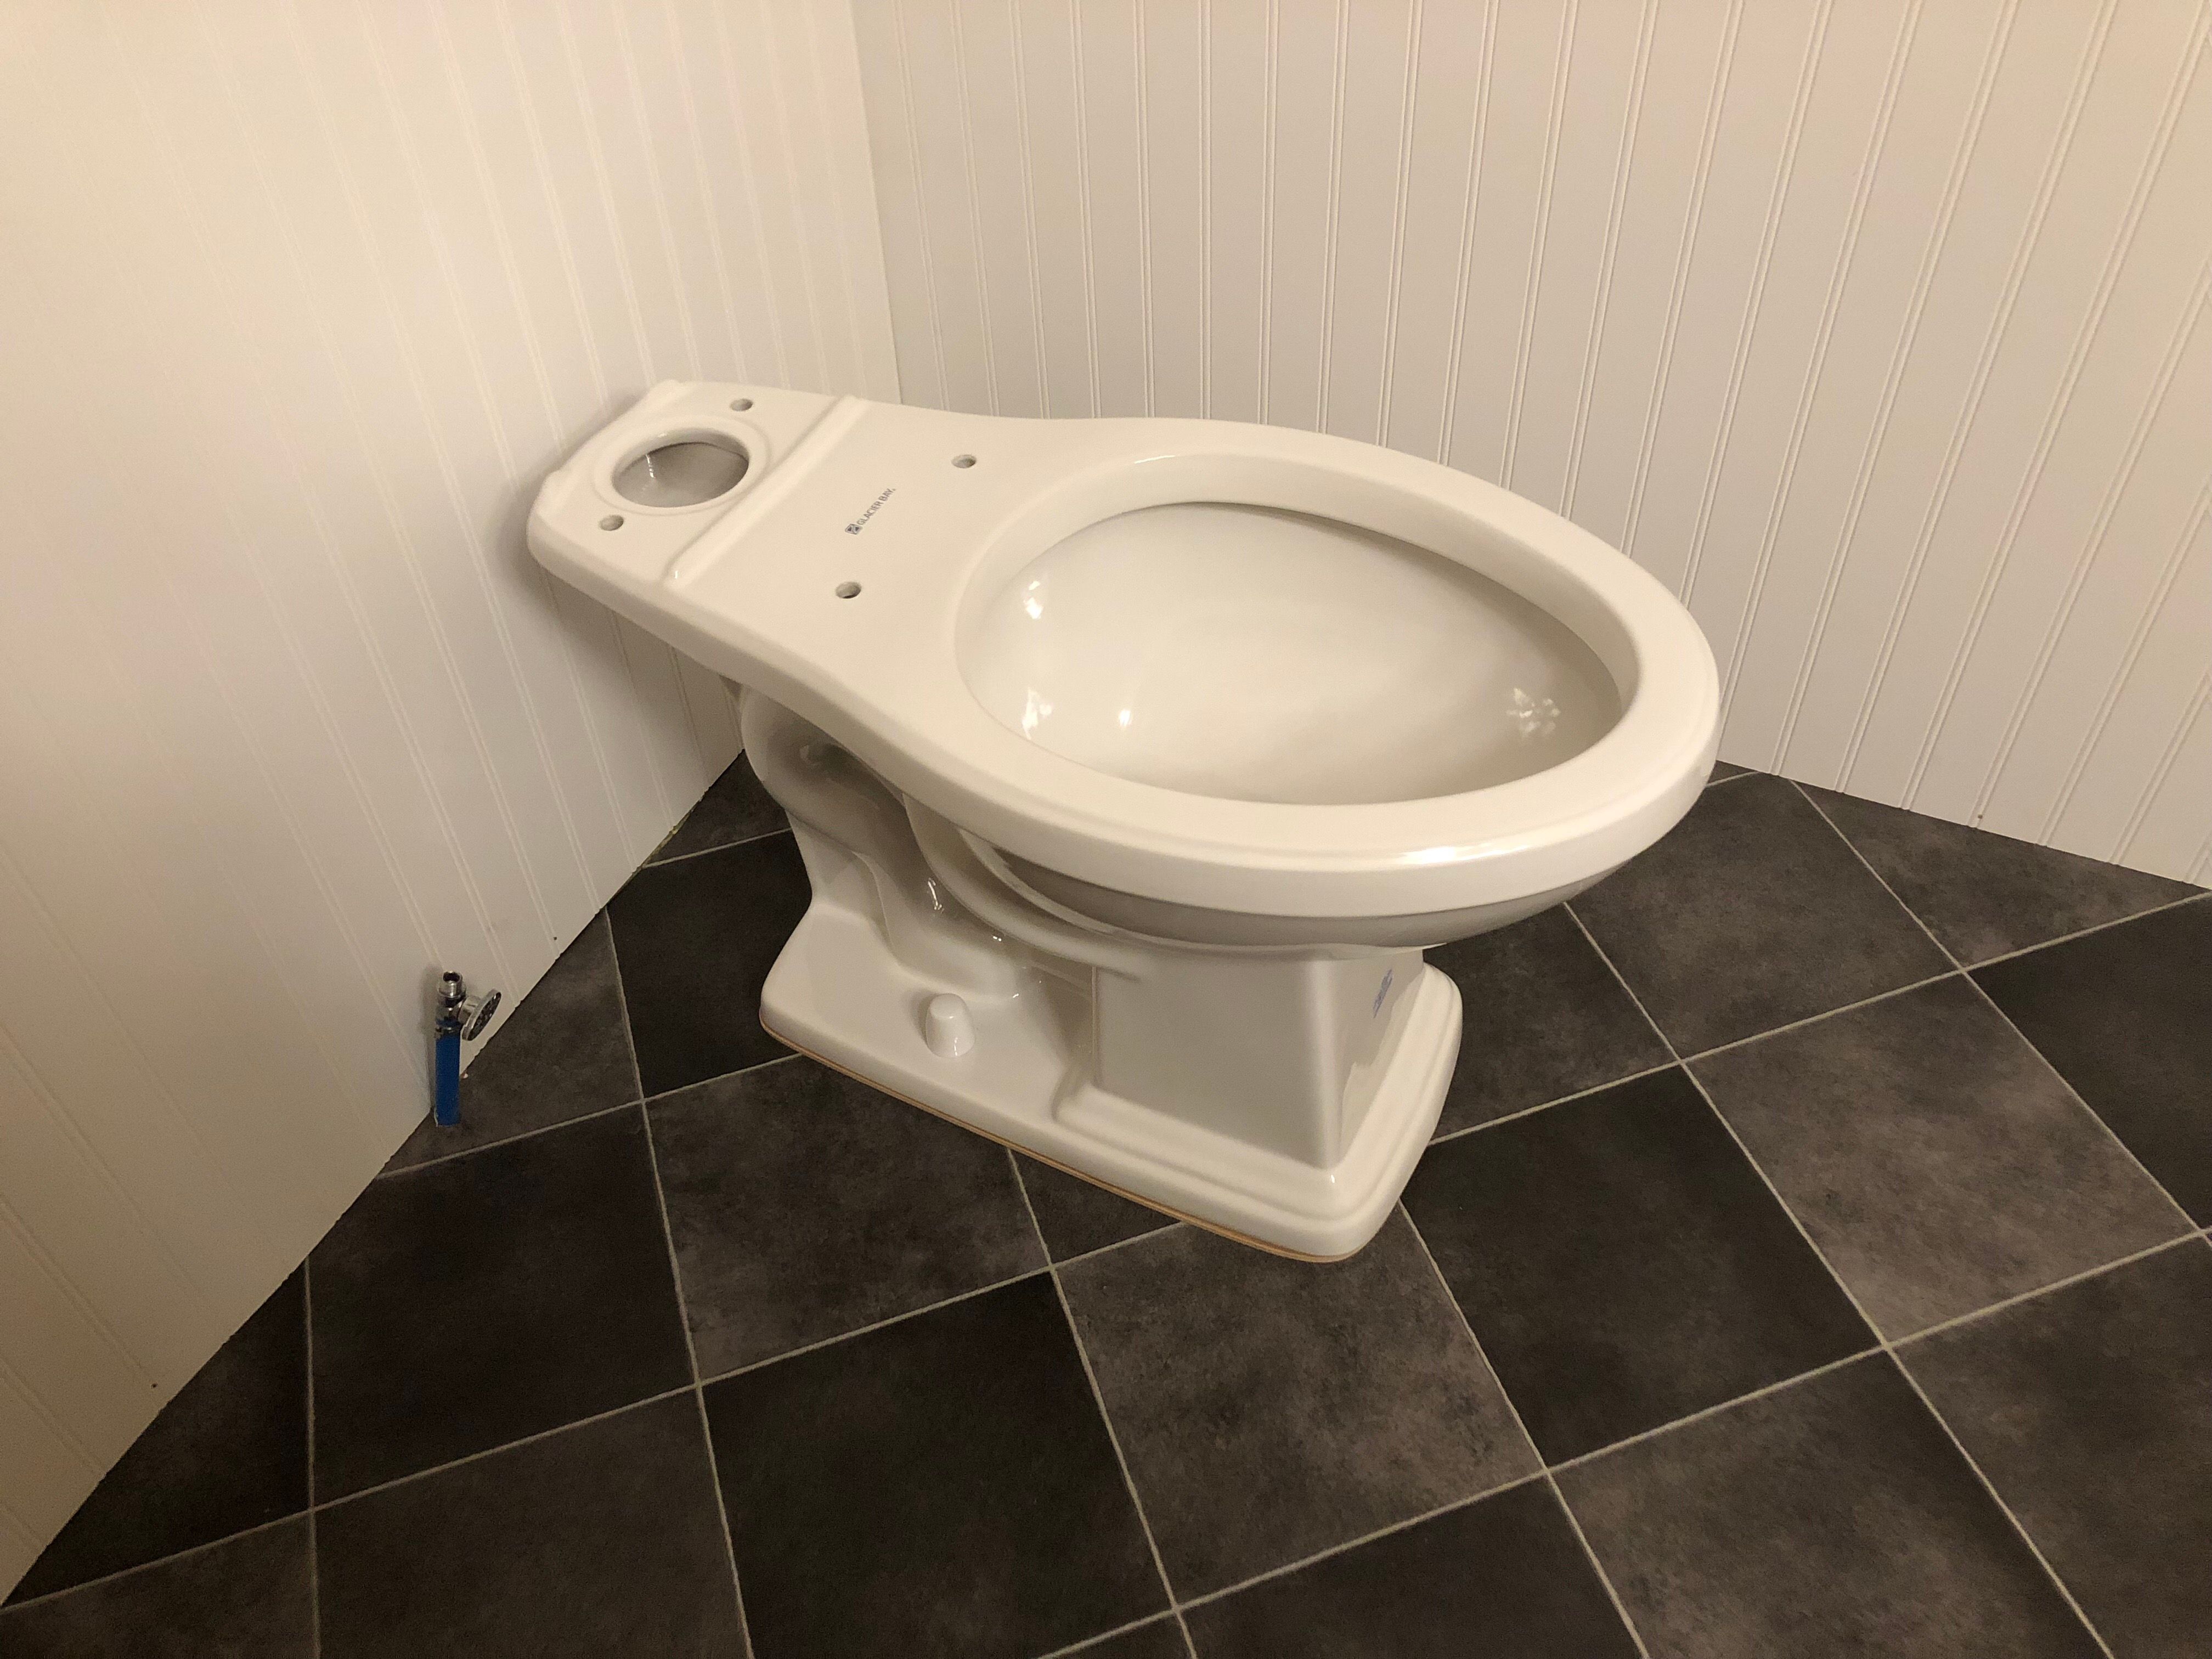
With the toilet tilted, resting on the front of its base, carefully lower it onto the wax ring and over the toilet bolts.
Tip: It is very helpful to have someone watch one side of the toilet as you watch the other to ensure the toilet is set evenly and without bending or disturbing the bolts or wax ring.
Press the toilet slowly and firmly onto the wax ring, allowing it time to spread and seal properly between the toilet and the plumbing flange. Check that the toilet rests on your bathroom flooring securely and does not rock or wobble. If your toilet rocks or wobbles, give yourself a high five! You've gotten yourself a ticket to the Bonus Round (see below).
If you're unlucky enough to have a sound and level surface as-is, you may skip to Step 3 below.
**********
!!! BONUS ROUND !!!
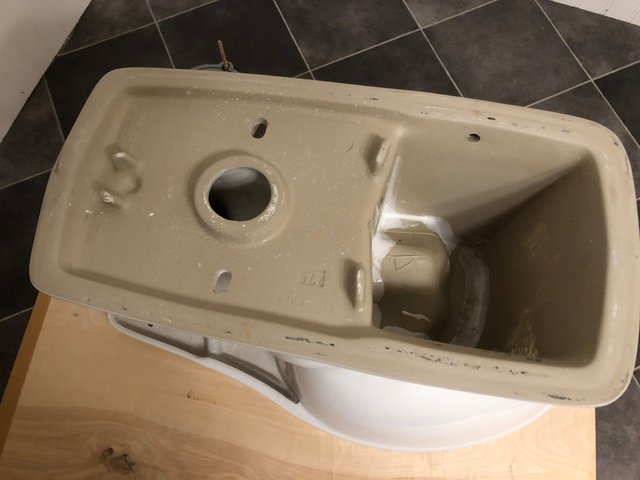
Step 2a - Remove the Toilet Base
Carefully remove the toilet from the wax ring and lay it aside. This is where purchasing the higher quality ring may pay for itself... ours was a rubber-based seal that was reusable. Had we just went with the plain wax ring that came with the toilet, we would have to go purchase another ring from the store before installing the toilet again.
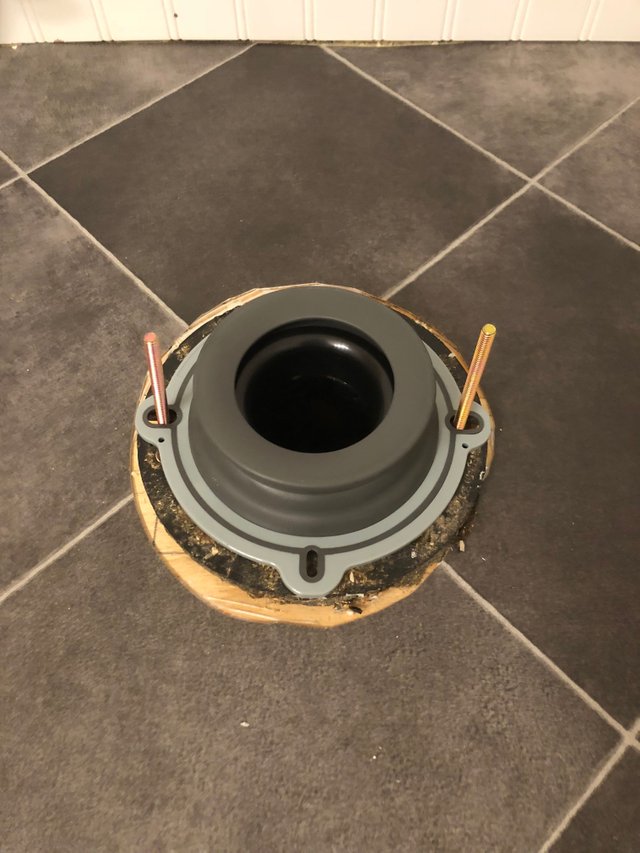
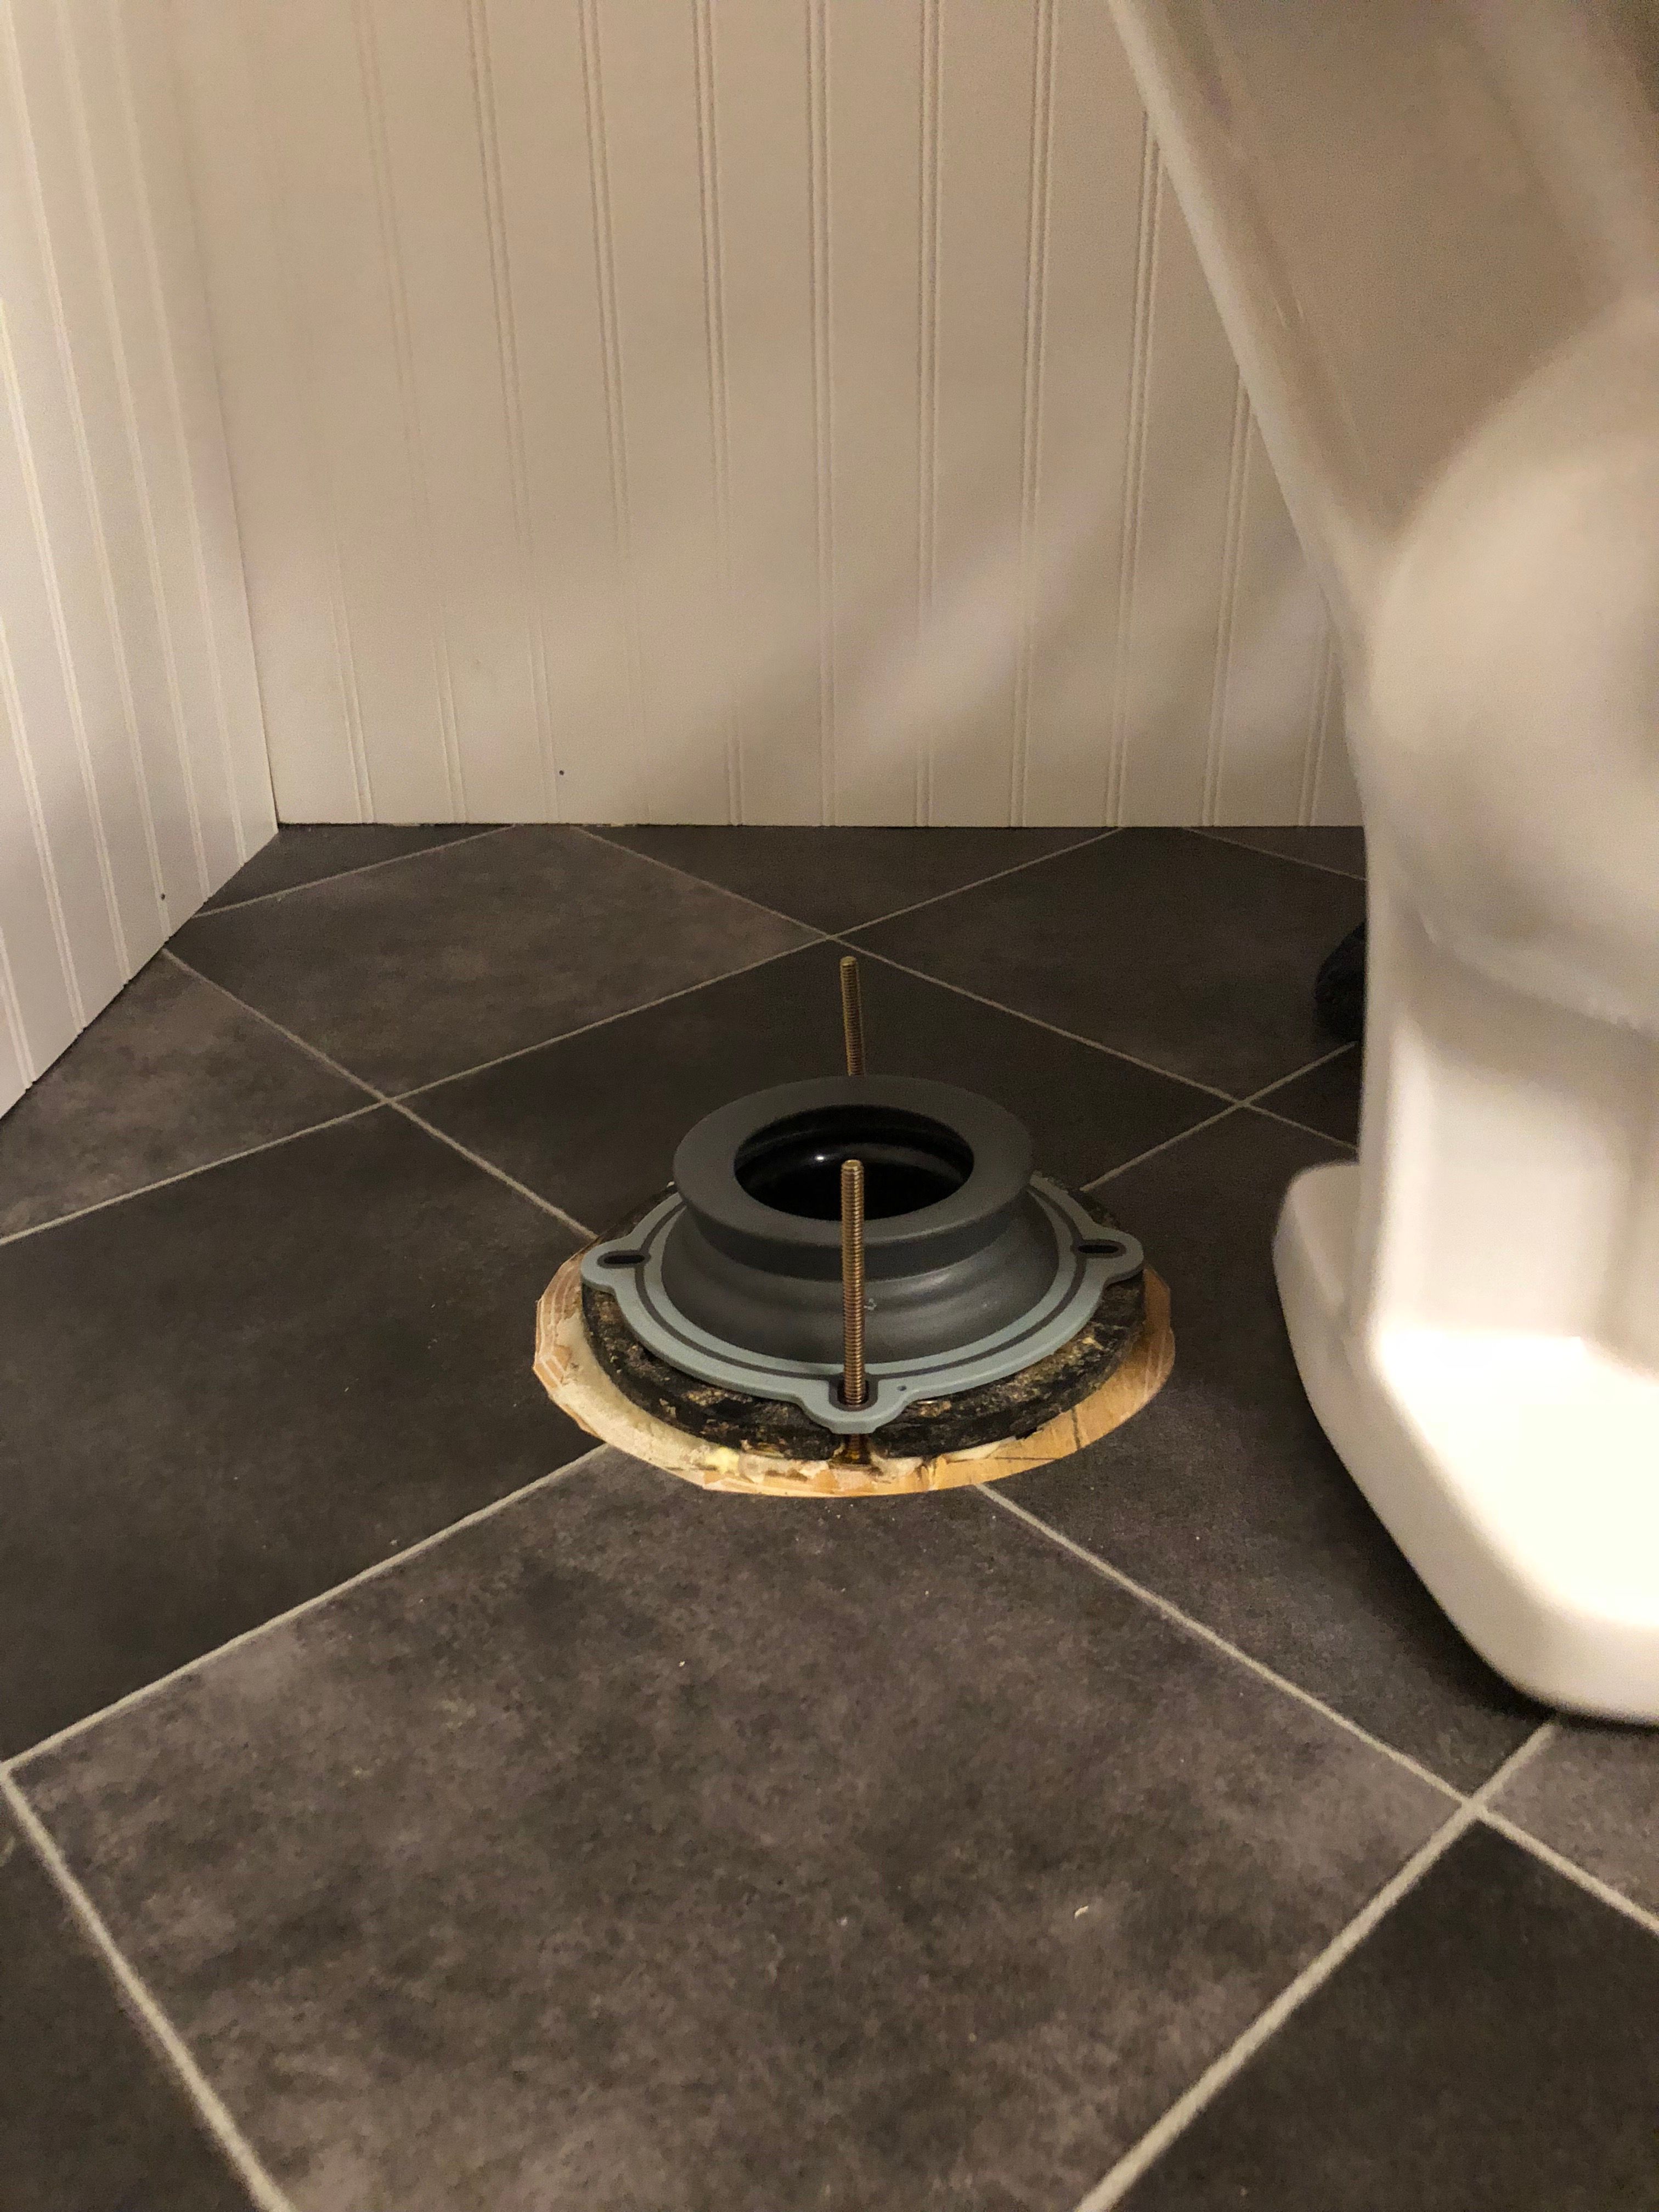
Step 2b - Measure & Decide
Grab a tape measure and measure the depth of the toilet inset (how much clearance you have between the floor and the inner underside of the toilet). Then measure the height of your toilet flange on the floor. Calculate the difference to find the minimum height of riser you need to fashion or purchase.
In our case, the toilet inset was 5/8" while our flange was 3/4" tall. This left us with 1/8" difference between the two. To allow sufficient room for the wax ring to seal and give ourselves some breathing room, we opted for a 1/4" high riser pad, made from a sheet of 1/4" plywood.
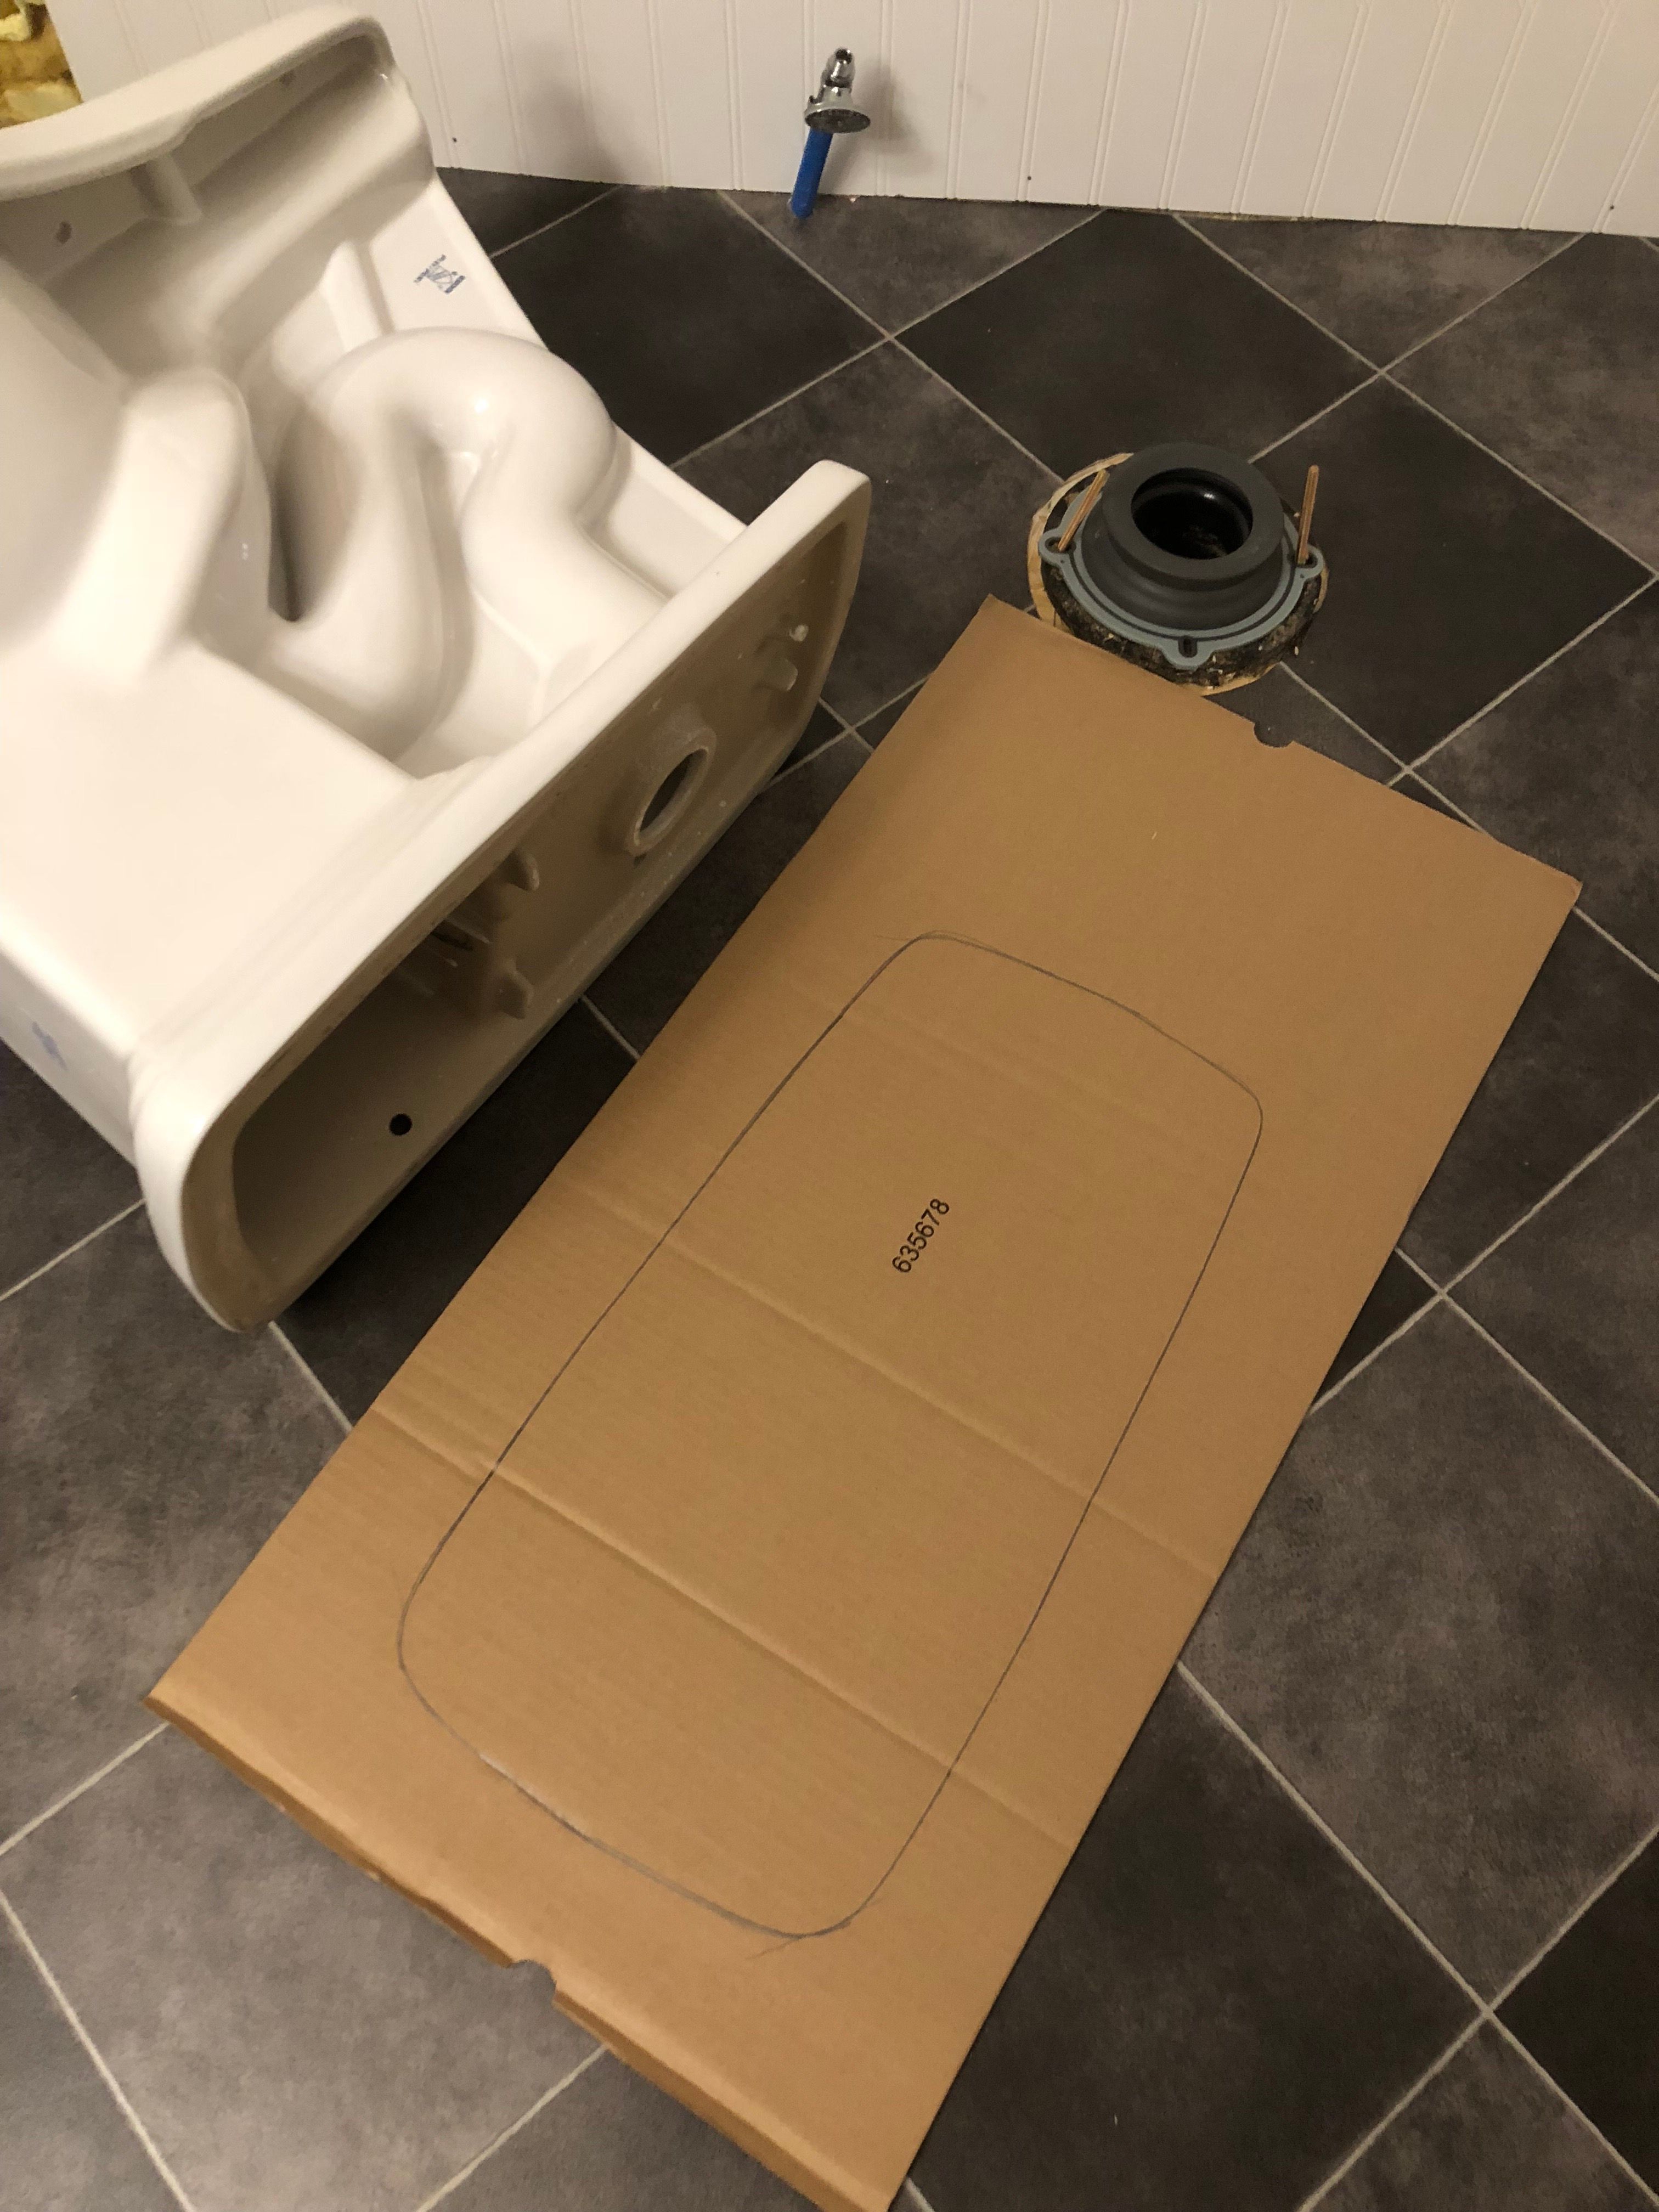
Step 2c - Build a Template
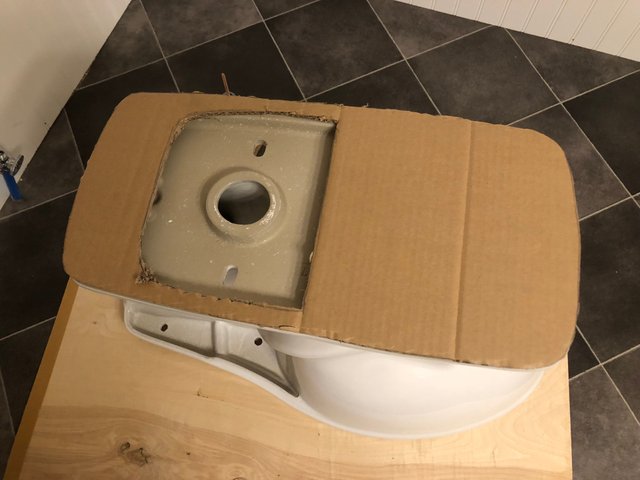
Using a piece of cardboard or other material, trace the outline of your toilet base onto it and cut it to shape. Sketch and cut out an opening for the flange and wax ring to pass through as well, then test fit the template on your toilet.
Trim and adjust your template until you are happy and sure that the flange and wax ring will clear it.
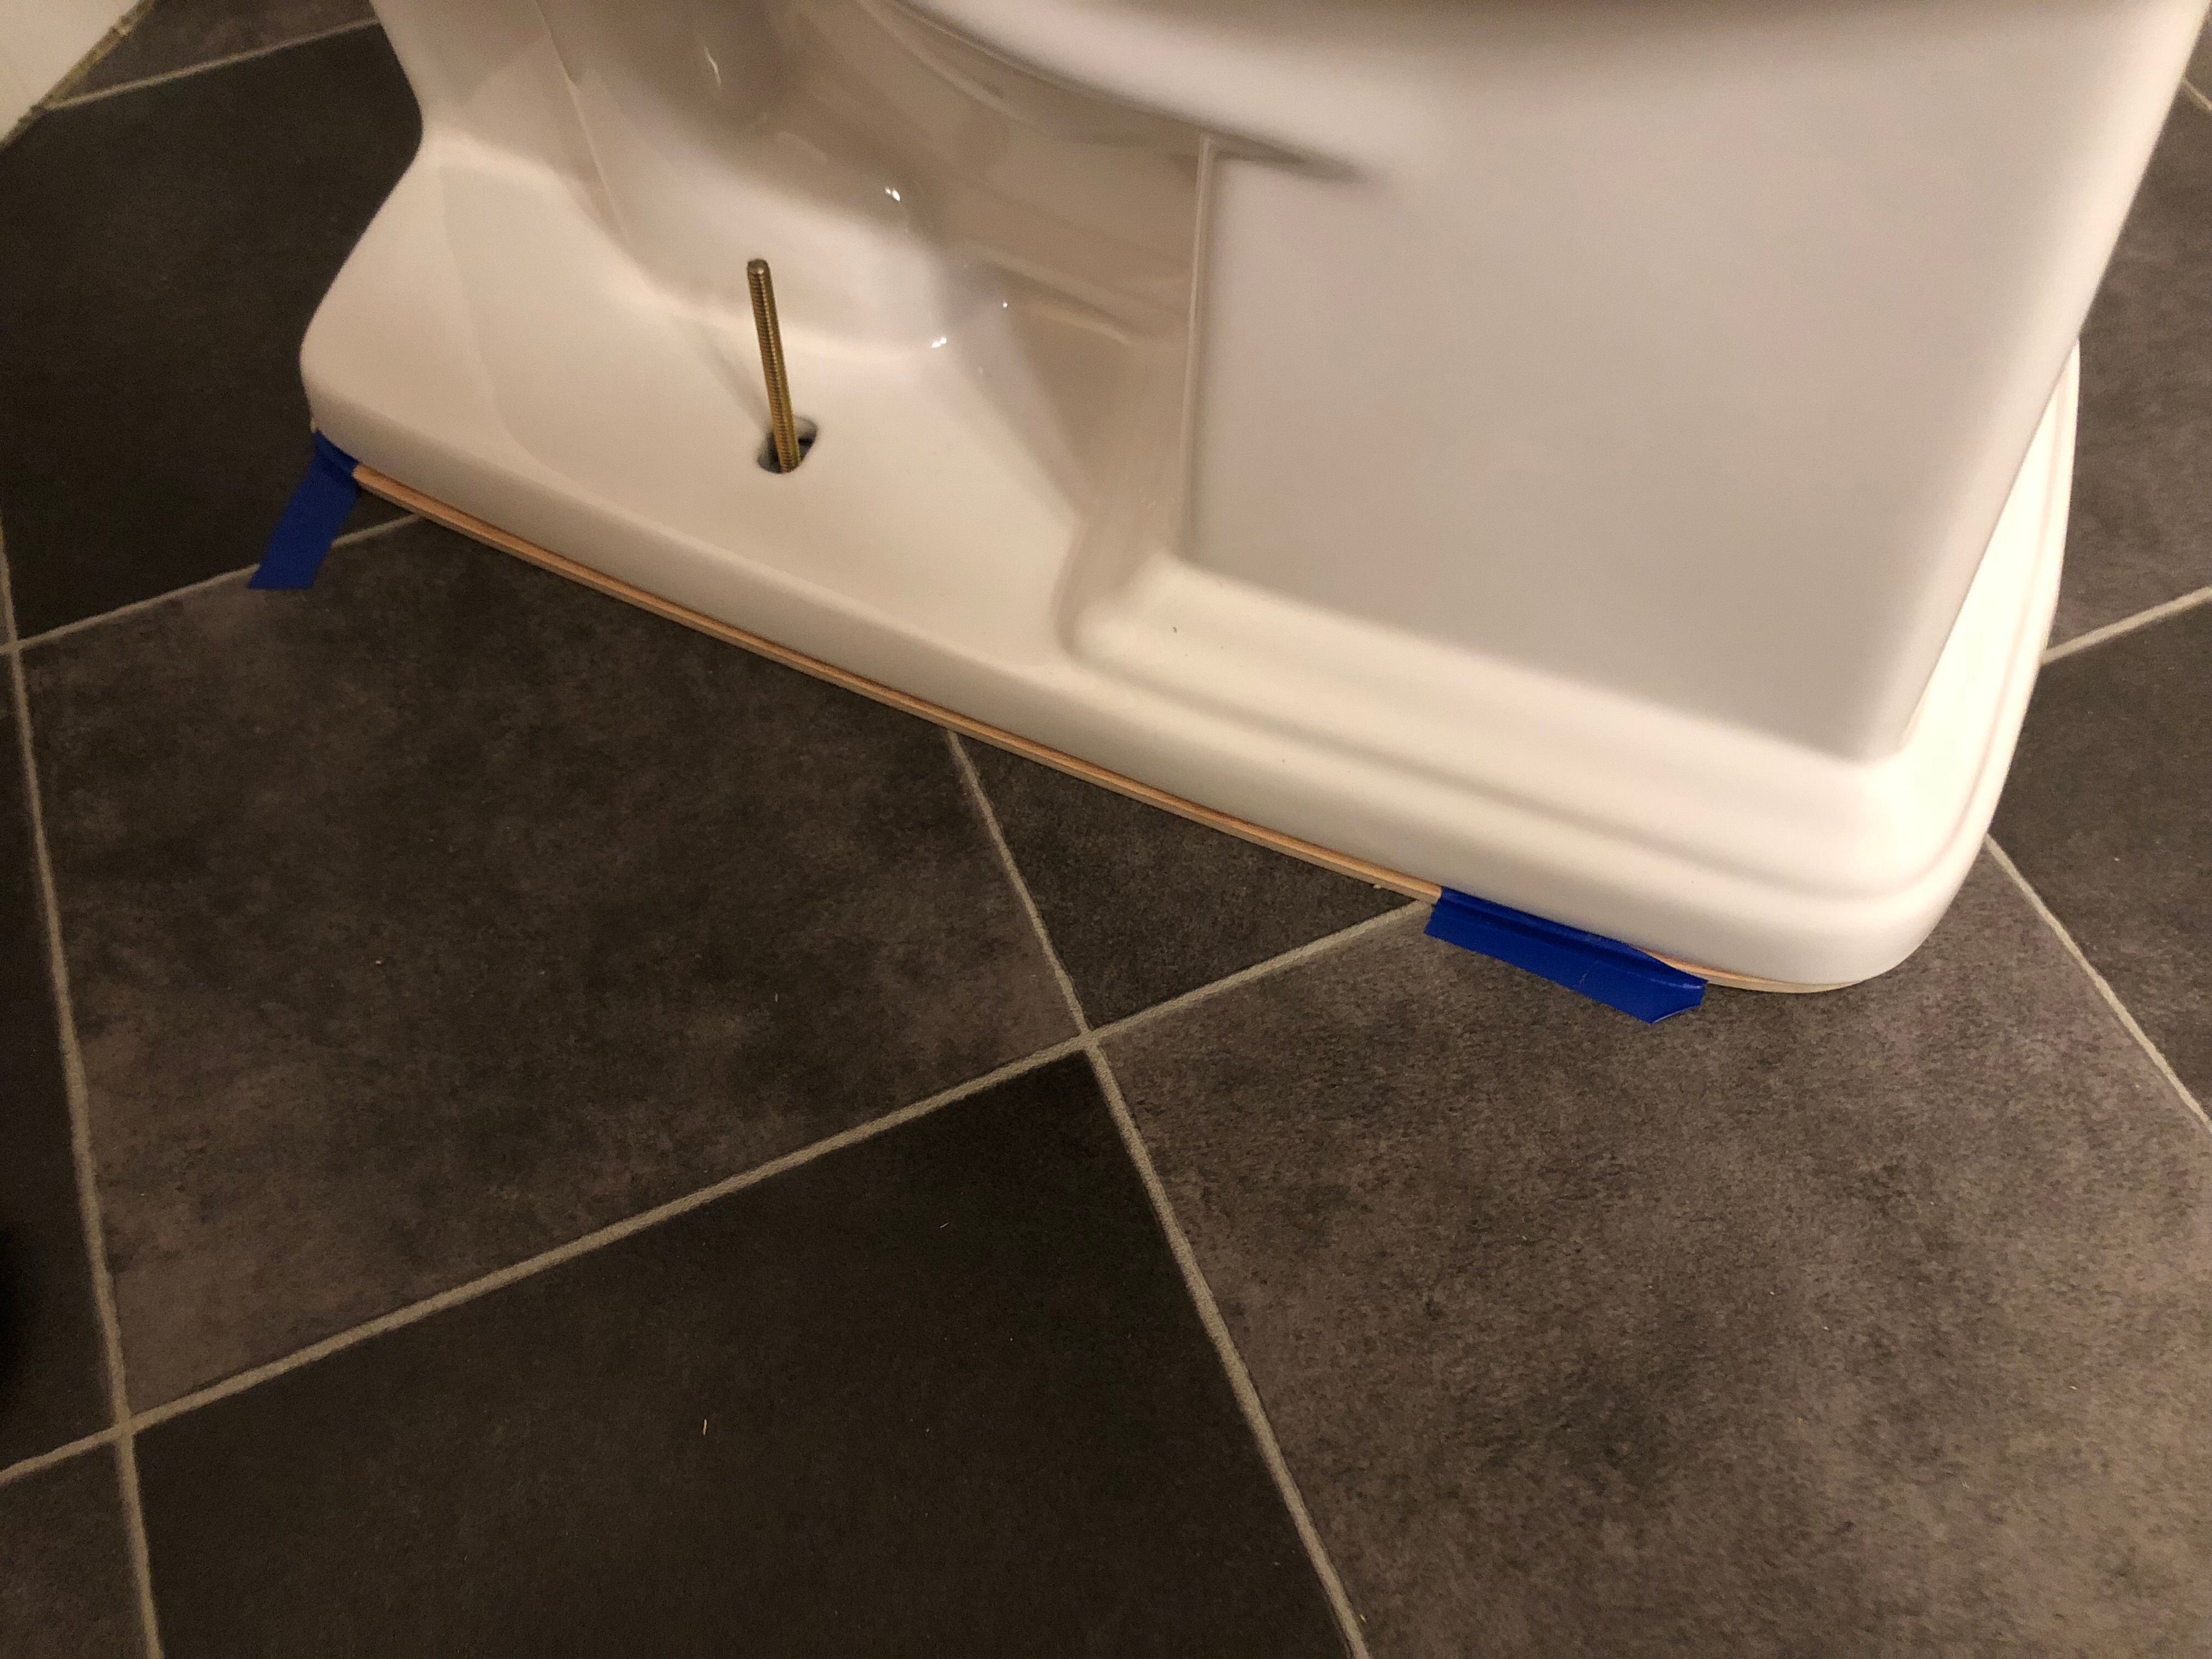
Step 2d - Cut the Riser
Trace your template onto your material (1/4" plywood in our case), and cut it to match. I used my band saw, but a jig saw or coping saw would have also worked. After cutting the plywood, I then hand sanded it to smooth the edges.
Step 2e - Test and Adjust
Test your newly made riser board to your toilet base and make any adjustments as you see fit.
Carefully set the riser board and toilet back over the toilet flange --
without the wax ring in place. You don't want to ruin a 2nd wax ring for this test fit.
Adjust and position the toilet and riser board until you are satisfied, then tape the riser board to your bathroom floor and remove the toilet. Be sure not to disturb your riser board when removing the toilet. You'll see why in the next step.
Step 2f - Secure Riser to Floor
Screw your riser board to your floor. Test the fit again by placing the toilet back on top of it. If you messed up, try again until you are happy with the positioning and result. When you are satisfied, reinstall your wax ring or seal and set your toilet again as indicated in Step 2.
!!! BONUS ROUND OVER !!!
**********
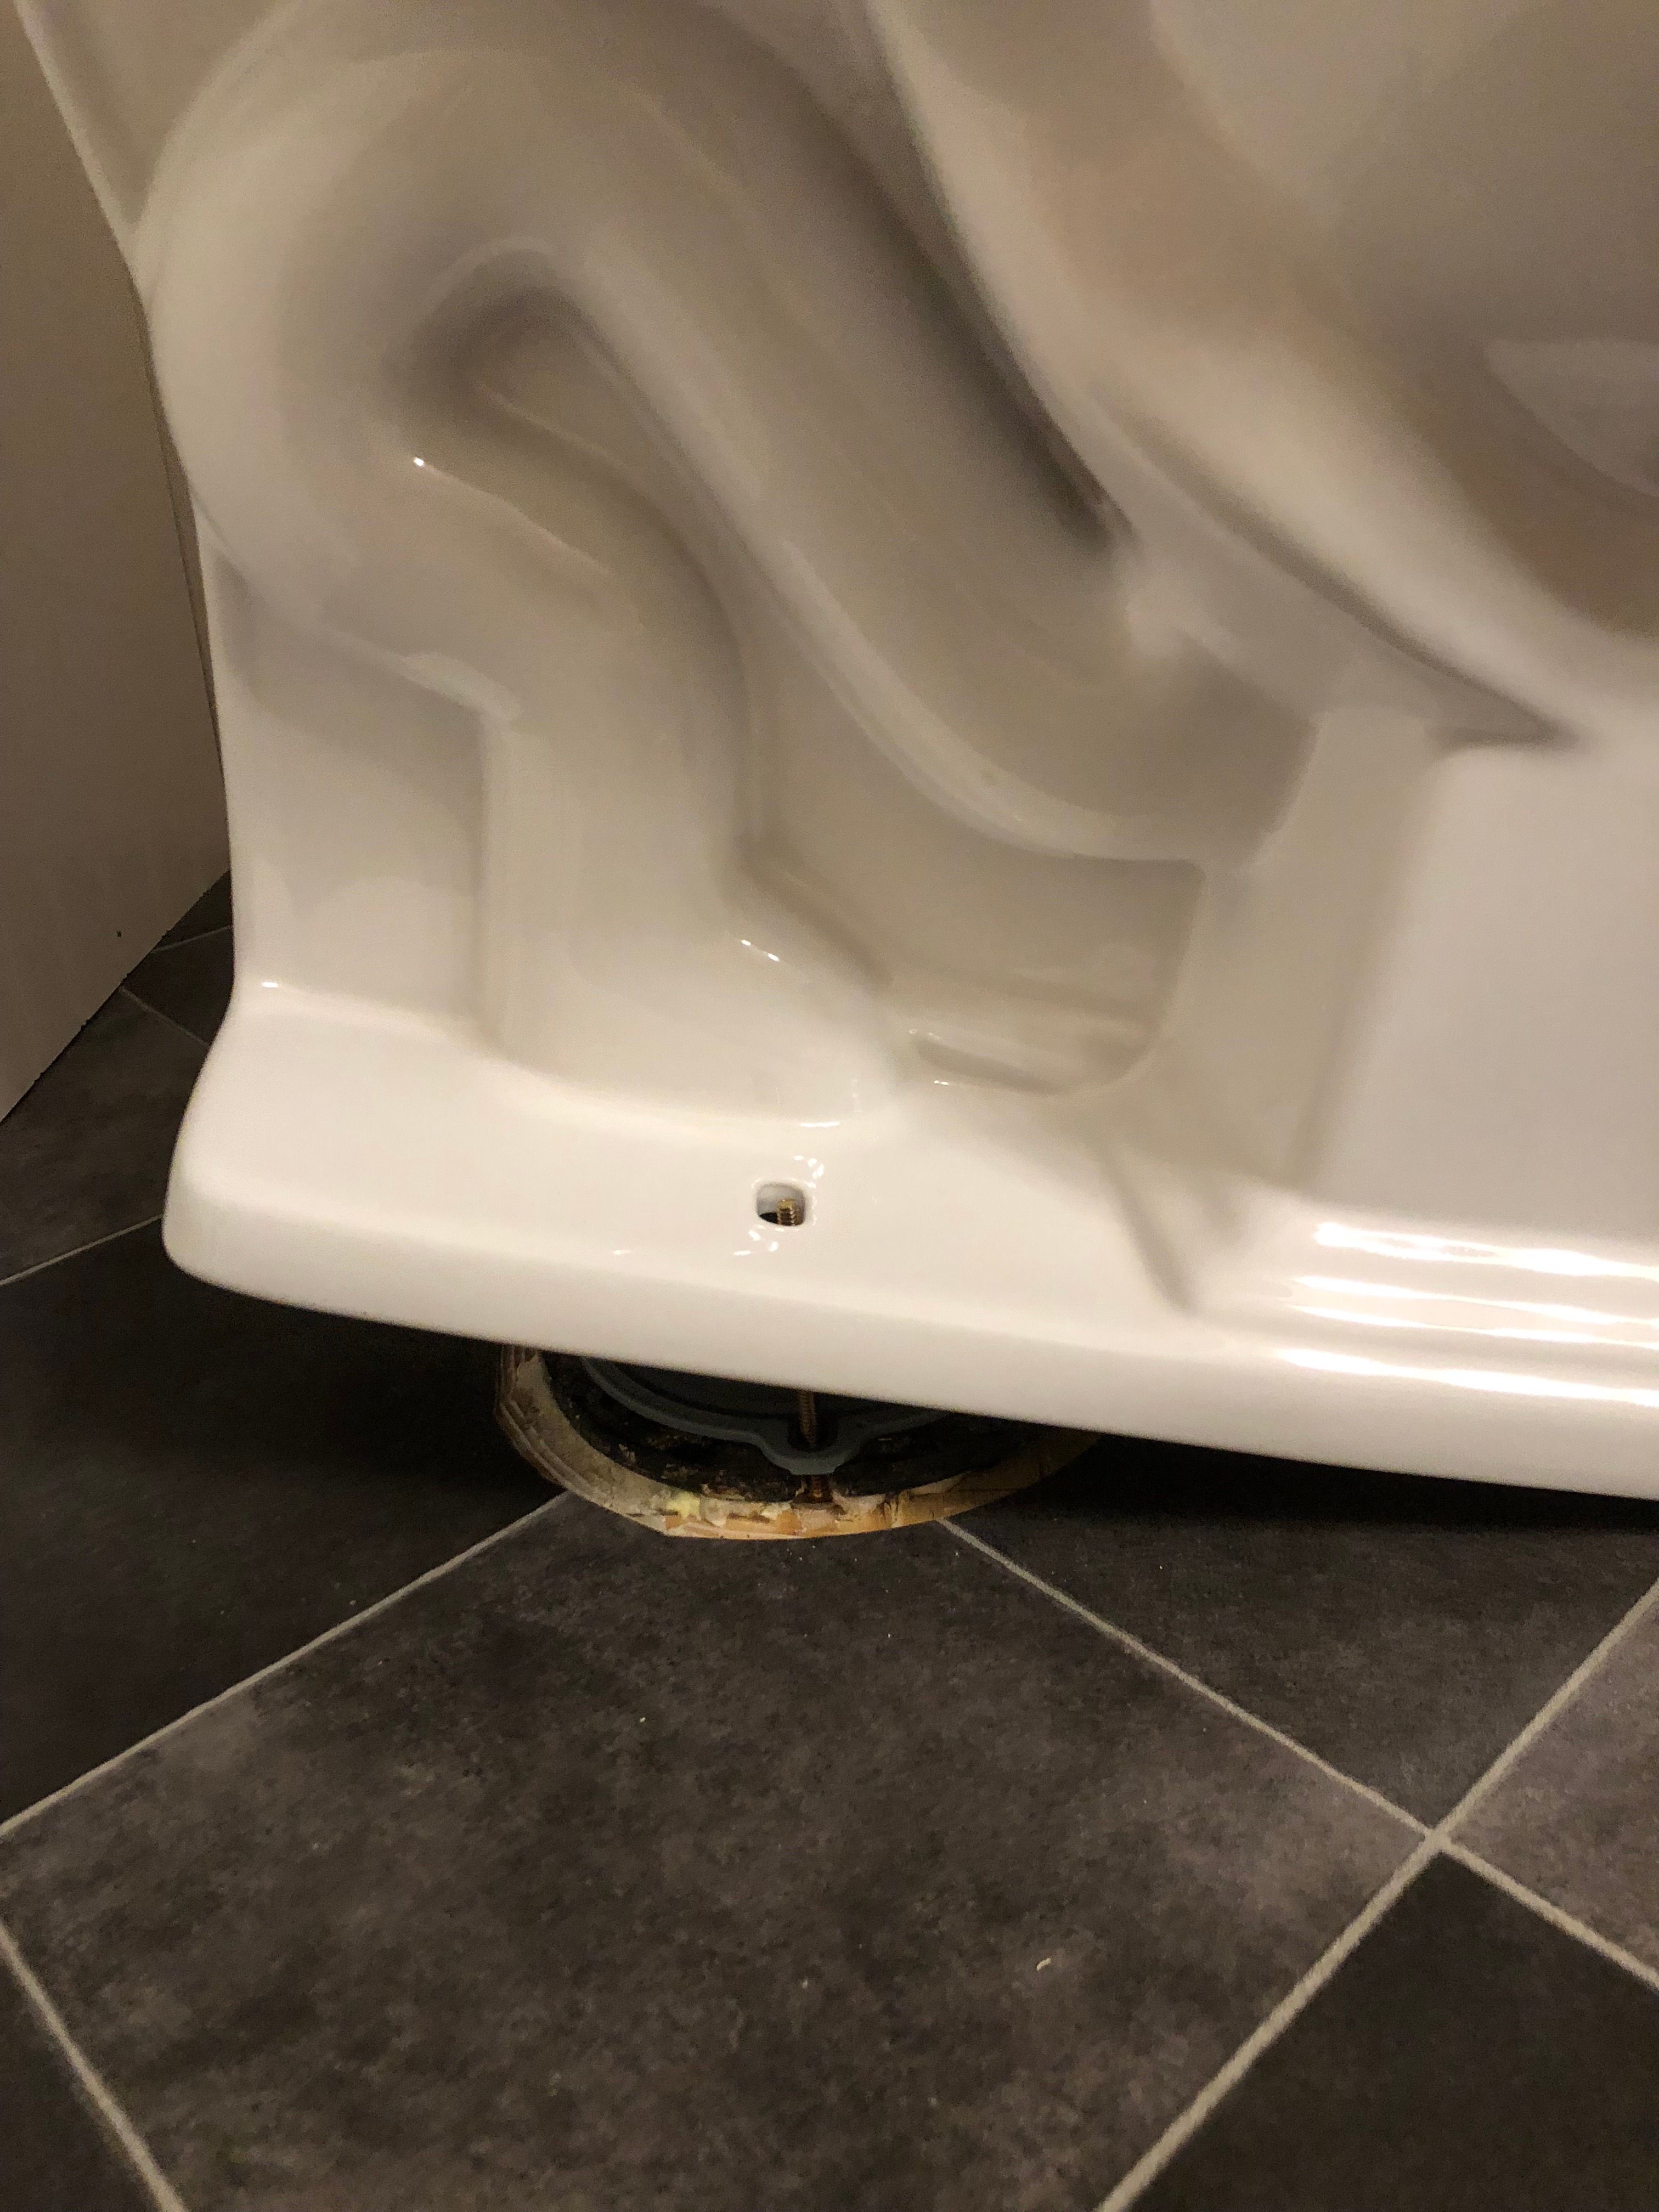
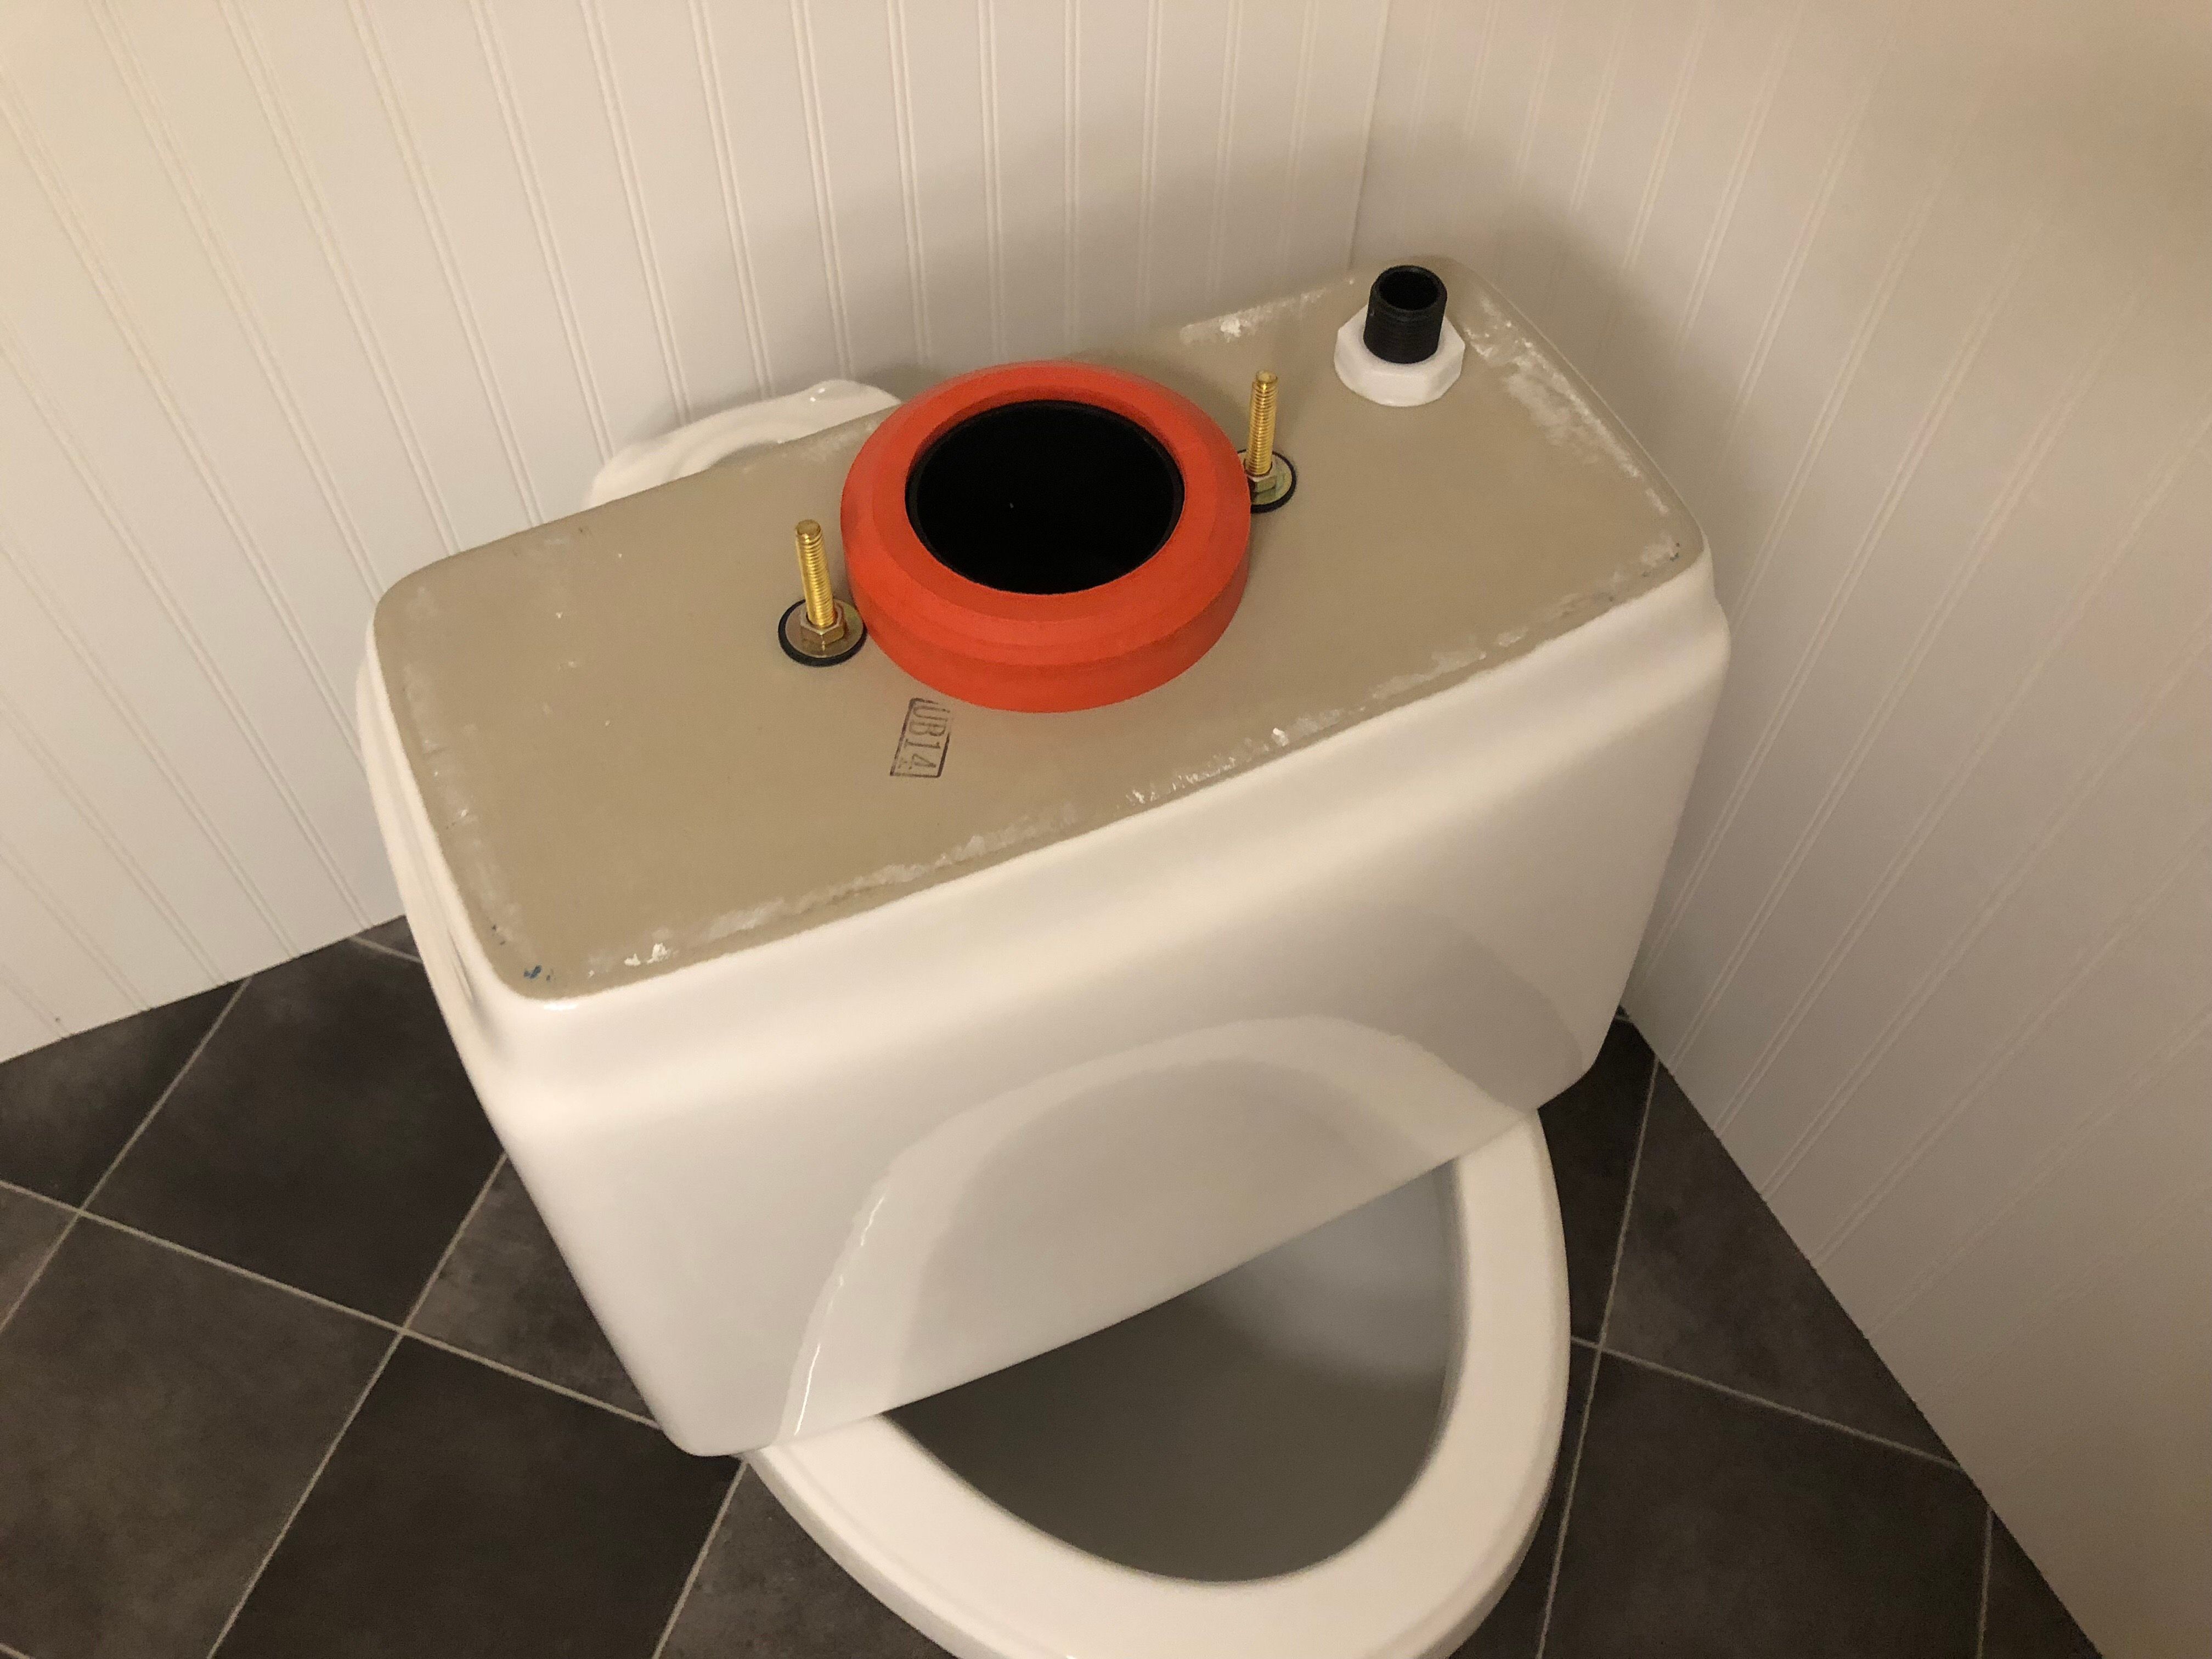
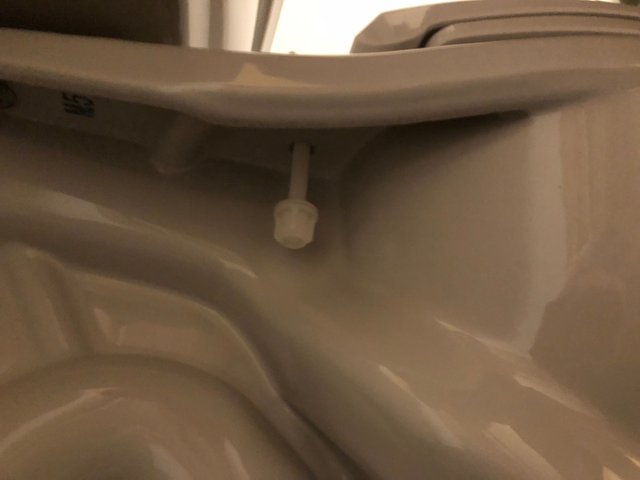
Step 3 - Bolt Toilet Base to Floor
Thread on the hardware provided for attaching the toilet to the bolts. In my case, this involved a plastic trim washer, metal washer, and hex nut. Push down on the toilet to help the wax ring seat and continue to "walk" the toilet down as far as possible by hand. Tighten one side, then the other, and back and forth as you go.
After tightening the hardware by hand, use a wrench and tighten the hardware further using the same technique as above, tightening one side a little, then the other, then back and forth. Be careful not to over-tighten the hardware as you may crack the toilet base or damage the toilet flange on the floor.
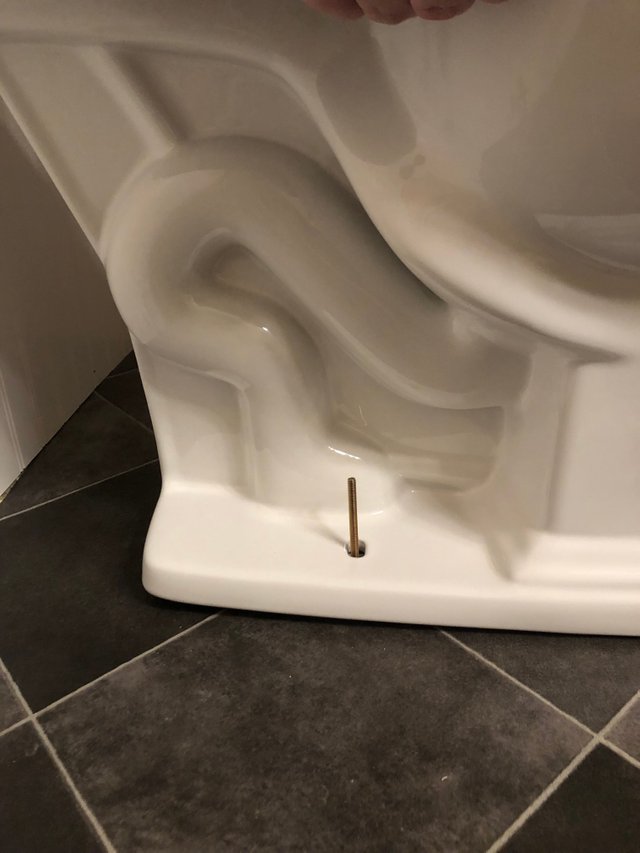
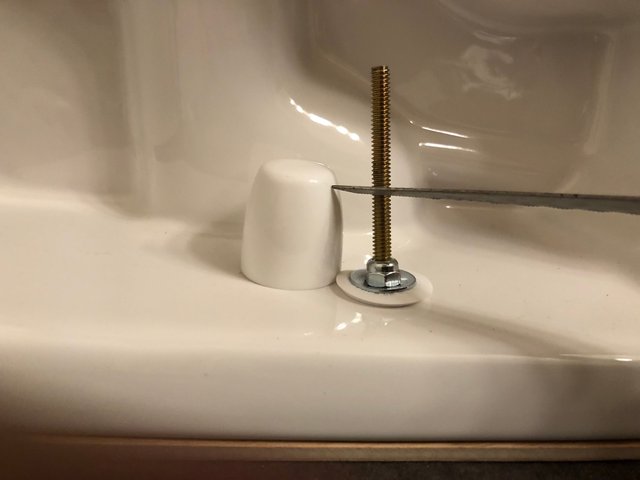
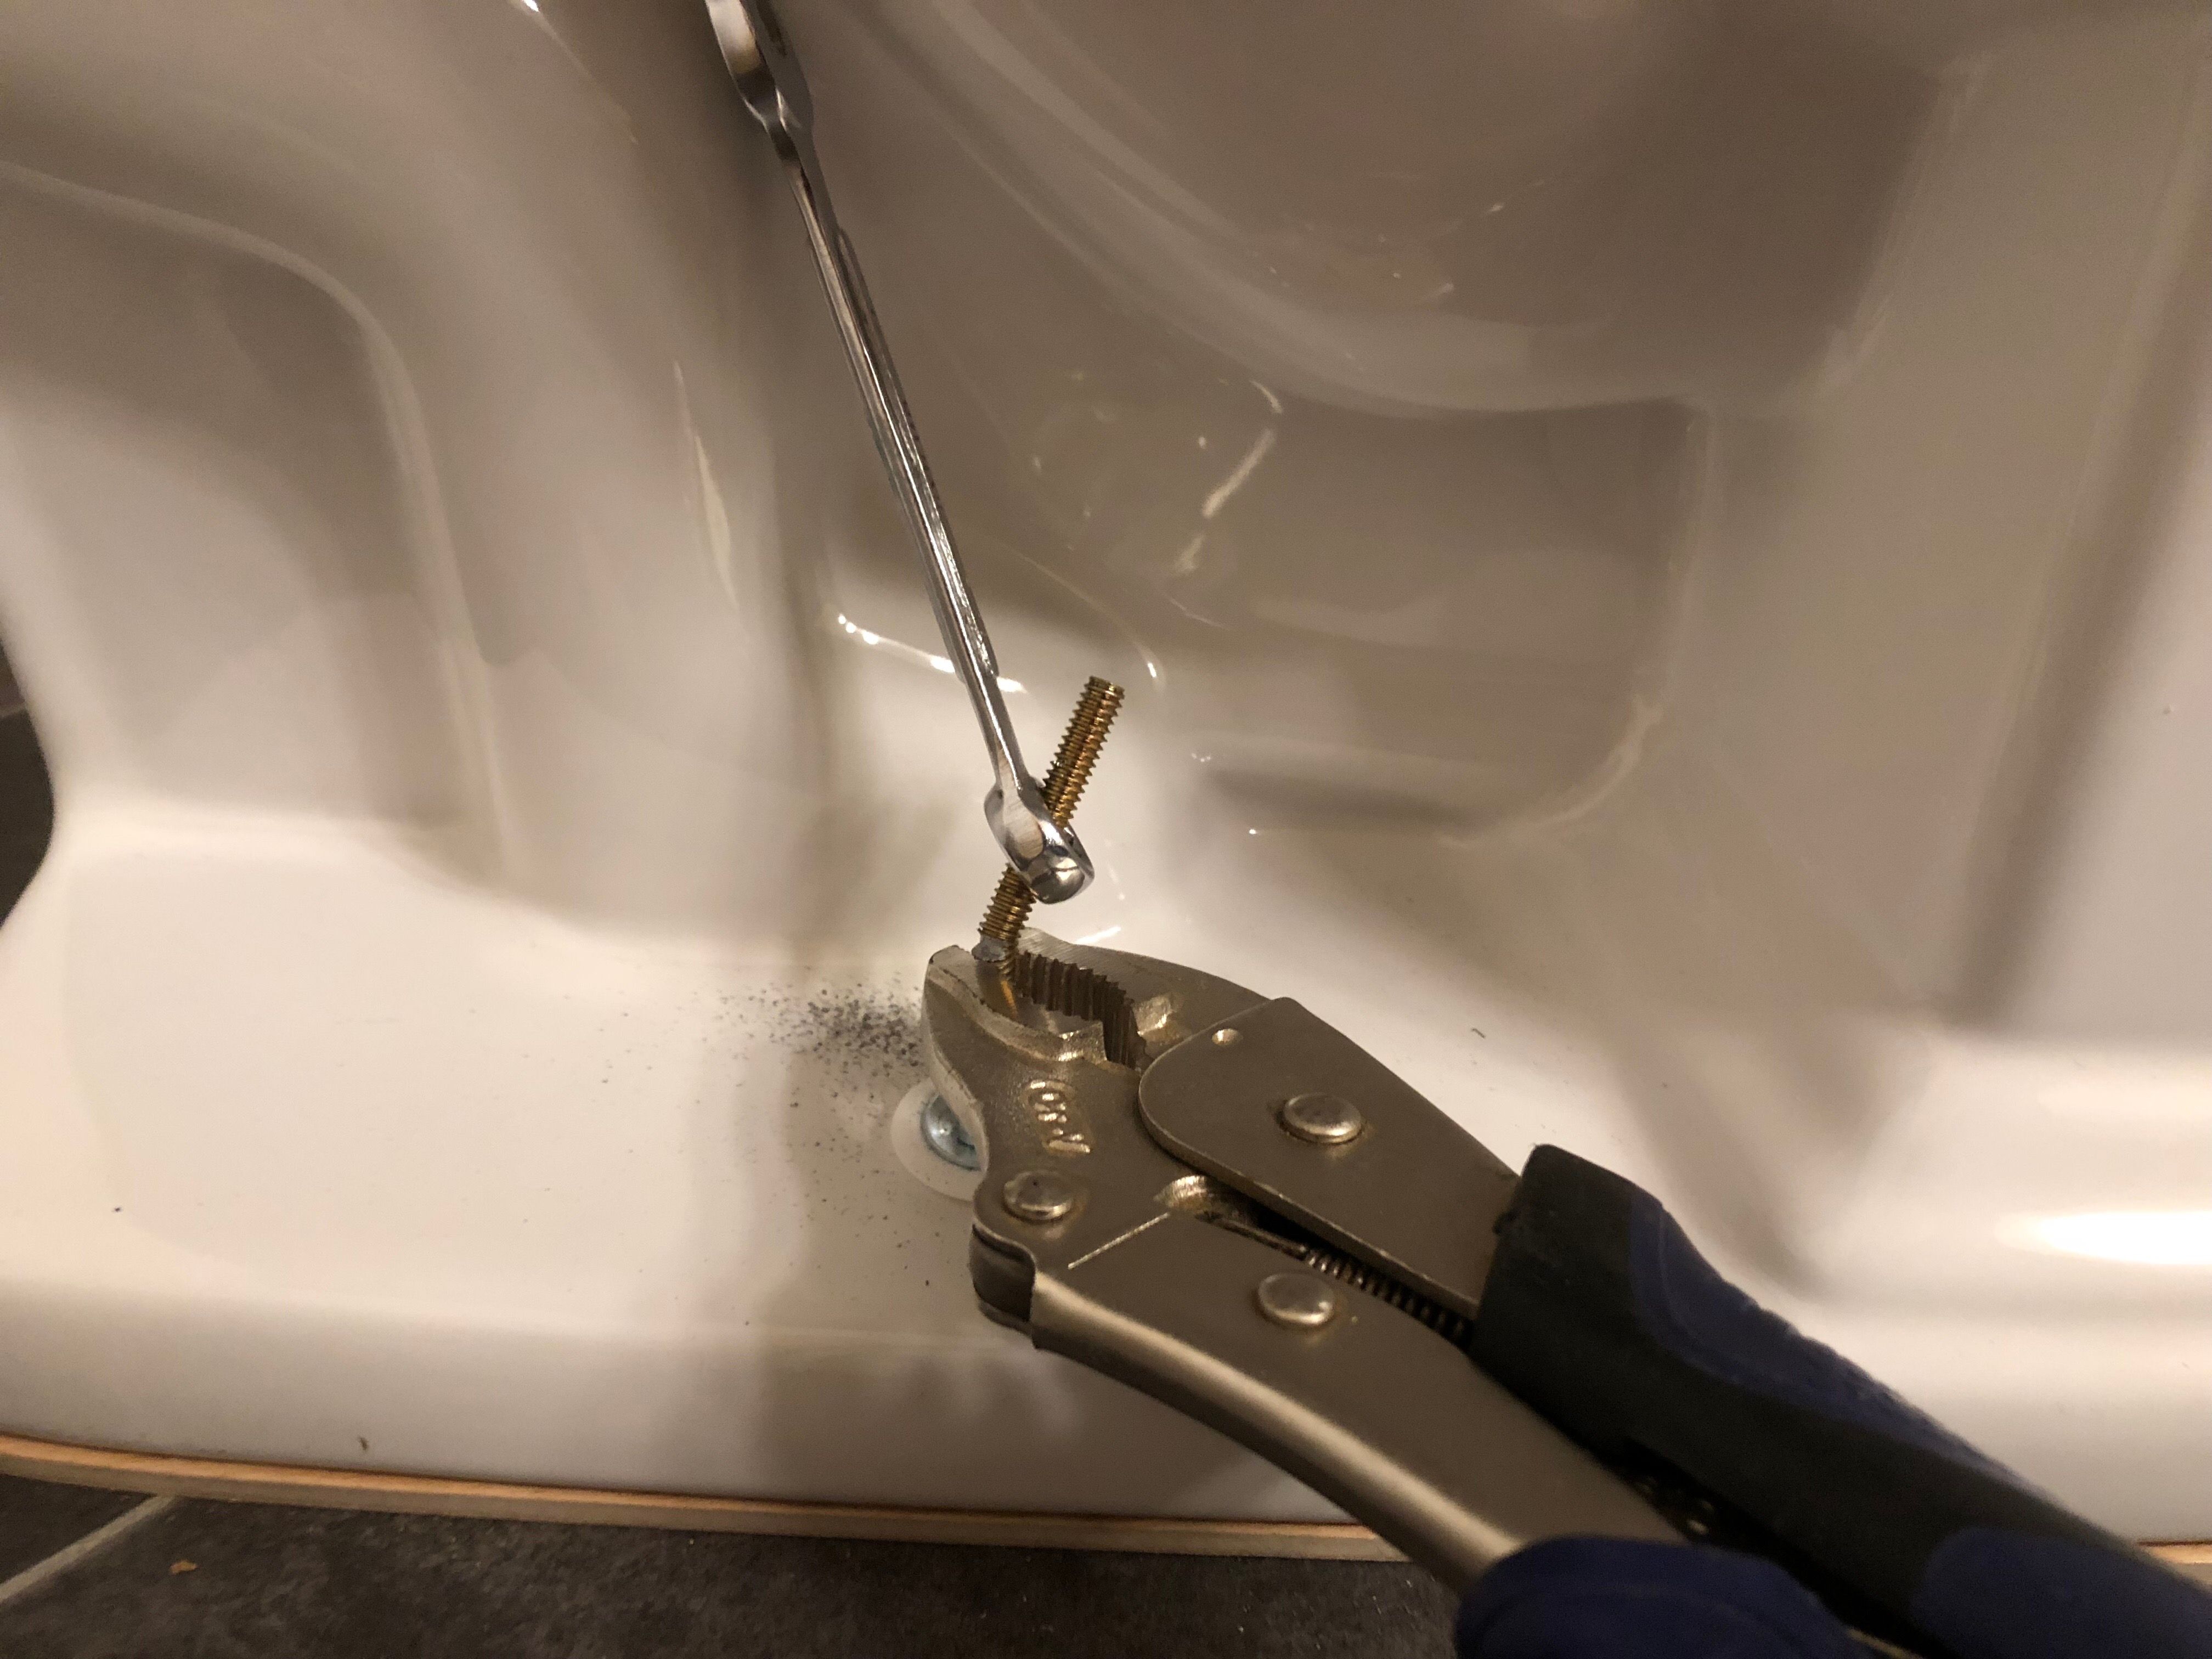
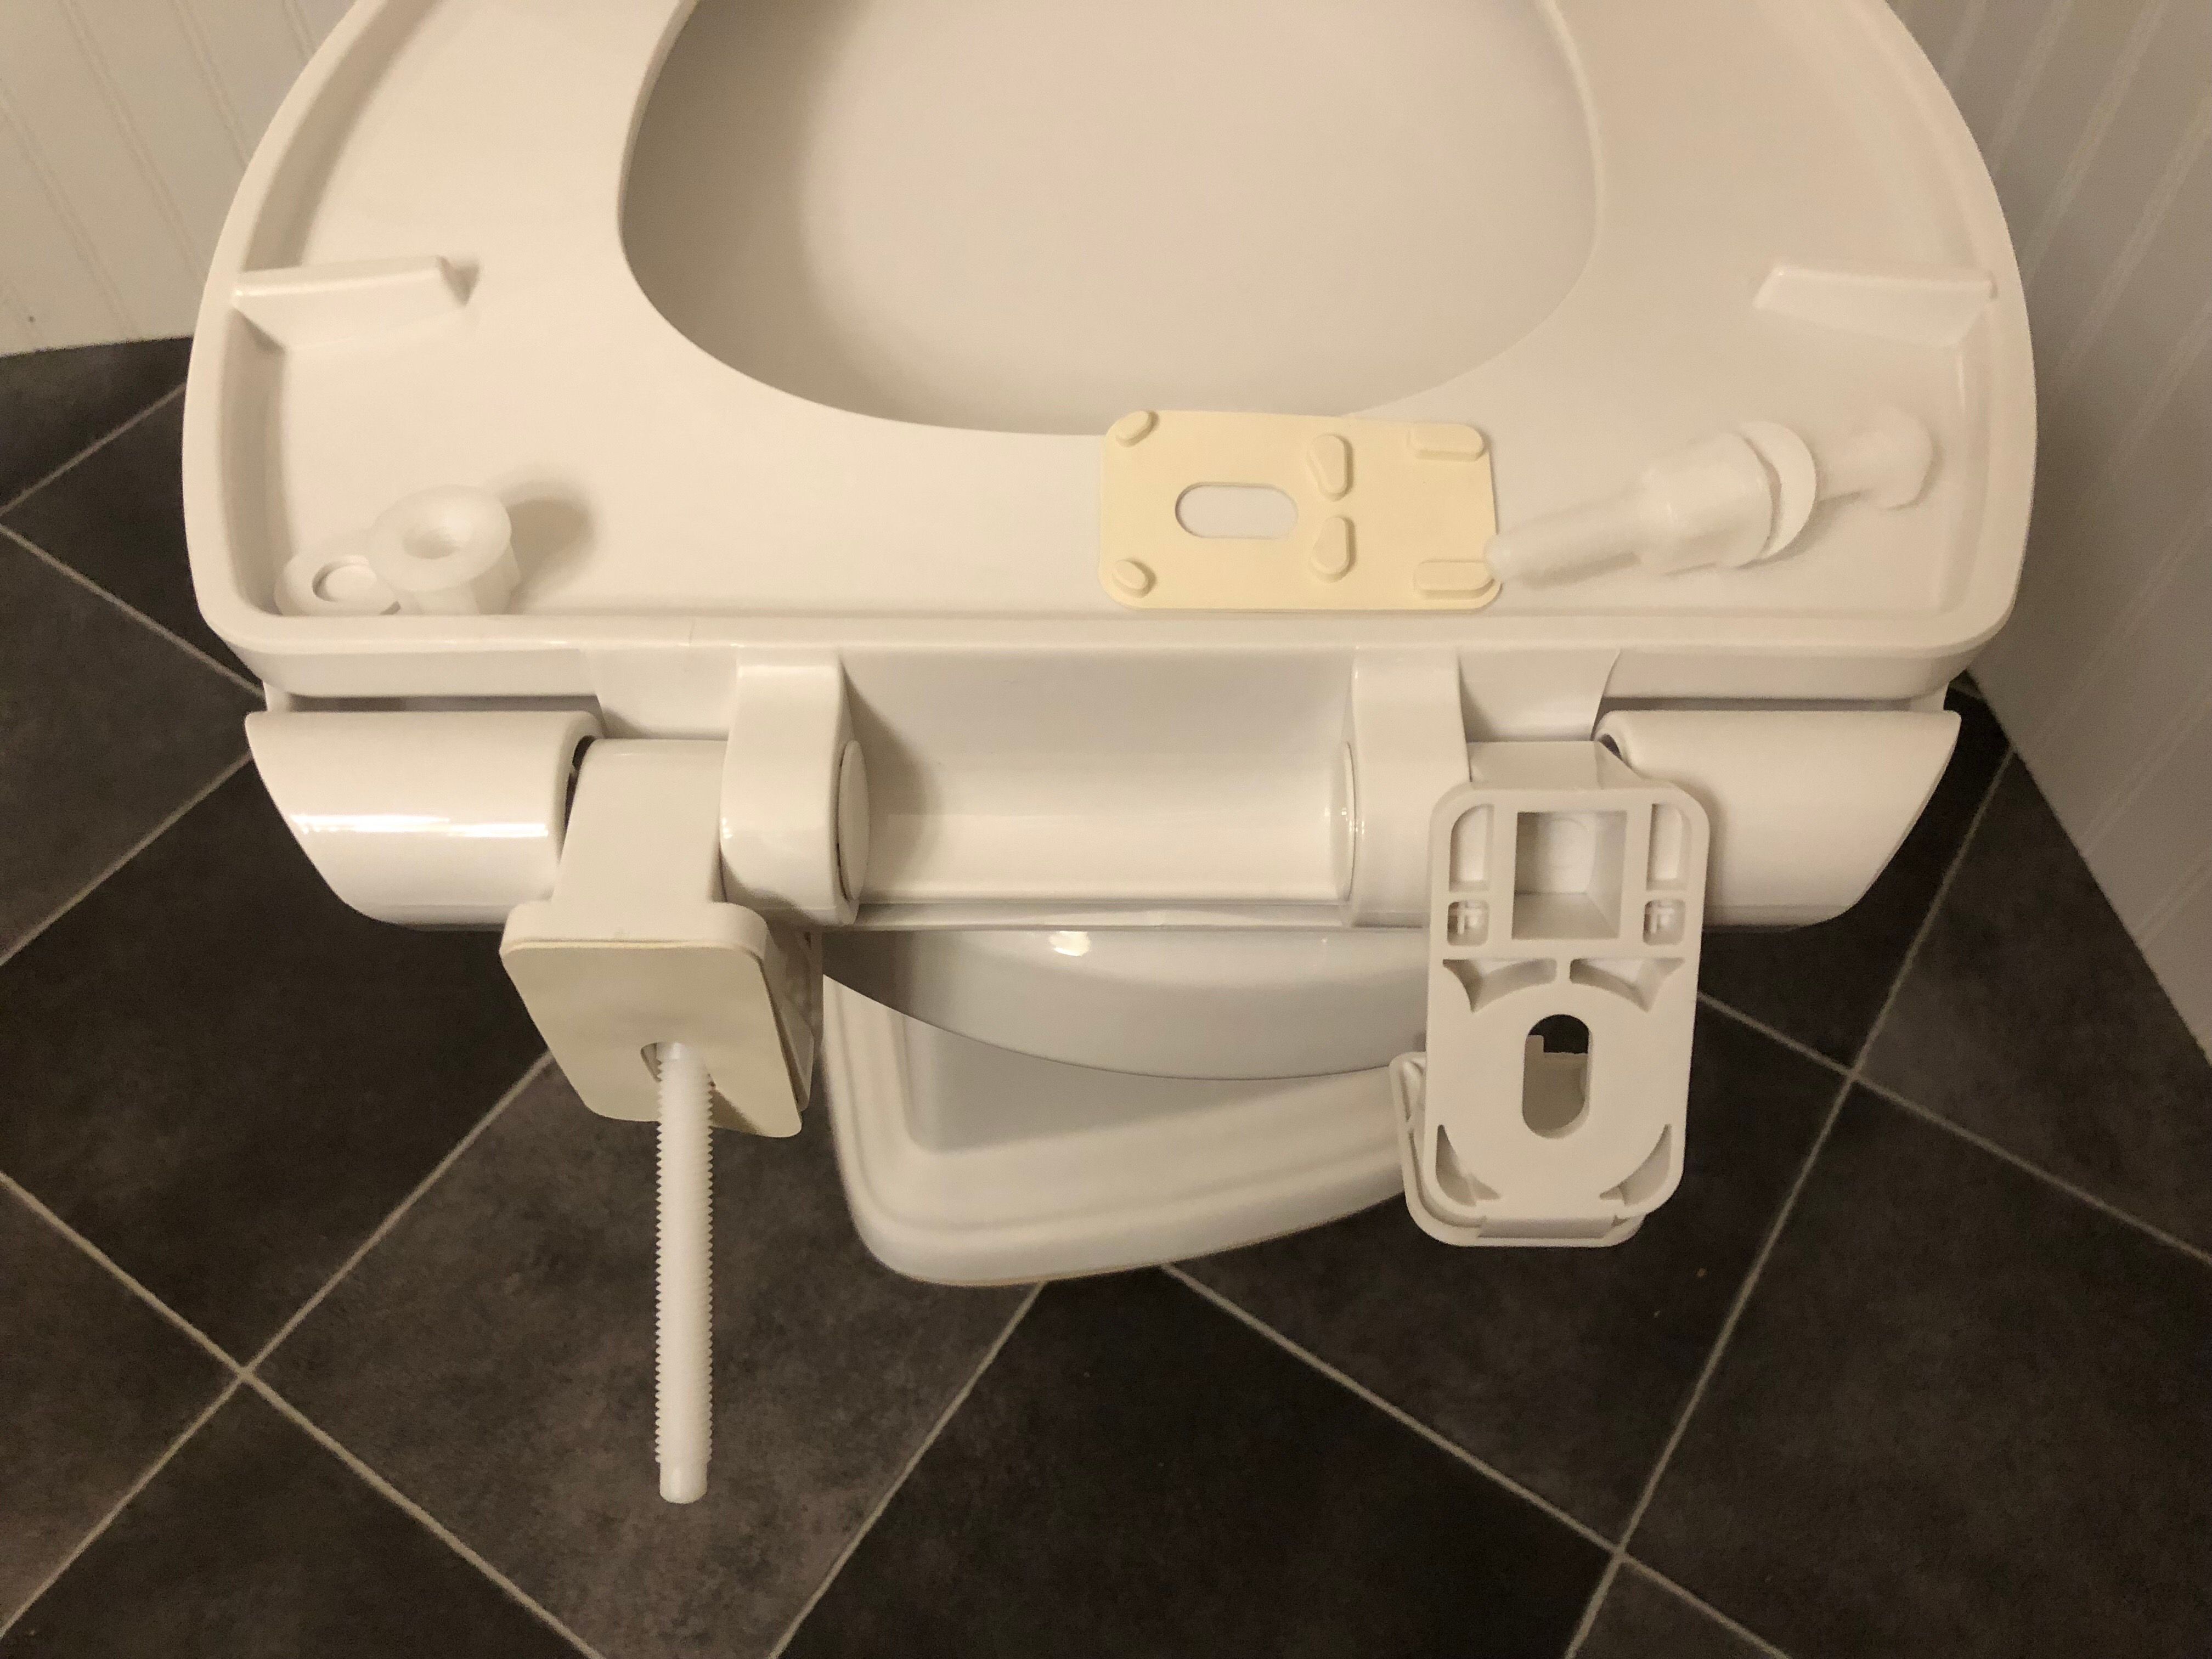
Step 4 - Trim & Finish the Toilet Base Bolts
Trim the toilet bolts to proper height. Set the decorative bolt caps that come with your toilet next to the bolts and cut the bolts a little lower than the top, but not too low. Longer bolts will help you if you ever need to reinstall the toilet again.
Cut halfway through the bolt, then used a pair of pliers and wrench to bend and break off the rest of the bolt. Be careful not to bend or break the bolt in an undesired location!
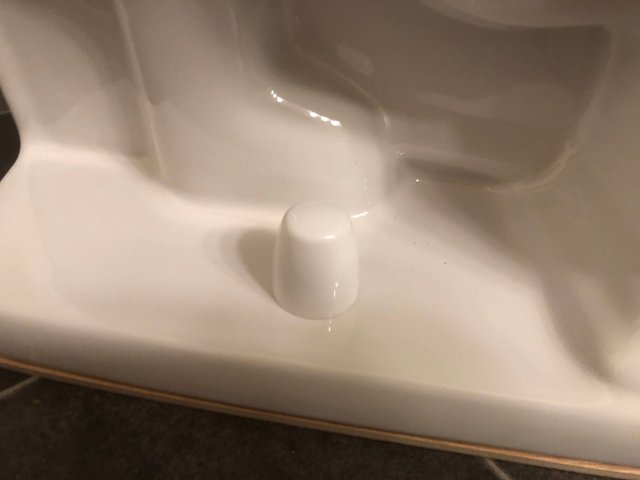
Install your trim caps.
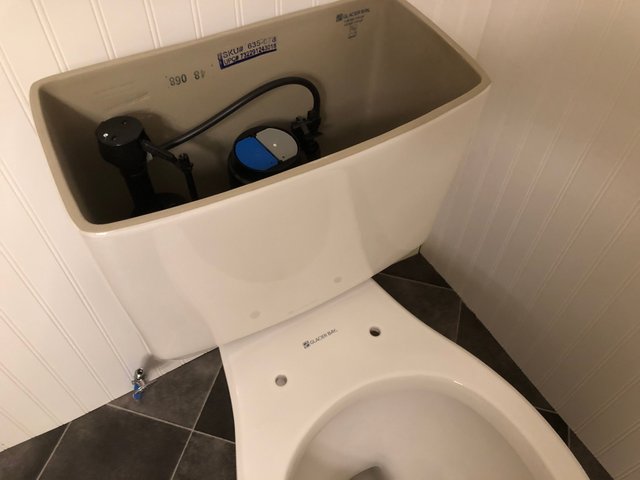
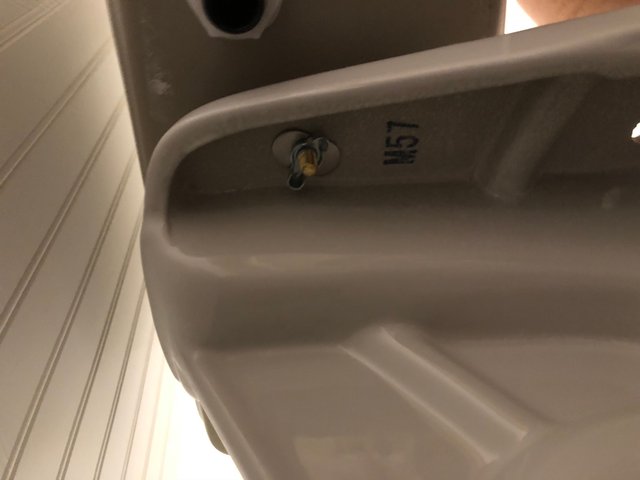
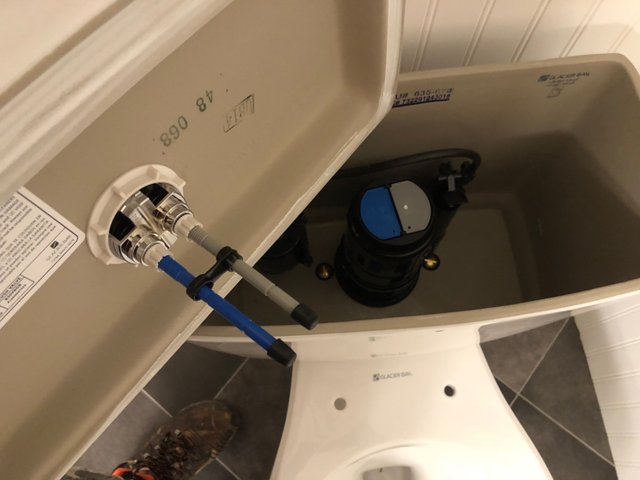
Step 5 - Install the Toilet Tank
Check the factory fitting on the bottom of the toilet tank that they are tight, then install the rubber seal to the underside of your toilet tank.
Carefully place the tank on top of the toilet base and align as needed so that the tank sits correctly on the toilet.
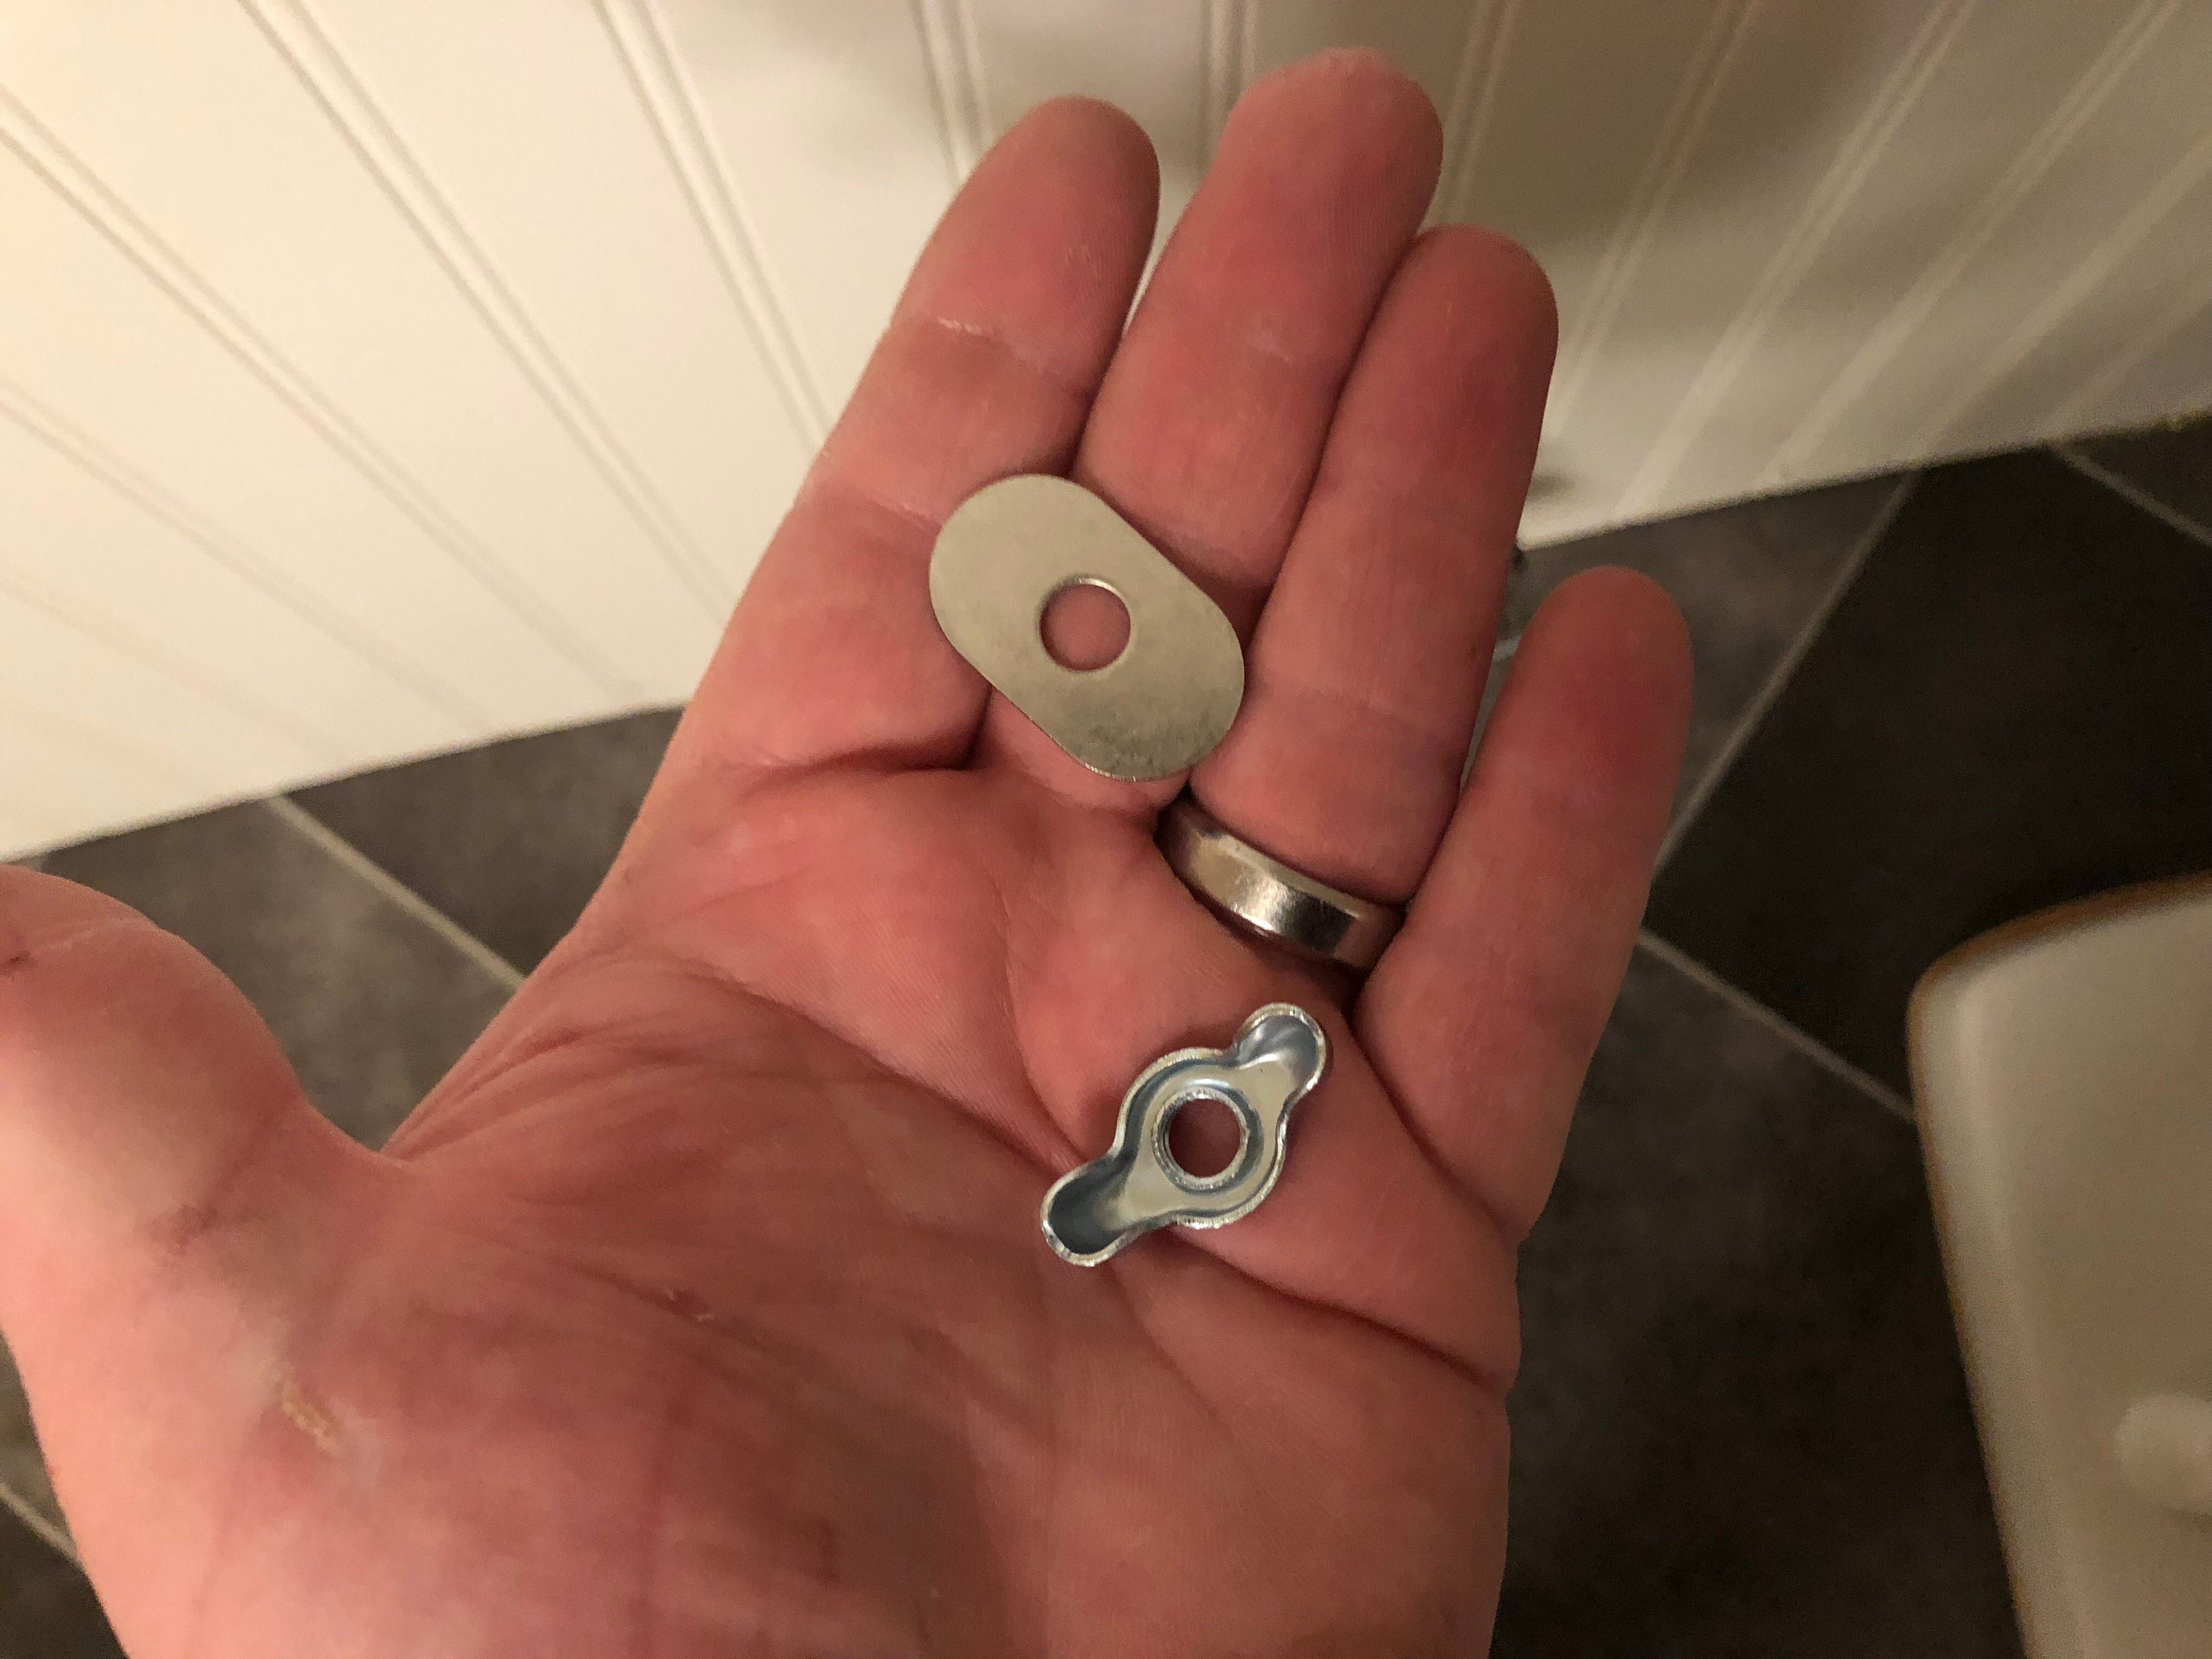
Install the hardware provided to attach the tank to the base. My toilet came with a metal washer and metal wingnut
Using the same technique as the toilet base, "walk" the tank onto the base by hand. Carefully tighten the hardware on one side at a time, switching from side to side until the tank is tightened properly. Be very careful not to over tighten the tank! Just enough to keep from leaking and to prevent any wobbling or movement.
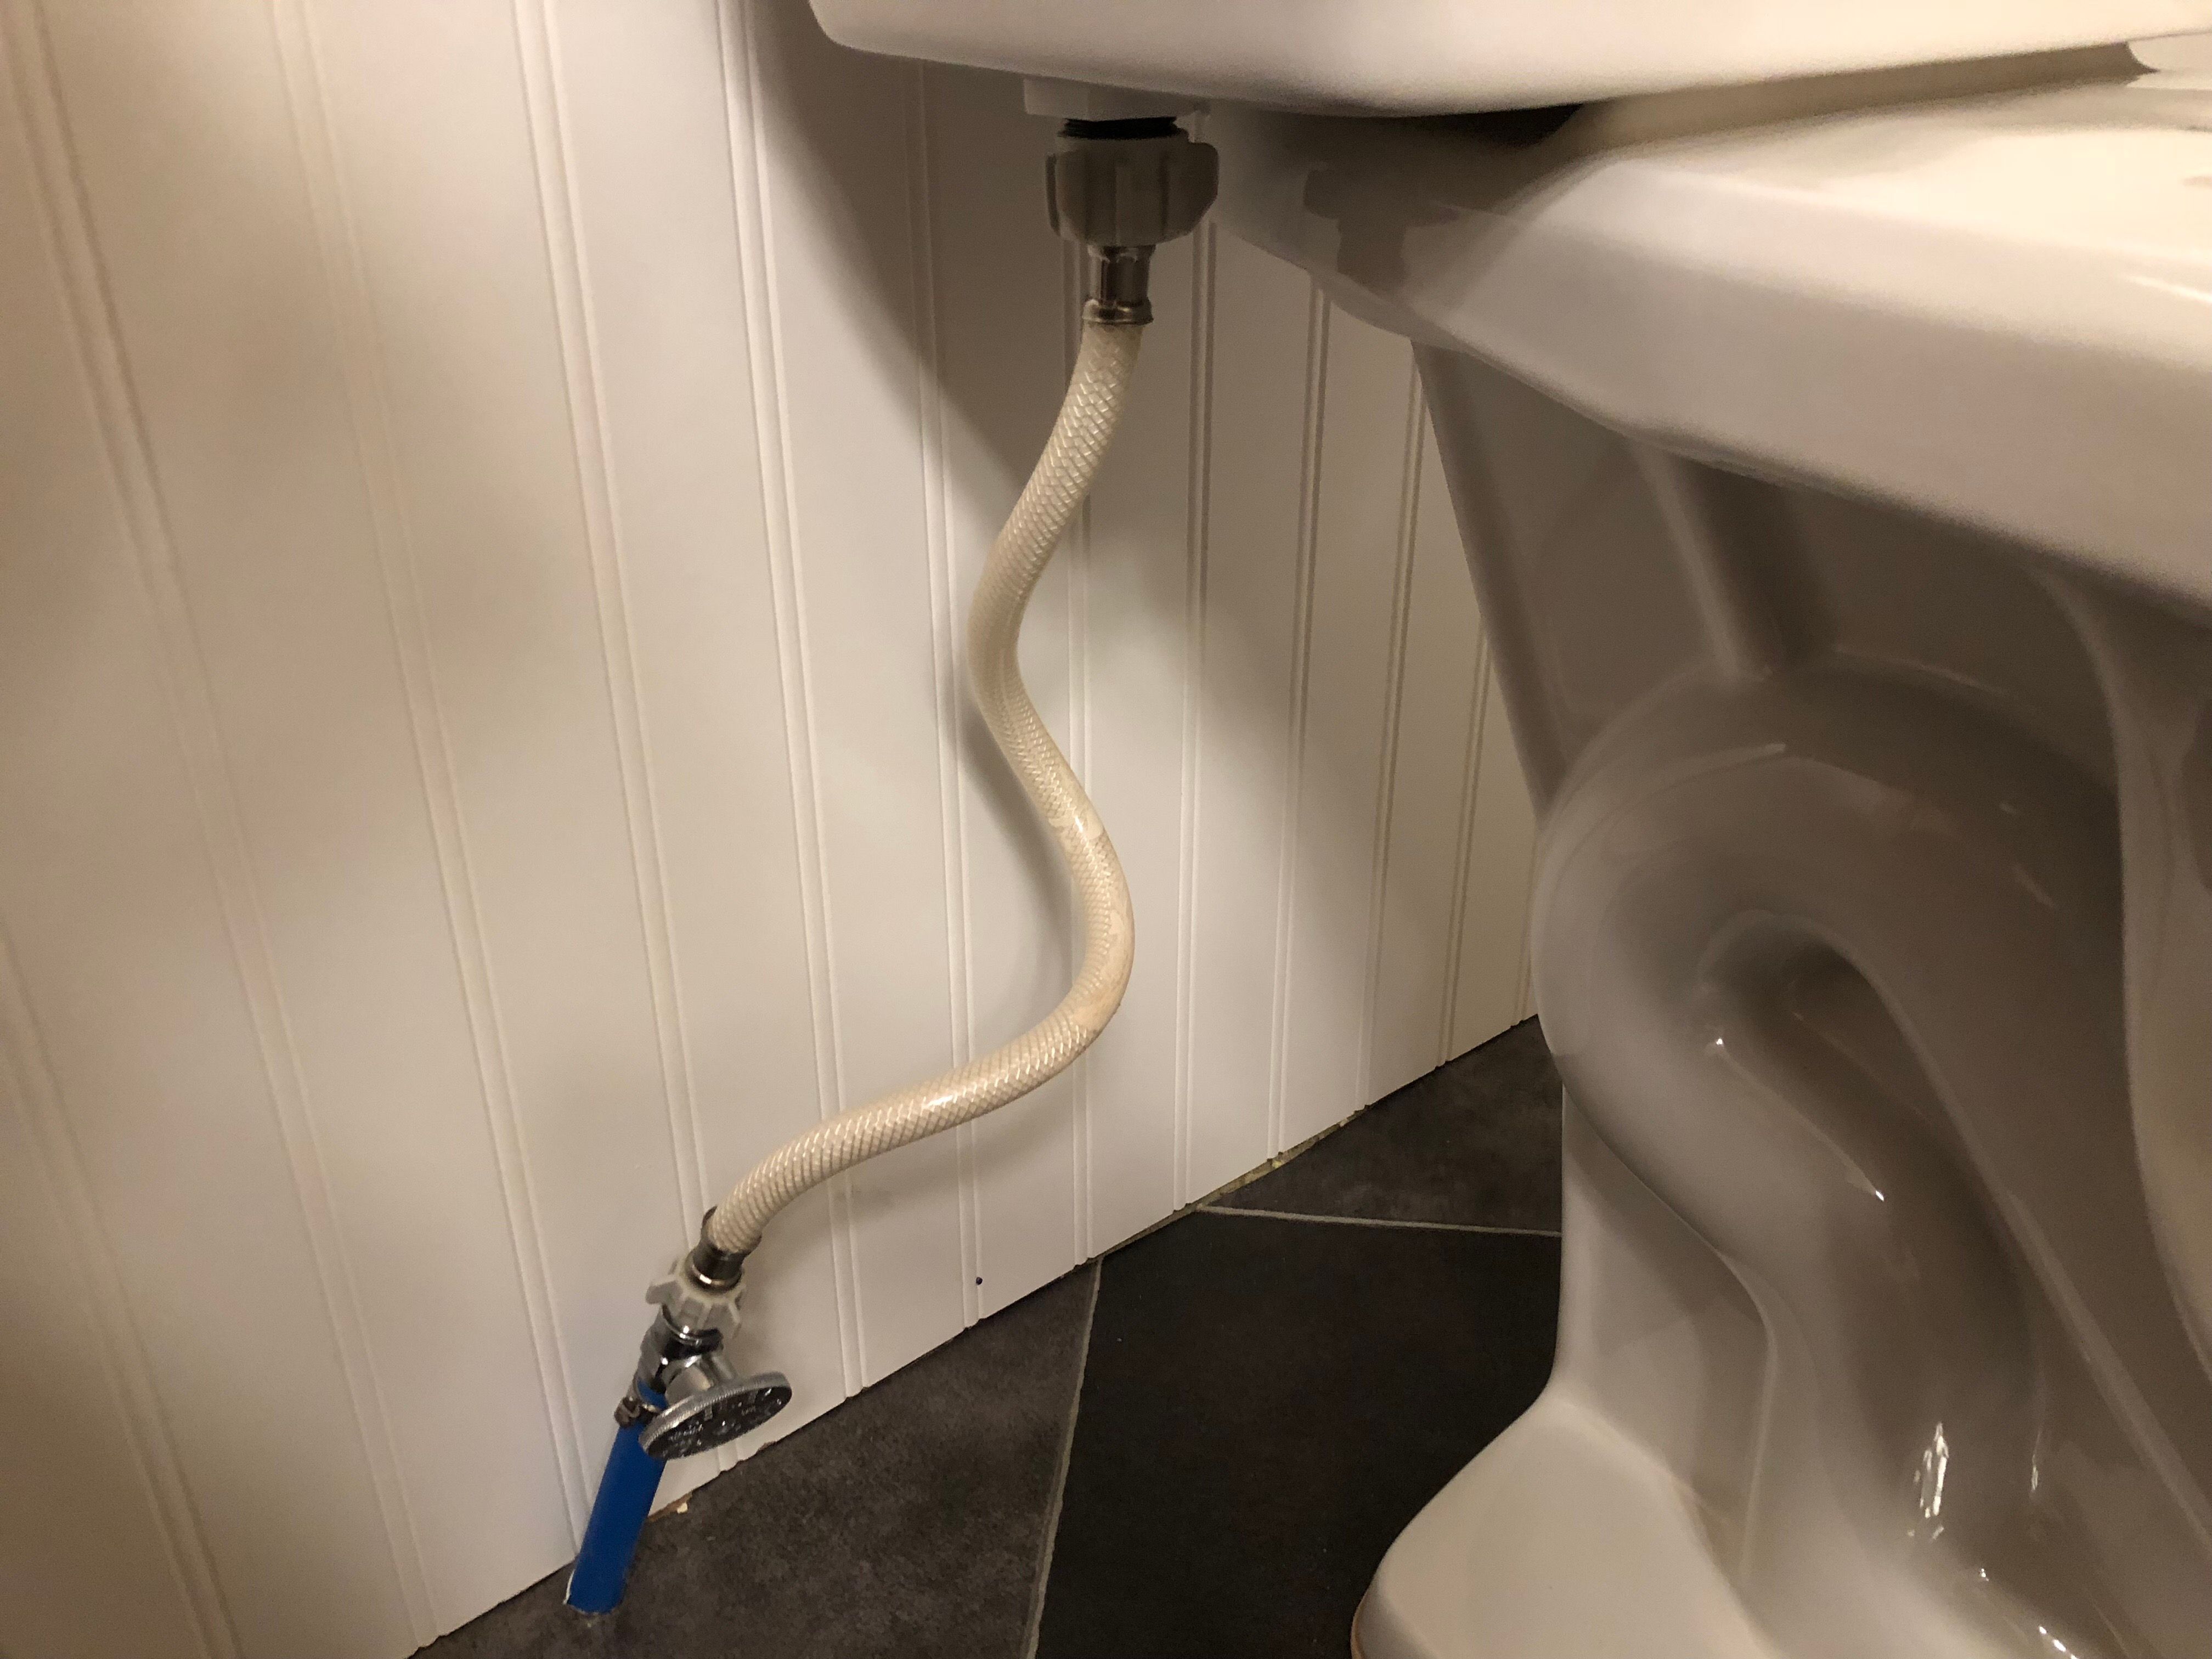
Step 6 - Connect Water Supply Line
Connect the water supply hose to the toilet. Many hoses sold today have flanges on them allowing you to install them without tools by just hand tightening them since they have internal rubber washers to help seal the connections.
Once the line is connected, go ahead and turn on the water to allow the tank to fill with water. I like to let the tank fill and sit for a while as I finish the rest of the installation to be sure there aren't any leaks.
Step 7 - Install Toilet Seat
While the tank fills and sits, go ahead and install the toilet seat. Our seat came with rubber pads, nylon bolts, washers, and nuts. The rubber pads go between the seat and the toilet and help to keep the seat from moving during use.
Thread the washer and nut onto the bolt from underneath and tighten the hardware down. These are okay to get fairly tight, just not so tight that you strip out the nylon threads. A wobbly seat is just about the most annoying thing in Toilet Land. Second only to a leak or non-functional throne.
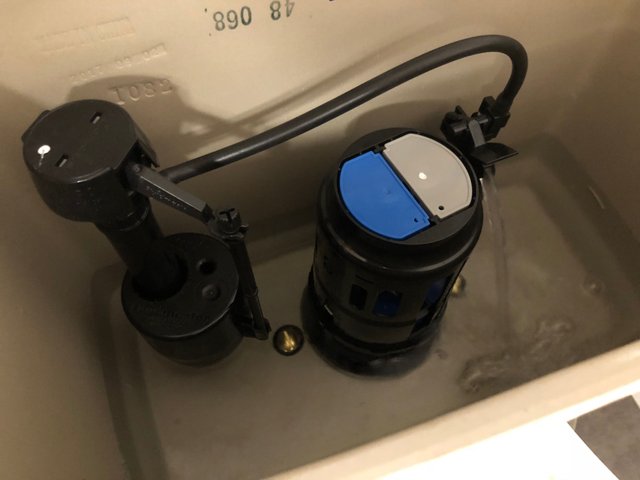
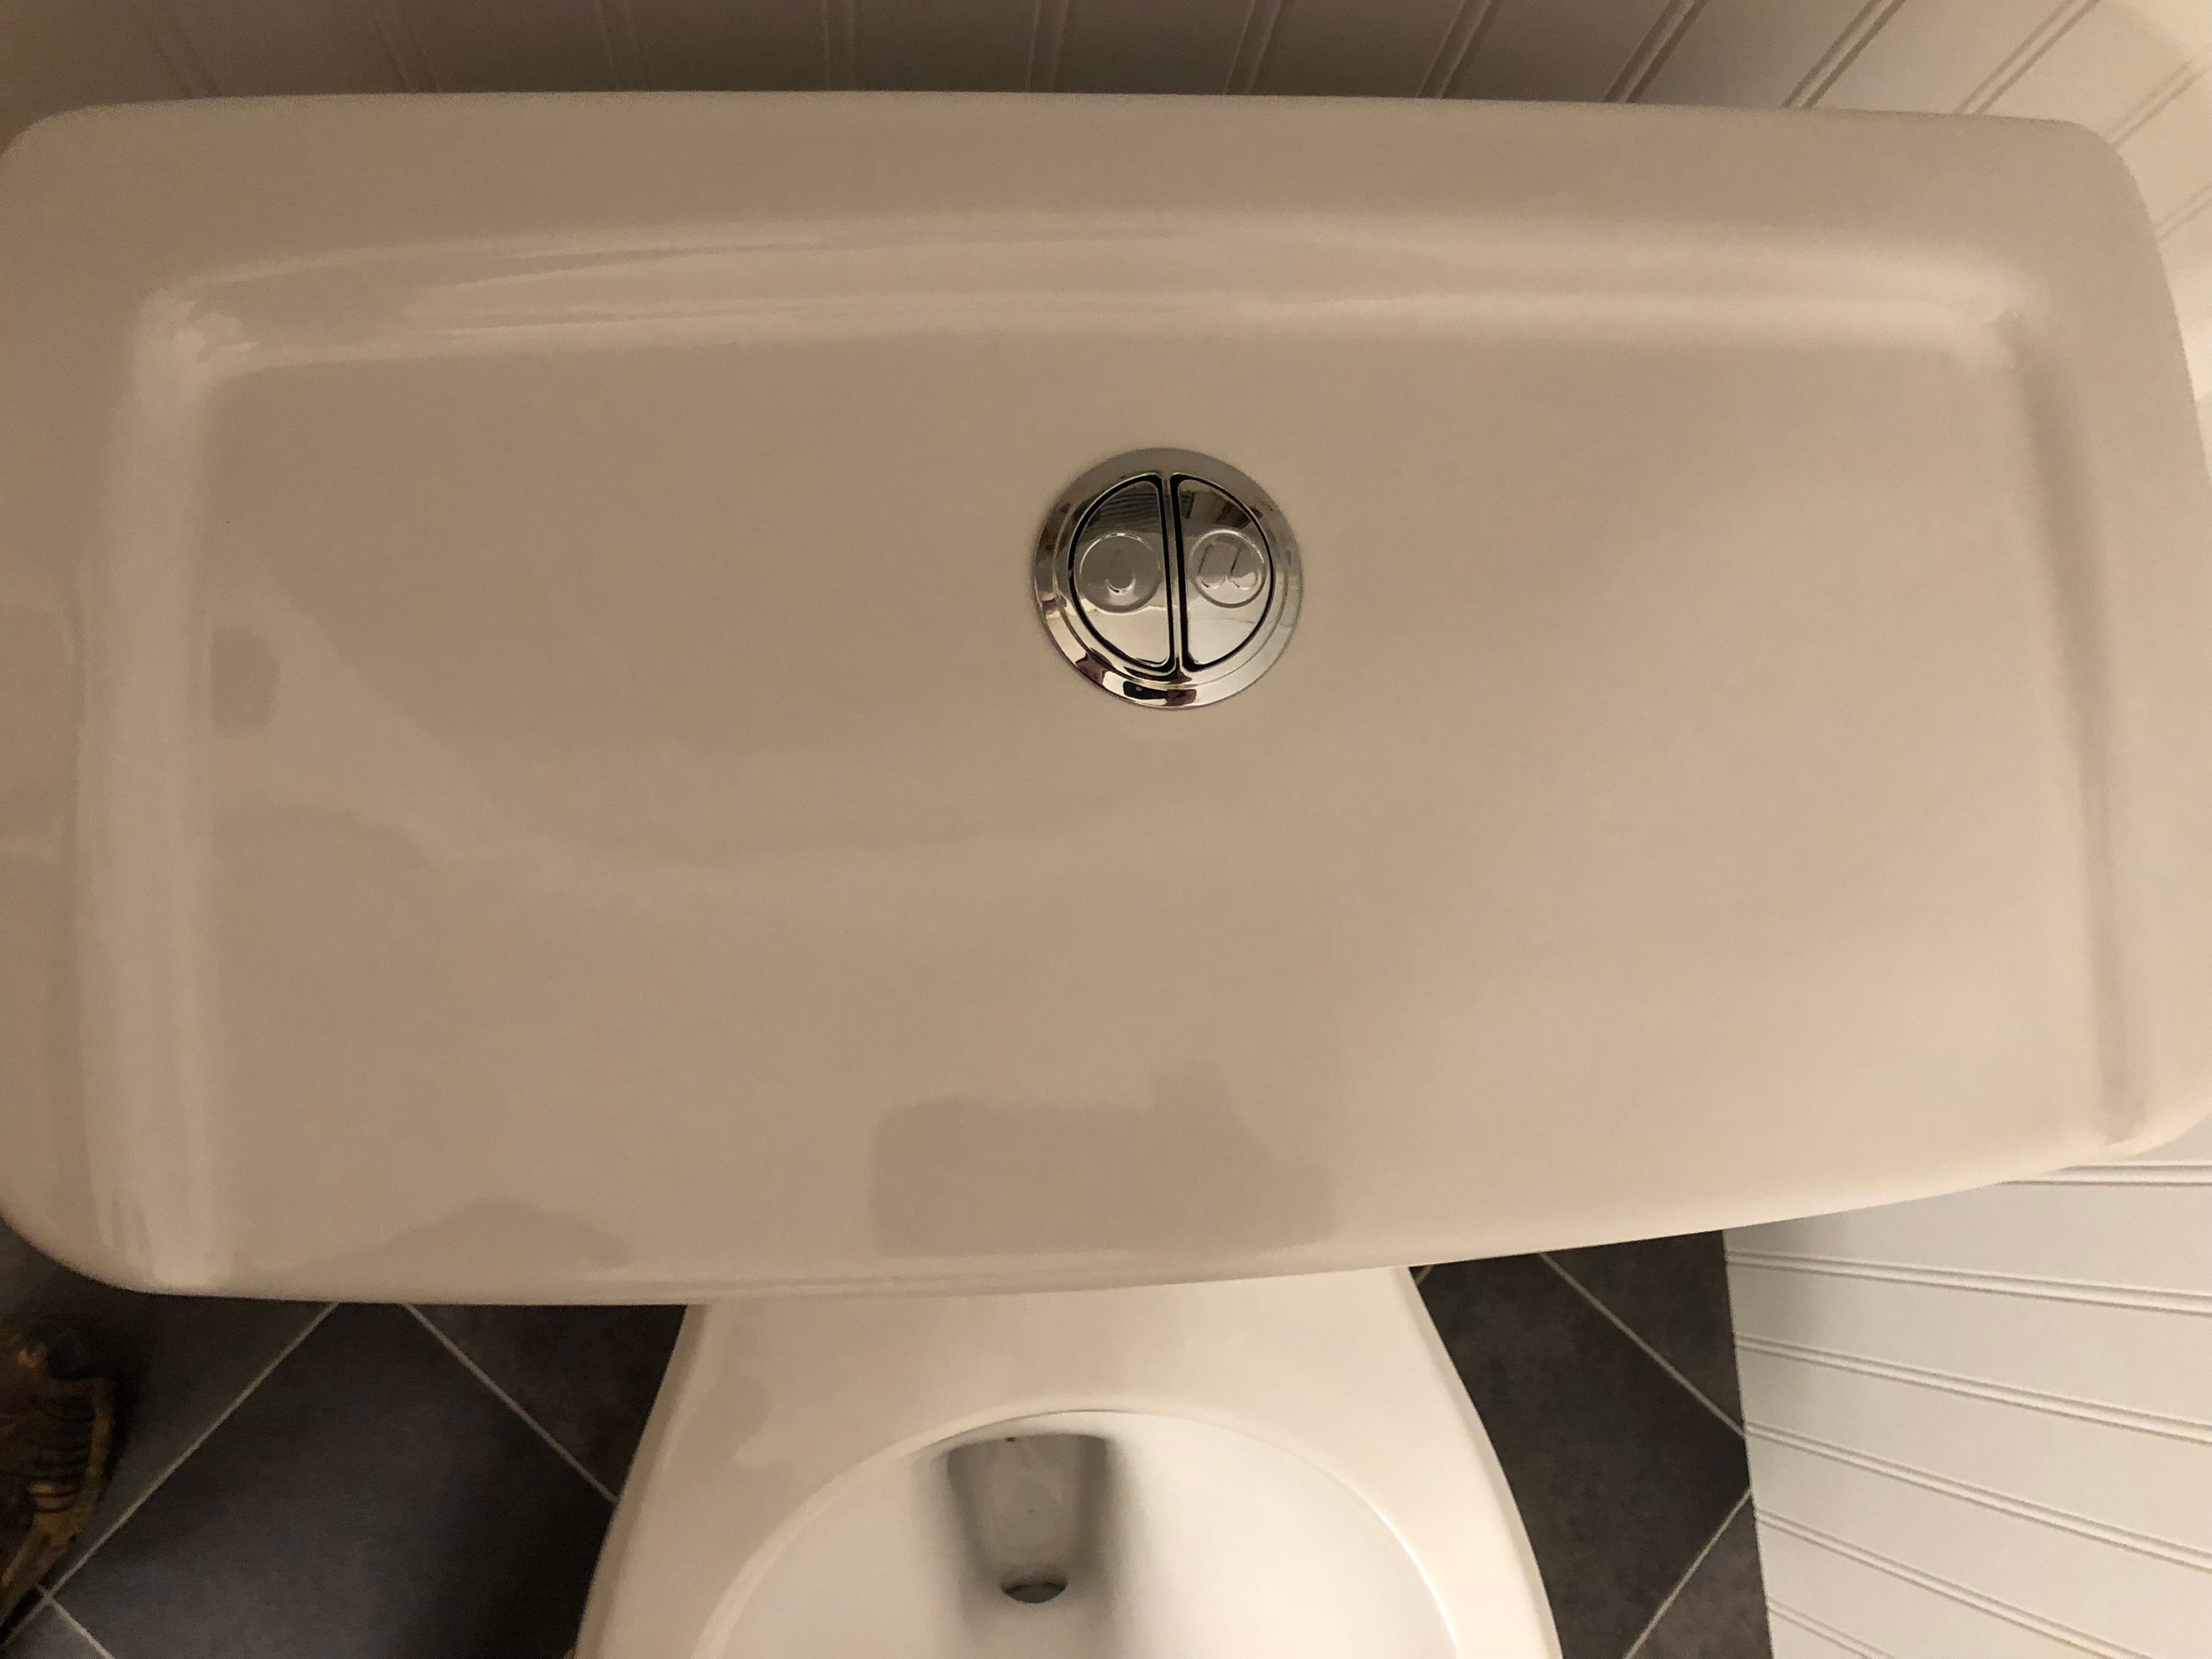
Step 8 - Install Flush Assembly
Depending on your type of toilet, you will have different steps to installing the flush assembly. Our toilet is a dual-flush model and the buttons were on top of the tank.
With our toilet, it was important to match the color rods on the flusher to the color paddles on the flush mechanism inside the tank.
Now is the time to adjust the fill level and flush linkages and adjust as needed. You want enough water in the tank to successfully evacuate the toilet bowl, but not so much that it's a waste of water.
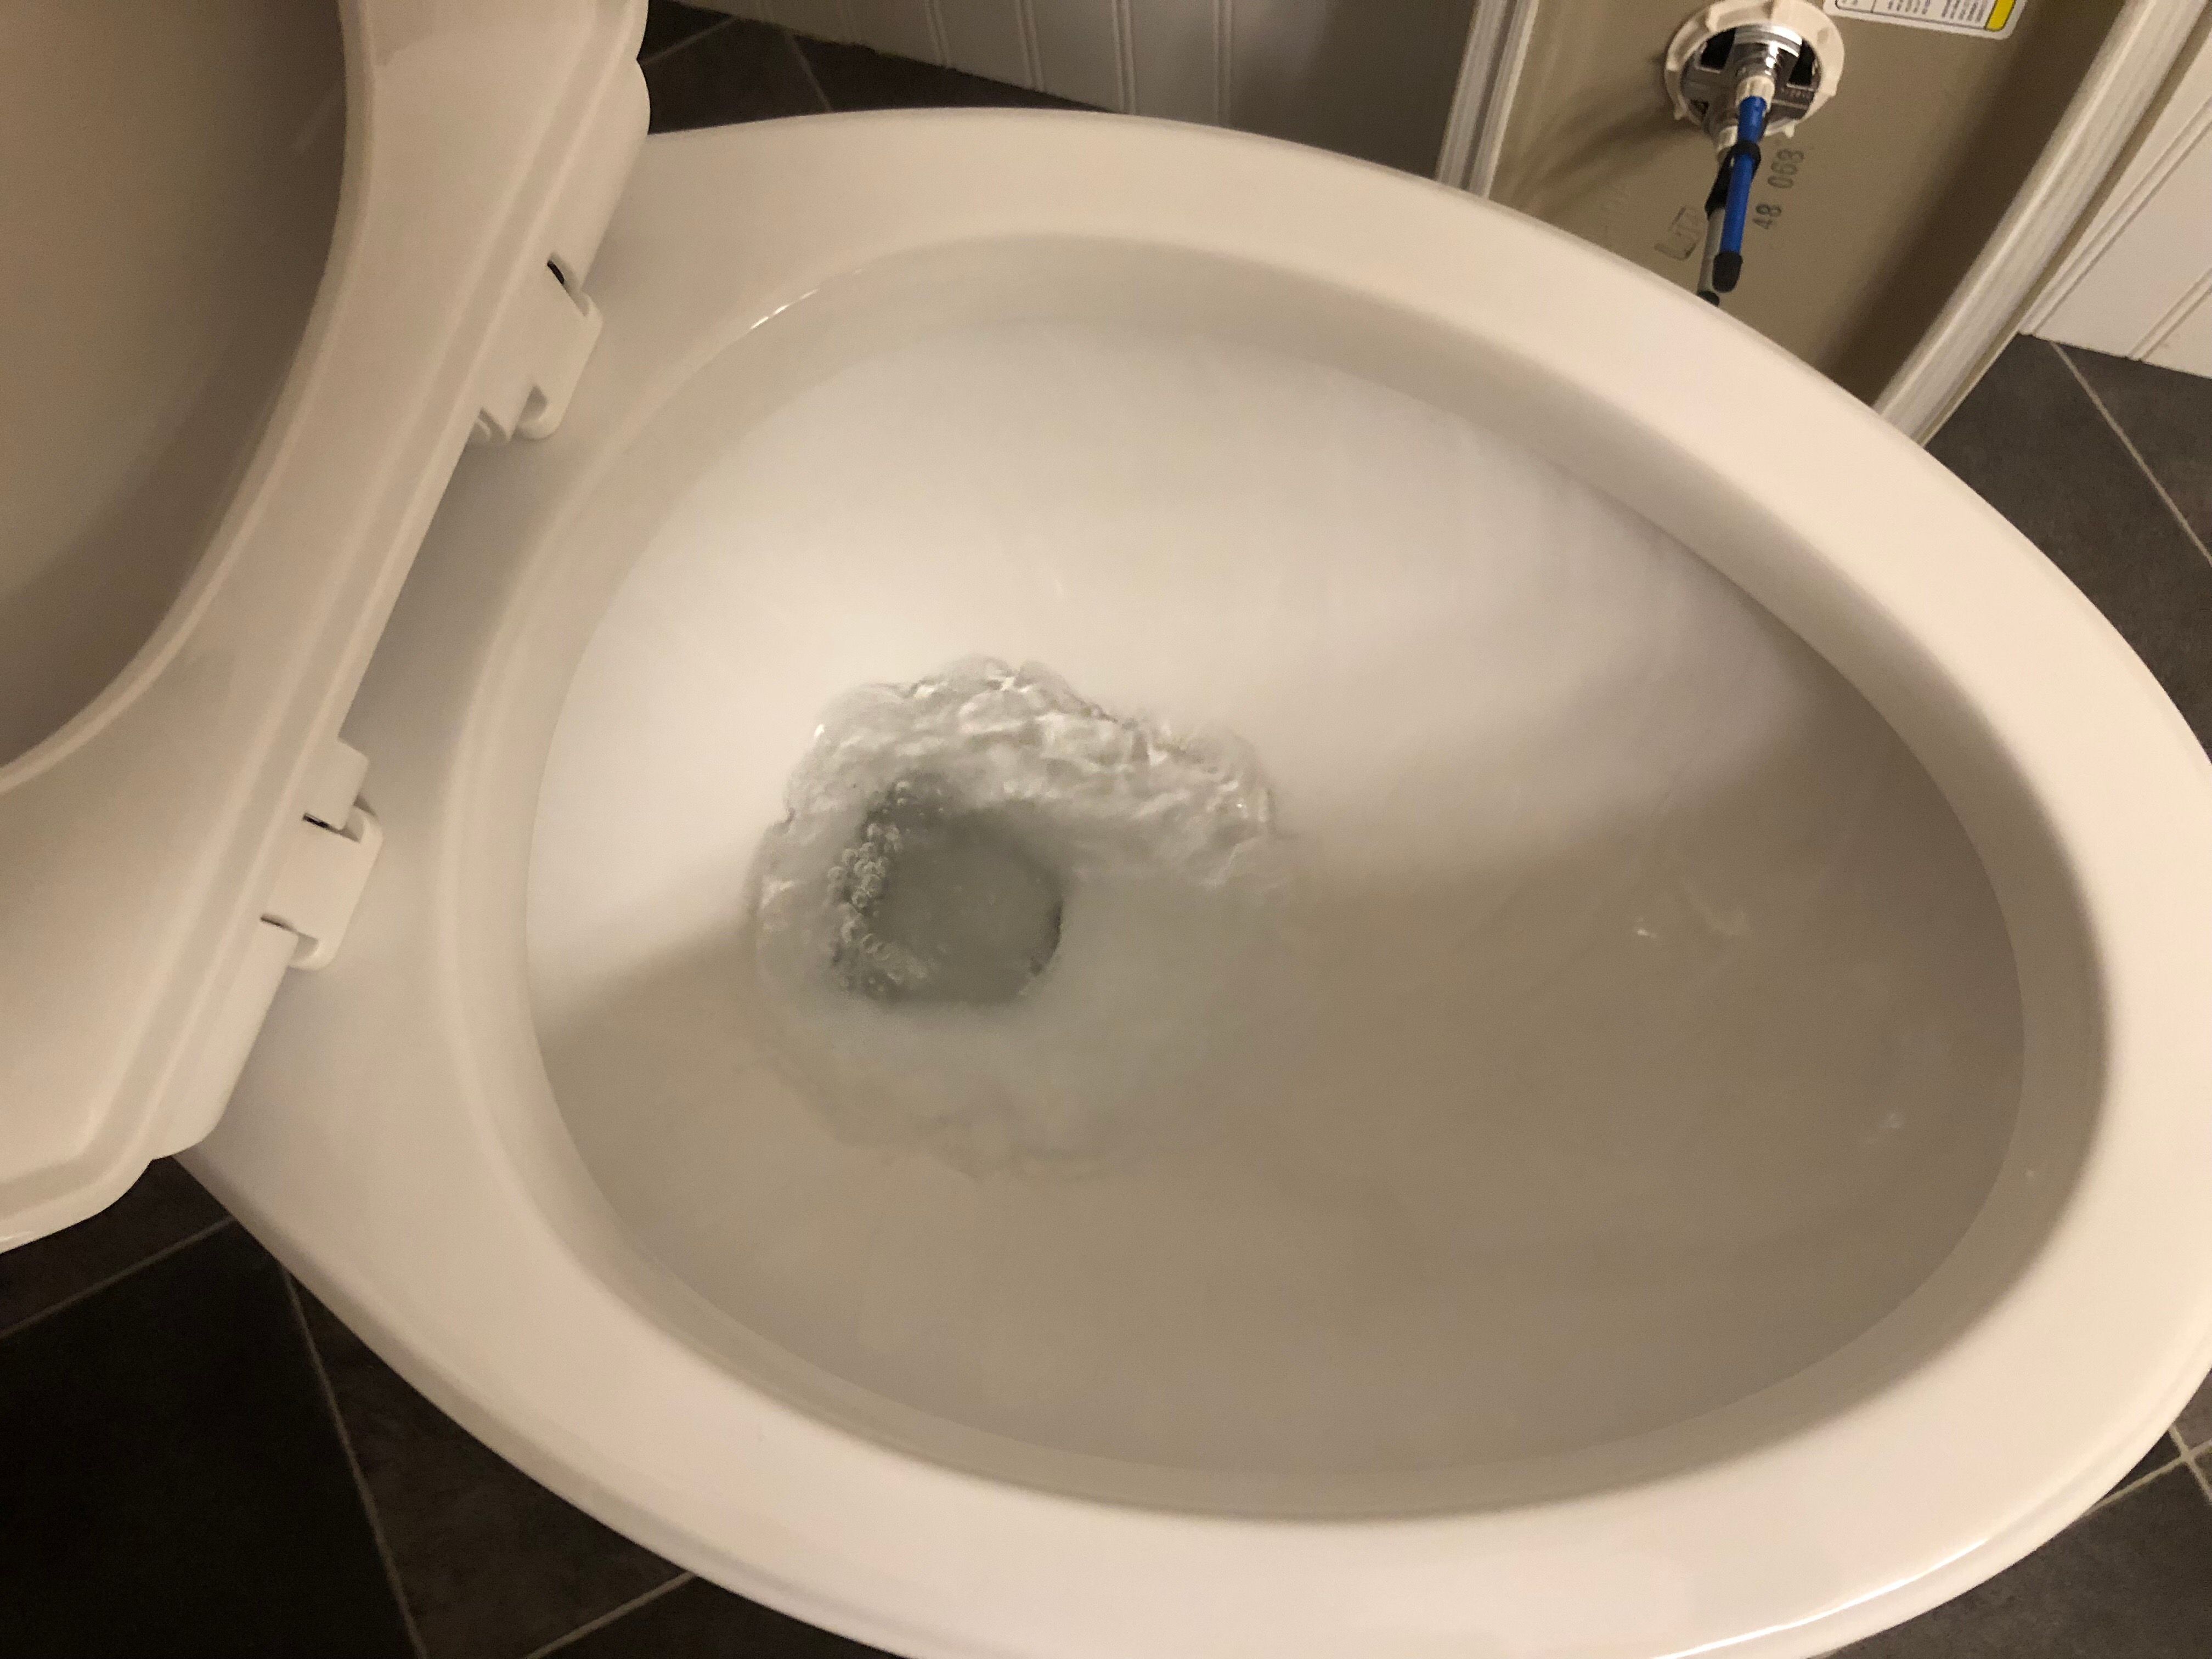
Step 9 - Flush and Look
With the flusher installed, you're now ready for your first flush! I like to run through about 4 flush cycles to subject the various seals and workings to enough water to encourage any leaks to become apparent to me. Run your hands around the various mating points of the water line, tank, toilet and floor to feel for water.
Did you find leaks?
No!
Outstanding! Give yourself a high five and exclaim from the highest mountain your joy!
Yes!
Never fear, you can fix this...
Check the alignment and hardware at the leaking site and address as you can. Common leaks from a toilet installation are:
- Water supply line leaking - Try tightening the connections first. If they are tight or it doesn't fix the leak, your water line may require the use of teflon tape on the joint threads. Turn off the water supply valve, empty the tank, disconnect the lines, tape the connection threads and re-assemble.
- Toilet leaking at floor - This is a bummer to find after all your hard work. The only thing to do is remove the toilet completely. Check the wax seal on the floor and try to figure out what went wrong to cause the leak at the floor. The most common reasons are: Misaligned wax seal, wax seal not thick enough to bridge from the floor flange to the toilet, re-used wax seal.
One Last Tip
You may be tempted to caulk where the toilet meets the floor to get a pretty look or to keep liquids from getting under the toilet...
DON'T DO IT! If you caulk around the toilet you will not know when a leak occurs until the floor has rotten out from under the toilet! It's much better to know right away.
There you have it. The complete how to for installing a toilet. Feel free to ask any questions or leave comments below. Thanks for reading!
@greenacrehome
Join Our Growing Community of over 250 Members!

http://www.homesteaders-online.com

You missed step 10...POTTY TIME!!! Haha!
BAHAHA too Funny.
:-D
At step 2: rock toilet gently back and forth until close to floor, then gingerly sit on the toilet bowl and do the ass shake back and forth to spread wax ring lol.
Sucks when the closet flange is taller than the toilet base... good fix though!!
Hahahaha!!! Yeah, it was quite the bummer, but at least I was able to show someone how to get around it. Thanks @jordanmccraw
I changed a toilet when I bought my first home - I was surprised how easy it was actually. I do caulk mine but that is because my home is a one-level ranch style and the toilet is only above the concrete slab foundation.
Oh yeah, not much worry at rotting that concrete! :-)
Well done @greenacrehome ! This is an incredible howto, really good detail, can see u put alot of effort into it. I’m probably still not brave enough to try but.. I recon I could do it now with this guide haha. Thanks for sharing this
I'm sure you could do it! :-) This post was a long one--longest I think I've written to date, but I didn't want to leave anything off. Thanks @zalife!
Aw and I thought it would be a compost toilet. but good to see it is an eco toilet. I would also agree buying the wax ring is better, than the crap in the box, and yes I did that once, I caulked around the toilet and yup it leaked and yup had to replace the floor under it. Excellent Post my friend.
Nope... just a regular one for us. After paying $10,000 USD for the well and septic, we're going to use them a little. ;-) Both of the above were requirements for building our home here, maybe if it were different we would have done otherwise when building, but having them now it just makes the best sense. Thanks @gardengirlcanada!
Great info. I've never had to do a template before but I probably should have at least once. I can remember needing 3 wax rings on one toilet and still having to caulk around the base to seal it up so the gas smell would seep in when the barometric pressure changed outside.
Wow! A triple-decker! :-) I was pretty bummed when I found out I had to do the riser, but it was one of those things I just had to do... too many people watching! Hahahaha!! Thanks @qberry, see ya around!
Happy Sunday! This comment is to inform you that your article has been linked and featured in the most recent issue of the Weekly Homesteading Newsletter! Please check it out if you are interested! Thank you!
Great! Thank you @kiaraantonoviche for including this post and for doing the WHN!