Planting Garlic November 21, 2018 @goldenoakfarm
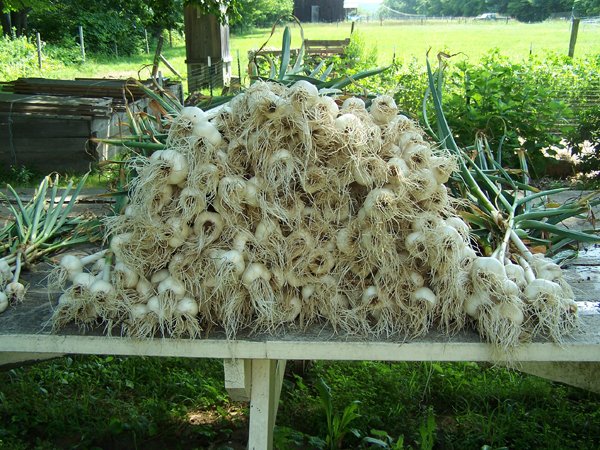
German Extra Hardy garlic harvest July 2018
I finally was able to start planting my garlic seed, saved back in July and cured, on October 17th. I prefer to plant the first week of October but between rain and pigs and chickens, it didn’t happen.
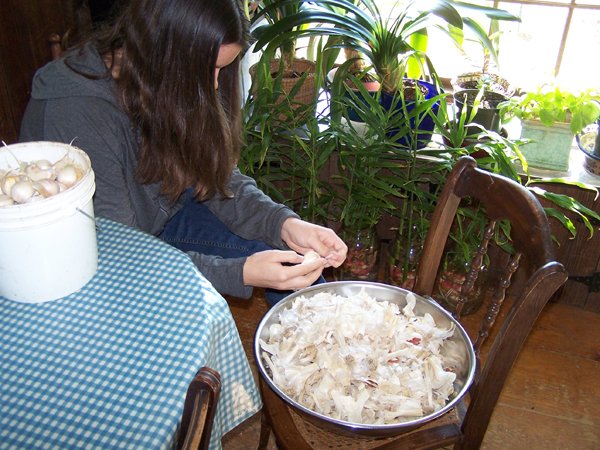
My intern had expressed an interest in planting garlic, so that was one reason it was done on this day. The first job was to separate the cloves. I like to remove the paper as much as can easily be done, so the garden doesn’t look like a trash filled parking lot.
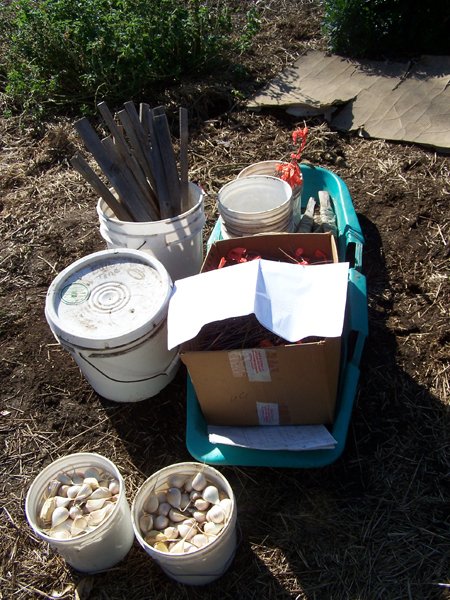
Then we went out to the garden shed and collected all the equipment and materials:
• Tools:
Tape measures
Pruners
Trowels and bulb planters
Axe
Rake
Pitchfork
• Stakes to mark each bulb in the mulch
• String
• Garden map
• BulbTone organic fertilizer
• Bucket of stakes for marking rows
• Buckets to hold our share of materials
• Bucket for weeds, etc.
• Buckets for moving mulch
• Cardboard for sitting on
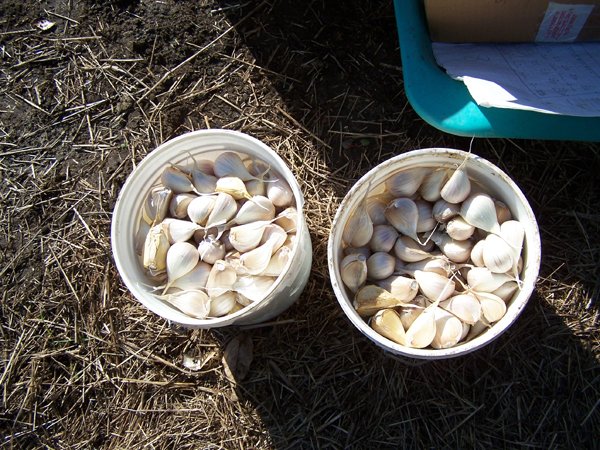
We’d each cleaned a bucketful of cloves. I planned to plant (4) 38’ rows. When we were cleaning we also selected only the very biggest cloves. The small ones were left to eat.
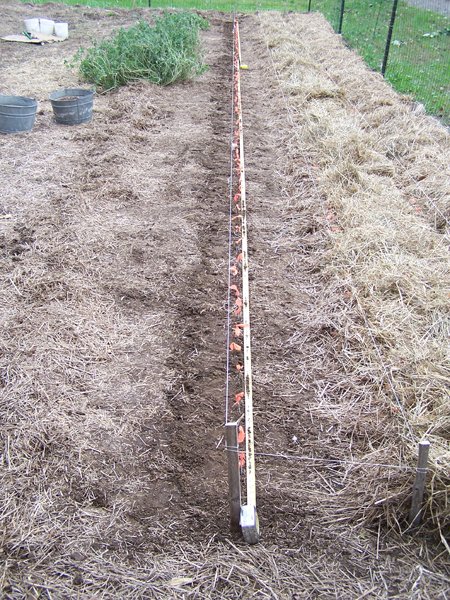
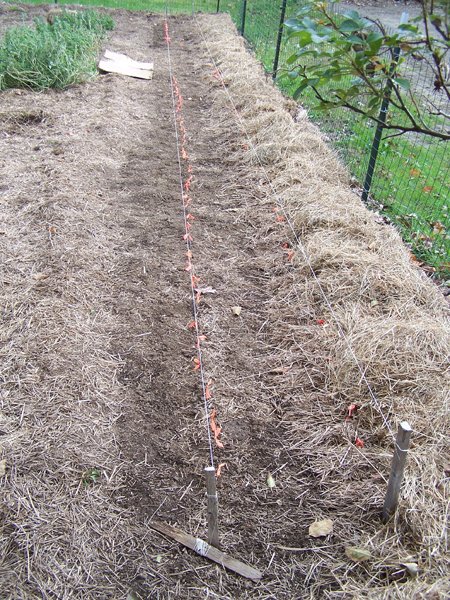
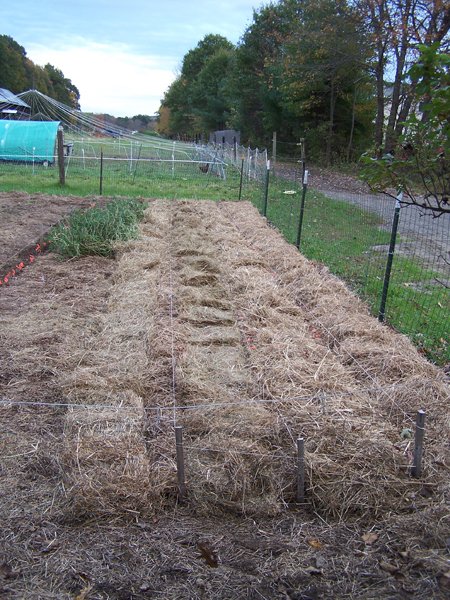
We measured off where the rows would go, put the stakes in, stretched a string to keep it straight, and laid out the tape measures.
Keeping straight rows a set distance apart makes mulching with hay leaves much easier.

I took one end and she took the other. We worked carefully because we had 3 supervisors over us: the house cat, the cows and calf, and the pullets.
I’ve found I use less energy if I sit on a piece of cardboard to insulate me from the cold ground. My intern likes hers, I think, because it keeps her cleaner. I long ago gave up staying cleaner in the gardens.
The spacing apart within the row is 6”. The spacing apart between rows is 18”.
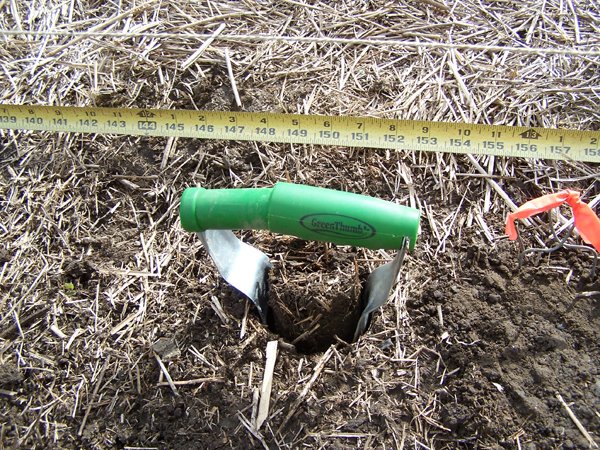
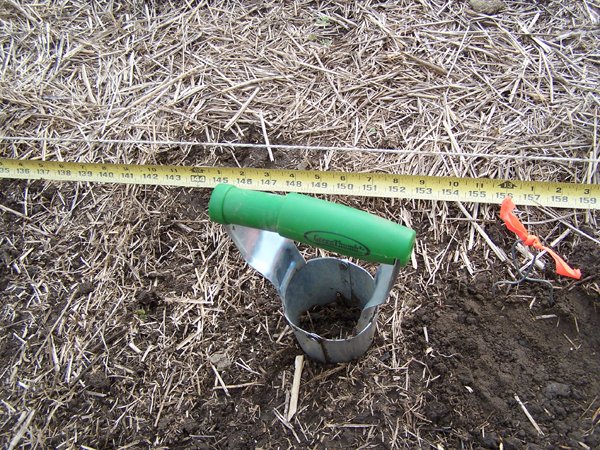
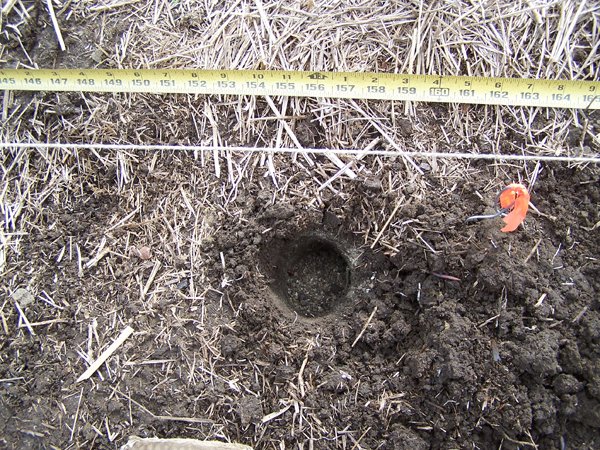
The depth is 6”. The bulb planter only goes to 4” so I push the soil up a couple inches higher.
Once the soil is removed, I put about a tablespoon of BulbTone organic fertilizer in the bottom of the hole. This is the only feeding they will get for the next year. (Check out the worms…)
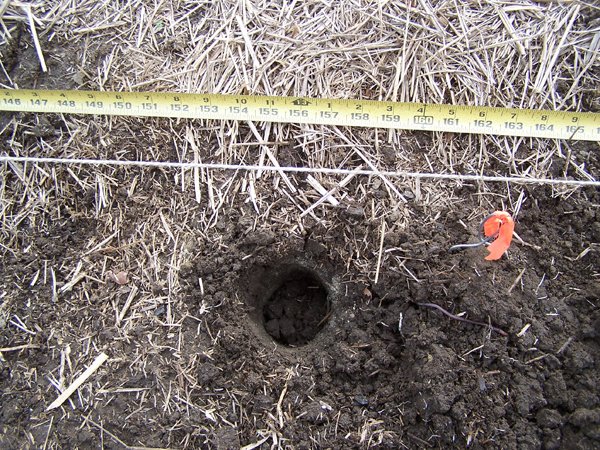
I cover the BulbTone with 1 – 2 tablespoons of soil.
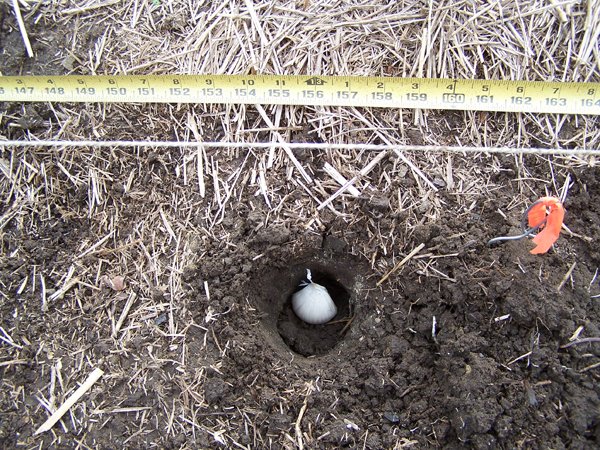
The clove goes in with the point up, the root end down. Cover with remaining soil and press firmly. You don’t want large air pockets, but there does need to be air spaces.
Then I put a marker precisely behind where I planted. Not only do these indicate where a bulb should come up, but they aid in putting the mulch down so the bulb can come up.
We got nearly 2 rows planted and half of one row mulched that day.
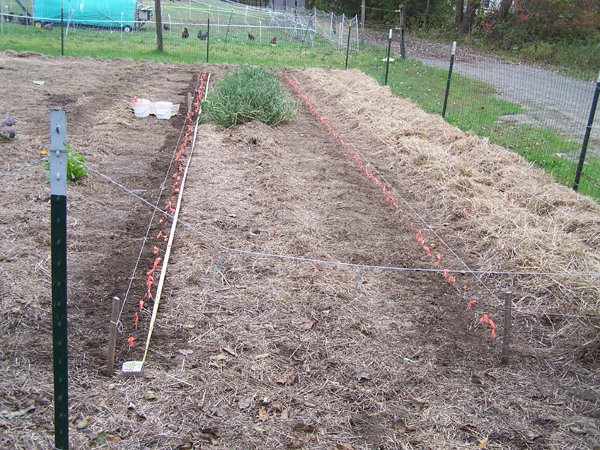
A couple days later, I was able to get out there again and finish the second row and mulch it, did the 3rd row and but didn’t mulch that.
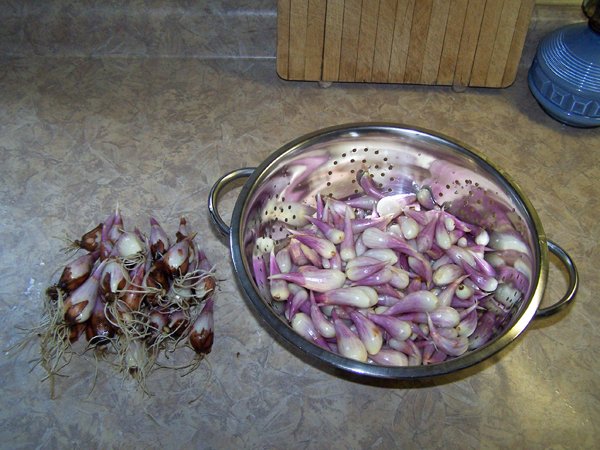
When I went to plant the 4th row, I realized there was supposed to be shallots planted there. I had harvested the shallots back earlier in the month and prepared the seed, on the left. They are French Gray shallots.
So I went and got them out of the fridge crisper drawer where I had stored them and put them in. They are planted exactly the same as garlic. I also had a few Chesnok Red cloves to plant in this row. The rest was German Extra Hardy, as were the other 3 rows.
By the time I finished all this, I was too tired to mulch the last row.
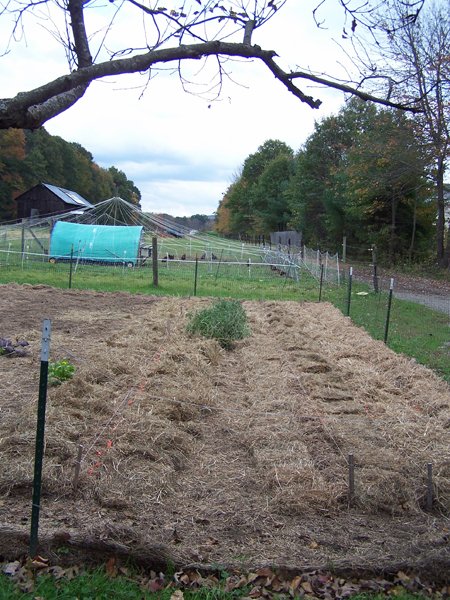
I got out there a few days later and got it mulched. I have not found more mulch so I was stealing it from the rest of the garden. I finished on October 23rd.
The green plants in the middle are horehound. It was planted here because tomatoes and horehound are symbiotic. I was able to plant the garlic around it as it is a perennial and will be moved next spring to the new tomato area.
I love your gardening log! You post so many nice pictures and the information is clear enough even for the beginner. Your worms are beautiful!
Do you put the shallots in the same way as the garlic? I adore cooking with shallots.
Thanks for sharing!
Xx ToL
Yes, shallots planted exactly the same way. Thank you for your kind words! I do try to post clear instructions and photos. It may seem complicated, because I outline exactly how I do it, but it really is mindless work. :))
This post was shared in the Curation Collective Discord community for curators, and upvoted and resteemed by the @c-squared community account after manual review.
@c-squared runs a community witness. Please consider using one of your witness votes on us here
Thanks! Hope it helps others with their planting.
it's impressive how neat and organized you are!
One thing we do for planting bulbs is use an auger attachment on the drill, a 3" and we have a big 5 or 6" too! Perhaps its cheating, but saves on the hand and wrist!
....She thinks of how many extension cords I'd need..... LOL
battery-operated!!!
None of those here.....Husband prefers corded.
Somehow, I think I prefer the quiet and digging over power tools. Besides, my supervisors might not find the noise so interesting....