How I built my 12ftx20ft chicken coop by myself - Part 1 - The main structure
The Chicken Coop Construction - Part 1
I am quite proud of my effort given my lack of construction experience. I have done extensive landscaping construction but buildings were a new one for me. Many of my construction projects end up running awry and the fact that this one has progressed to the point it has, makes me pretty happy.
Our old coop was just not able to handle the number of chickens we had and was not nearly warm enough in the winter. I had a couple of roosters get frost bitten combs, even with heat lamps, due to the porous nature of the walls. That meant it was time for a new coop, and this is how it looks right now.

The Floor
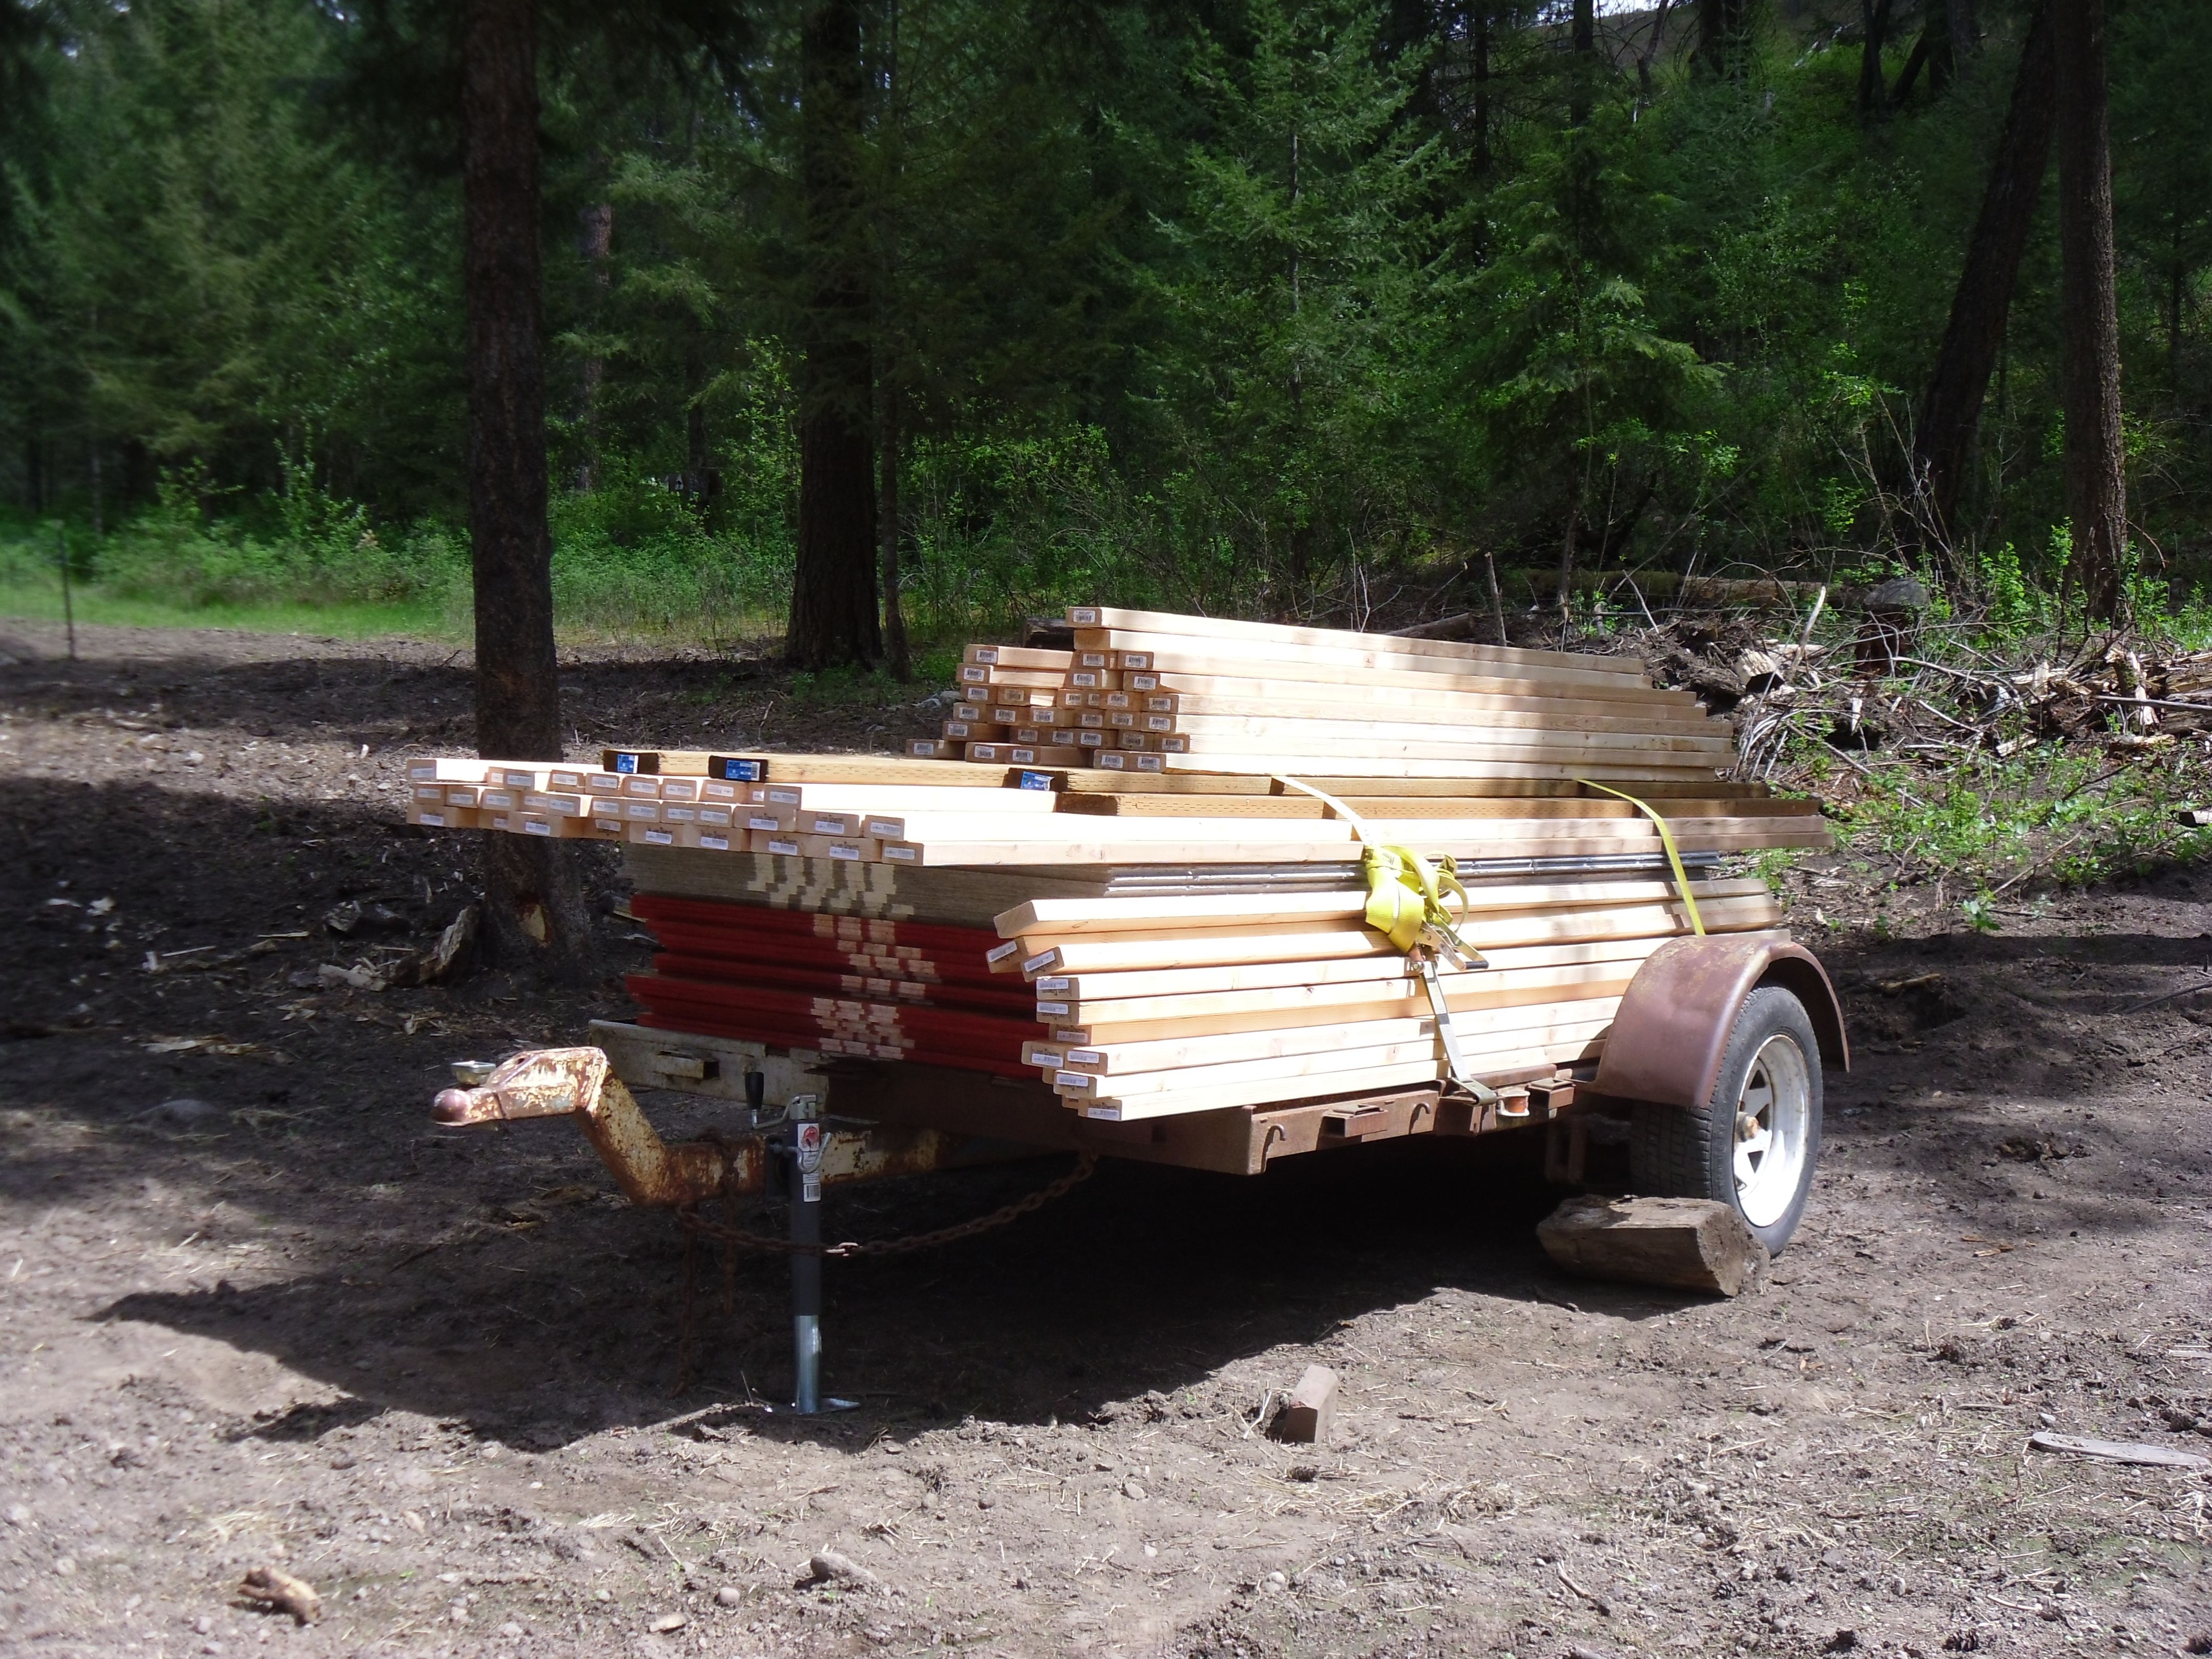
Home depot has the no interest financing for 12-24 months offers every so often through the year so we took advantage of it to buy the materials. It was quite a heavy load for the trailer but we got it home in one piece and parked next to the construction site. It took me a few days to get it unloaded from the trailer where it sat covered from May until August.
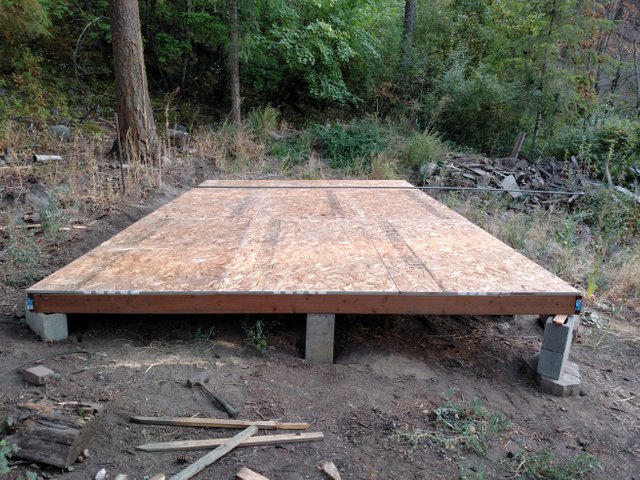
I had drawn up sufficient plans for the walls that I was comfortable starting the construction process. In April I somewhat leveled the soil with the front blade of a tractor I rented from across the highway, namely for the 3 point tiller, but got the ground close enough to make it workable so that in mid August I started building the floor.

It took (15) 10ft 2x6s of pressure treated lumber for the floor joists. At the middle point I used 2 boards nailed/screwed together as my meeting point of the two halves. I put it together on the ground a half at a time, connected the halves, then started lifting it into a level position putting blocks under each side to keep it off the ground. It took a little while to work in circles and crosses around the joists as I checked my various levels to ensure I was as close as possible.
Along the joists I drove wood stakes into the ground parallel to and touching them to the point the stakes were very solid. This allowed me to screw the stakes to the joists which works to keep the joists from flexing in the middle of the floor. There are now a good bit more blocks around the circumference to ensure stability.

The floor went on easily enough and I was able to use a 20 ft piece of 1/2 inch metal pipe as my vice so I could square the joists to the floor. The numbers worked out well, 7.5 sheets of flooring which meant buying 8, and I only had to cut one in half. The vice worked super well for being able to square the floor by myself.
The Walls
The walls took a little work to ensure I had all my pieces and lengths correct so I wasn't cutting incorrectly. I had collected a bunch of old used windows from craigslist so I was able to choose which ones I wanted to use and have my measurements before I started building. Like the floor I built the walls in halves, connected them, then lifted them into place and braced the ends of both sides.
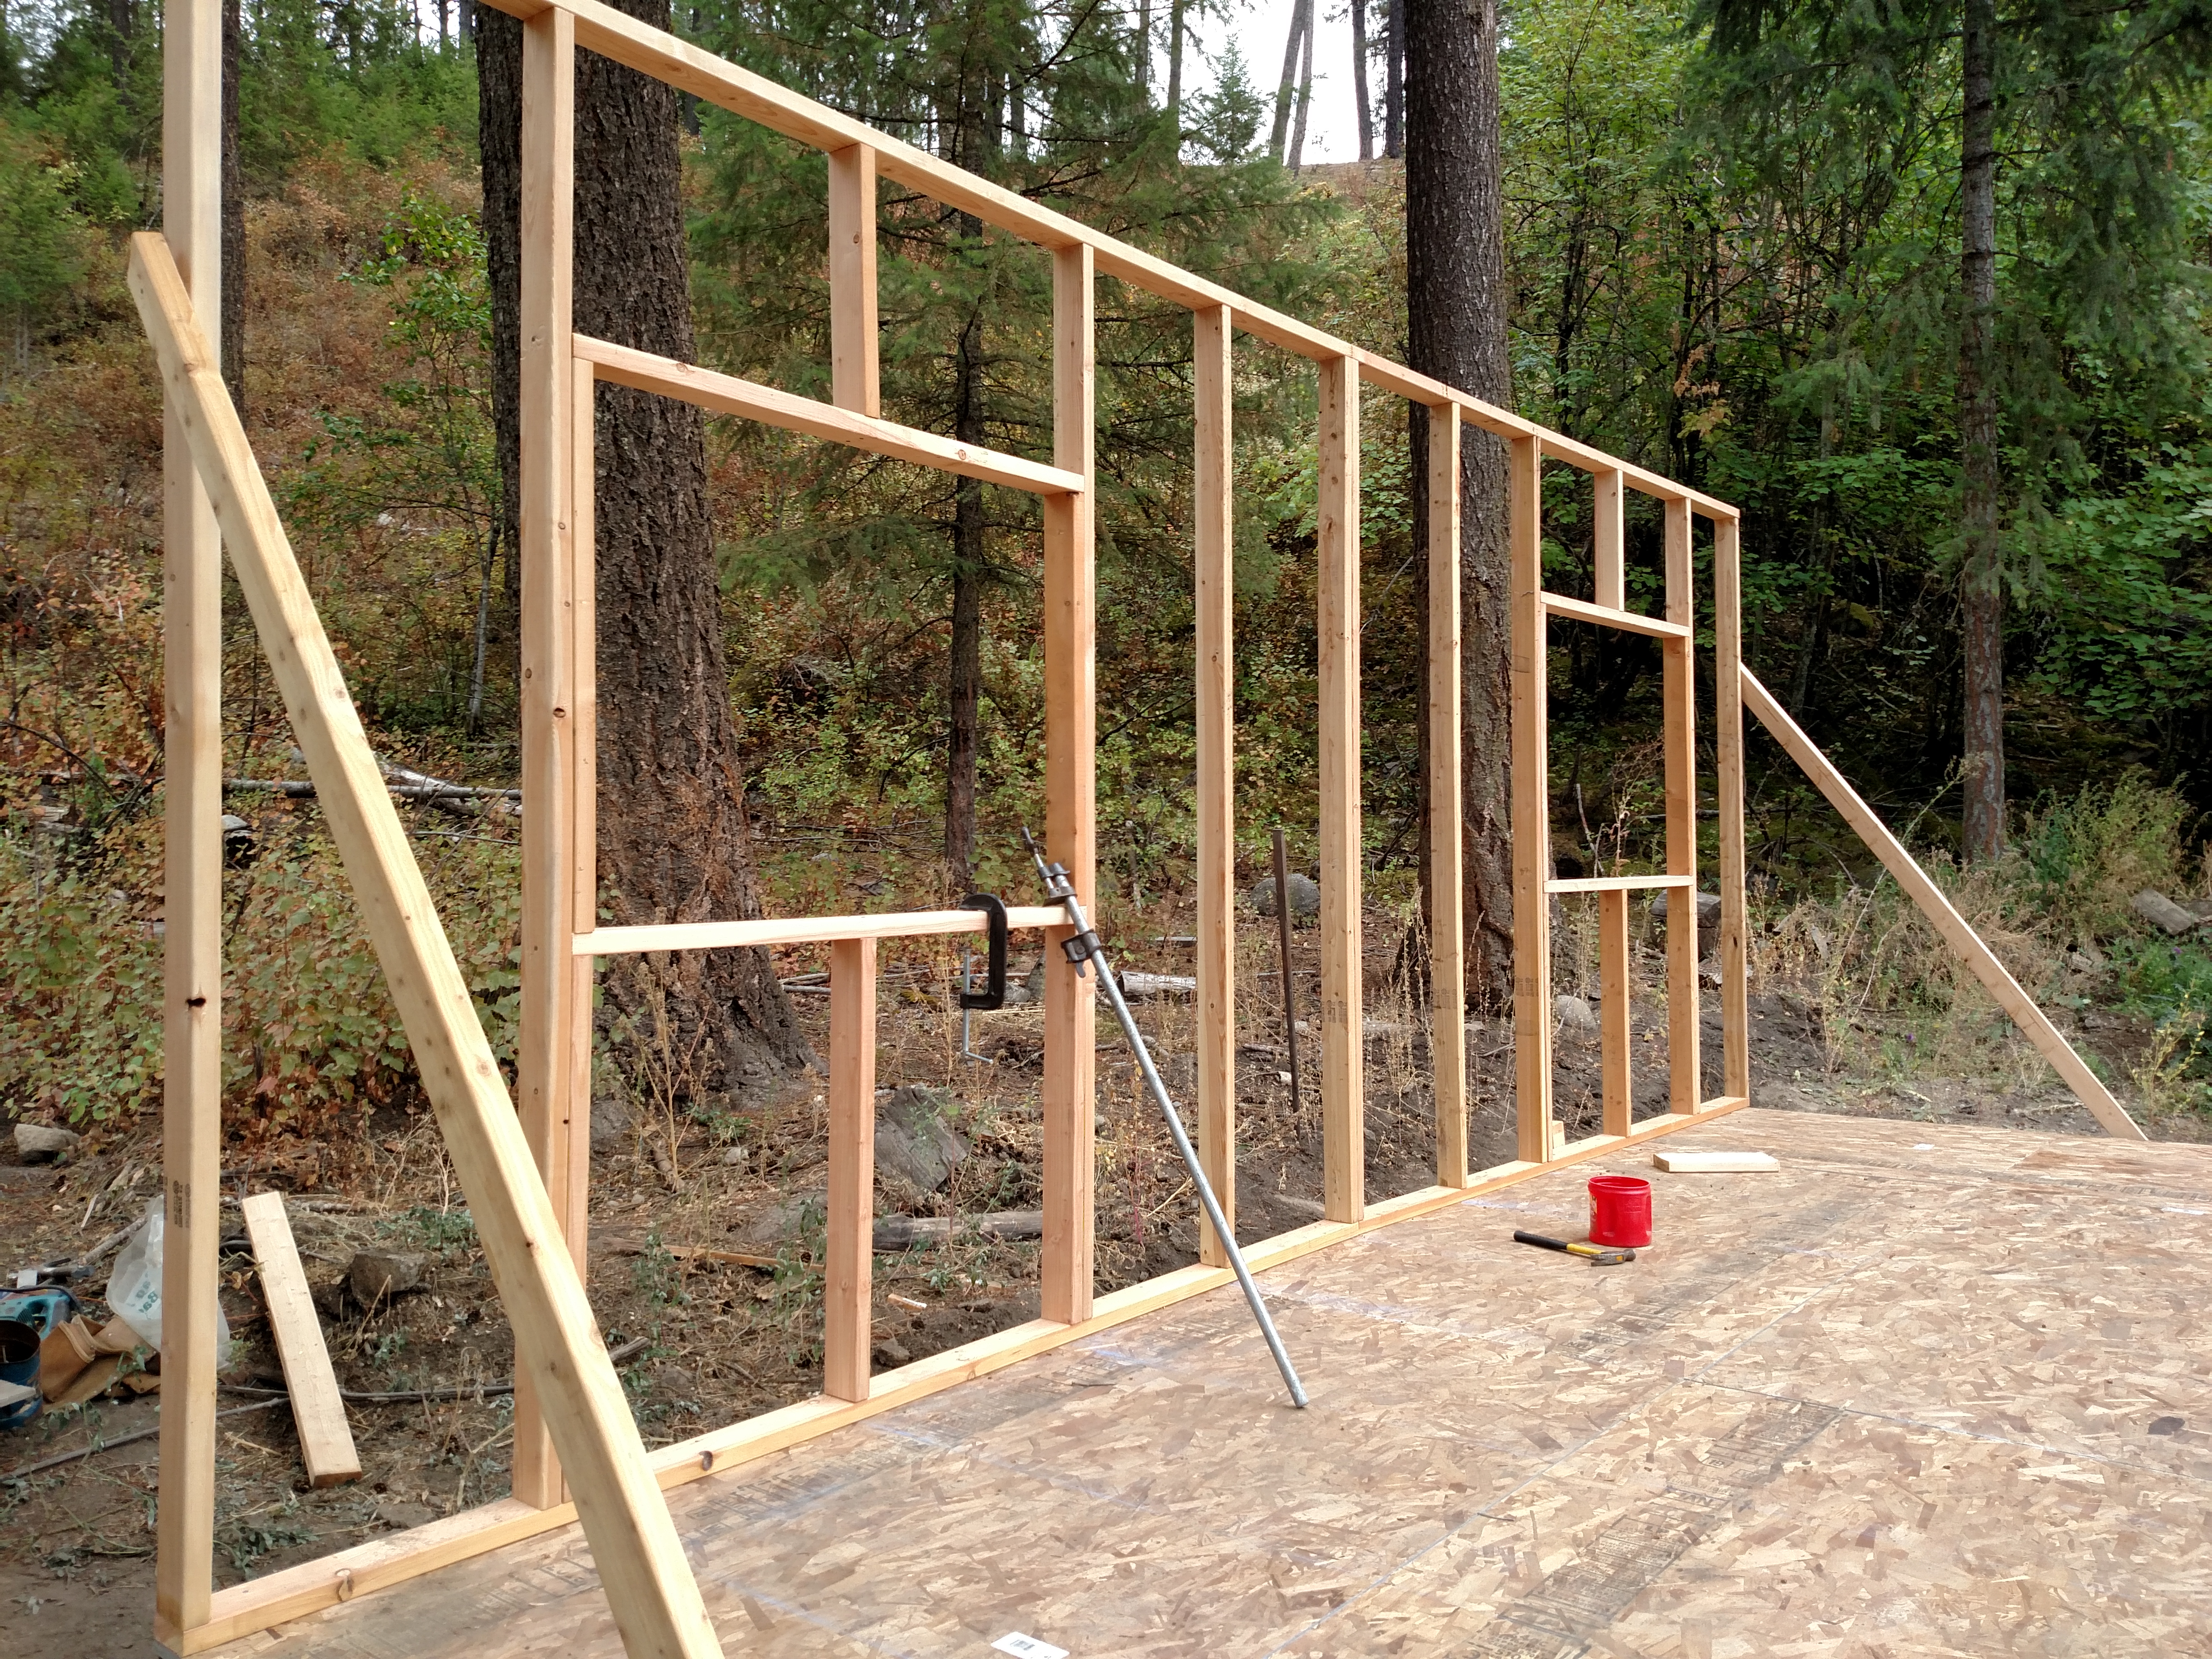
The end wall was built a bit smaller so it would fit between the two side walls. I needed to be able to lift it into place after having built it on the floor. This was one of the first points that it felt real, that I was actually getting this thing built by myself and so far to this point in only 2 weeks. The man door end went together a bit easier than the windowed walls and I was able to install my metal door in place. I sized the barn door such that I could back my truck up to it and it would be just wide enough to fit, though I tend to not push that far.

The Roof
The rafters were a bit of a problem to get the angles of my cuts correct. I built all my rafters myself so that meant cutting both ends of each 2x4 at the correct angle for the slope of my roof. This is important for both sides but none more than the peak where the boards attach. The eaves can have a wonky angle on the face of the end cut and not create to much of a problem, but if the peak point cuts are not correct the structural stability can be reduced.
I built each rafter on the floor out of three 2x4s then screwed on a 2x4 perpendicular to the rafter. This 2x4 allowed me to lift the rafter vertically up to the top edge of the walls with out the need of another person. I lifted the rafter until it cleared the top of the walls then I turned to set the ends with my notch cuts on the headers. I did this for all the rafters and once I had 2 setup I tacked a 2x4 near the peak at measured intervals so the rafters stayed at the proper separation distance.
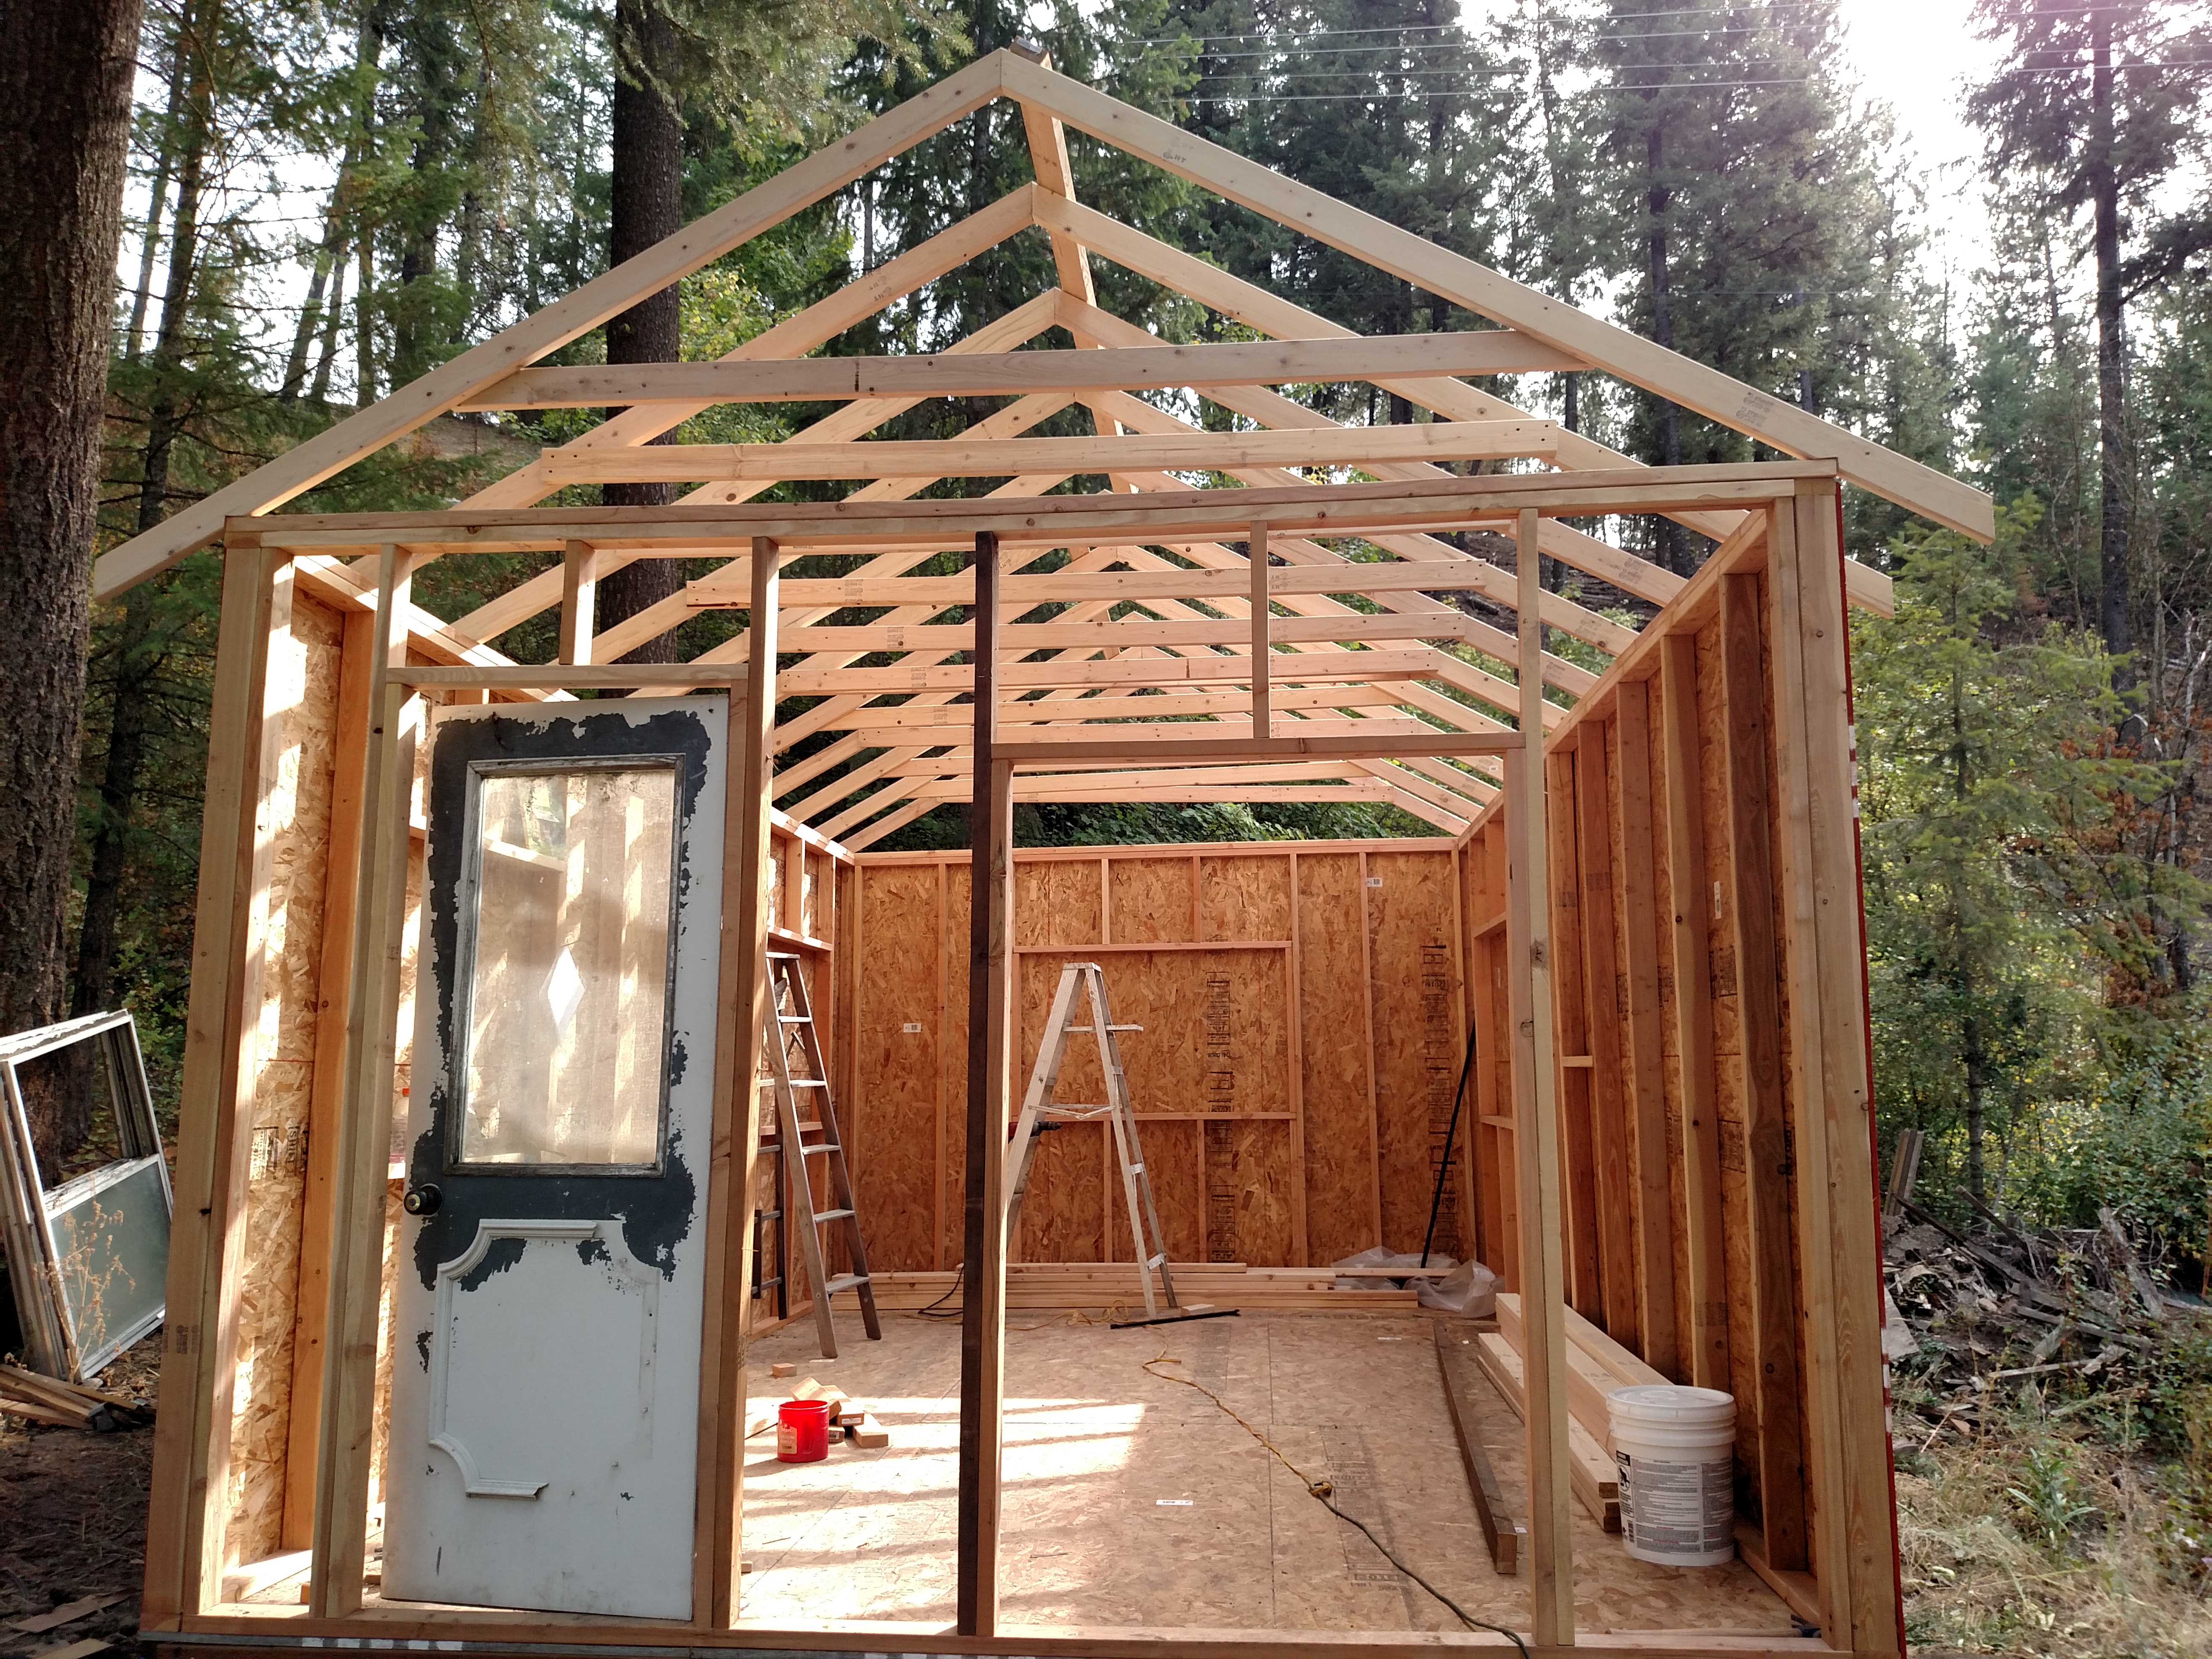
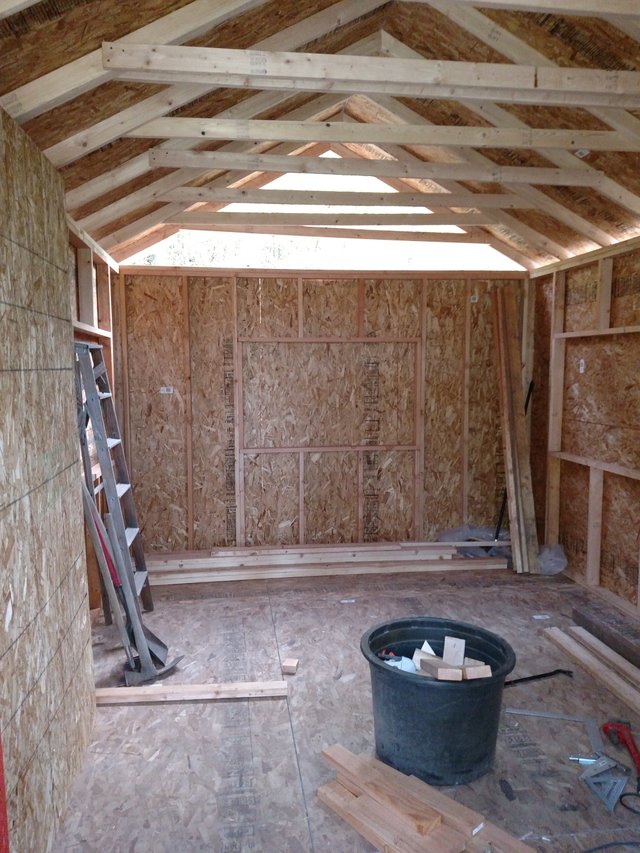
The roofing went on with a little trouble as it was initially difficult to keep everything square but it ended up working out quite well. You can see that my rafters are not perfect, hell NOTHING I do is, but they are built such that I have a large amount of space available beneath them. This is looking at the south end of the coop. There are 3 windows that are in the actual chickens room, but just needed to be cut open.
Looking to the north at the man door and the barn door with the one window spot on the east side that faces the chicken yard.

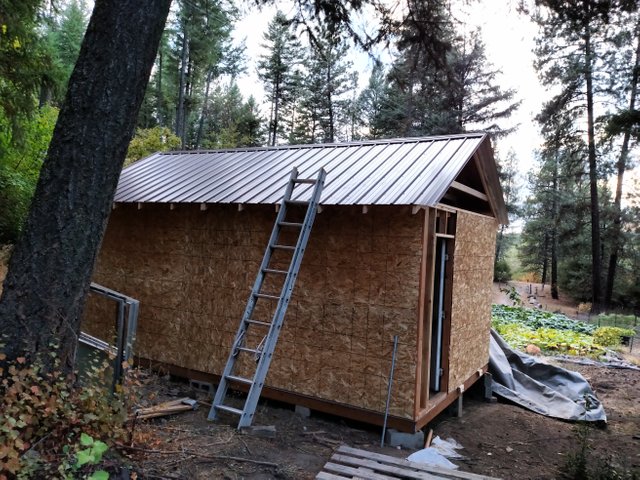
The Roofing
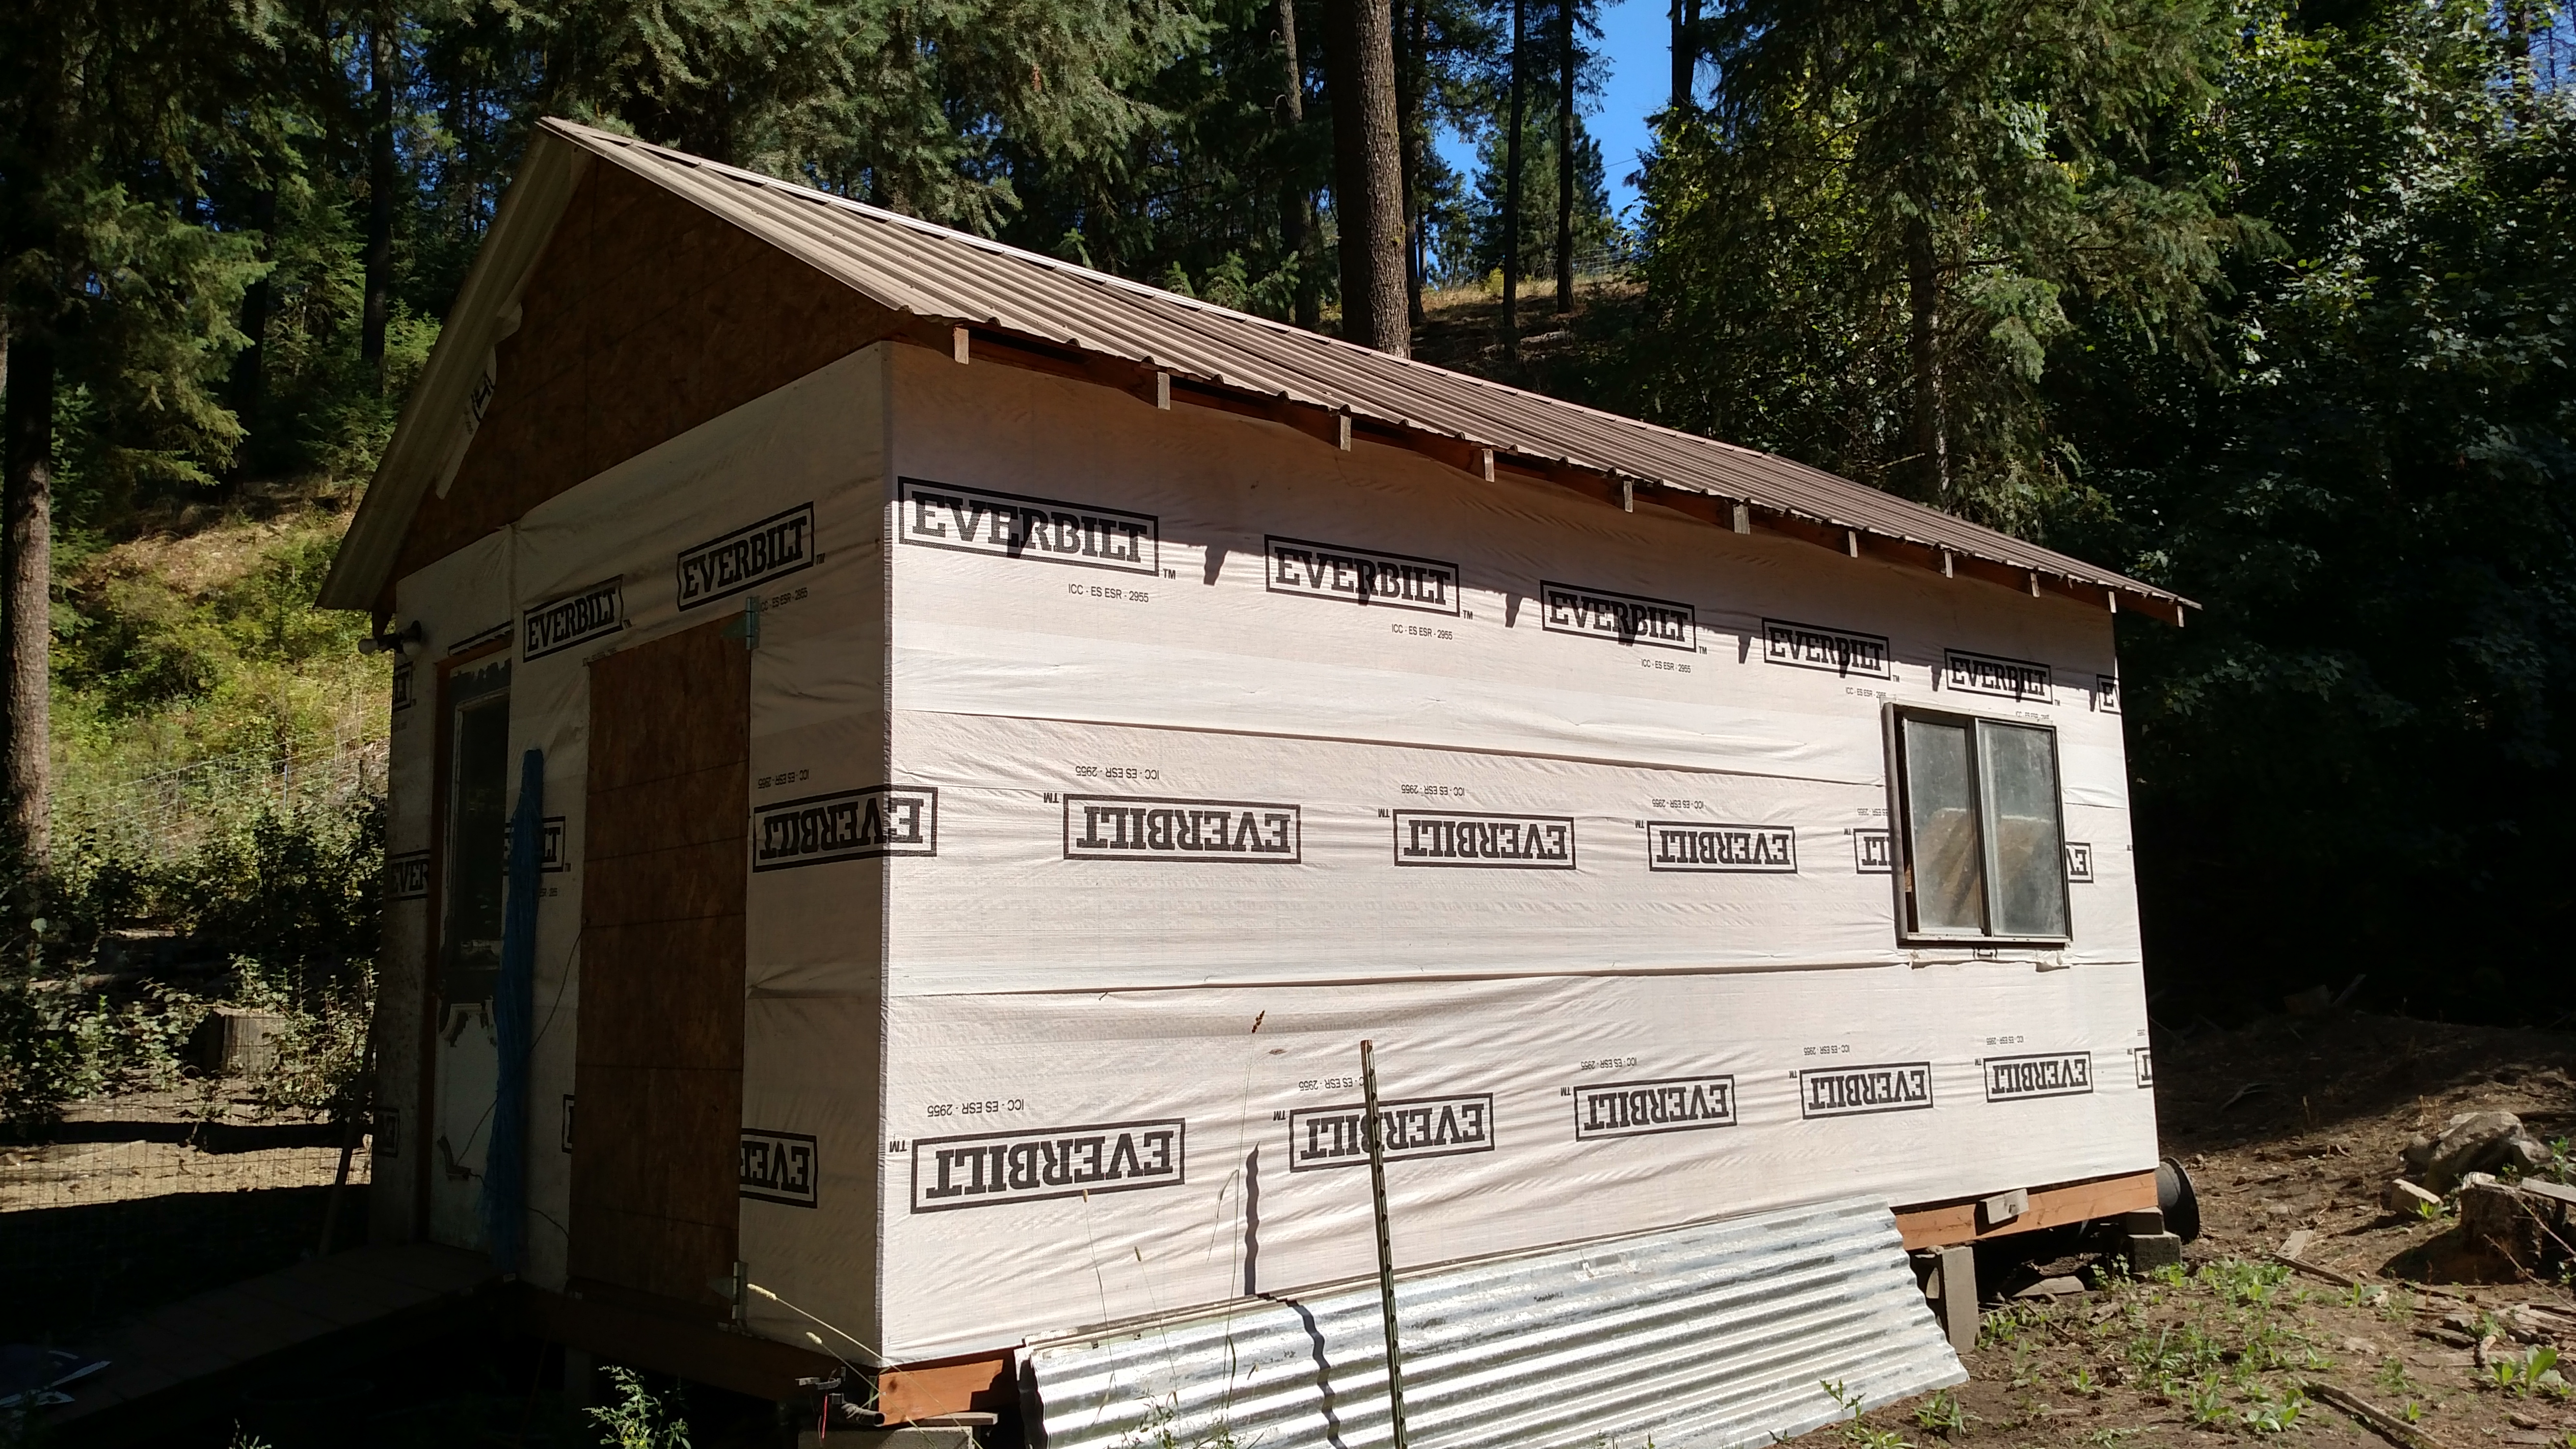
Once the roof sheathing was on I was able to put the metal roofing on which was not very difficult. The hardest part was just staying on the roof as I was screwing the metal to the wood. I leaned all the roofing pieces against the eaves and then climbed on the roof. This allowed me to haul one at a time up and install it.
The view from the other side looking towards what is now the chickens yard.

That is the basic outer structure of my 12x20ft chicken coop and the end of Part 1. In the next post, Part 2, I will show the Chicken's Room. The coop is not finished, but it is extremely sufficient to house my chickens comfortably and safely. Pretty good for by myself I feel..
READ PART 2
How I built my 12ftx20ft chicken coop by myself - Part 2 - The Chicken's Room

Check out my blog @flemingfarm
OR
You can read my blog series here:
| Time | #1.0 - Back Pain |
| Expectations | #2.0 - Weeds |
| Patience | #3.0 - Pests - Gophers |
Fleming Family Farm
FLEMING FAMILY FARM, LLC
Sustainable & Organic Methods | Heirloom Produce
All images are original works of Fleming Family Farm unless otherwise notated and credited.
If you find this post useful or entertaining, your support is greatly appreciated by upvoting, resteeming, & following!


Join the SteemitHomesteaders Slack Channel! Image is Invite Link.


Wow very nice job on it. More like a Chicken Mansion. Built like a house. Very nice. Upvoted and Resteemed....
We are preppers helping preppers. For new preppers joining Steemit, be sure to use the #preppers tag so we can follow and resteem your posts.
Thanks. In my part 2 you'll see they don't get the entire place... Though they probably wish they did.
Great article! I would like to include this post in the next issue of the Weekly Homesteading Newsletter which is a series posted every Sunday that aims to help collect awesome articles and resources like this one! This article will be linked and your username featured if you accept - please let me know if it is alright to include your article as soon as possible! Thank you and have a great day!
Absolutely! and THANK YOU in advance!
That's some nice work there!
That building is just about big enough to live in. :-)
It really is like a tiny house. 12x20 is surprisingly spacious, but that is probably since there is no ceiling which opens it up a lot. Plus I have seen a lot of tiny houses smaller than this online so people are doing it and in less cubic feet.
Yeah, some of those tiny houses are really tiny!
Awesome job! I love me a good diy post. ;-)
Thank you. I'm still not done but it made it through a pretty hard winter none the worse. The tyvek did well and sheeted any moisture off of it.
Congratulations! This post has been upvoted from the communal account, @minnowsupport, by flemingfarm from the Minnow Support Project. It's a witness project run by aggroed, ausbitbank, teamsteem, theprophet0, and someguy123. The goal is to help Steemit grow by supporting Minnows and creating a social network. Please find us in the Peace, Abundance, and Liberty Network (PALnet) Discord Channel. It's a completely public and open space to all members of the Steemit community who voluntarily choose to be there.
If you like what we're doing please upvote this comment so we can continue to build the community account that's supporting all members.
An excellent bit of work there.
I need to make a new house for the ducks and goose before winter comes - although it might be a bit more modest than this fine construction.
I will say that our first coop on the farm was a shed turned into a coop which did work okay and was just barely big enough. We had 50+ pekin ducks some years back and they all fit in the coop with the chickens. It was a bit tight, but they managed. I find the nice thing with ducks and geese is they don't tend to fly so the house can be a lot smaller than the chickens who need to roost.
Giving my support and sharing the love for this post. Upvoted!
Thank you! Much appreciated!
Great job. I could live in your chicken coop! It 's plenty big enough for me and the chicks. You should be very proud of your handiwork. 🐓🐓
Thanks. It is totally large enough and the loft is the ceiling of the chicken's room so if the interior were made more house like with insulation and walls, it would be pretty darn comfy. I am still not finished, but it has progressed to a stable point, is weather tight and is use-able.
Your gals will be delighted with their luxurious accommodations! Glad you stopped by. 🐓🐓