[Esp / Eng TUTORIAL] Maquillaje artístico inspirado en Steem Women Club ♀ ♡ / Steem Women Club Inspired Makeup Art ♀ ♡ #SteemExclusive
Hello, beautiful women of #SteemWomenClub ♡ Today I'm really excited and delightful by showing you my latest creation, that it's inspired on this wonderful community, their colors and Steemit's colors, that every time I know a little more about it, I wanna just not only to participate, but to give some quality content that improves and helps to make the community greater and even more complete than already is. Also, this creation has their step by step in case you want to do it, so let's go with the steps♡

Materiales / Materials
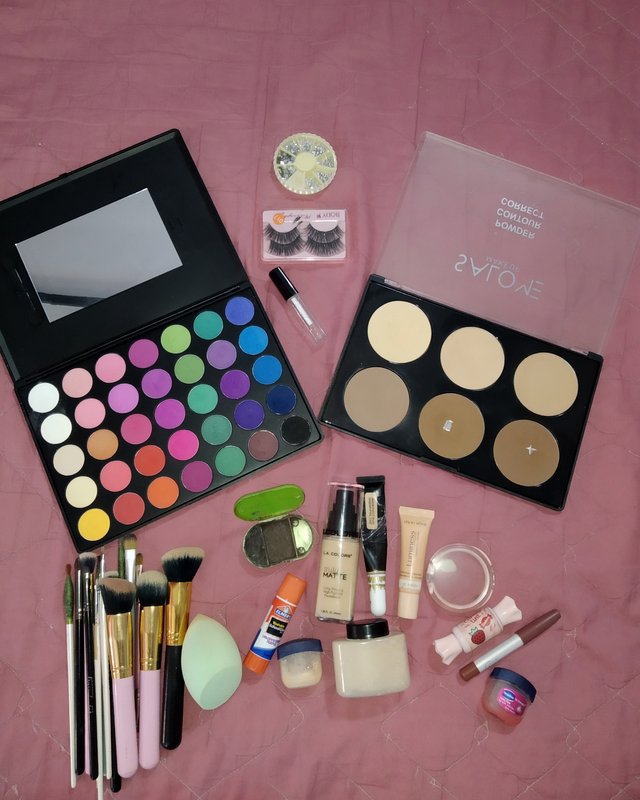
*Productos para cejas (pega elmer's y set pomada / sombra).
*Productos para rostro (base de nuestro tono de piel), corrector (un tono más claro que nuestro tono de piel), corrector blanco, polvo suelto translúcido, rubor, contorno o bronceador, iluminador (tonos de nuestra preferencia).
*Productos para labios: Delineador de labios neutro, tinta para labios rojiza, vaselina para labios.
*Joyería para maquillaje como cristales, flores, corazones.
*Herramientas: Brochas para rostro, esponja de maquillaje, brochas para ojos.
*Eyebrows products ( elmer's glue and brow shadow and pomade set).
*Face products: foundation (of our skintone), concealer (one shade lighter), white concealer, loose translucent powder, blush, contour or bronzer, highlighter (of our preference).
*Lips products: Neutral lipliner, red lip tint, lip vaseline.
*Some makeup jewelry like crystal, flowers, hearts.
*Makeup tools: face brushes, makeup sponge, eye brushes.
Procedimiento / Procedure
Preparación de la piel / Skincare
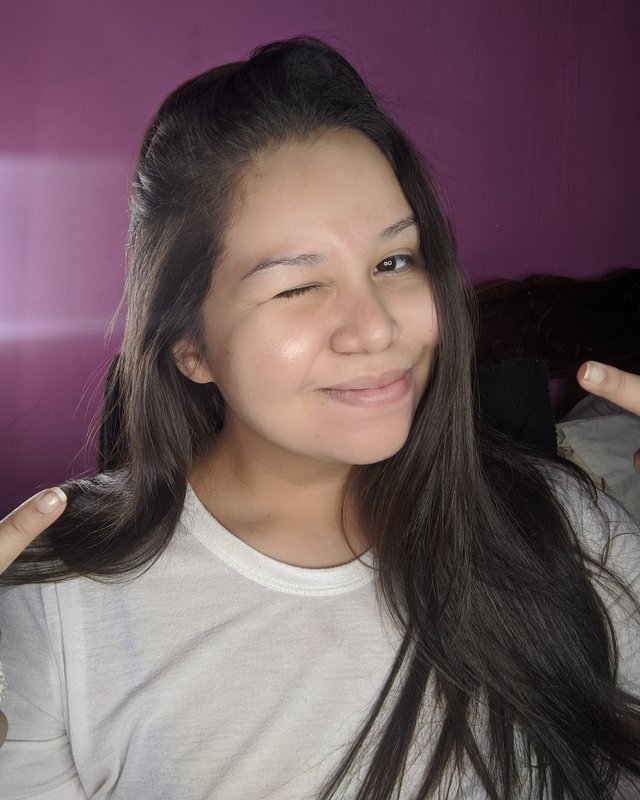
As I normally comment, skincare is essential to achieve a flawless finish on our makeup. I'm letting you [here](https://steemit.com/hive-188403/@steemitbeauty/my-morning-skincare-routine-step-by-step-mi-rutina-matutina-de-cuidado-de-piel-paso-a-paso) my detailed daily skincare routine, that's normally what I do before doing my makeup.
Cejas / Eyebrows
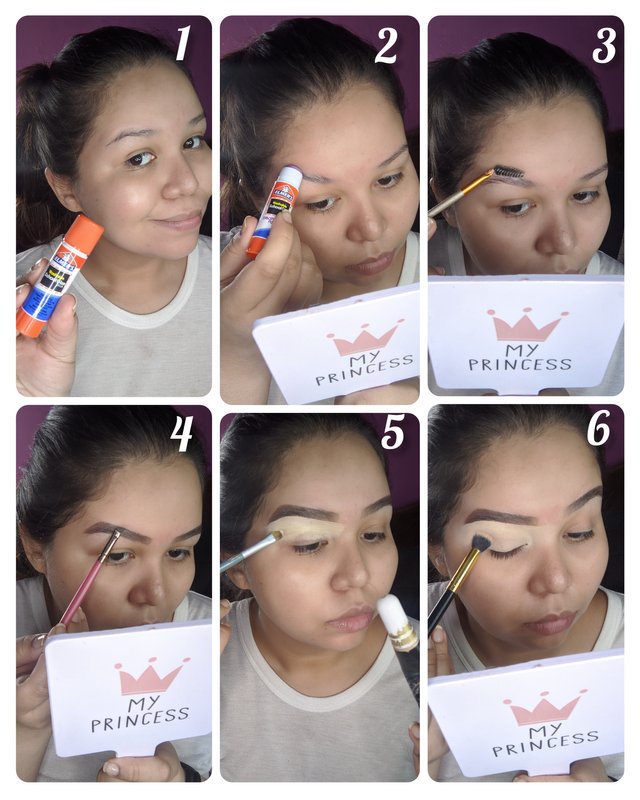
This time we're doing bushy brows, because we're going to need more space on our lid. We're starting applying glue in an ascendant way over our brow and once the hairs are up (1-2), we're going go give the the desire shape(3). Next, we're filling the brow with some pomade or shadow(4) and then, defining the brow with our concealer. To finish, we're going to blend the concealer all over the lid, to use it as a primer.
Ojos / Eyes
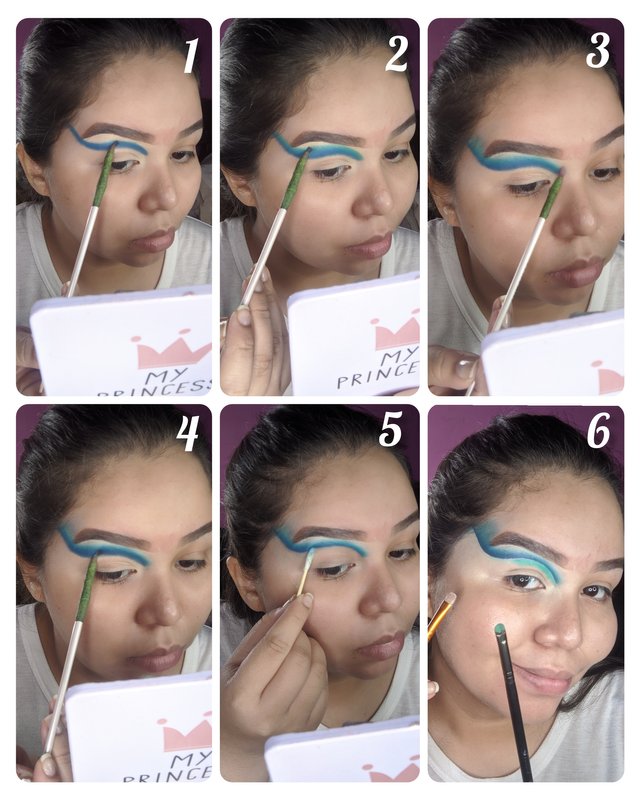
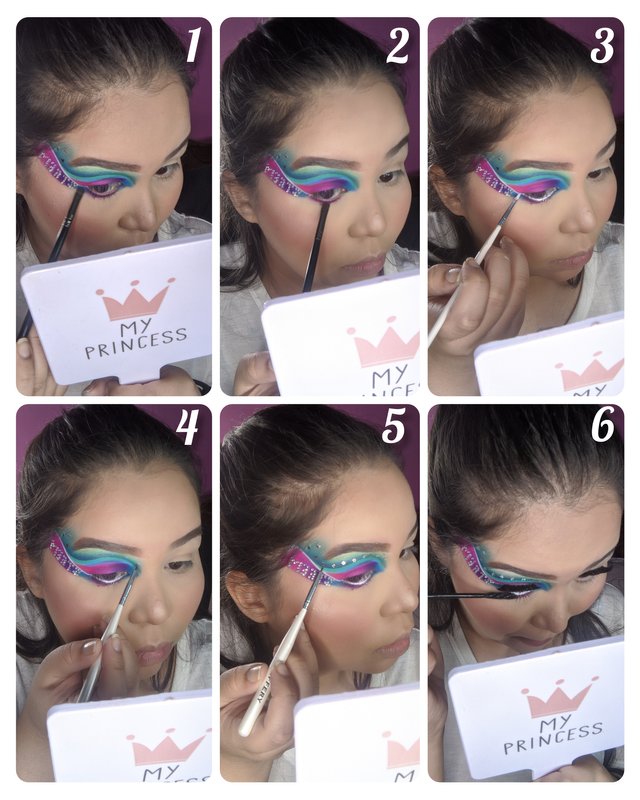
With a medium blue shade, let's draw our crease (1) and then, we're blending the edge with turquoise (2) and over that, with white(3). To give some darkness, we're defining the lower edge with a dark blue shade (4) to then, cut that crease (5). We're filling the cut with some concealer and start to apply the turquoise shade (6).
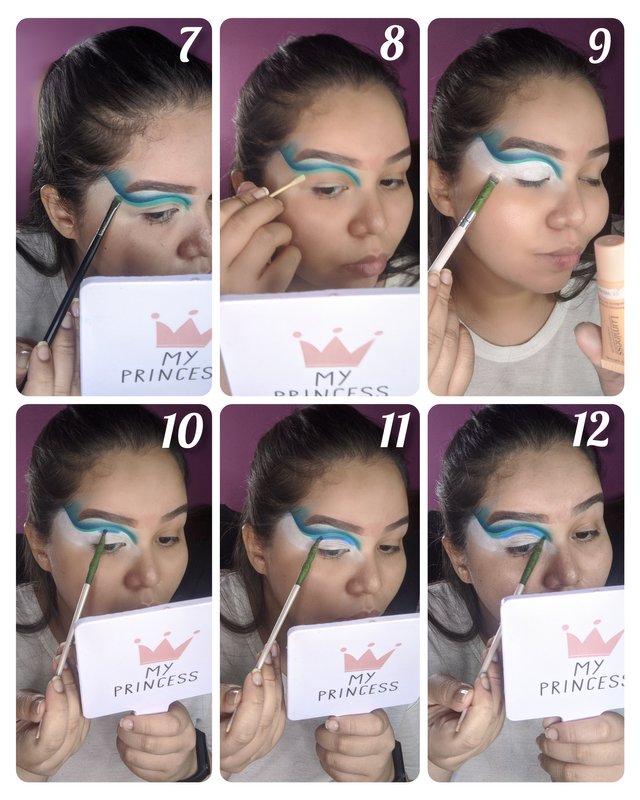
Luego de aplicar la sobre turquesa (7), haremos otro corte (8) y rellenaremos con corrector blanco (9). Ahora haremos un gradiente de azules, empezando con el oscuro el centro (10), el medio a los lados (11) y luego, el turquesa (12).
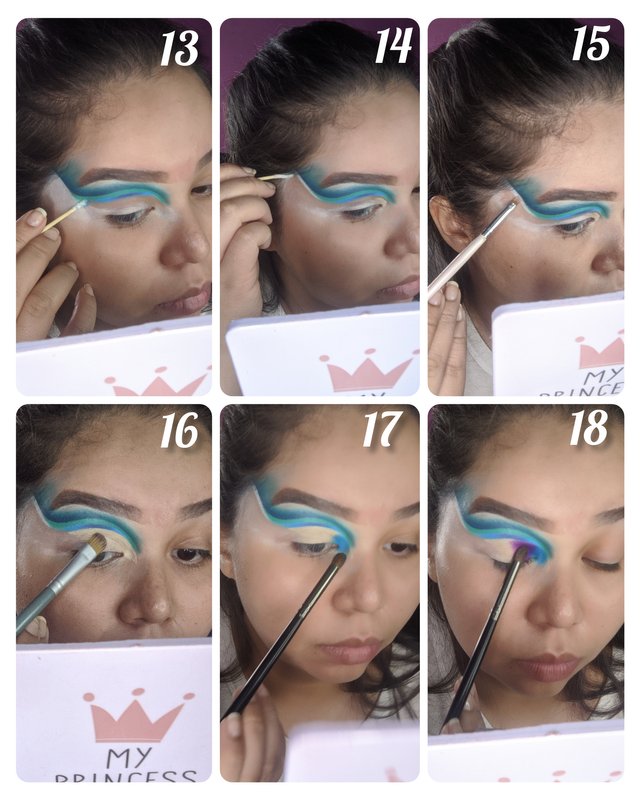
Now we're doing another cut, letting a white line at the end and setting it with the white eyeshadow (13-15). Then we're going to fill it and staring doing a cool toned gradient, going first with the medium blue, then the purple (14-16.)
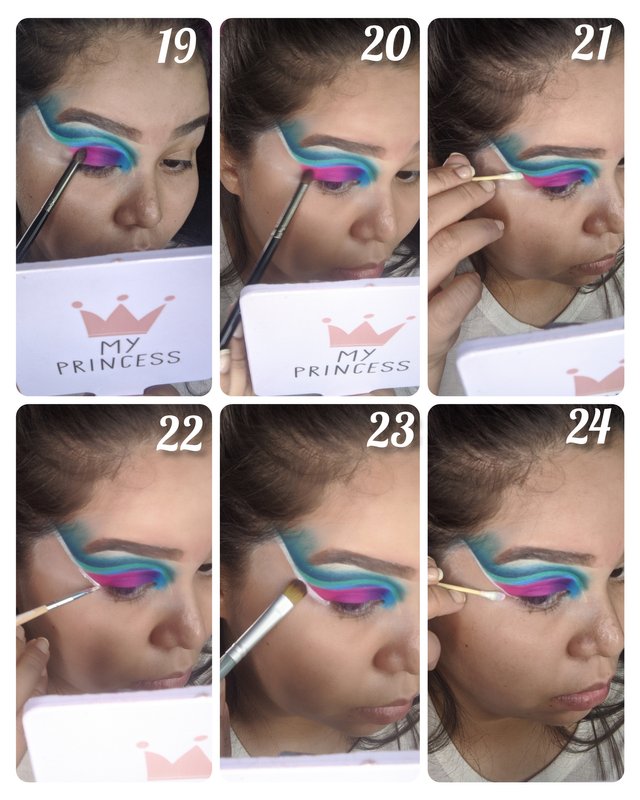
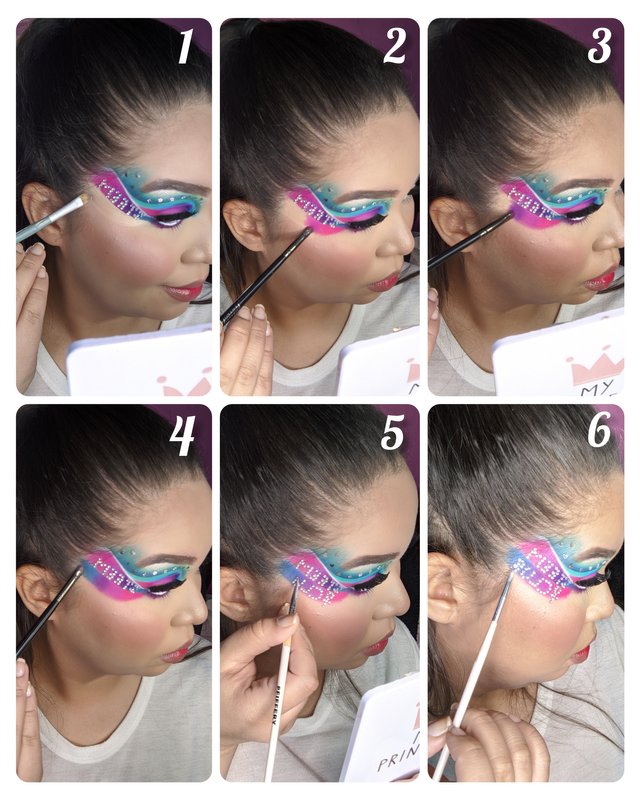
Let's continue applying a transition shade between the fuchsia and the purple, finishing with a purple shade (19-20). Now we cut the outter corner and then, apply a line of white concealer, then setting it and defining it very well (21-24).
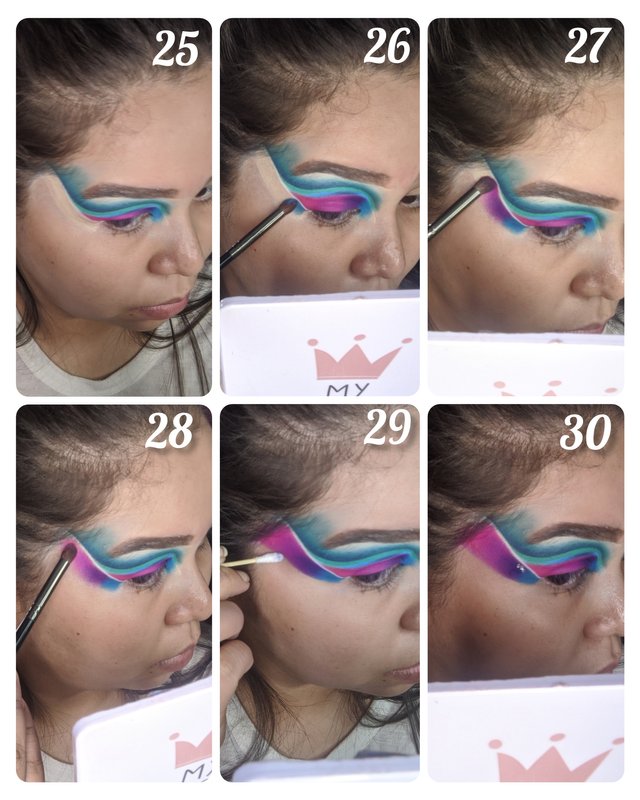
We're applying a layer of concealer under the white line and start creating the same gradient that we did before (25-28). Then we're cleaning the lower edge and going to start applying the crystals over the gradient (29-30).
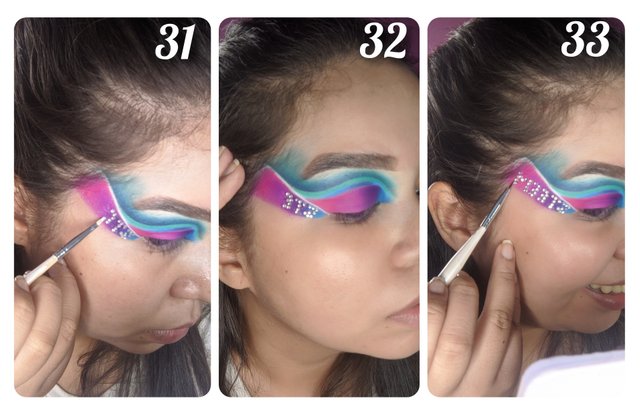
Using lash glue, we're going to apply those crystal, giving shape to each letter to form the ''STEEM'' word (31-33). Now let's continue with the face and then we're finishing the eyes.
Rostro / Face
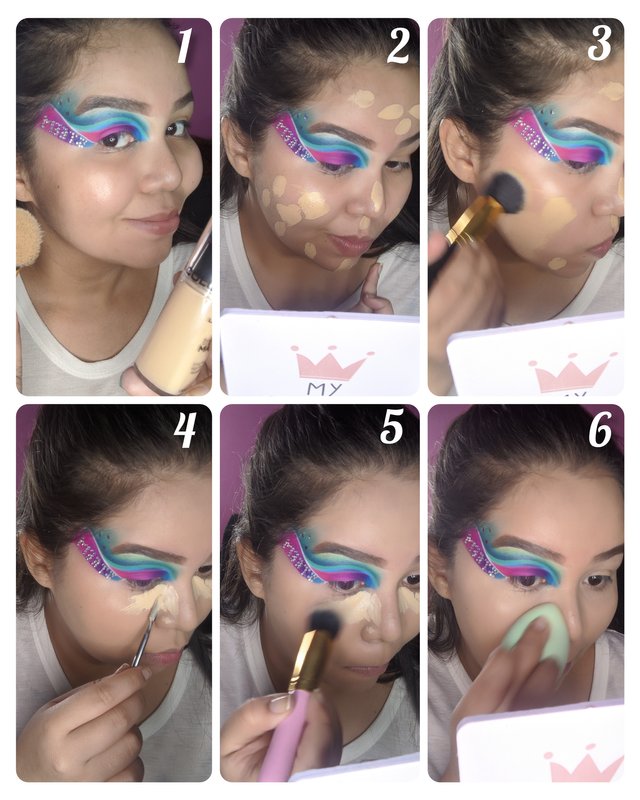
We're starting applying and blending our foundation all over our face and then, our concealer (1-4). Now we're setting our under eye area with some powder (5-6).
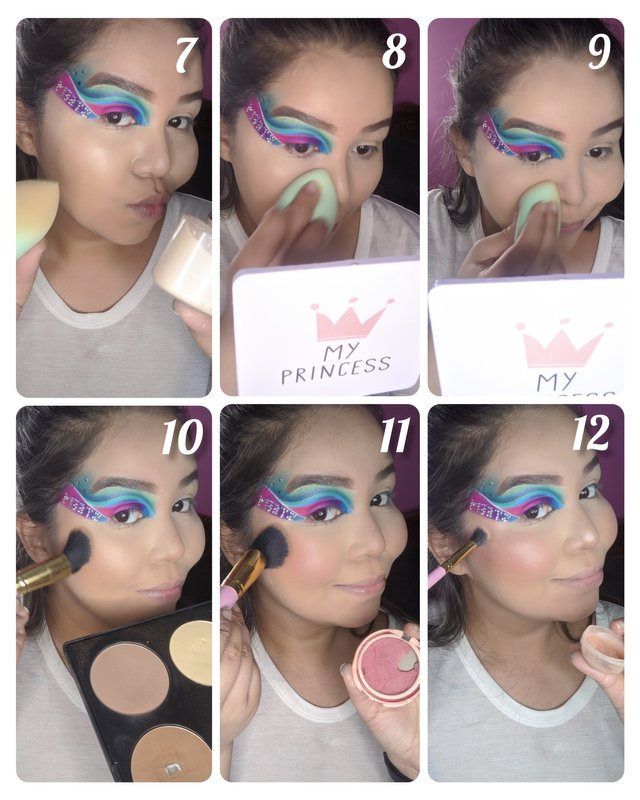
We're going to finish setting our face to then, define it with some contour (7-10). We're finishing applying some blush on our cheeks and some highlighter (11-12).
Continuación de ojos / Eyes continuation
We're going to apply some purple eyeshadow on the center of out bottom lid, and the medium blue shade on their sides. Then, aply some white concealer over our waterline and the apply the jewelry (1-4). We're going to finish putting on some lashes and mascara (5-6).
Labios/ Lips
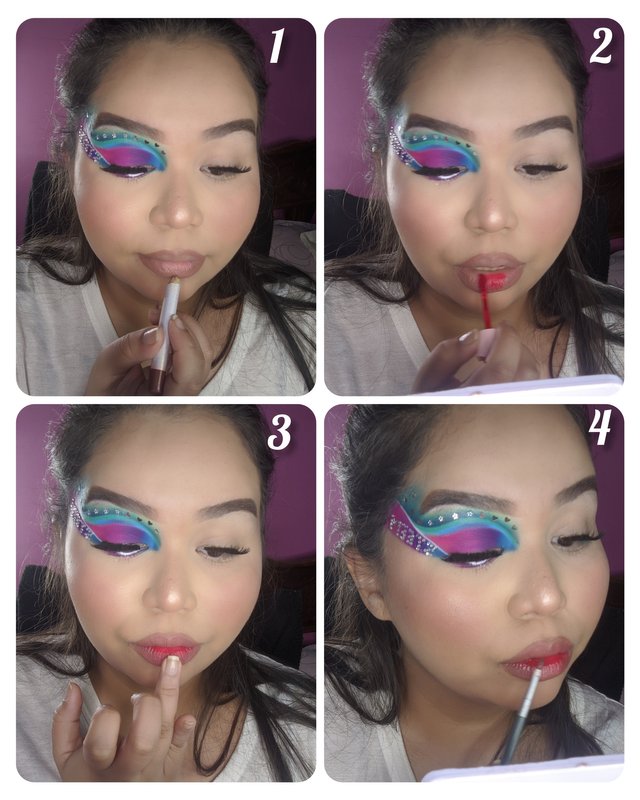
We're going to define our lips and them, filling them with some tint and bleding that with our finger (1-3). Then we apply some vaseline on the center of our lips to make them look glossy (4).
Ahora nos peinamos y arreglamos un poco, para ver la magia ♡
Now we're getting our hair done, to see the magic ♡
![IMG_20210419_162941-01[1].jpeg](https://steemitimages.com/640x0/https://cdn.steemitimages.com/DQmPXKswMfG7ewcgQHNW4vRjXdi6bG9G7216HDLdhxWSqT2/IMG_20210419_162941-01[1].jpeg)
Y... ¿Voilá? ... A pesar de que me encantó el resultado, quise completar el nombre de la comunidad así que, vamos allá♡
And... Voilá? ... Even though I love the result, I wanted to complete the name of the community so, let's achieve that♡
We're going to apply some concealer under our gradient to start doing an inverse one (1-4). Then we put the crystals over it, doing the feminine symbol ♀ and the, the ''CLUB'' word (5-6). I gotta say that the ''B'' at the end was the hardest to achieve😓
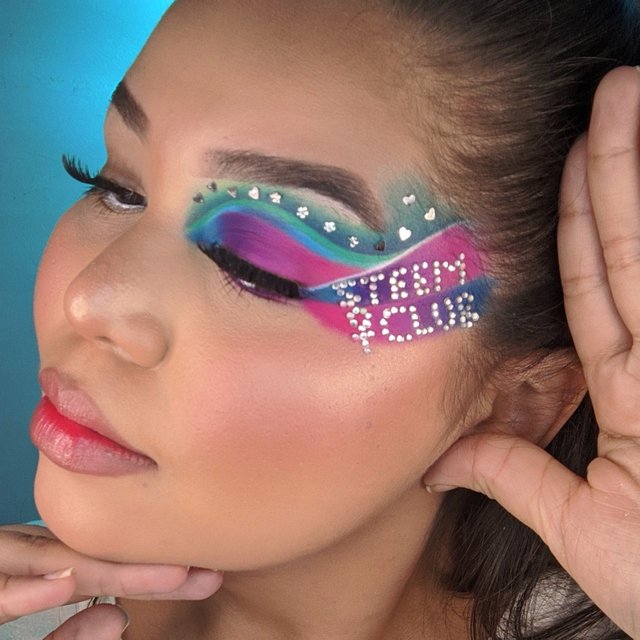
¡Ahora SÍ estamos LISTAS PARA BRILLAR y representar esta hermosa comunidad como se debe!♡
Now we're READY TO SHINE and represent this beautiful comunity!
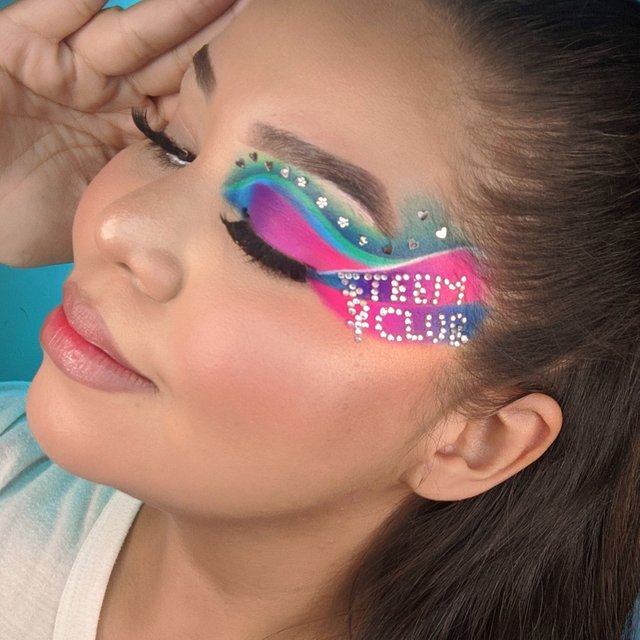
![IMG_20210419_172630-02-01[1].jpeg](https://steemitimages.com/640x0/https://cdn.steemitimages.com/DQmST8Aj3YyPkifdE6ZEbyJUdnEfMk9ix4MQAMFAKwFP4kH/IMG_20210419_172630-02-01[1].jpeg)
No puedo despedirme sin antes agradecer el hermoso espacio que nos brindan en esta comunidad para crecer y a la maravillosa @saracampero por sus consejos y apoyo♡ Definitivamente disfruté hacer este maquillaje y las horas de esfuerzo valieron la pena, porque quedé enamorada del resultado♡ Espero que a ustedes también les haya gustado y les recuerdo que en mi perfil tienen otros lindos tutoriales, nos vemos pronto♡
I cannot leave without thank this beautiful chance and spot to grow in this community and the wonderful @saracampero for all the advices and support♡ I've definetly enjoyed doing this makeup and all the hours and effort worth it because I felt inlove with the result♡ I hope you liked it too and I remind you that you can find another nice tutorials on my profile, see you next time♡
@steemitbeauty muy original y hermoso.
Esta espectacular❤️
Felicidades amiga
Buen día! Realmente eres buena con el maquillaje. Quedaste hermosa. Aunque al natural ya lo eres y bastante. Pareces una niñita sin maquillaje. Je, je, hermosa. Felicidades!
Espectacular. 🌺🌷
Me encantó, te quedó muy bello
Bellísimo!!! 😍❤️ Felicidades!💖
Hermoso maquillaje amiga, me encanto tienes mucho talento para esto.
Esta muy lindo y original. 👍
La palabra que describe tu post es ESPECTACULAR. Eres una profesional del maquillaje
Espectacular te quedó ese maquillaje, tienes un gran talento para estos tipos de maquillajes, felicitaciones, saludos y bendiciones!!