SIZ Approved Course ||IT-Tech|| Excel Uses Procedure| Lecture 01||20% payout to @siz-official || by @cryptokethor 10-10-2021
Asslam-o-alekum!
Hello guys how are you, i hope you are all well and me also fine allhamdulillah.
first of all I would like to thank this @siz-official community and specially thank to @cryptokraz who's making the best way to achieve maximum growing up to our goal's..
Allah Almighty has placed some potential in every human being. Like some people do. They keep trying to highlight their own abilities. Some people have this ability inside. Allah Almighty has placed potential in every human being. Some of them are good designers. There are some good teachers. There are some drivers. Someone has a technology capability inside. Do some painting in the same way. Make something. Some work on Microsoft Word. In the same way many people try to show their abilities.
I am once again grateful to this community and the owner of this committee. That's who developed such a platform. In which we can all show our abilities. And can try to meet your needs.
So being part of this @siz-official community, I'll share with you. Our first lecture today. In which, I will tell you how to make Excel standby. Whatever it is, making boxes,painting, coloring, making words smaller and bigger,add or delete row and coulm's. I will try to present it with explanation. Hope you all like it a lot.
Lecture No 01:
Excel uses procedure
.jpeg)
First when we open Excel. So we see a very simple sheet. That's something we'll see.
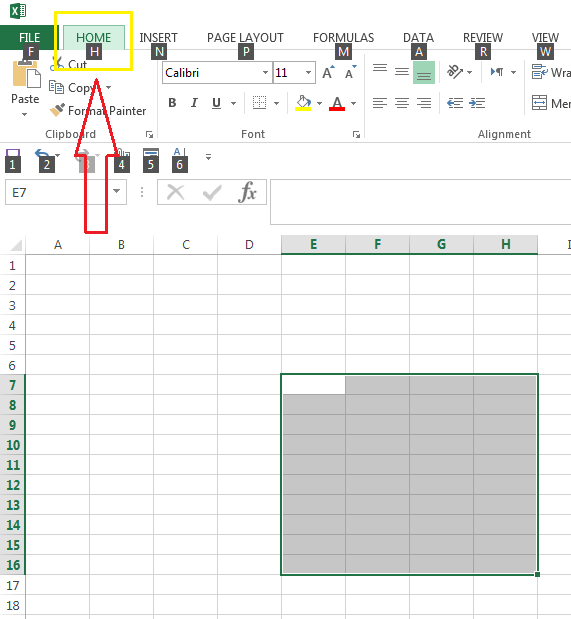
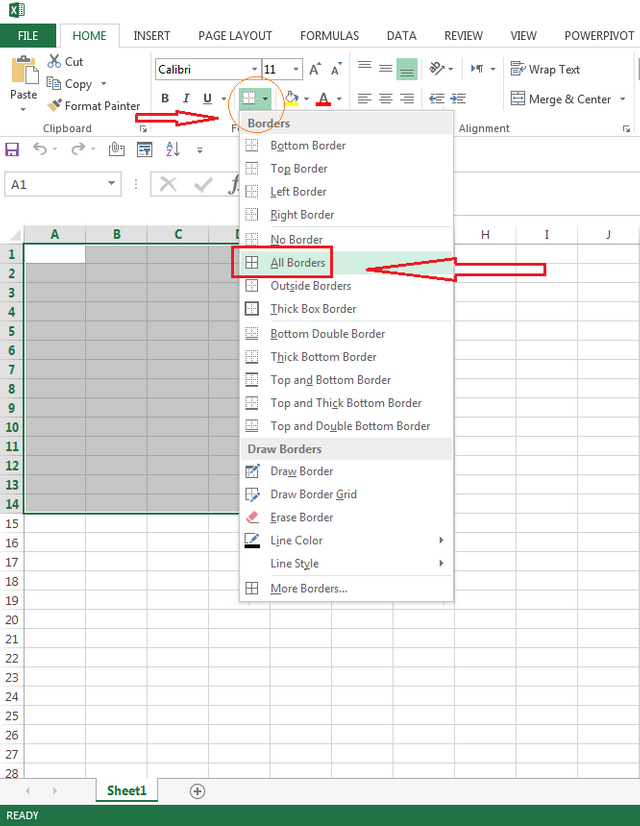
First we will make the table. We will go home to make the table. Then we will go to the borders. We'll open it up there. So a lot of options will appear. From which we will select All Border. This will become one of our boxes. Make as many boxes as I can in it. That's all we can make a complete table like this. If we want to create a table of ten rows and ten columns, we will go home after selecting it. Then we will go to the borders. After going into it, we will select Alborders based on the function. So all the space within ten rows and ten columns will become tables.

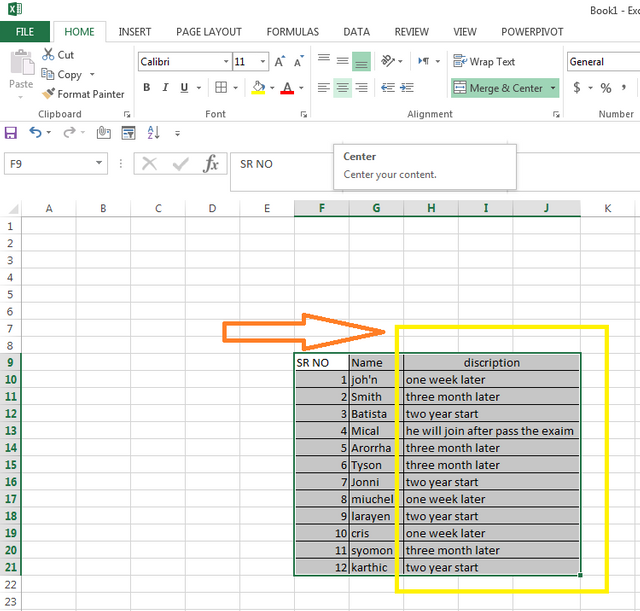
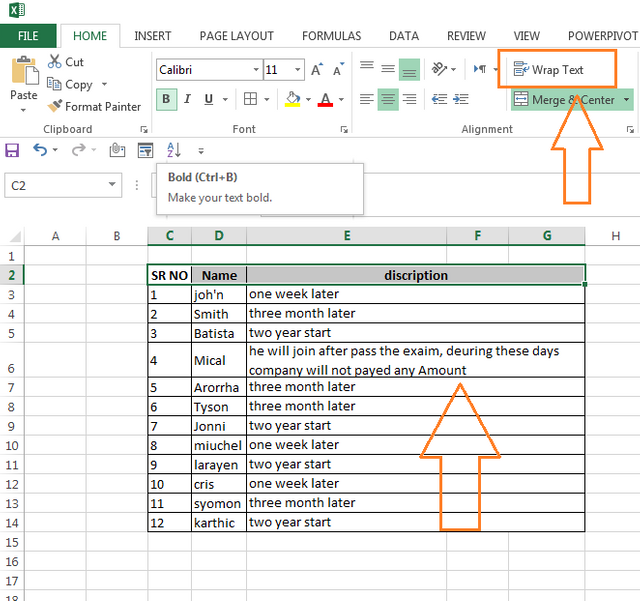
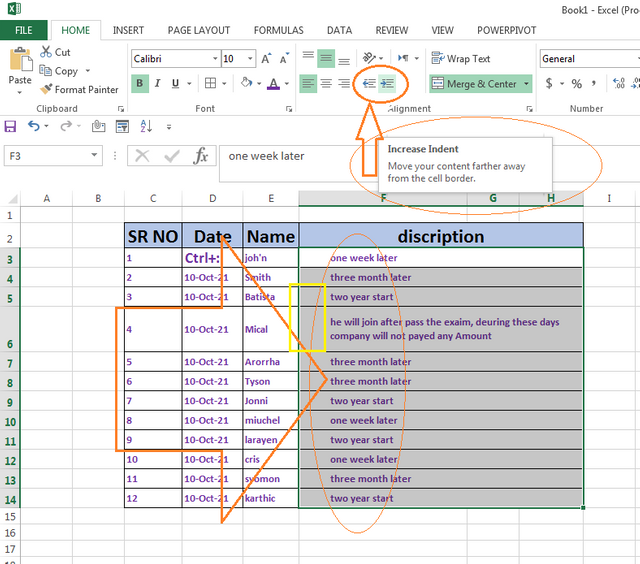
After creat the table. First add serial number second name and third description.
Data inside the description to view inside a box. We'll merge it. For this we will go to the Merge & Center and merge it. So the space of three boxes will become one box.
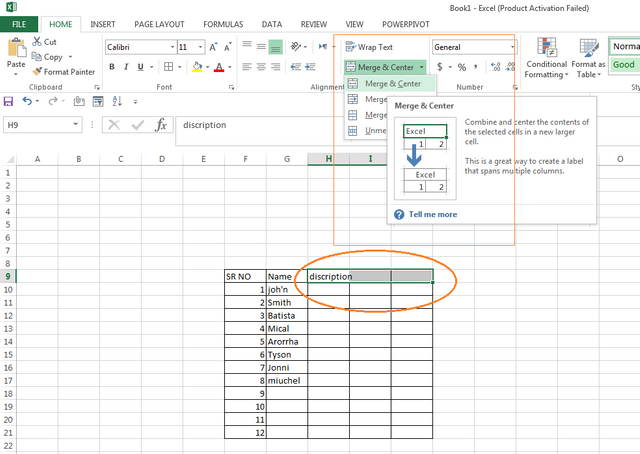
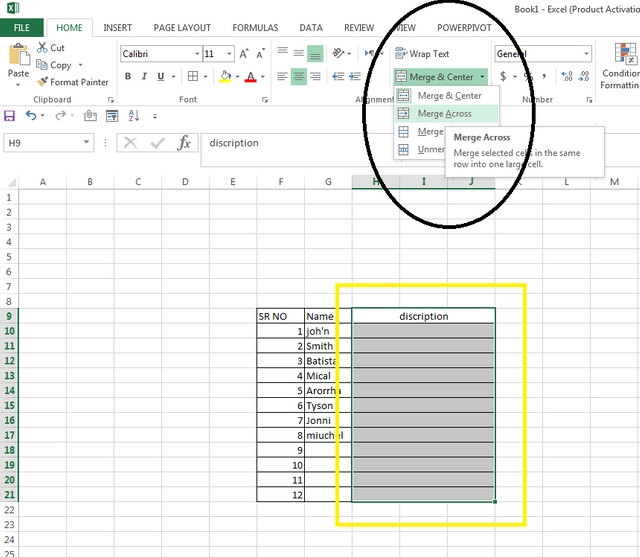
After merge we enter description data.
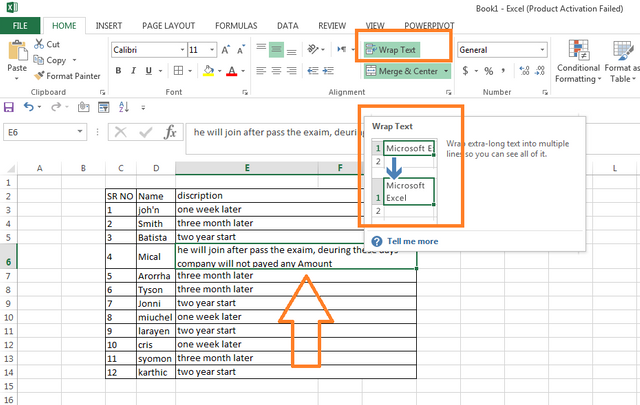
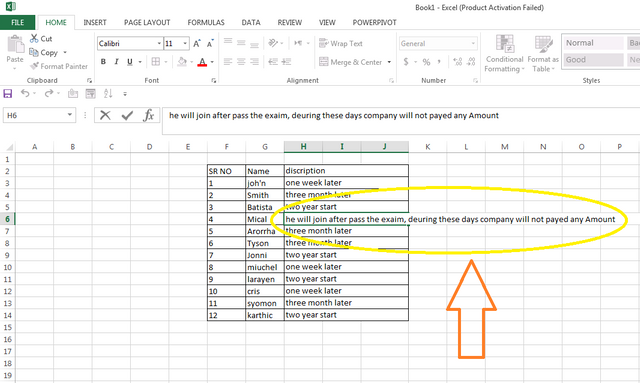
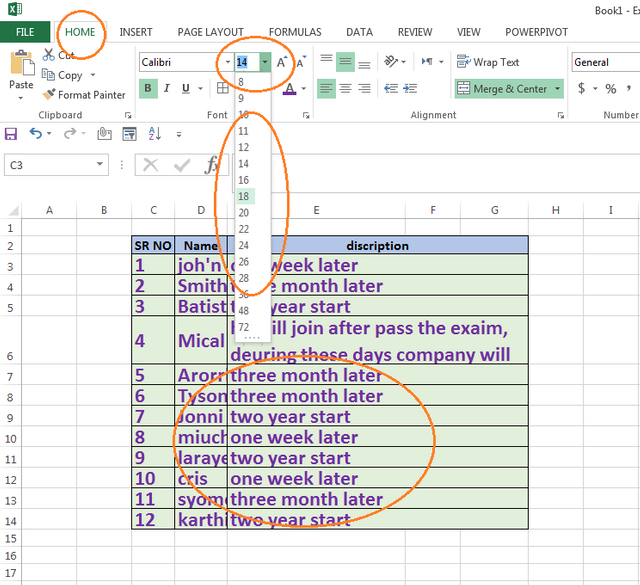
If anything is written too long, to look at it properly in less space. We can use warm tax in two lines in the same box.
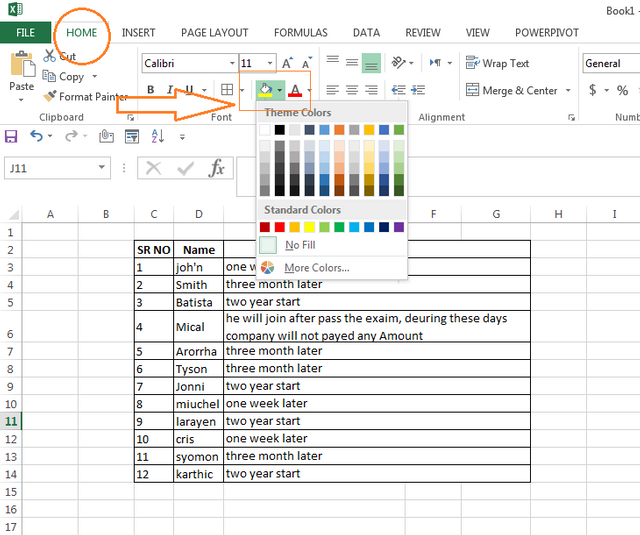
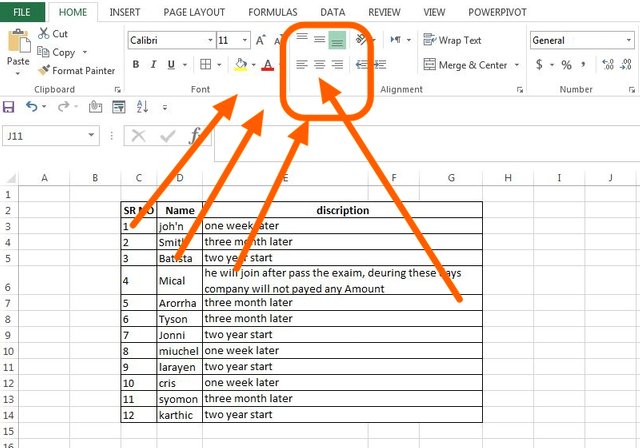
Then color the selective cell inside the sheet. We will go home. Will go inside the theme color. And by selecting your favorite color, we are the selective cell. It can give color.
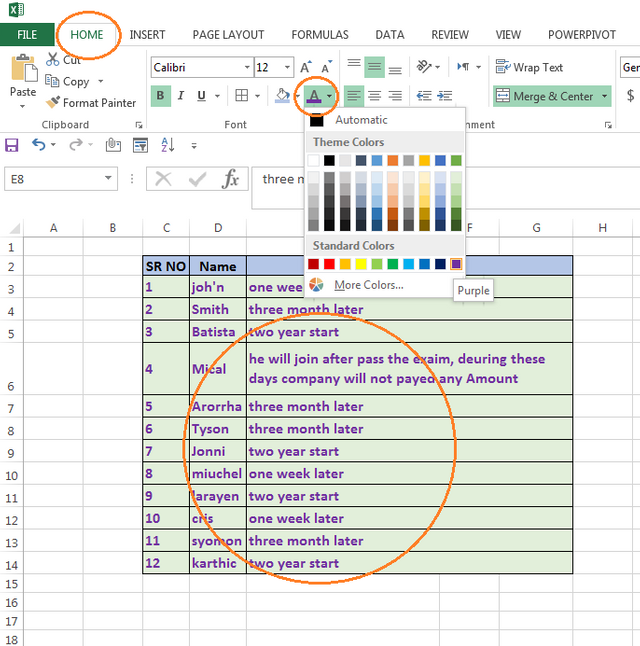
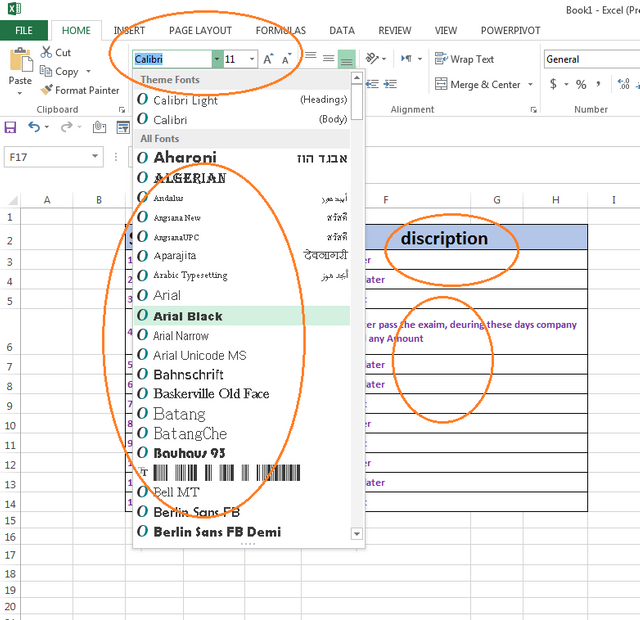
After coller the cell,s if we need word color is change. We go to home and go to word theem, select you need color and word color is changed.
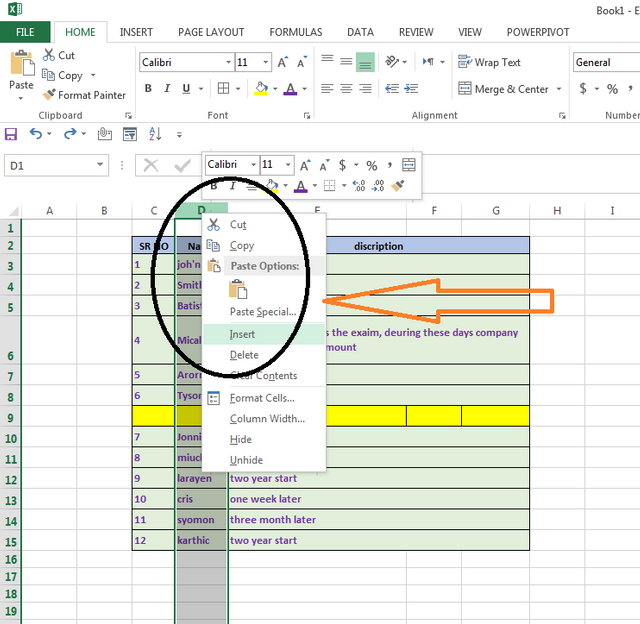
If somewhere inside the sheet it will be necessary to use another row. Or a row may be necessary. So where to row. I will select this row. Right click there. After right clicking the option will open. I will select the insert option from these options. Then there will be another row added.
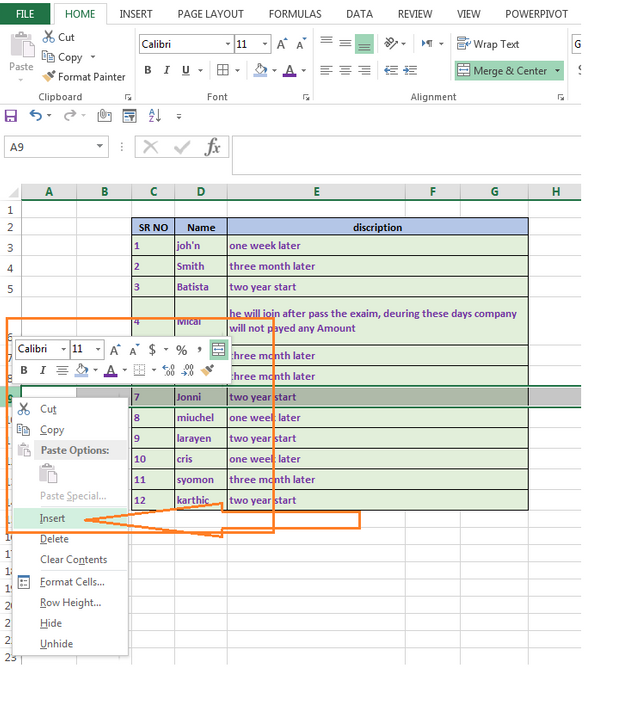
If somewhere inside the sheet it will be necessary to use another coulm. Or a coulm may be necessary. So where to coulm . I will select this coulm . Right click there. After right clicking the option will open. I will select the insert option from these options. Then there will be another coulm added.
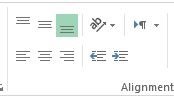
We will use this method to write the data written in different cells inside the sheet, up and down.
Data written in different cells inside the sheet, will adopt this method to write differently.
Data written in different cells inside the sheet, will adopt this method to write in an appropriate order.
Inside the created sheet if we want to select the date in a column. We want the date to be written inside it. So we can enter the date inside this column accordingly.
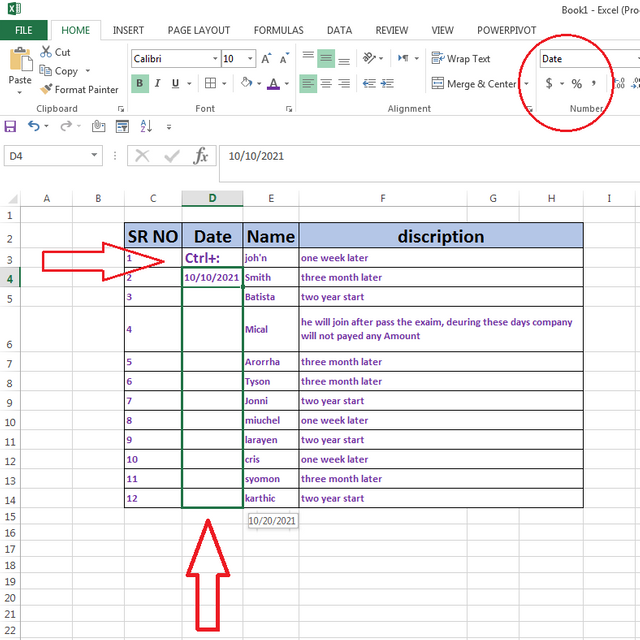
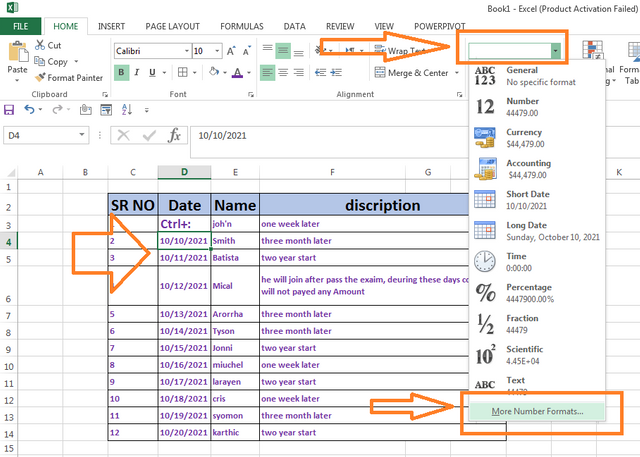
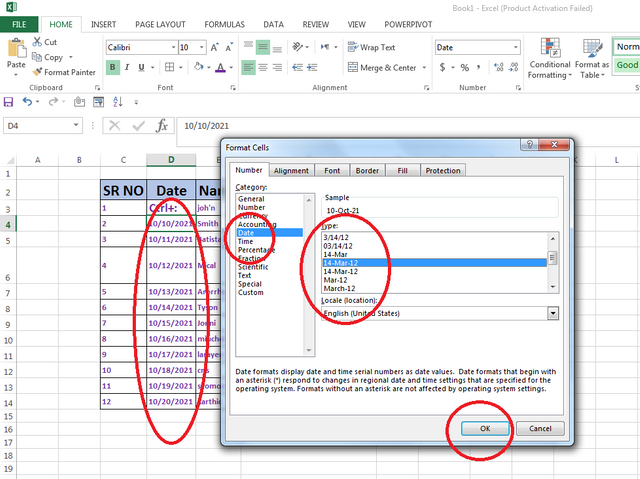

Data written inside a single column. To write at appropriate distances. We can enter this data at appropriate distances according to this method.
Thanks for Visiting My Post If You Want To Know More About Me Follow This Link Below:
Special Thanks to...
@cryptokraze
@vvarishayy
@suboohi
@arie.steem
Regards @cryptokethor
You have made a very good post. Your course is very wonderful. Many people will benefit from this course.You have a very good skill. There is a lot to learn from you to continue this course.
Keep it up.
Wao very detailed and informative post you share. I hope everyone learn a lot from here. In our daily life we use Excel for many purposes.
Good one Post dear friend you make a very good post thanks for sharing a good information with us my best wishes for you.
Regards, Faran Nabeel
Thanks to all of you for liking my post and appreciate me.... Thanks a lot...
Congratulations your post has been selected in the best 5 post of the day. Keep Steeming :)
Thank you so much mem for appreciate me.... Jazakallah