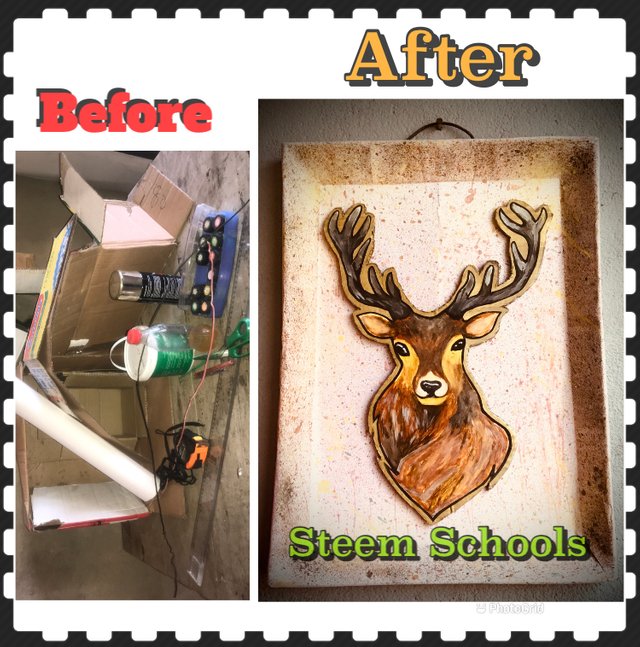
Before and After Contest ||Week 5- Day 6: Design Steem Exclusive Things From Raw or Waste Materials ||"Wall Portraits with Cartons and Cardboard Paper."
WALL PORTRAIT WITH CARTONS AND CARDBOARD PAPERS

Hello and good day everyone!
Please permit me to start by saying a Big Thanks to the Moderator @enveng, and also to extend my profound gratitude to all the officials who spend their time resources and efforts ensuring the success of this Creative Contest and its Rewards God Bless you All Amen!
STEEM SCHOOLS @mcharmattan
Below are the full details and a step by step processes I took to create my Wall Portraits with Cartons and Cardboard Papers
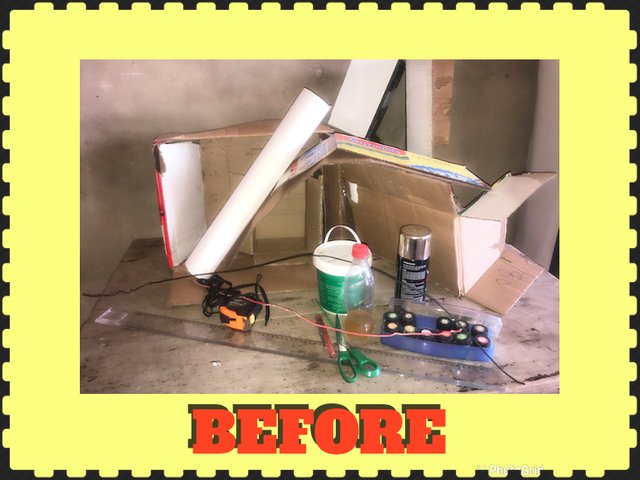
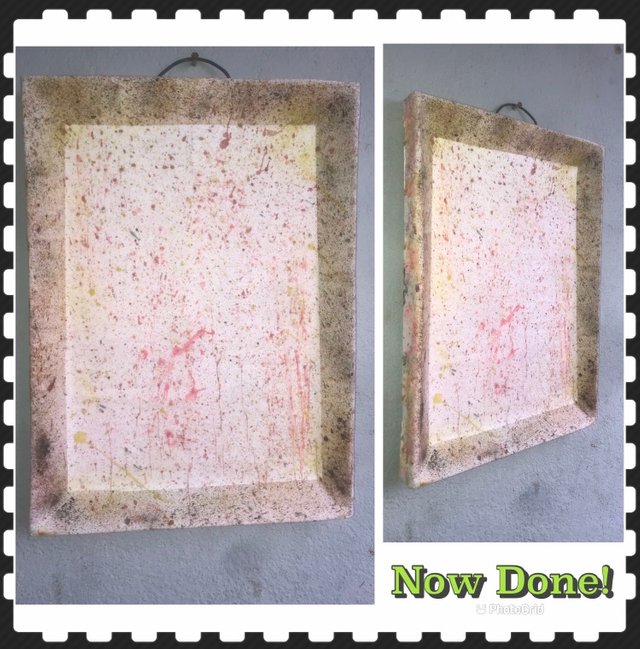
BEFORE

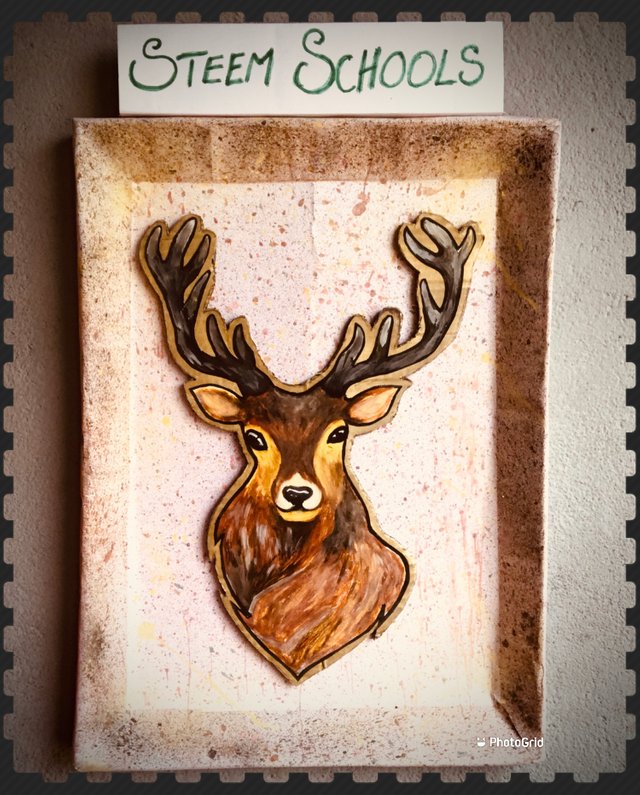
AFTER
MATERIALS:
Cartons
Cardboard Paper
One 3 inches Nails
Measurement Tape
Ruler / Scissors
Pliers / Wire
Pencil / Eraser
Top-Burn Gum
Poster Colors
Spray Paint.
I will divide my Contest Report into Two Sections:
(A) The Frame Creation
(B) Image Painting and Calving
(A) THE FRAME CREATION
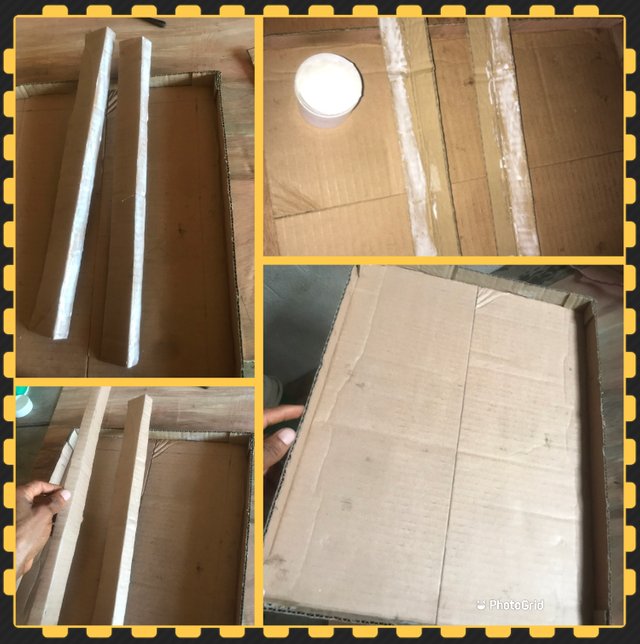
STEP 1.
With my measuring tape and scissors , I Measure and cut the cartons using the following Sizes :
Frame Board: ( Widths = 12.5 / Height = 17.5 )
Frame sides: ( 2units of 17.5 / 2 units of 12.5 )
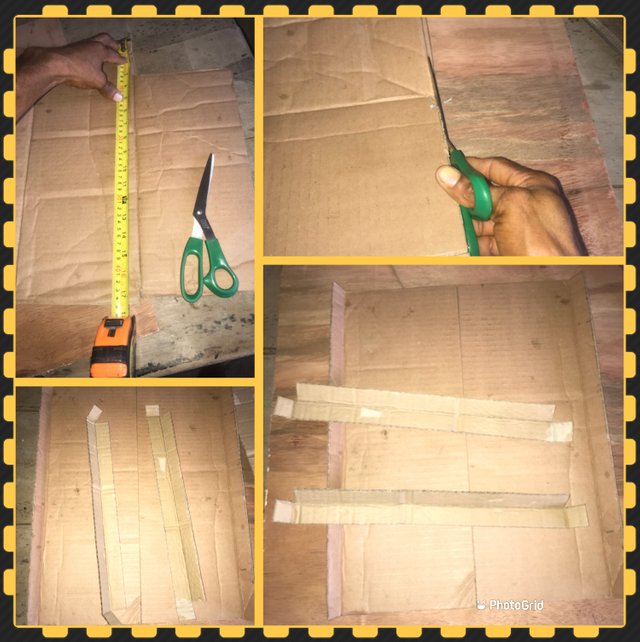
STEP 2.
I applied gum on the frame side and joint it to the frame board giving it a rectangular look with surrounding of 1.5 inches as shown in the photos bellow.
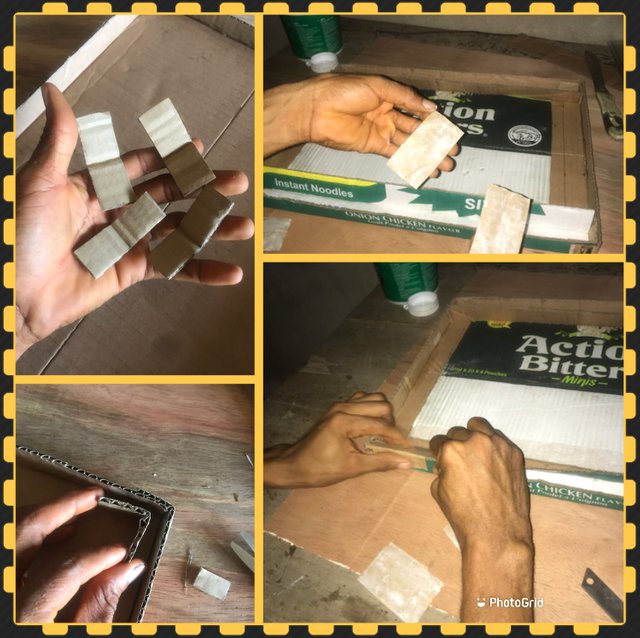
STEP 3
I also measured another frame sides of the same measurements to use and surround the inner frame board in other to give the surrounding frame more supports.

STEP 4
I cut a small carton of 1.5 inches height and 4 inches Length to lock all the frame angles.
This is very important to the frame so I applied gum and then mount it at the corners. See photo below for clearer understanding.
STEP 5
After reviewing the frame size, placed it on a cardboard and cut the size that can covers it surface after all the attachments have been made to strengthen it.
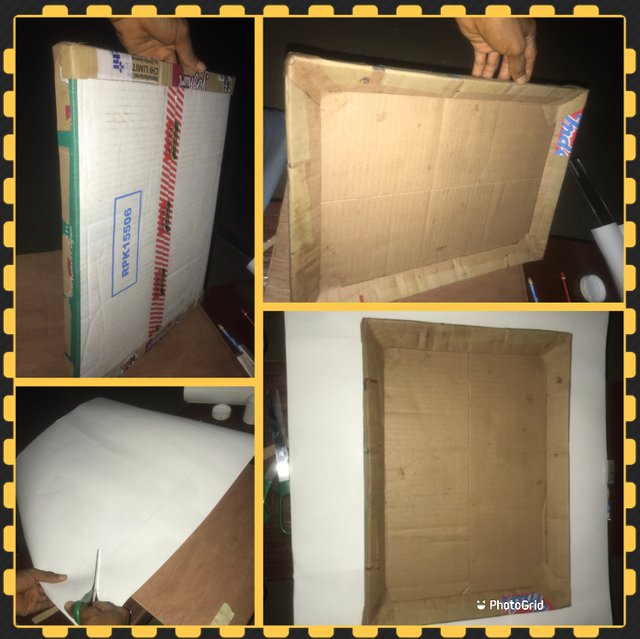
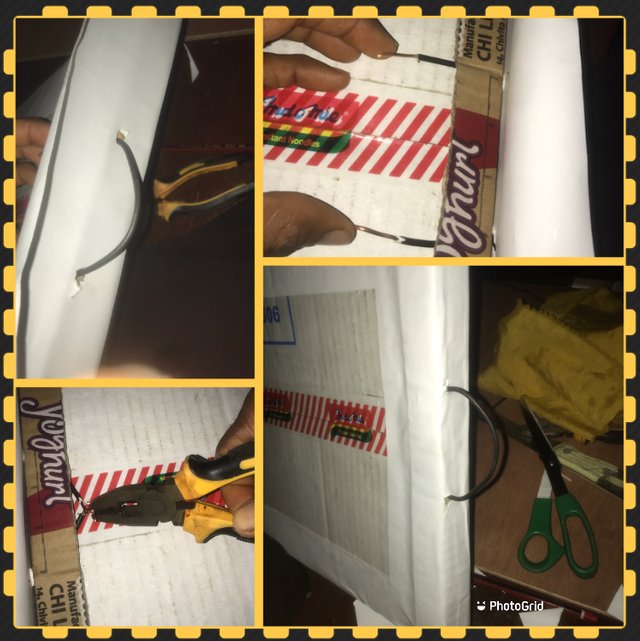
STEP 6
I applied gum to the frame board then place the card board on it and use small piece of clothes to press it for a smooth surface gluing.
Note I only covered three (3) of the frame sides with the cardboard remain one side of the 12.5 inches see what happen to it in the next step.
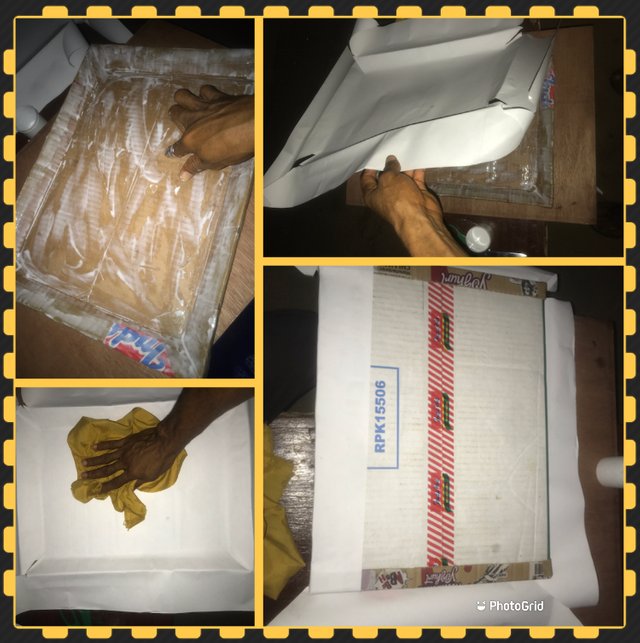

STEP 7
At this step, if you have an hook of chain you can use it but in my case, I cut a wire of and averaged 5 - 6 inches long and make a hole from the top of the frame side that I left uncovered and insects the wire; using pliers to bind the wire so as not to pull out. Then I cover the frame top.
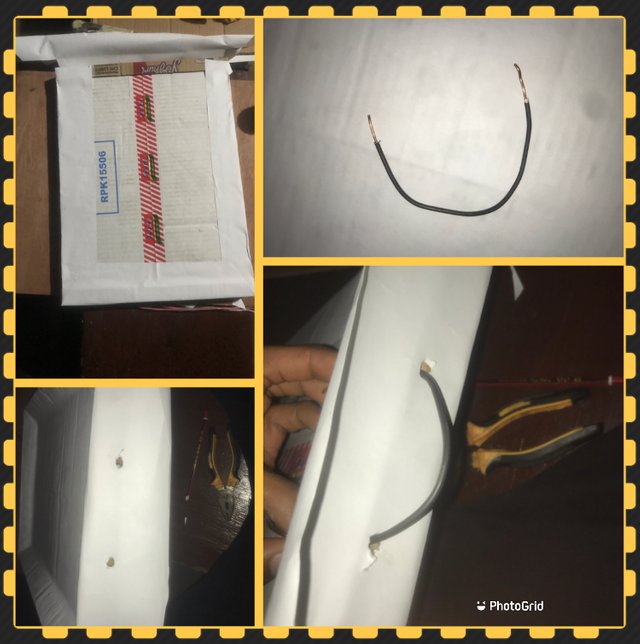
Cheers...! I just create a portrait hook for my frame hope that was cool!
Let’s move on to the next step!
STEP 8
The back of the frame is the last place to cover, so I cut another carton that fits the remaining space at the back, applied gum to it and close it all.
Review all sides and board of the frame to ensure nothing is missing out.
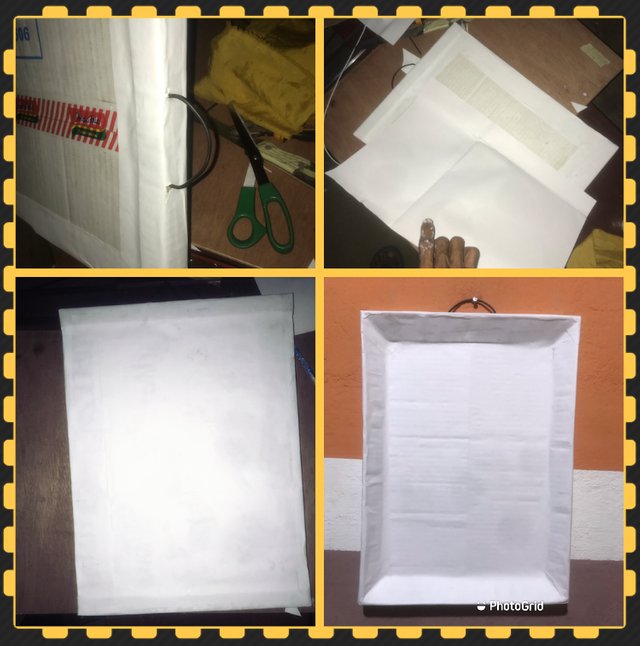
STEP 9
With my Poster Colors, I spray the frame using toothbrush to sprinkle the different colors on the frame as desired.
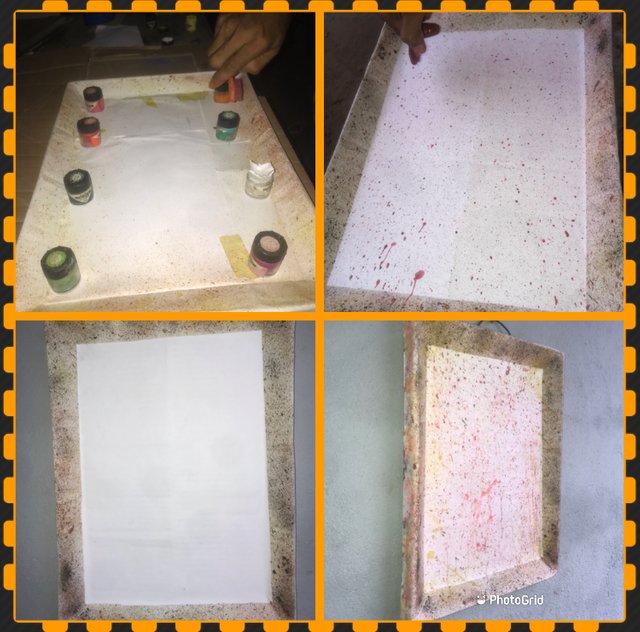
Here Comes The Ready To Use Frame Made From Carton and Cardboard.

(B) IMAGE PAINTING AND CALVING

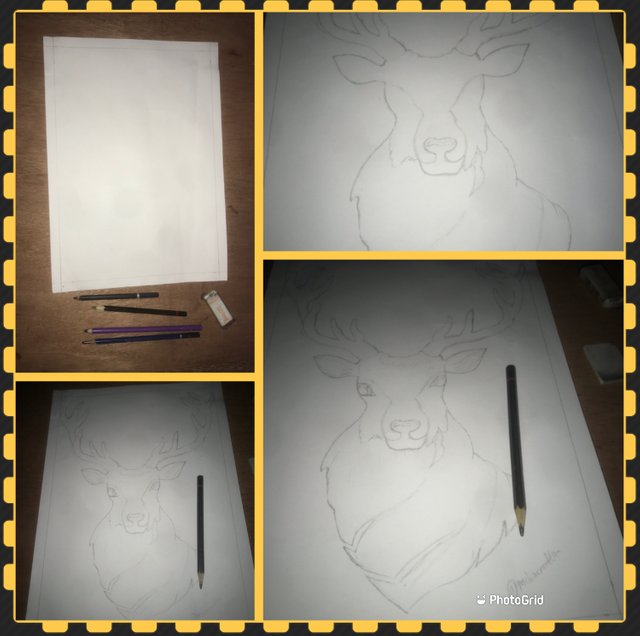
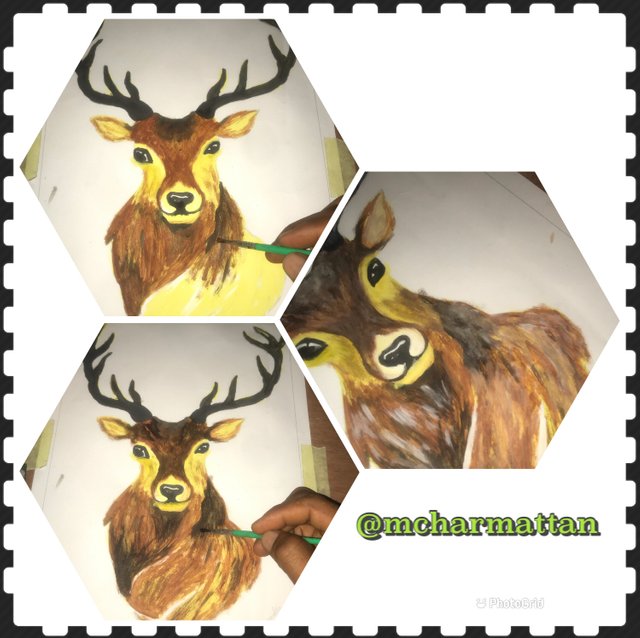
STEP 1
Using a paper of 13 X 9.5 inches, I begin my sketch. One can have multiple choices of what to sketch but the greatest of it all is having the right picture that suits your artwork at the right time.
It may interest you to know that lots of pictures came through my mind but that of the ”Deer” supersedes all.
So without wasting of time, I set up my drawing board and began my sketch.

STEP 2
From my Poster Colors I selected the ones I wish to use, with my small brush, I mixed the yellow color and then painting began.
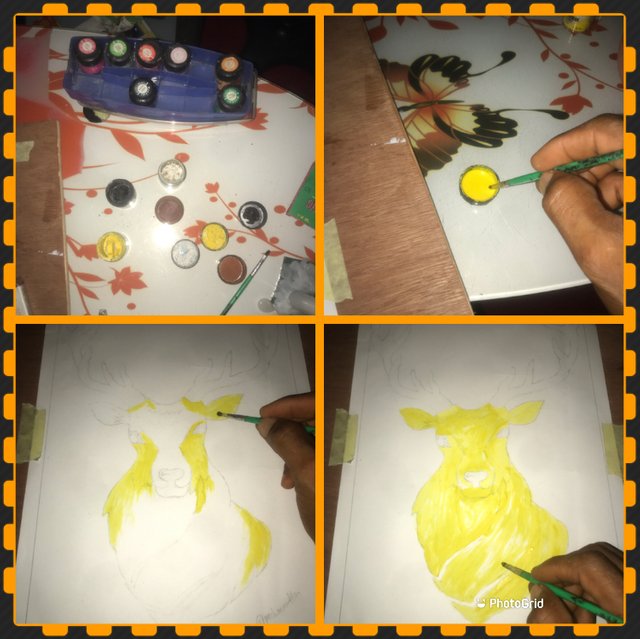
STEP 3
Applying Black gives it a new different look from the yellow priming!
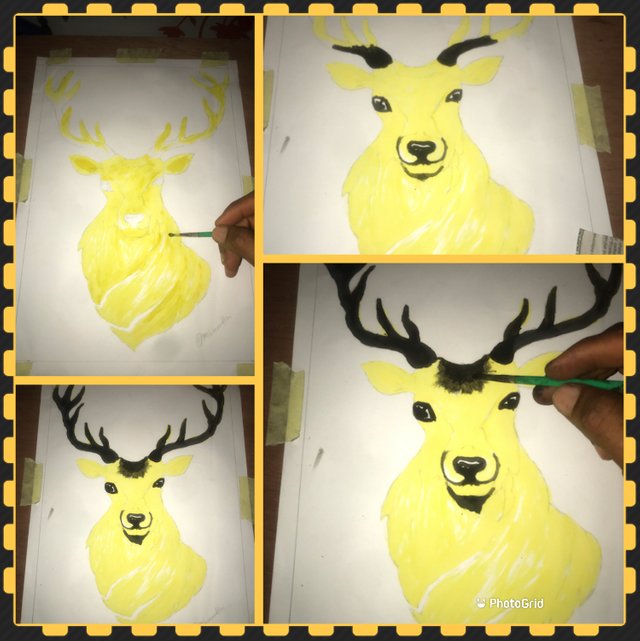
STEP 4
Painting Progression as more inspiration comes, Creativity rebirths the nature “Deer”
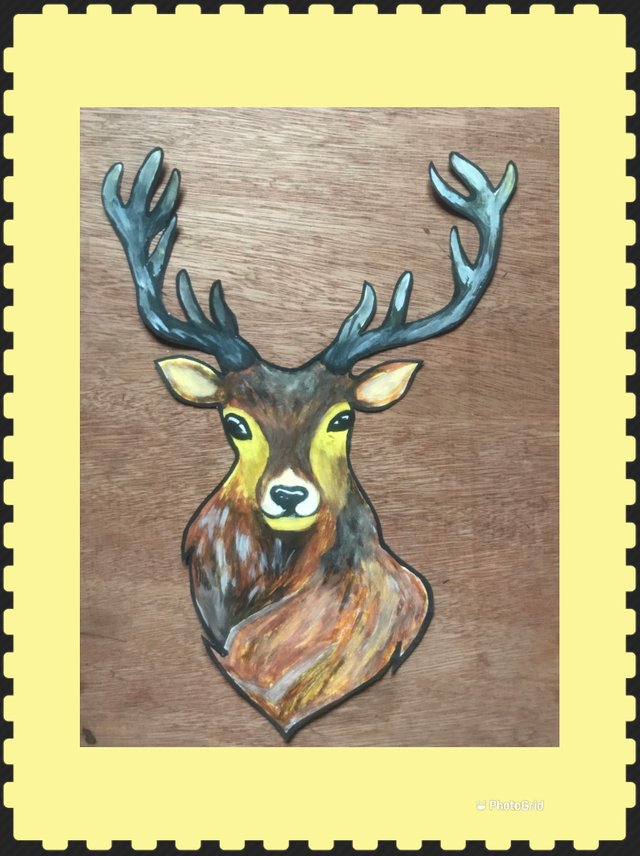
STEP 5
Using my scissors, I calved and tressed the outlines with Black

Here Comes The Full Image
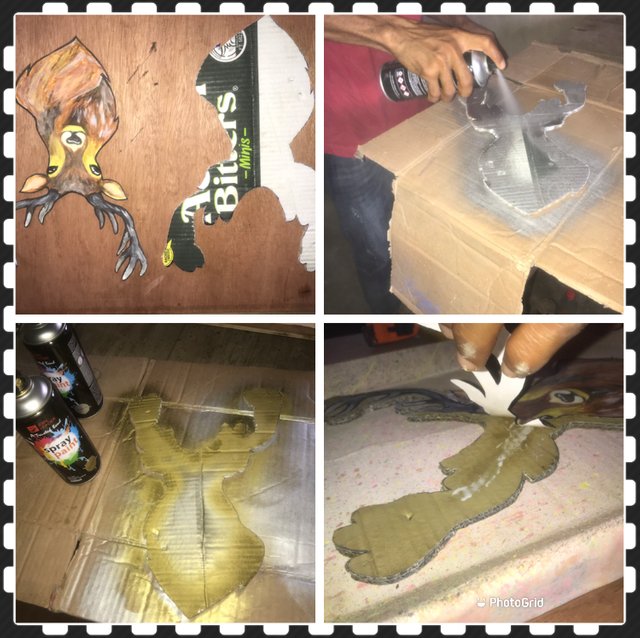
STEP 6
I reproduced the tressed image on a Carton with a quarter inches circumferential difference, spray it with gold color and apply gum to it and mount it at the center of the ready made frame and also mount my original image on the center of the new image, giving it an outline from the gold spray paint I spread the new image.
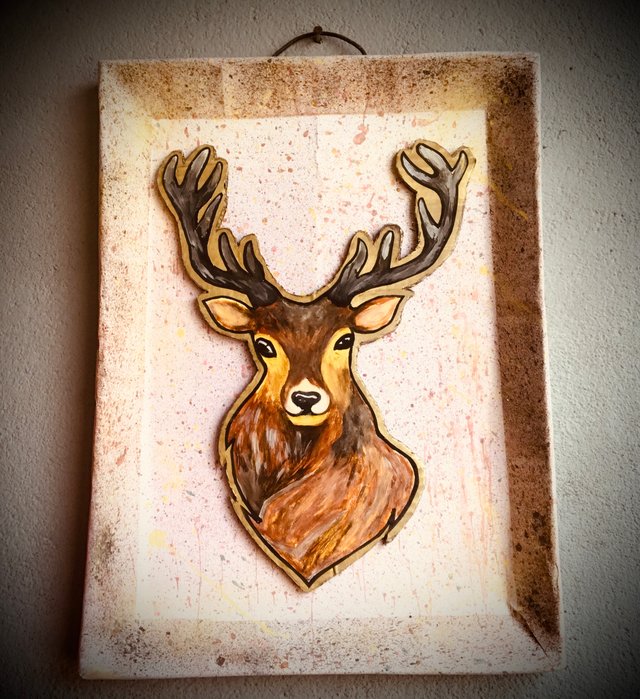
MISSION ACCOMPLISHED
Thank You! @enveng (MOD)
I wish Myself Good-luck!
Made by @mcharmattan
Hello @mcharmattan, nice to see you. You did great work again. It is obvious that you are a very good artist. I would want to see this beautiful wall portrait on my wall 😍👍
WOW! Thanks so much! @enveng
I sincerely appreciate your compliments honestly speaking I am amazed!
If you need the portrait I can make it with wood for you so it can stand a test of time.
Thank you very much @mcharmattan, I just said it to express that I liked your wall portrait. It's the thought that counts 😊
Okay @enveng I really appreciate that thanks
que talento amigo.. demasiado original tu presentación, muy buena explicación
Muchas gracias querida, realmente aprecio tu cumplido.
Hola amigo, me encantó tu trabajo quedó genial muy buena técnica.
Felicidades!!
@yurimar
Muchas gracias amigo
Realmente aprecio el cumplido.
¡Gracias de nuevo!
brother un super talento y me encanto tu contenido, genial como te dedicas para hacer esas hermosas manualidades.
Muchas gracias hermano
Realmente aprecio tu cumplido.
¡Dios te bendiga!