My Lifestyle Content Choices: Tutorial - "Image masking design":

Helo my fellow steemians,
I believe our day and is going smoothly and we'll.
I so much appreciate the love and kind gesture from this community: @steem4Nigeria,
I sincerely thank @ngoenyi for making me to be aware of this contest as a new comer.
Today I will teach and be showing us how to do a image masking using an Android phone.
The steps are simple to follow and I believe we all will learn from this tutorial.
Image masking simply means hiding some visible parts of your image.
Example of it is creating a frame for your image.
- An Android phone
- Data
- Remove.bg (an Android app / web app)
- Pixellab (an Android app)
You can get the above mentioned apps by downloading them from the Google play store.
Removing image background

This is the original picture format I've used for the design.

I launch the remove ng app
When the app has open I will now click on the upload image button to insert my picture for background removal.

After clicking on the upload image button, it will direct me to my phone gallery then I will select or choose the image I want to use.
When the image is uploaded, the background will automatically be removed.
I will now click the download button to download the background removed image to my gallery.

I will launch the pixellab lap app
I will then click on the import icon to bring the picture into the app interface.
After that I will insert an object by clicking on the shapes icon, the inserted shape will be shown in my next screenshot.

I inserted the shape shown above and I did choose a red colour for it which we'll learn as we go.
I clicked on the copy button to copy the shape, the result will be seen in my next screenshot.

After duplicating the the shape, I changed its colour to white, while the original is red at the back of the white colour duplicated shape.

I inserted another shape with a different color below the white duplicated shape.
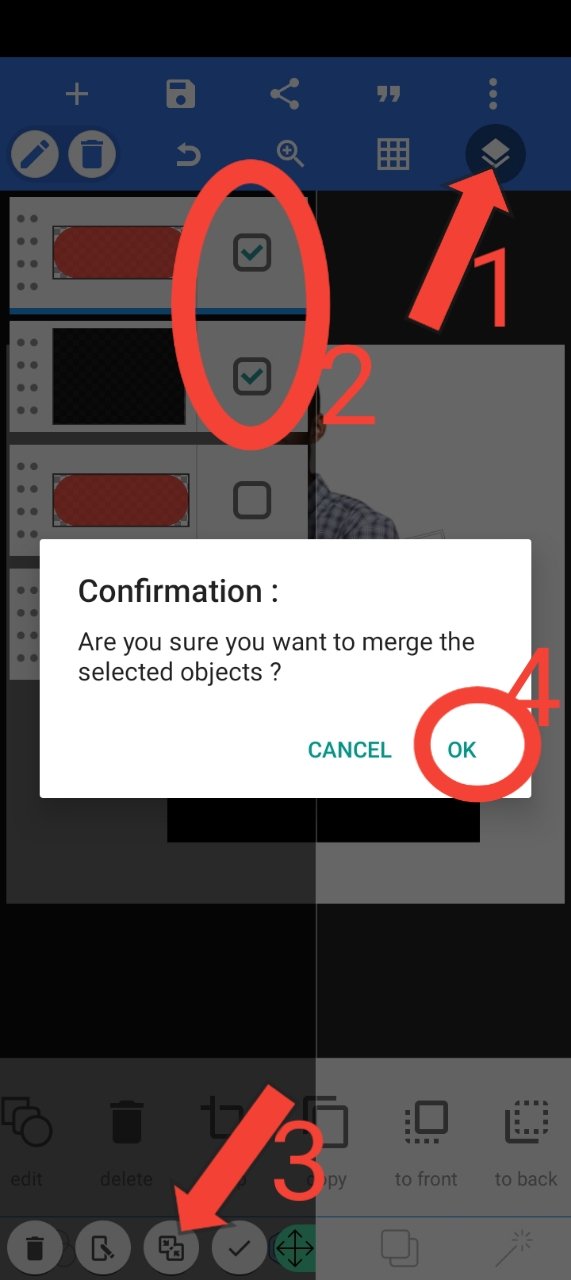
I meshed my last created shape and the second duplicated shape together by:
- Clicking on the layer icon
- Selecting the two shapes I want to mesh
- Clicking the meshed icon
- Clicking the "ok" button
I have clearly adumbrate the steps in the screenshot above.

I clicked on the erase colour icon

I enabled the erase colour option and increase the tolerance option to 70,
By doing this the first shape I created will be now visible.

I changed to the colour to match my background which is white.

I now move my image untop the first shape

I moved my picture down to mask it: hiding some parts.

I now used the text tool to type my steemit username on the drawing page.
And I also decided to draw a rectangle and give it a blue colour to occupy the whole of the page, serving as a background.
I believe you've all follow the steps and know how to create a image masking design.
You can also learn from me how to create professional designs using your android phone.
I invite @fredquantum @patjewell @goodybest to be part of this contest
@tipu curate
;) Holisss...
A good tutorial.
--
This is a manual curation from the @tipU Curation Project.
Upvoted 👌 (Mana: 5/8) Get profit votes with @tipU :)
Thank you very much,
I appreciate 🙏
This is a very good job friend. Keep it up.👌👍
Thank you very much